

JSON editing for complex parameters
Edit as JSON turns an object or array parameter into a JSON editor. Use it when the form is hard to navigate, or when you need pills (dynamic values from earlier in the flow) in nested keys or array items. The recordings on this page use an Atlassian Jira Create issue step and its Fields object.
When to use
Section titled “When to use”- The parameter is a deeply nested object or a large array, and the form rows are hard to scan or fill.
- You need to mix literal JSON with pills in the same structure (for example an array of recipients, or nested issue fields).
- Prefer the default form when the schema is shallow and every value is easy to enter as a normal field.
Before you begin, open a flow in the designer with permission to edit it, and select a step that exposes an object or array parameter.
Switch to Edit as JSON
Section titled “Switch to Edit as JSON”Object and array parameters open as a form by default. Edit as JSON replaces that form with a JSON editor for the same field so you can type structure and place pills by path.
Open the field menu. On the object or array field, open the three-dot (⋯) menu.
Choose Edit as JSON. Studio switches the field to the JSON editor. Existing form values appear as JSON when the structure can be represented that way.
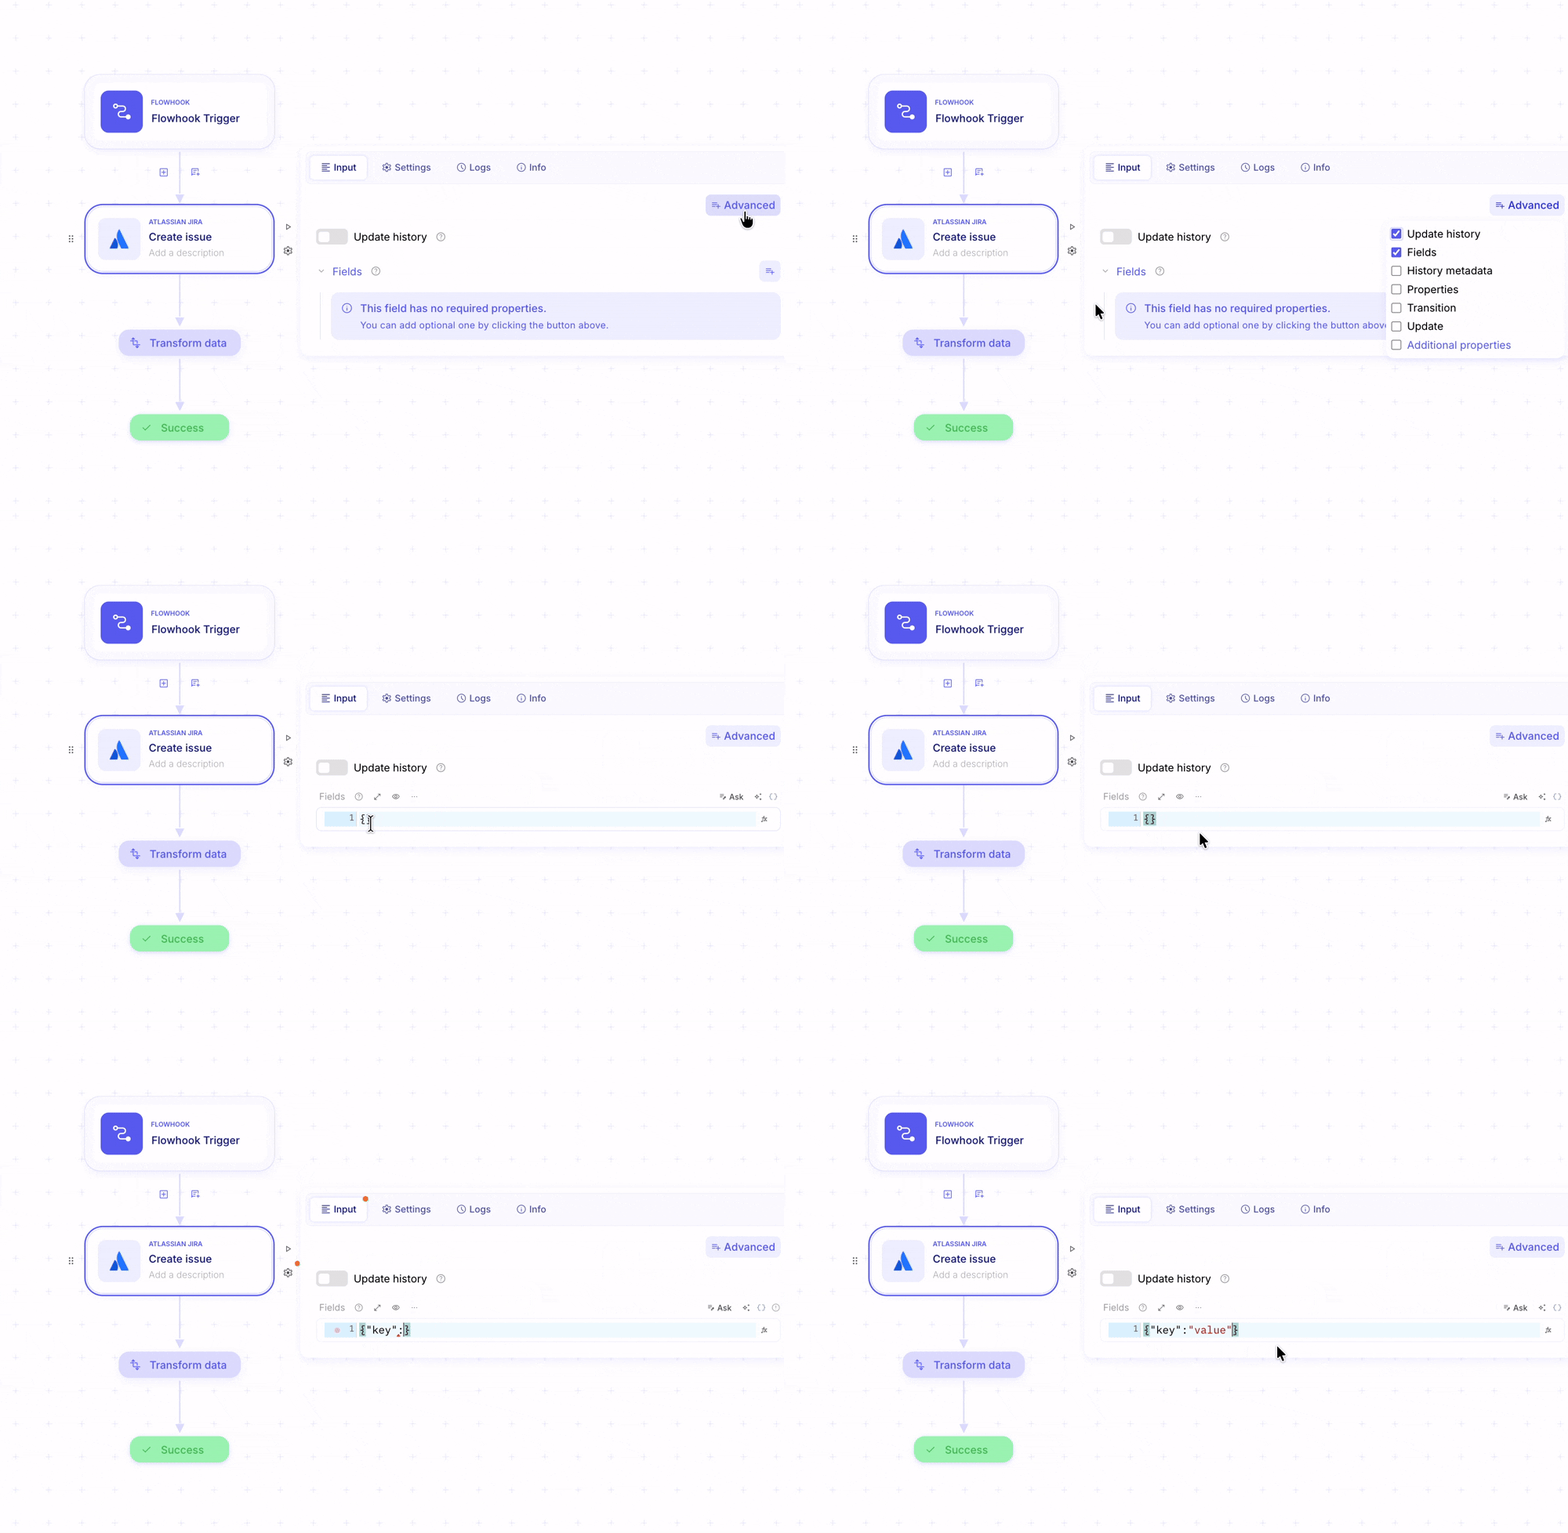
Edit the JSON. Keep the content valid JSON (quotes, commas, braces, and brackets). Type
/in a string value to open the data picker and insert a pill from an earlier step or variable.
Format and expand the editor
Section titled “Format and expand the editor”While the field is in JSON mode, the same field menu includes Format, which indents the document so nested keys are easier to read. Use the expand (fullscreen) control on the field when the payload is larger than the inspector allows.
Format the JSON. Open the field menu again and choose Format. Studio rewrites the editor with indentation.

Open fullscreen when needed. Choose the expand control on the field to edit in a fullscreen modal, then close it to return to the inspector.
Switch back to the form
Section titled “Switch back to the form”When you no longer need the JSON editor, return to the form view for that field. Studio labels the action Edit as Object or Edit as Array, matching the parameter type.
- Open the field menu. On the JSON field, open the three-dot (⋯) menu.
- Choose Edit as Object or Edit as Array. Studio restores the form UI for that parameter. Copy the JSON somewhere safe first if you care about the exact text—switching can rebuild the form from the parsed structure.
Example
Section titled “Example”An operator creates a Jira issue from a flowhook and fills Fields as JSON so nested keys stay in one place. They switch Fields to Edit as JSON, type a small object (or paste one), insert a pill where a value must come from the trigger, choose Format to review indentation, then leave the field in JSON mode for the run.
- Select Create issue. Open the Atlassian Jira Create issue step and open Input.
- Edit Fields as JSON. Use Edit as JSON on Fields, then enter nested keys the form would otherwise split across many rows.
- Insert a dynamic value. In a string position, type
/and pick a value from the flowhook or an earlier step. - Format before you save the flow. Use Format so you can spot missing commas or braces.
Keep in mind
Section titled “Keep in mind”- The content must stay valid JSON. Invalid JSON prevents the step from parsing the structure; common mistakes are missing commas, unclosed quotes, and unbalanced braces or brackets.
- Edit as JSON is for object and array parameters. It does not appear on fields whose schema uses oneOf or anyOf (composite shapes that need the form to pick a branch).
- Switching back with Edit as Object or Edit as Array rebuilds the form from the parsed JSON—copy the text first if you need the exact editor contents.
Related
Section titled “Related”Work with data · Transform data and reassign variables · Send raw HTTP requests