

Run a flow through a webhook
A Webhook trigger starts a flow when an external system sends an HTTP request to a Mindflow URL. You choose asynchronous or synchronous mode, optionally require an API key, and can return a custom HTTP response with a Webhook response step. Screenshots on this page show the Webhook trigger Settings and Auth tabs so you can match the labels in Studio.
When to use
Section titled “When to use”- An external ticketing system, SIEM, form, or middleware must start a flow over HTTPS.
- You need an immediate HTTP acknowledgment (async) or a response body from the flow (sync).
- Prefer Run a flow from an AI··Room when operators should start the flow from chat.
- Prefer Run a flow through email when the source is inbound email.
- Prefer Call a flow when one Mindflow flow should start another inside Studio.
Before you begin, you need permission to create and deploy flows in the environment. Deploy the flow before callers rely on the webhook URL in production.
Add a Webhook trigger
Section titled “Add a Webhook trigger”A Webhook is the trigger that exposes HTTPS endpoints for the flow. Studio shows copyable URLs after you add the step.
Open the flow. Create or open the flow in the designer.
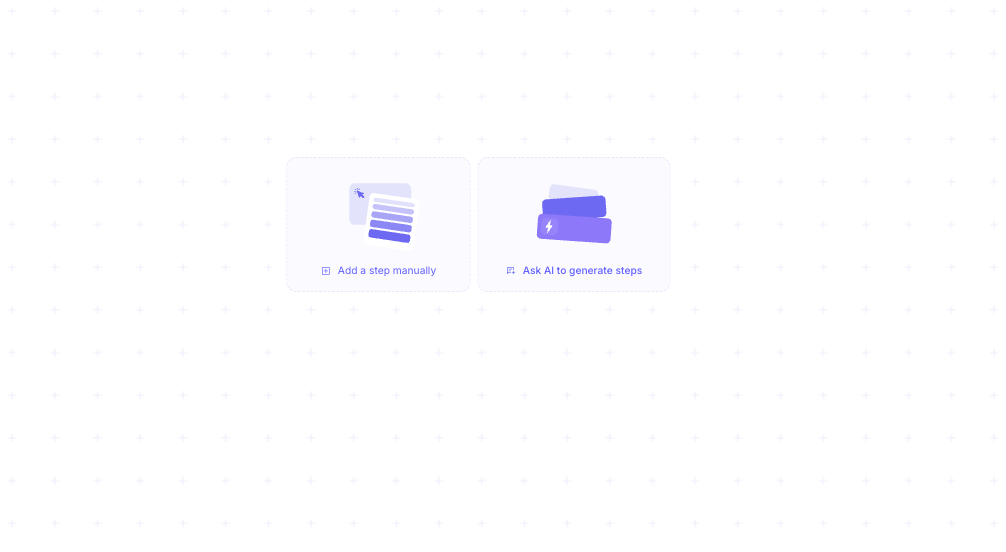
Add a step manually. On an empty canvas, choose Add a step manually.
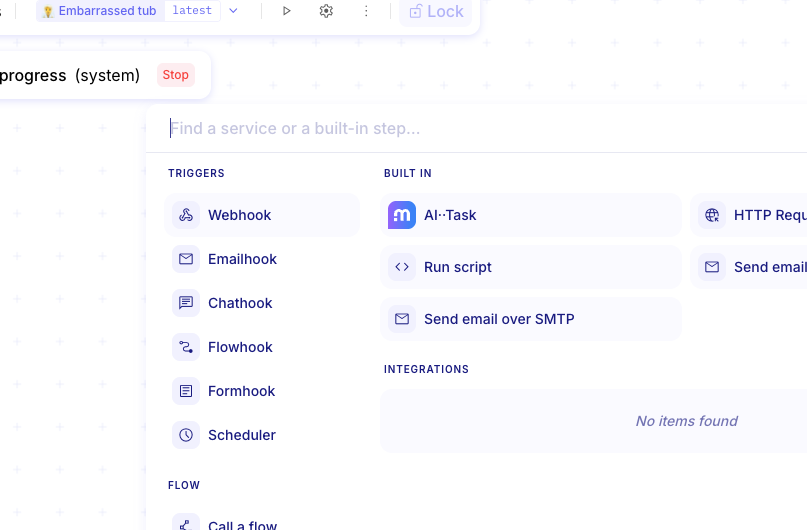
Choose Webhook. In the step catalog, open Triggers, then choose Webhook.
Rename and describe the step. Rename the Webhook step and fill a description so the designer shows why this trigger exists.
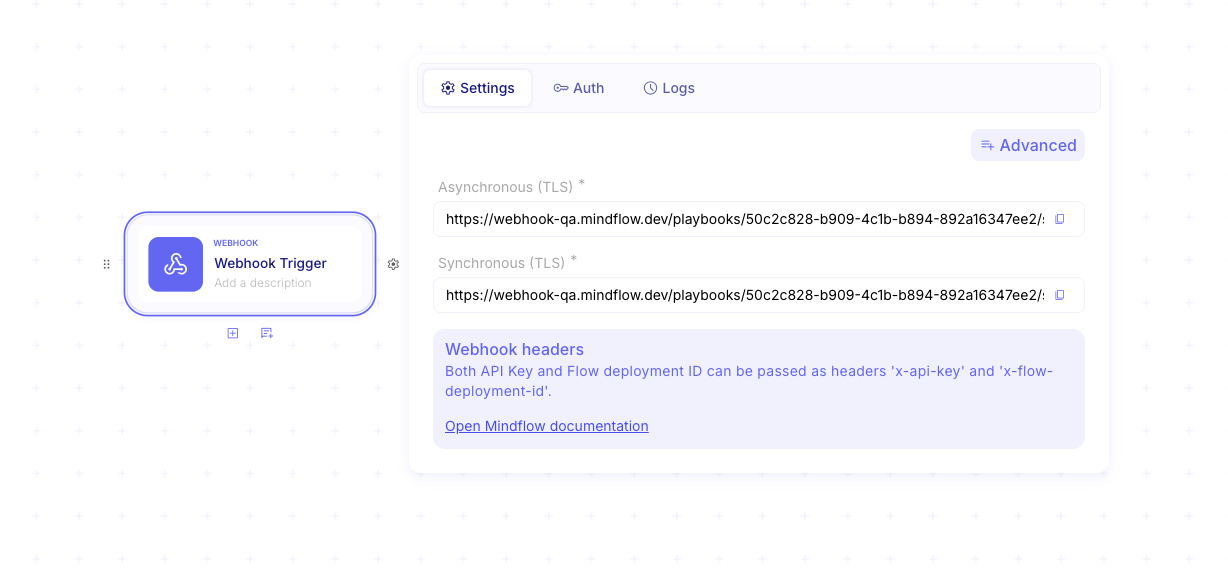
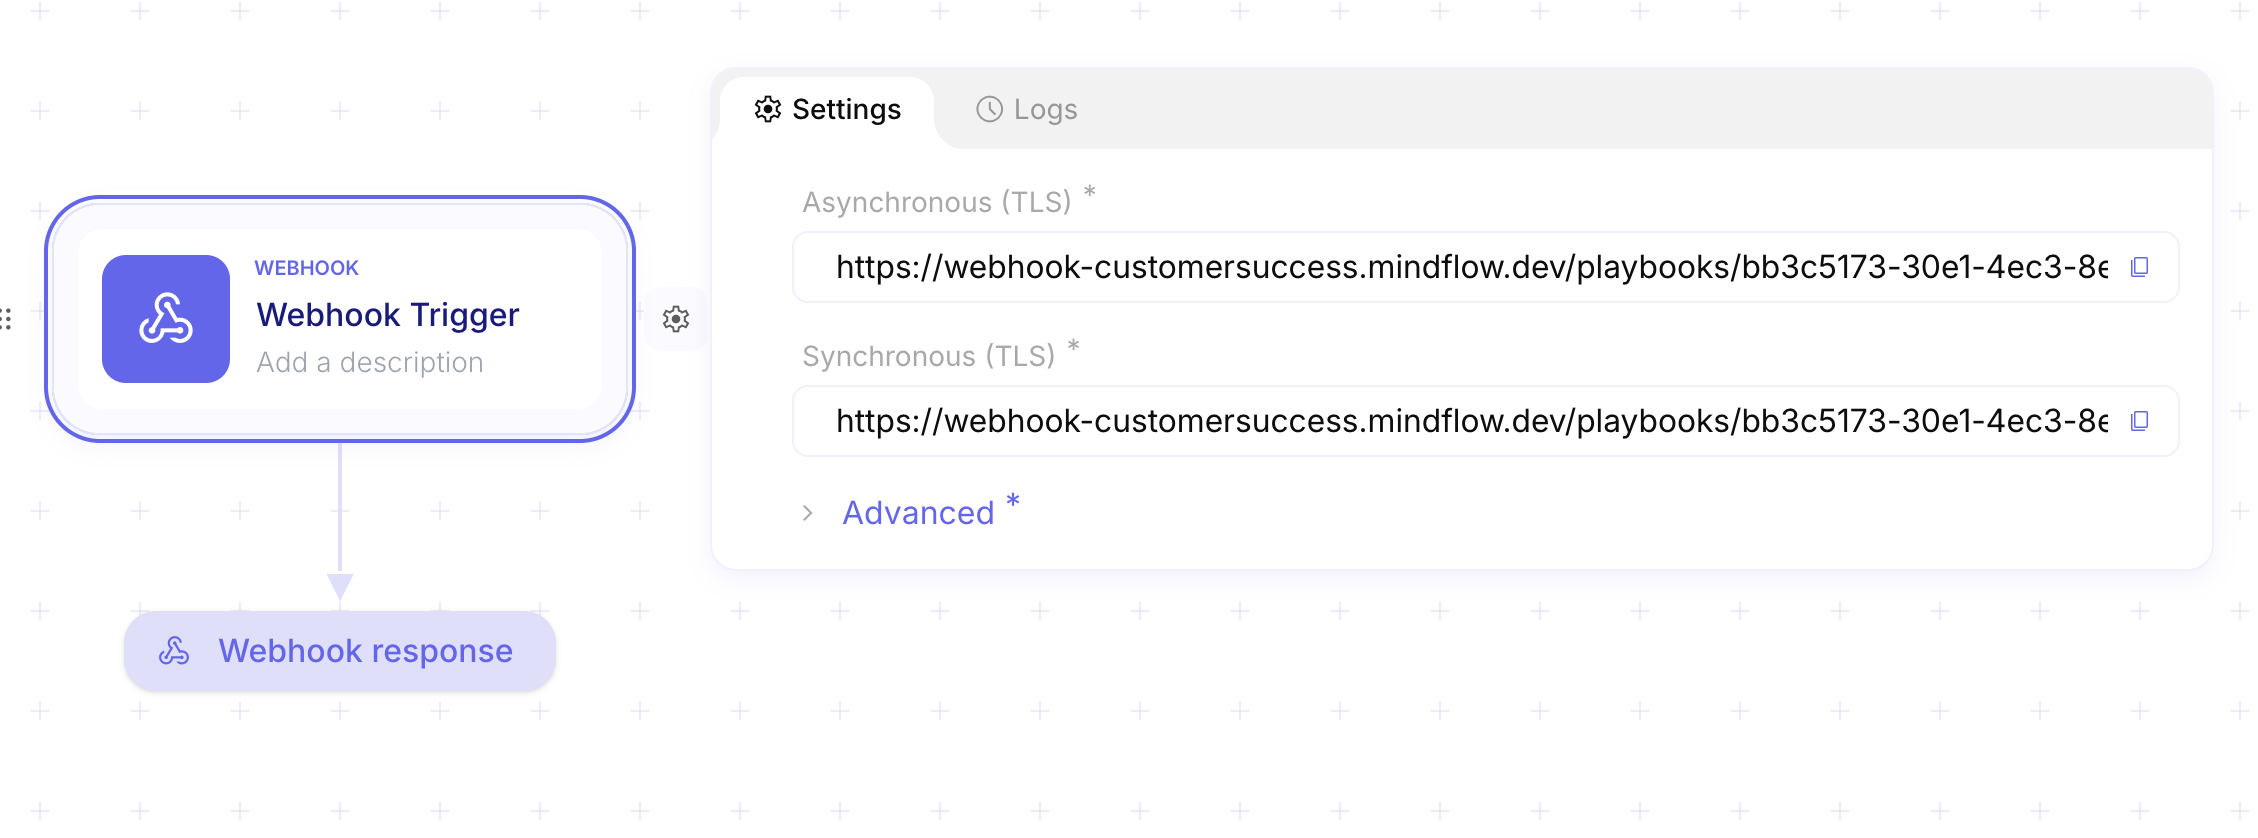
Open Settings. On the Webhook step, open the Settings tab. Copy Asynchronous (TLS) or Synchronous (TLS) from the read-only fields. When mTLS is enabled for your environment, Studio also shows Asynchronous (MTLS) and Synchronous (MTLS).
Choose asynchronous or synchronous mode
Section titled “Choose asynchronous or synchronous mode”Asynchronous returns an HTTP response as soon as Mindflow accepts the request, without waiting for the flow to finish. Synchronous waits for the flow (and an optional Webhook response step) before returning.
Copy the matching URL from Settings. Studio shows the query-param route (…/run-async-qp or …/run-sync-qp) with the
trigger id in the path. Hostnames come from your tenant (for example webhook-….mindflow.dev).
curl "https://webhook-{tenant}.mindflow.dev/playbooks/{trigger-id}/steps/start/run-async-qp"curl "https://webhook-{tenant}.mindflow.dev/playbooks/{trigger-id}/steps/start/run-sync-qp"Secure the webhook with an API key
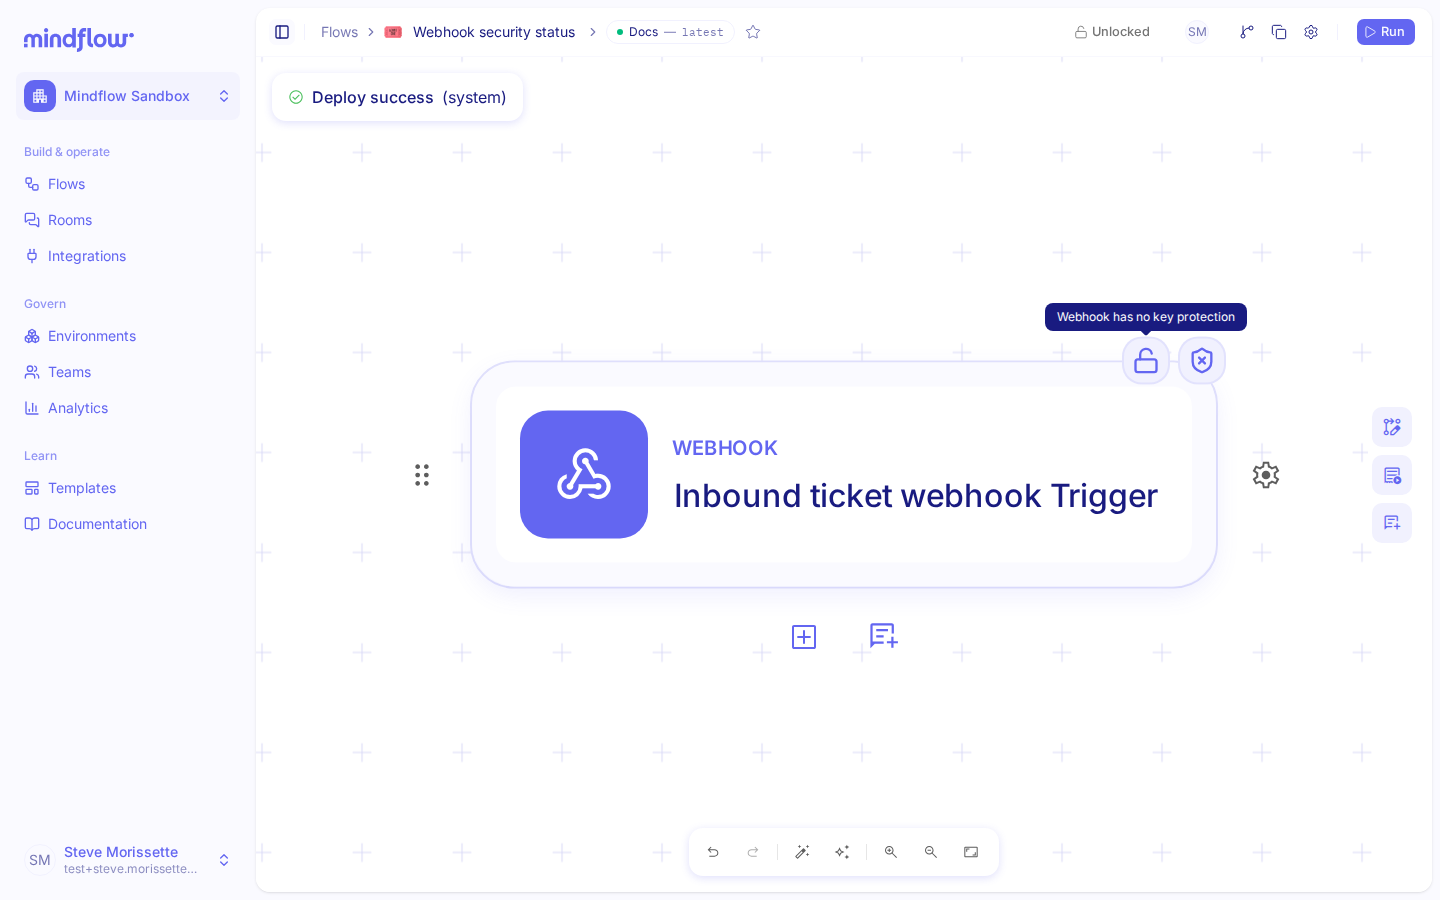
Section titled “Secure the webhook with an API key”Without an API key, any caller who knows the URL can start the flow. On the canvas, the Webhook step shows security status badges (for example an open lock when there is no API key protection). On Auth, generate a key so callers must send it—the open-lock badge clears once a key is configured.
Open Auth. On the Webhook step, open the Auth tab.
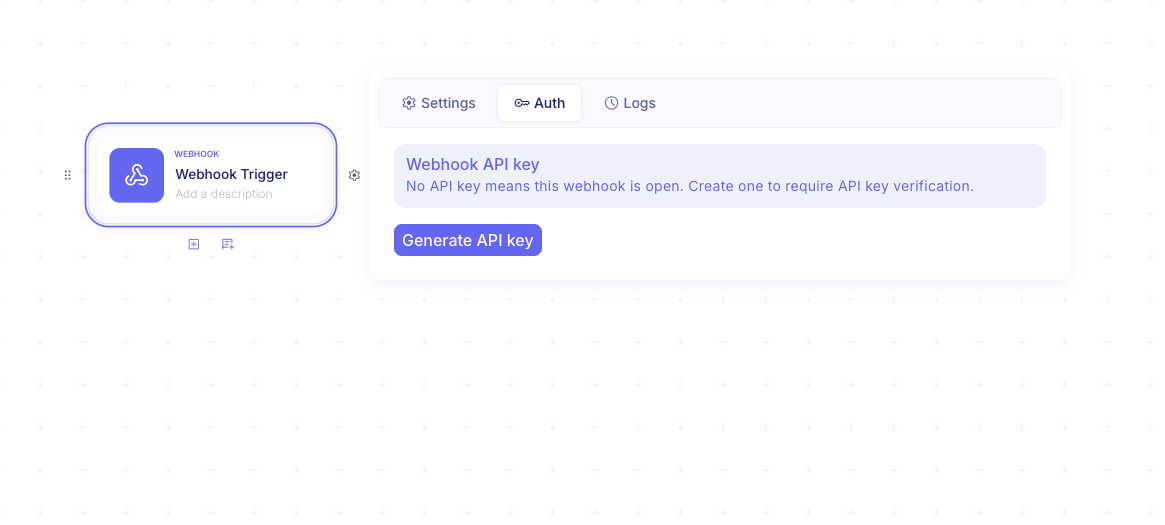
Generate API key. Choose Generate API key. Copy the key and store it with your caller. Use Rotate or Delete from the key menu when you need to replace or remove it.
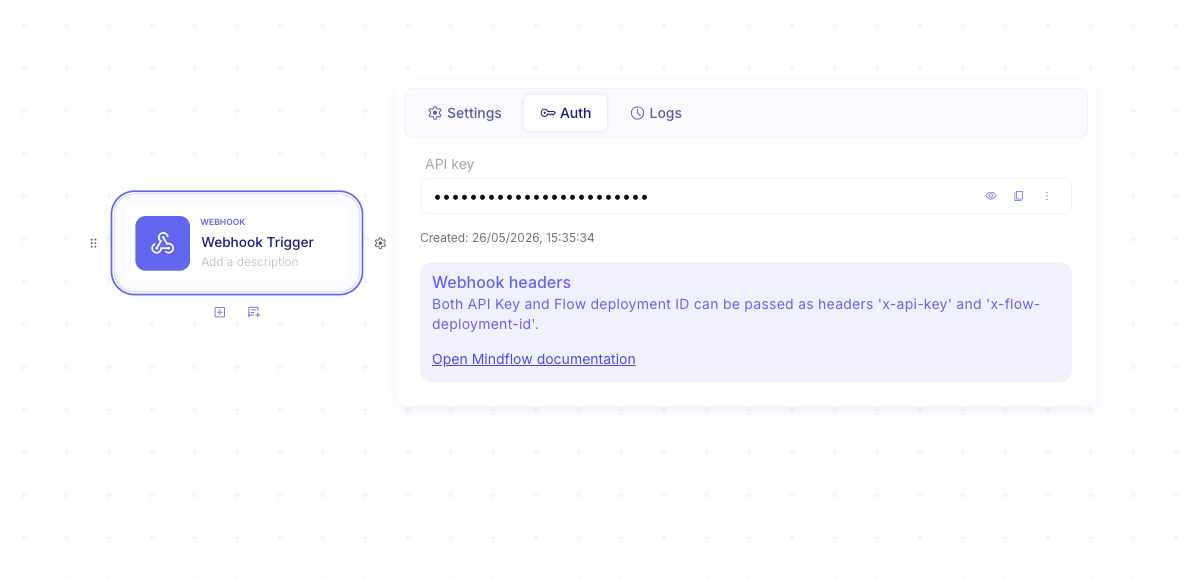
Send the API key and flow deployment id
Section titled “Send the API key and flow deployment id”Callers must identify the flow and, when a key exists, authenticate. Prefer headers over query parameters when your caller supports them.
Send the key as x-api-key. Use a non--qp path URL when the trigger id is already in the path:
curl "https://webhook-{tenant}.mindflow.dev/playbooks/{trigger-id}/steps/start/run-async" \ -H "x-api-key: YOUR_API_KEY"Append apikey on the query-param route. Prefer headers when you can; query keys can appear in proxy logs.
curl "https://webhook-{tenant}.mindflow.dev/playbooks/{trigger-id}/steps/start/run-async-qp?apikey=YOUR_API_KEY"The Settings copy fields already include the trigger id in /playbooks/{trigger-id}/…. That is the usual path for the
URLs Studio shows.
curl "https://webhook-{tenant}.mindflow.dev/playbooks/{trigger-id}/steps/start/run-async" \ -H "x-api-key: YOUR_API_KEY"Use the header-only URL and send the flow deployment id as
x-mindflow-flow-deployment-id (or the legacy alias x-mindflow-playbook-id):
curl "https://webhook-{tenant}.mindflow.dev/playbooks/steps/start/run-async" \ -H "x-api-key: YOUR_API_KEY" \ -H "x-mindflow-flow-deployment-id: {flow-deployment-id}"Return a custom HTTP response
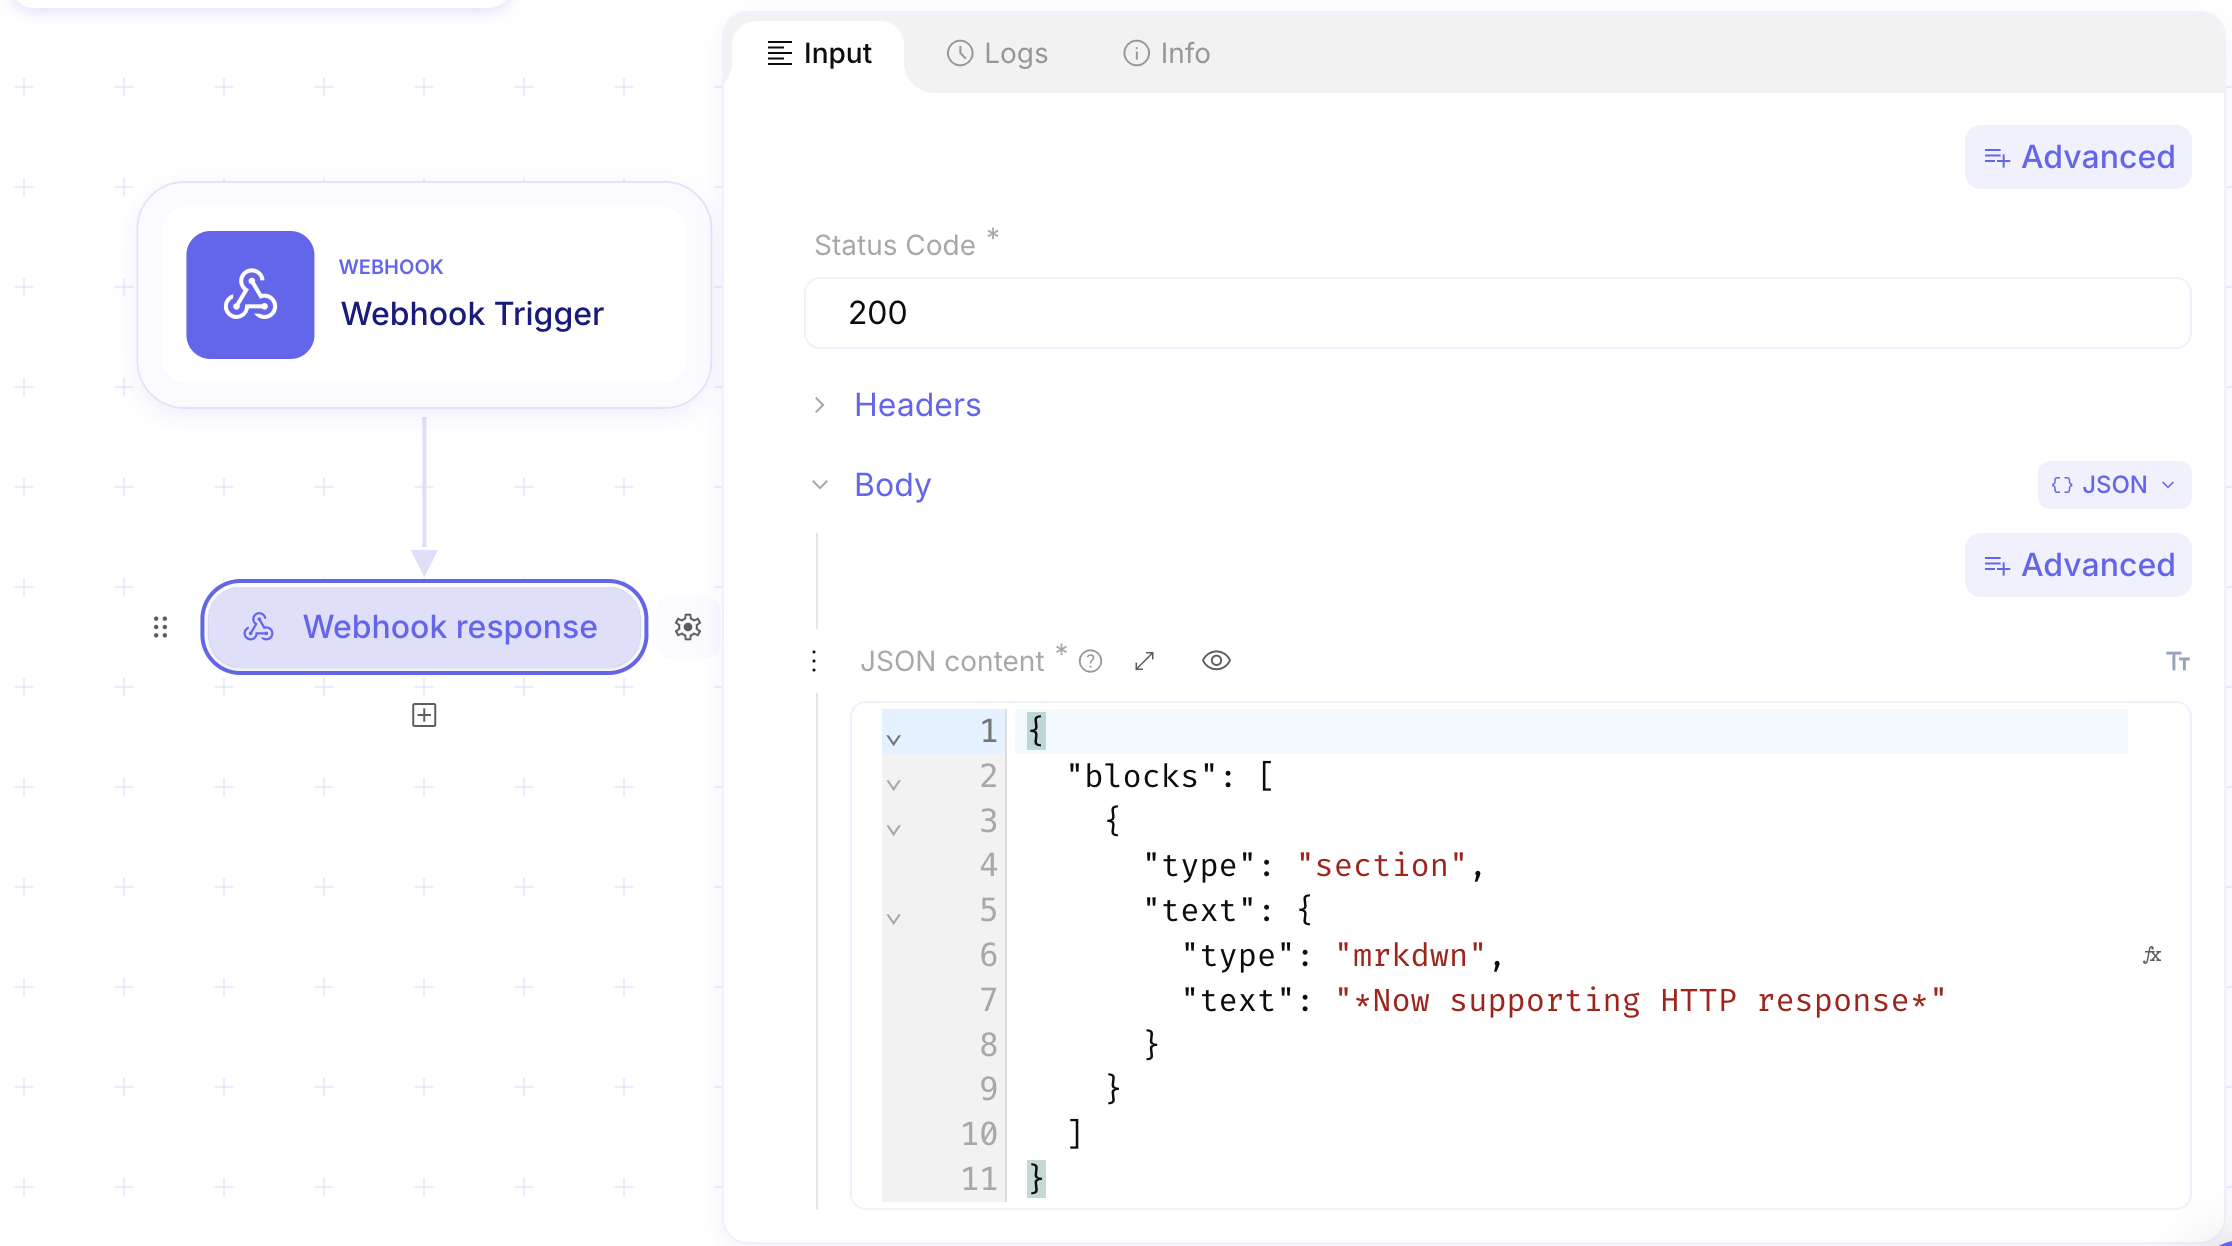
Section titled “Return a custom HTTP response”Webhook response sets the status code, headers, and body for a synchronous webhook call. Place it where the flow should reply. The flow can continue after the response; later steps keep running asynchronously.
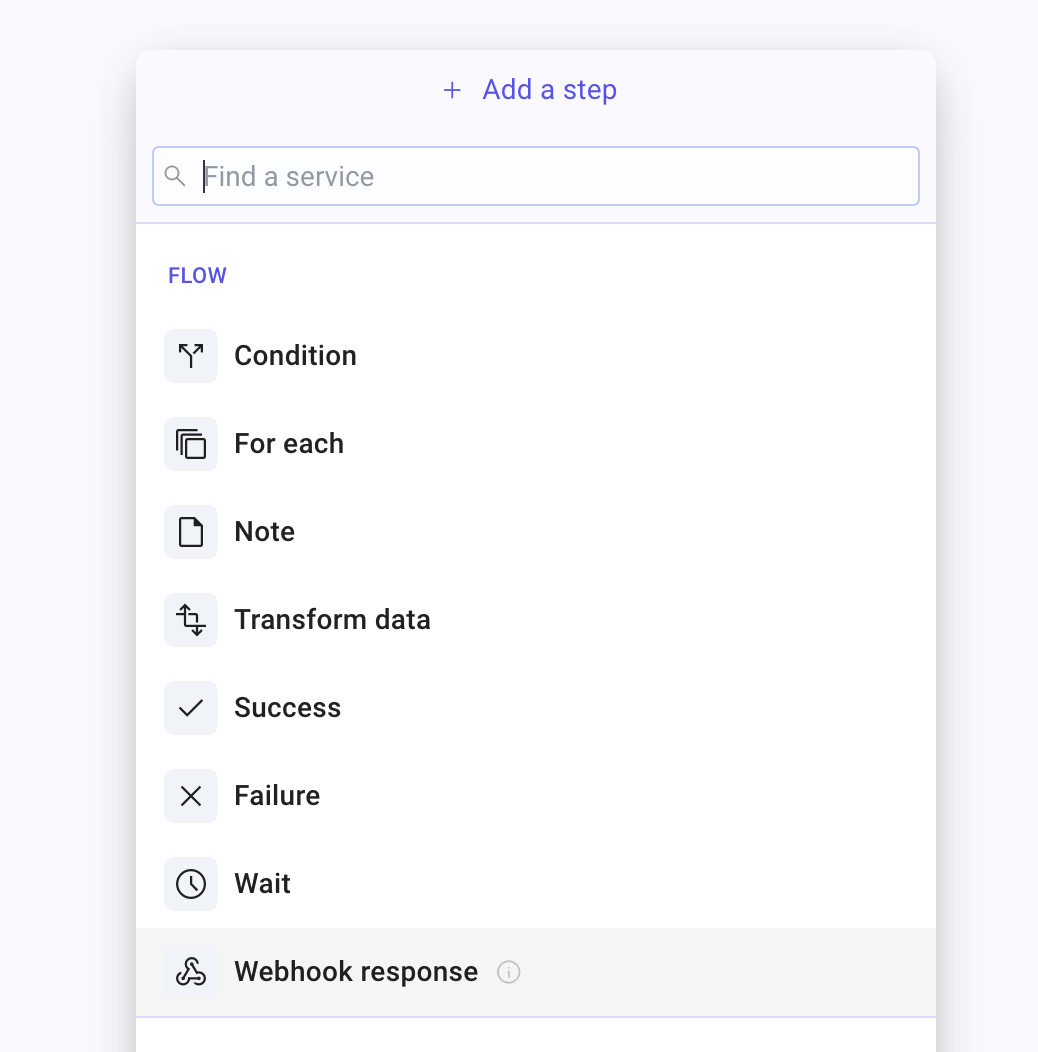
Add Webhook response. Open Add a step, choose Flow, then Webhook response.
Configure the response. On Input, set Status Code, optional Headers, and Body (JSON, Text, or XML). Use data pills for dynamic values.
Call the synchronous URL. Use Synchronous (TLS) (or mTLS) from Webhook Settings — not the asynchronous URL.
Limit callers by IP
Section titled “Limit callers by IP”On the Webhook step, open Advanced and add Allowed IPs when only specific networks should call this endpoint. Organization-level allowlists apply as well — see Restrict webhook callers with an IP allowlist.
Example
Section titled “Example”A SOC platform posts a new alert JSON to Mindflow. The flow Ingest SIEM alert starts with a Webhook named
Receive SIEM alert, uses an API key in x-api-key, and runs asynchronously so the SIEM gets an immediate
acknowledgment while enrichment continues in later steps.
For a caller that needs a custom body back (for example a chatbot middleware), use the synchronous URL and a
Webhook response step that returns status 200 and a short text or JSON body within 25 seconds.
Authorizer flow pattern
When a vendor sends a token you must verify before the real automation runs, put validation on a front webhook flow, then call the destination flow only after the check passes.
Receive the vendor request. Start with a Webhook (often synchronous).
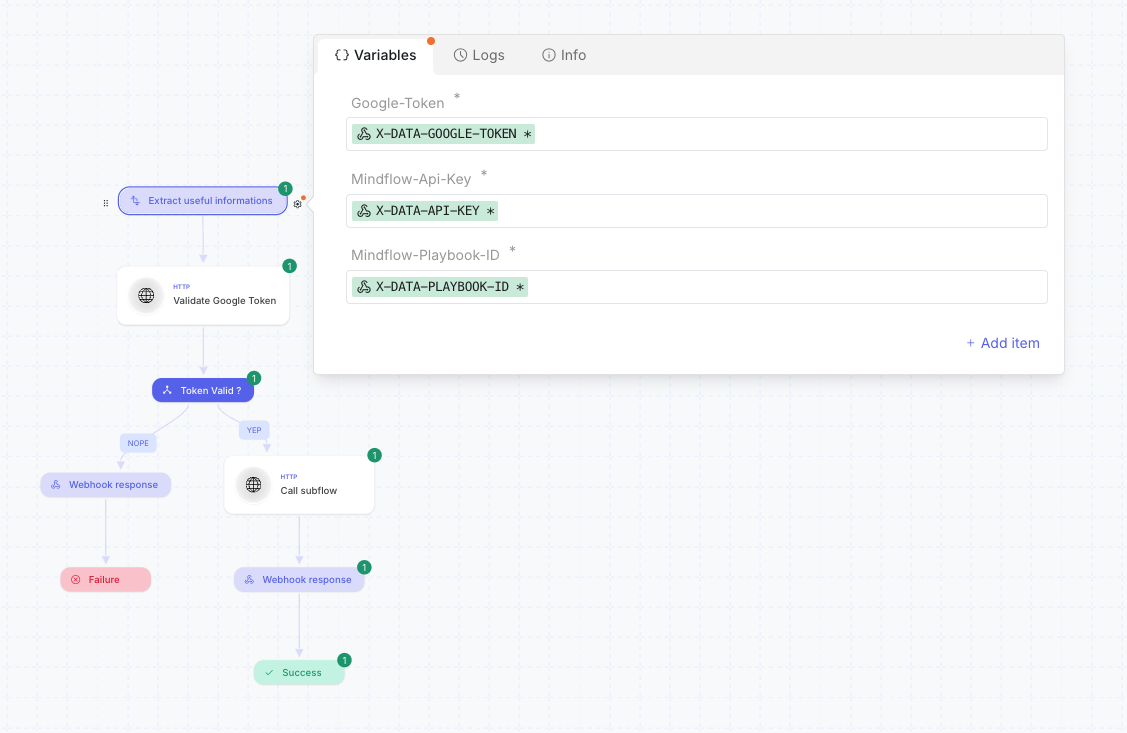
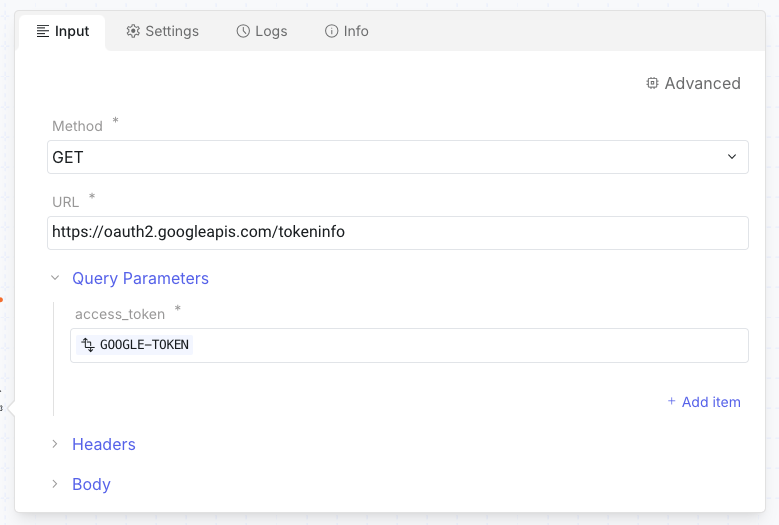
Validate the token. Call the vendor API (for example a Google OAuth token check).
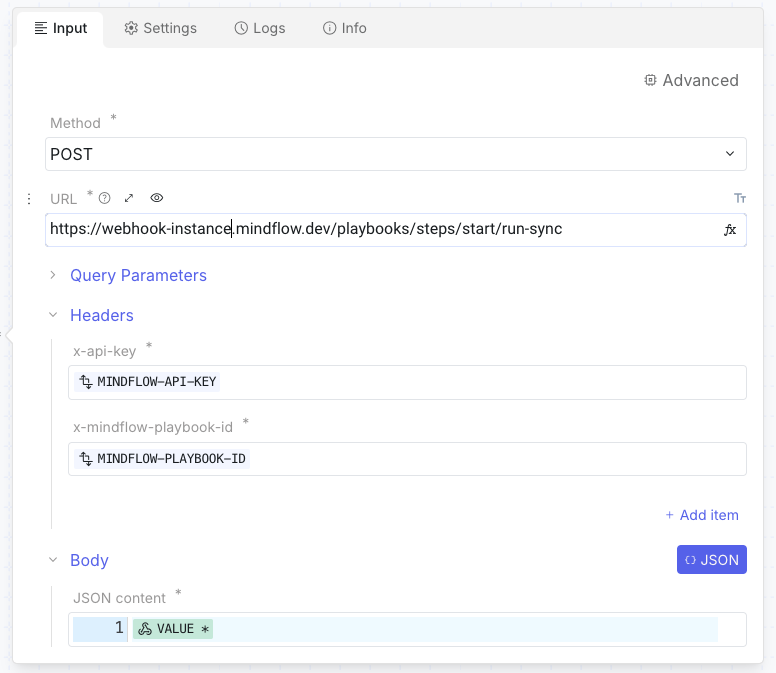
Continue or reject. On success, start the destination flow (for example with Call a flow). On failure, return an error with Webhook response.
Keep in mind
Section titled “Keep in mind”- Deploy the flow before external systems depend on the webhook URL.
- Supported HTTP methods include GET, POST, and PUT.
- Prefer
x-api-keyandx-mindflow-flow-deployment-idheaders over query parameters when the caller can set headers. - For network-level control, combine webhook Allowed IPs with the organization allowlist — see Restrict webhook callers with an IP allowlist.
Related
Section titled “Related”Trigger your flow · Restrict webhook callers with an IP allowlist · Run a flow from an AI··Room · Manage version and deployments