

Analyze files with AI··Task
AI··Task can analyze files produced earlier in a flow. Add email attachments or a service step’s response body as file pills, then send those files to the selected model together with the required text input. The files are resolved again on every run, so the AI··Task uses the files from that execution.
When to use
Section titled “When to use”- Summarize, classify, or extract information from a document returned by an integration or HTTP request.
- Analyze one or more files received by an email trigger.
- Ask a model about an image, PDF, spreadsheet, or text document supported by that model.
This feature uses files already available in the flow. It does not upload files from your computer.
Before you begin, add the AI··Task after the email trigger or service step that produces the files. Run that source once so its files appear in the attachment picker.
Attach a service response body
Section titled “Attach a service response body”Use a service step when the file is returned as the response body of an integration, HTTP request, nested flow, or email action. The service step must be earlier than the AI··Task in the flow.
-
Run the service step. Run or dry-run the source step so Step logs contains a response.
-
Open the AI··Task Input tab. Select the AI··Task and open Input.
-
Open the attachment picker. Below the Input field, select Add file.
-
Choose the source step. Under Steps, select the service step that returned the file.
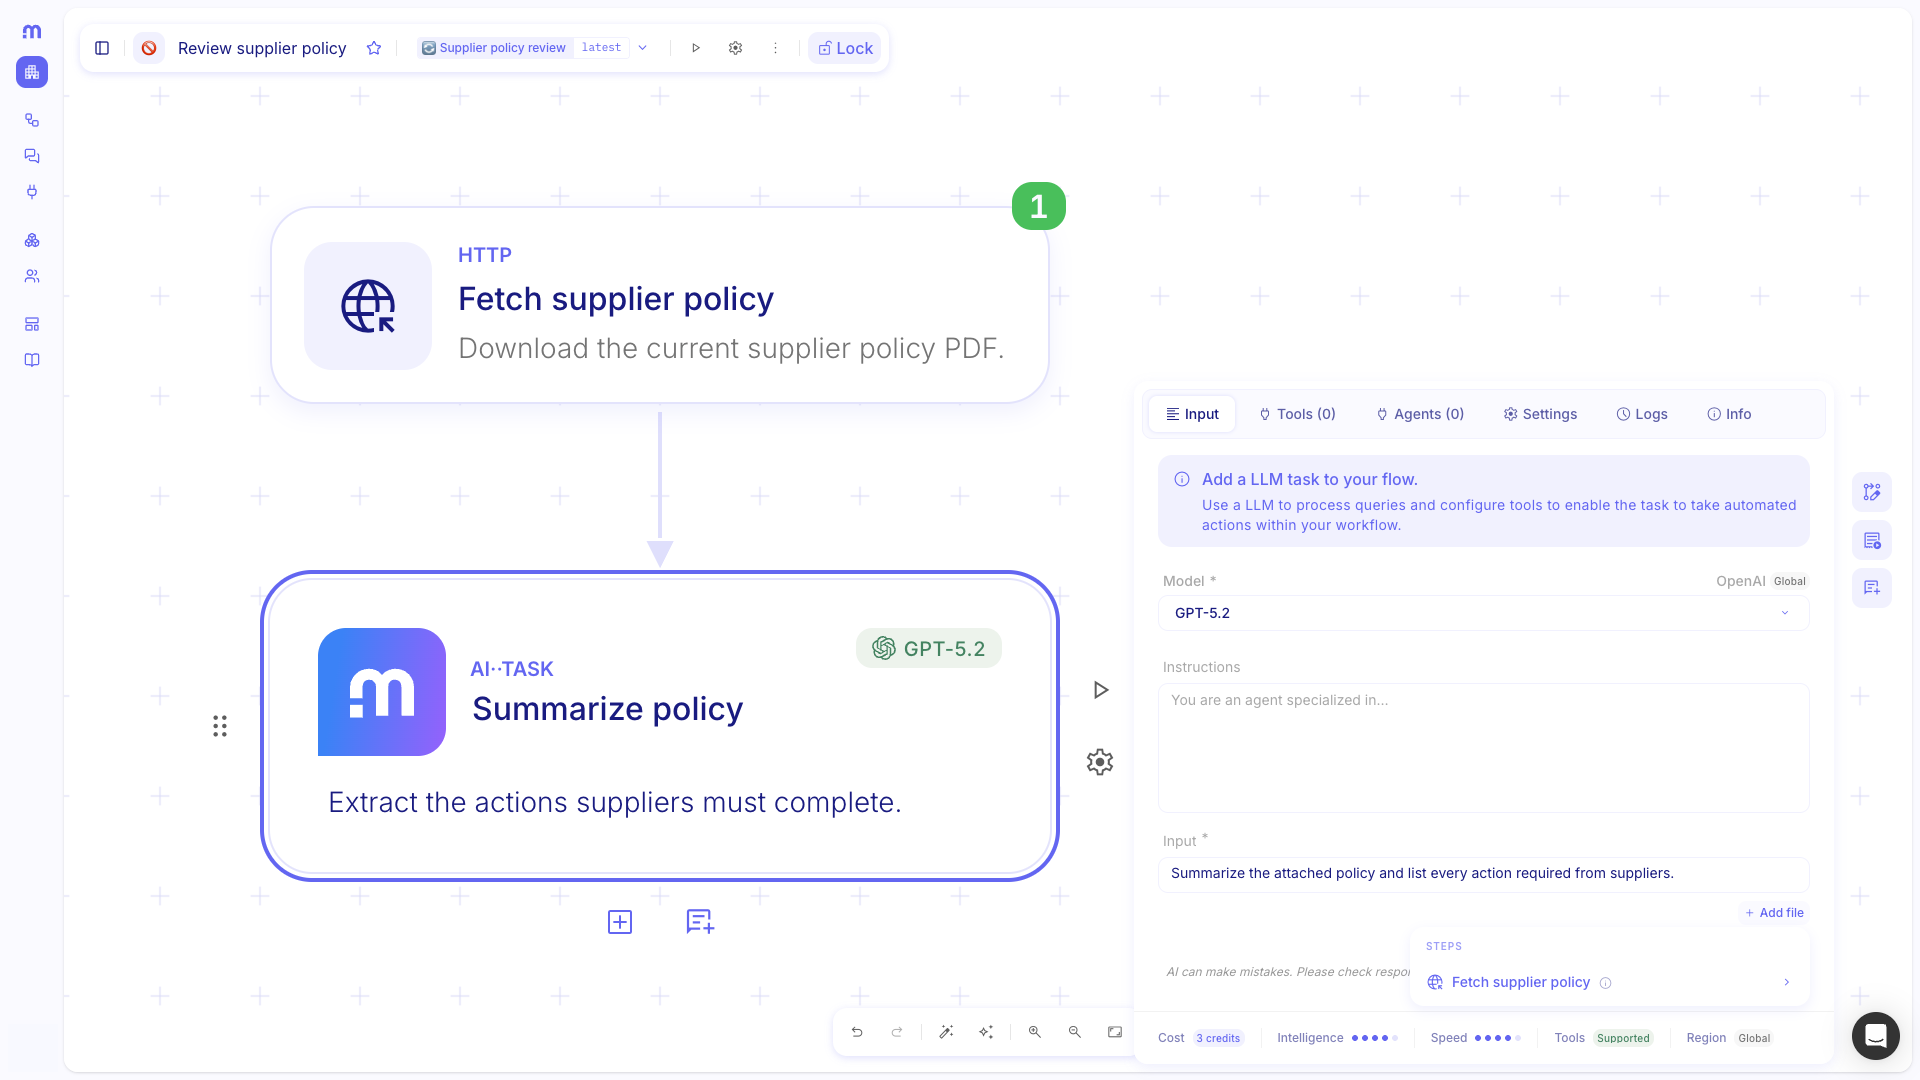
-
Choose a run. Under Step logs, select the run whose response you want to inspect.
-
Attach the response body. Under Service files, select the filename or Body.
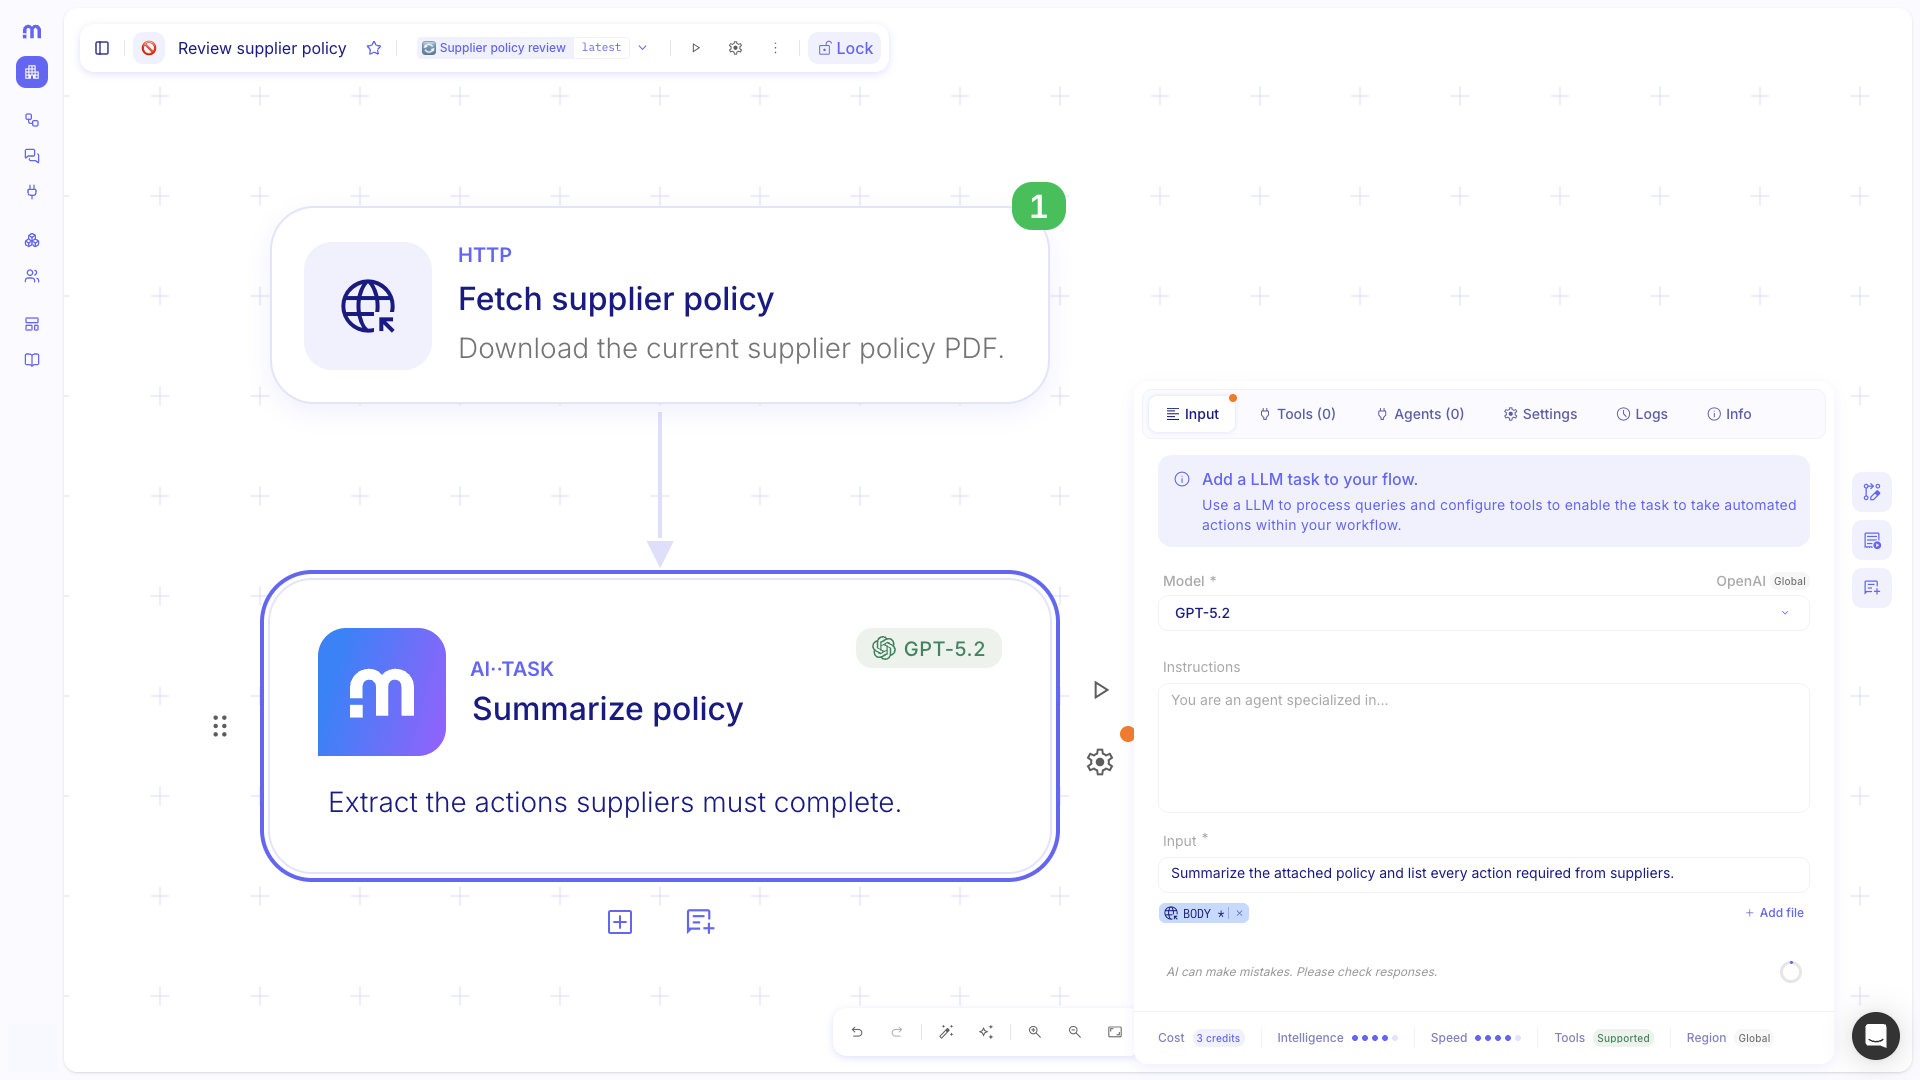
The selected response appears as a file pill below the Input field.
Attach files from an email trigger
Section titled “Attach files from an email trigger”Use an email trigger when the files arrive as attachments on an incoming email. You can attach every file from the email or select individual attachments.
- Send an email to the trigger. Trigger the flow once with an email that contains the files you want to use.
- Open the AI··Task Input tab. Select the AI··Task and open Input.
- Open the attachment picker. Below the Input field, select Add file.
- Open the email source. Under Triggers, select Emails, then choose the relevant email run.
- Choose the attachments. Under Email attachments, select All attachments, or select individual Attachment[n] rows.
- Add individual files. If you selected individual rows, select Add N files to add them to the AI··Task.
Each selection appears as a separate file pill. All attachments stays dynamic and uses all attachments from the email in each execution.
Configure the AI··Task
Section titled “Configure the AI··Task”Attachments supplement the text input; they do not replace it. Tell the model what to do with the attached files and choose a model that supports their file types.
- Choose a model. In Model, select a model that accepts the images or documents you attached.
- Write the input. In Input, describe the files and the result you need. The field cannot be empty.
- Check the estimate. Review the Files segment in the token meter for an approximate file cost.
- Run the flow. Run the complete flow so the source and AI··Task use data from the same execution.
- Review the response. Open the AI··Task Logs, then inspect Response.
The file token count is an estimate. The provider determines the final token usage and charge.
Update or remove an attachment
Section titled “Update or remove an attachment”File pills remain linked to their source step or trigger. Update a pill when it should point to a different file, or remove it when the AI··Task no longer needs that source.
- Open the file pill. Select the pill below Input to inspect its source and referenced files.
- Replace the source when needed. Select Update, then choose one replacement file from the attachment picker.
- Set missing-file behavior when available. Keep Required enabled to fail the step when the pill has no value in a later run. Disable it to allow an empty value.
- Remove an attachment when needed. Select the pill’s Remove control.
If the pill shows No file data yet, preview or run its source step.
Example
Section titled “Example”A security team needs a short summary of a supplier policy published as a PDF. Their flow uses an HTTP Request step named Fetch supplier policy, followed by an AI··Task named Summarize policy.
- Fetch the policy. Configure Fetch supplier policy to return the PDF as its response body, then run the step.
- Attach the response. On Summarize policy, select Add file, Fetch supplier policy, the latest run, and the PDF body.
- Ask for the summary. Enter an instruction such as “Summarize the attached policy and list every action required from suppliers.”
- Inspect the result. Run the flow and review the AI··Task response in Logs.
The same AI··Task configuration processes the current PDF returned by the HTTP Request on each flow execution.
Keep in mind
Section titled “Keep in mind”- File support depends on the selected model and provider. The model picker does not currently verify compatibility with attached file types.
- Bedrock models accept PNG, JPEG, GIF, and WebP images, and PDF, CSV, DOC, DOCX, XLS, XLSX, HTML, TXT, and Markdown documents. Other providers can support different formats.
- Files larger than 200 MB cannot be loaded for inference. Providers can impose lower limits.
- An AI··Task requires text in Input, even when files are attached.
- The attachment picker currently supports email trigger attachments and response bodies from earlier service steps.