

Create Business Rules
Introduction
Section titled “Introduction”The ServiceNow Table API allows programmatic interaction with incidents, providing functionalities for creating, searching, updating, and deleting incidents.
To securely use this API, various authentication methods are available. In this guide, we will focus on using the API key for authentication.
In this guide, we will learn to:
- Set up a Business Rule to automatically send a request to a webhook whenever a record is created.
Prerequisites
Section titled “Prerequisites”Before getting started, make sure you have:
- A ServiceNow administrator account
- The URL of your ServiceNow instance
Walkthrough
Section titled “Walkthrough”To configure a trigger that sends a request whenever a specific condition is met, navigate to All > Activity Subscriptions > Administration > Business Rules and create a new rule.
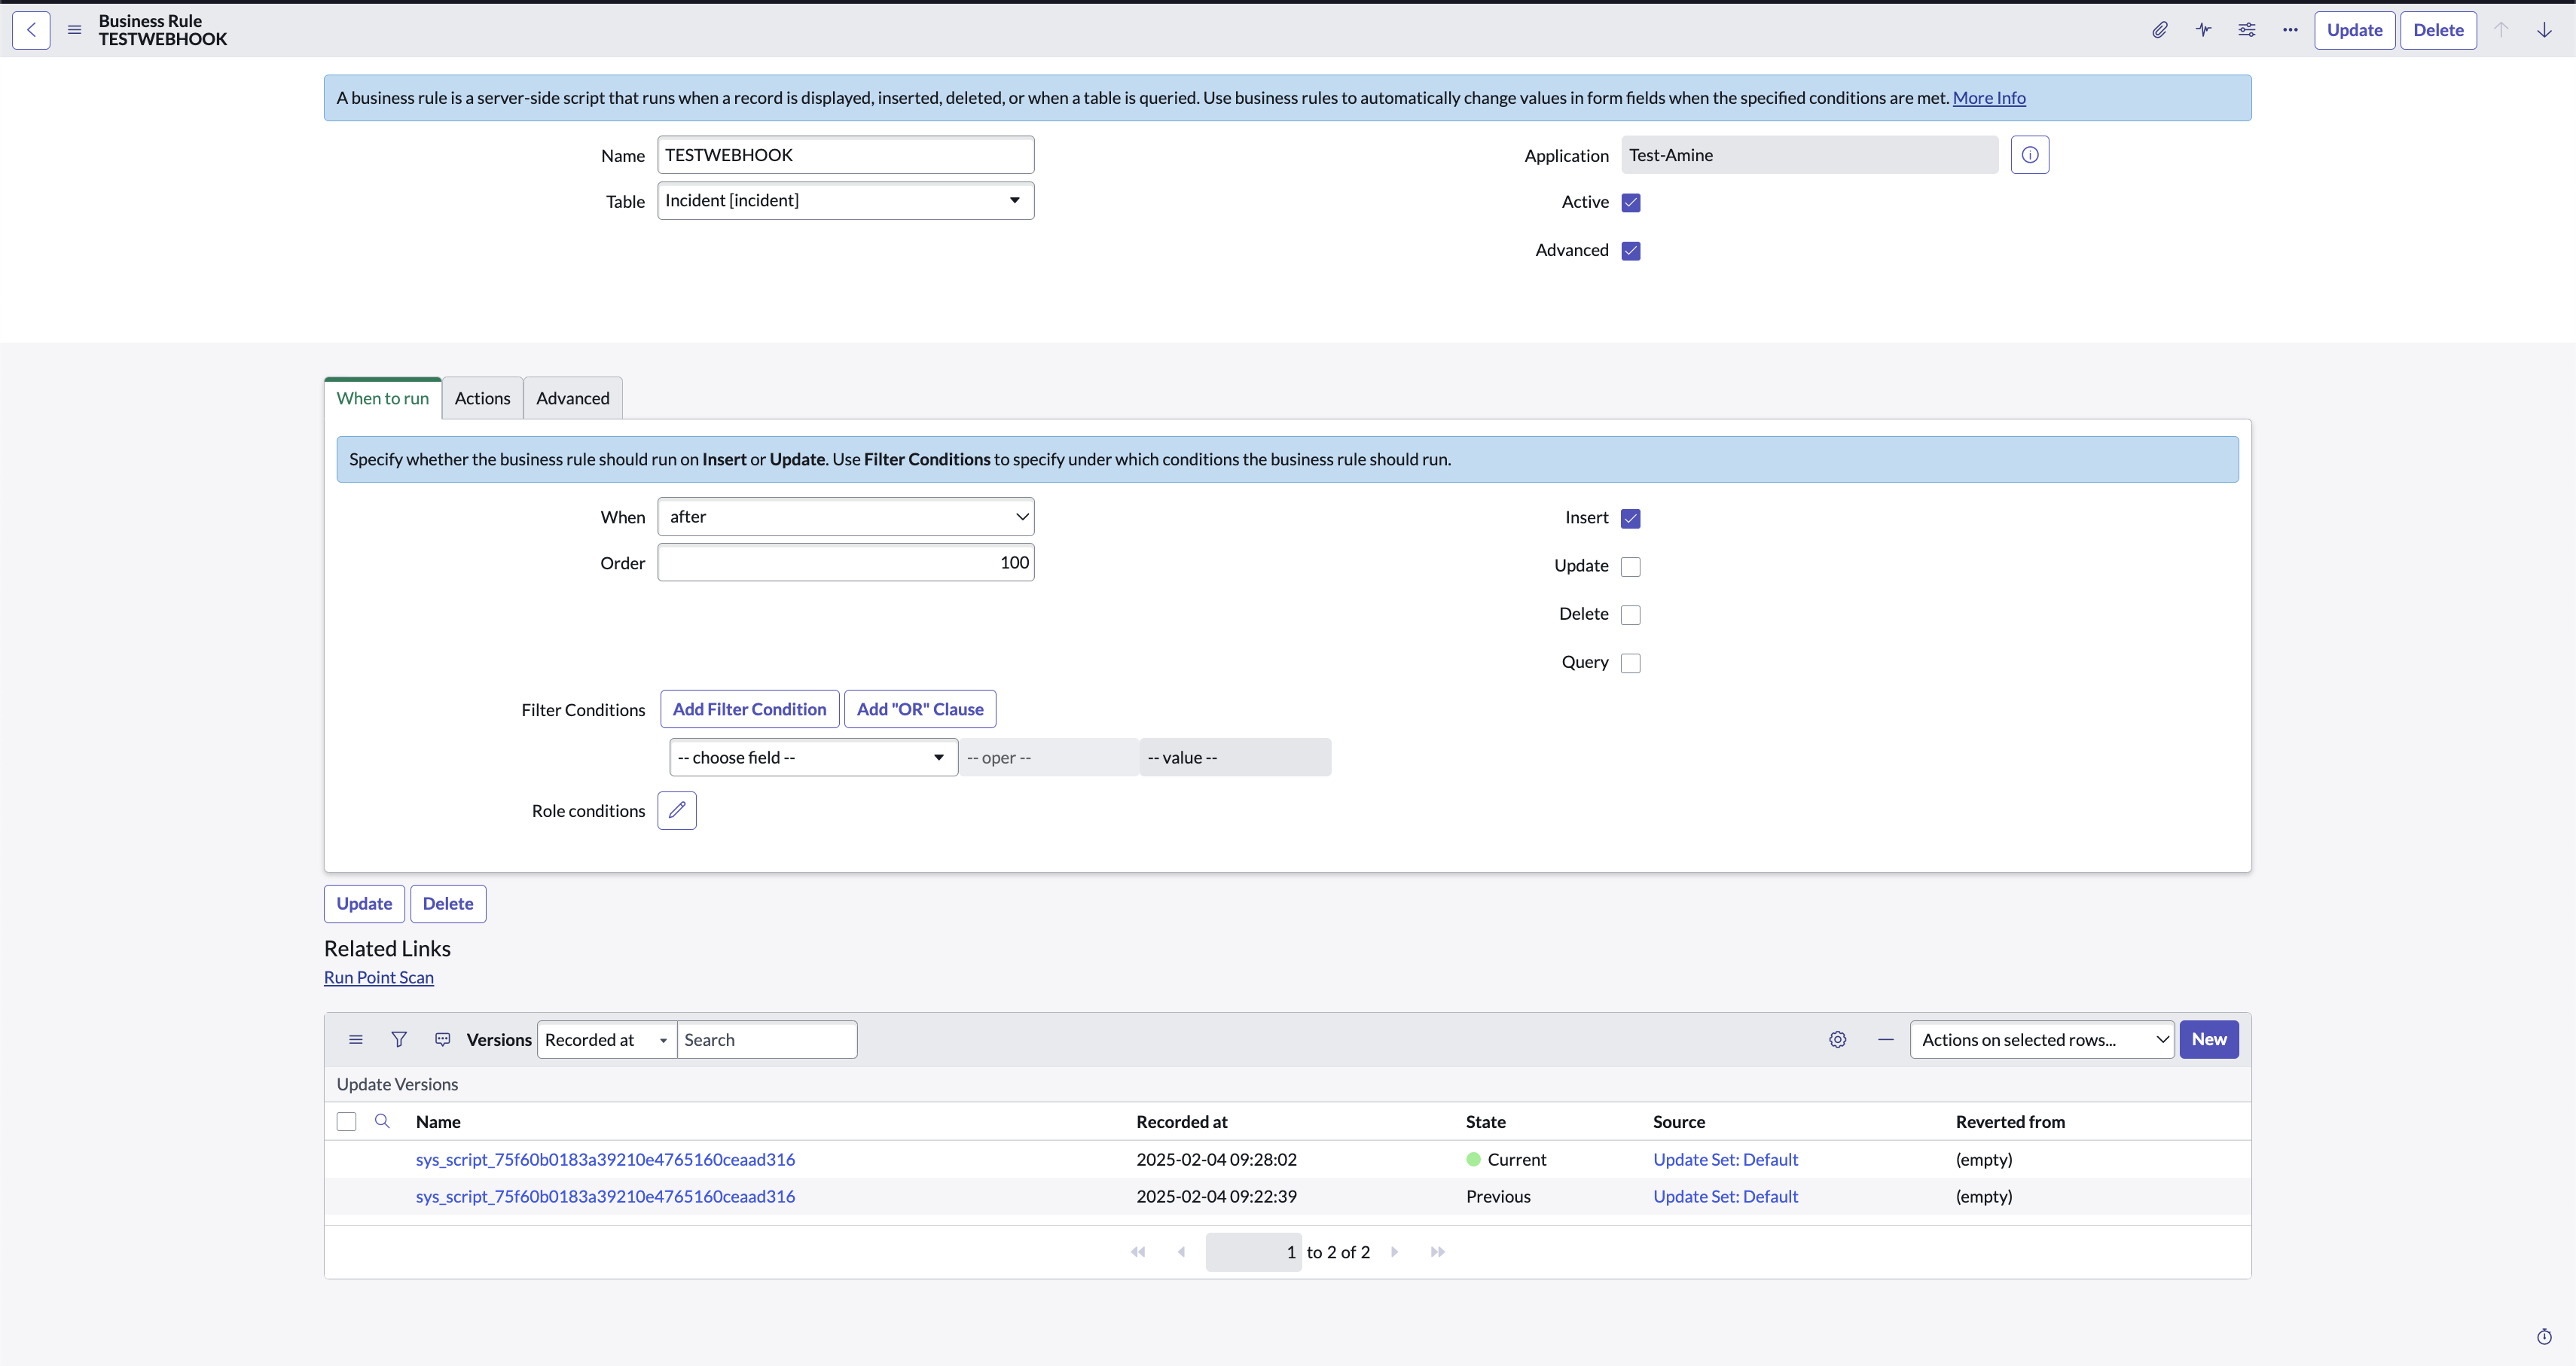
Configuring the Business Rule
Section titled “Configuring the Business Rule”In the rule configuration, fill in the following fields:
-
Table : Select the target table (e.g., Incident [Incident]).
-
Advanced : Check the Advanced option to display the Advanced tab, where you can add a custom script.
-
When to run
- When after: Choose this option to specify that the rule should run after the event has occurred.
- If you experience issues to send outbound requests with “Illegal access to Outbound HTTP”, turn When to async.
- Select insert: Select Insert (equivalent to creating a new record).
- Order: Leave this option unchanged.
- Filter: Do not modify this option.
- When after: Choose this option to specify that the rule should run after the event has occurred.
-
Advanced
-
Script: In this tab, add the custom script that will perform the desired action (e.g., send a request to a webhook or perform other specific actions). In the payload, you can include the fields that the request should contain. Find below a script example.
;(function executeRule(current, previous /*null when async*/) {var restMessage = new sn_ws.RESTMessageV2()restMessage.setEndpoint("https://webhook-{your-env}.mindflow.io/playbooks/{playbook-id}/steps/start/run-async")restMessage.setHttpMethod("post")restMessage.setRequestHeader("Content-Type", "application/json")restMessage.setRequestHeader("x-api-key", "your Mindflow api key")var payload = {request_id: current.sys_id.toString(),request_number: current.number.toString(),created_date: current.sys_created_on.toString(),updated_date: current.sys_updated_on.toString(),}restMessage.setRequestBody(JSON.stringify(payload))try {var response = restMessage.execute()var httpResponse = response.getStatusCode()gs.info("Webhook Response: " + httpResponse)} catch (error) {gs.error("Error sending webhook: " + error.message)}})(current, previous)
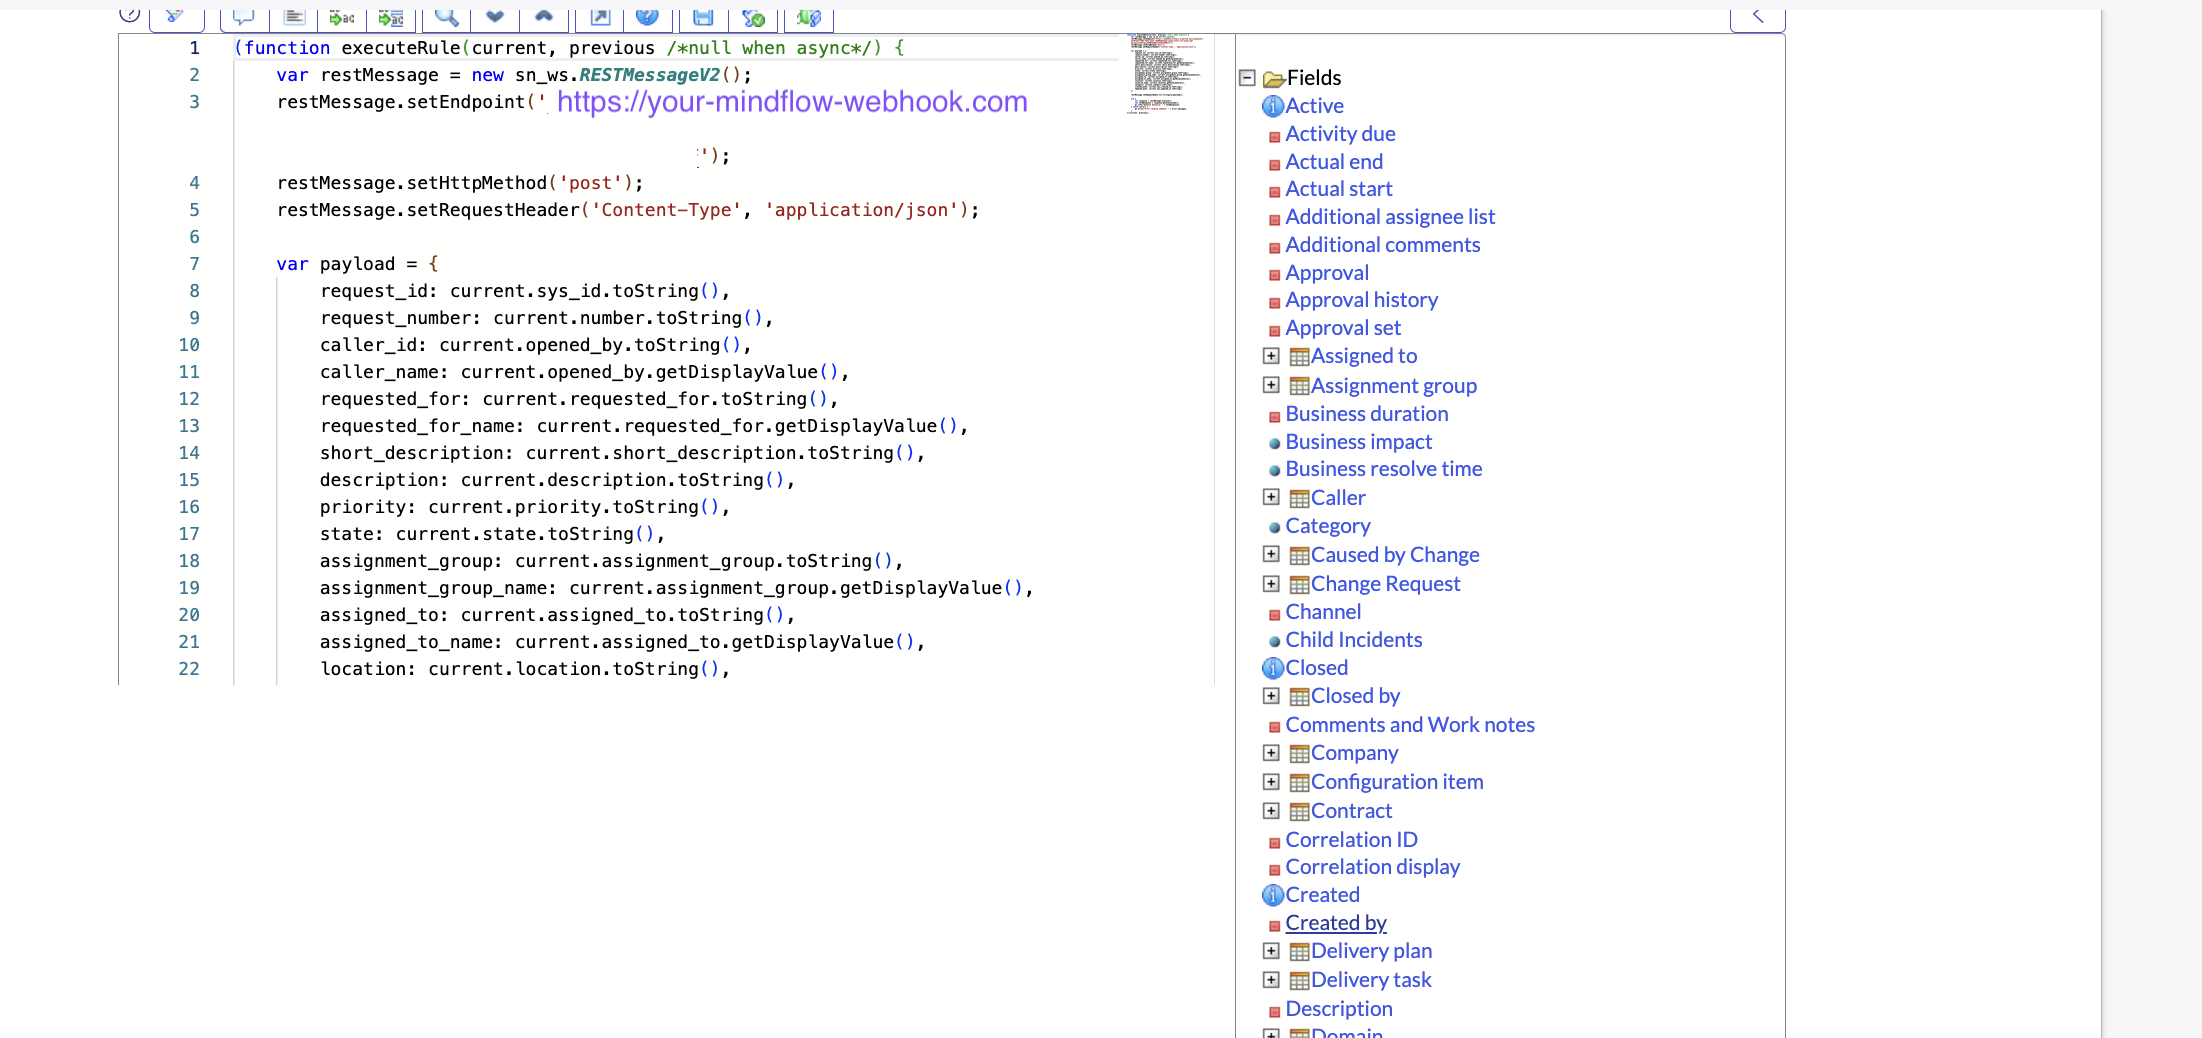
On the side, you can select the fields to include in the payload.
-
Retrieving Webhook URL and API Key in Mindflow
Section titled “Retrieving Webhook URL and API Key in Mindflow”To obtain the asynchronous webhook URL to paste in the script below and the API key for the Header, follow these steps in Mindflow:
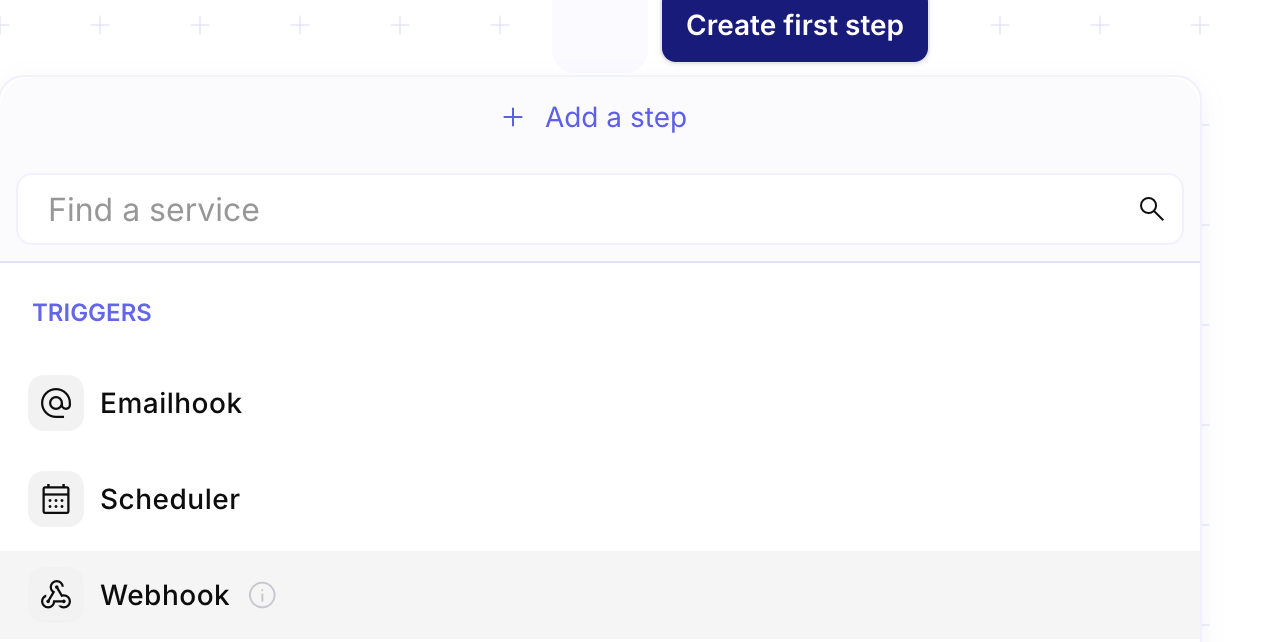
- Add the Webhook Trigger
-
At the beginning of your playbook, add a Webhook trigger to initiate the workflow.
-
Open the Settings tab to view the webhook details.
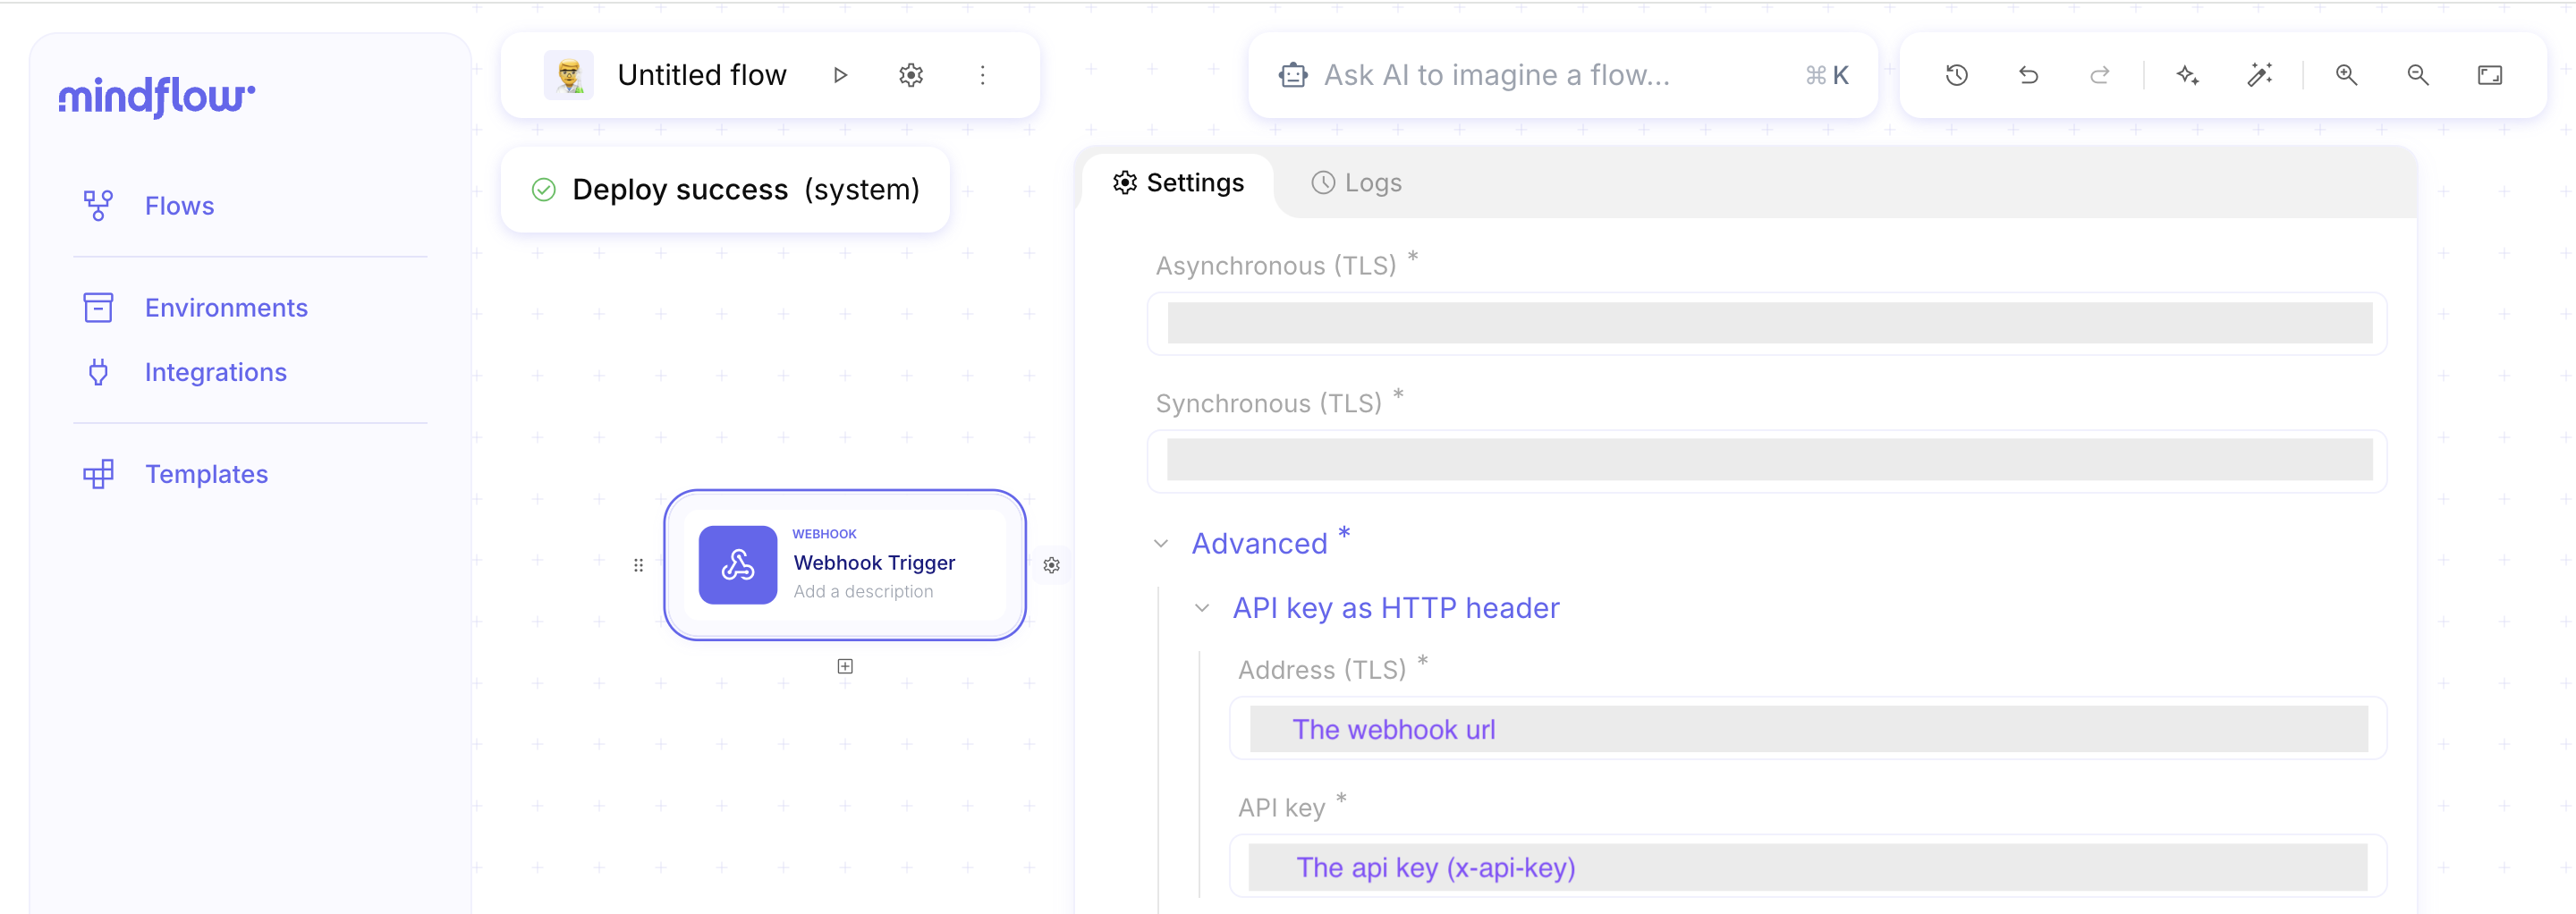
- Copy the asynchronous webhook URL: This URL will be used to receive triggered events.
- Get the API key: In the Header section, locate the key x-api-key and copy its value. This key is required to authenticate requests sent to the webhook.