

Credentials
1. Create OAuth2.0 Client ID
Section titled “1. Create OAuth2.0 Client ID”1. prerequisites
Section titled “1. prerequisites”- Create a project on Google Console
2. Configuration Consent Screen
Section titled “2. Configuration Consent Screen”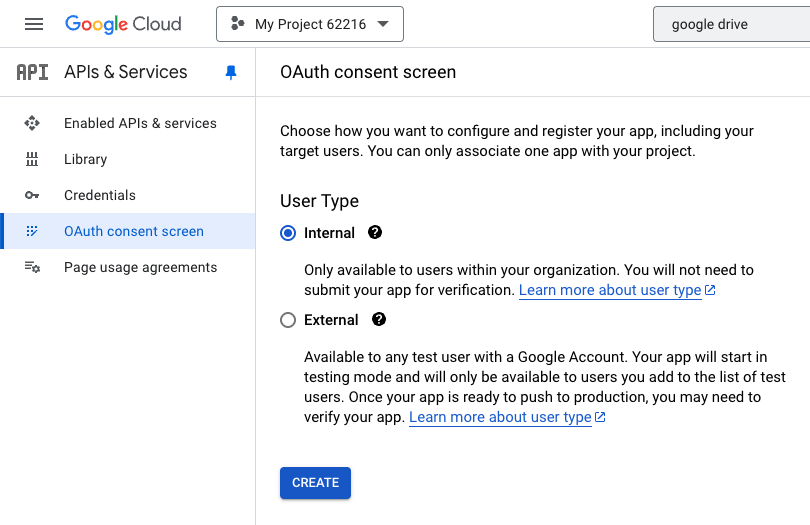
-
Internal: gives access only to people in the organisation
-
then push Create
-
then configure the required fields
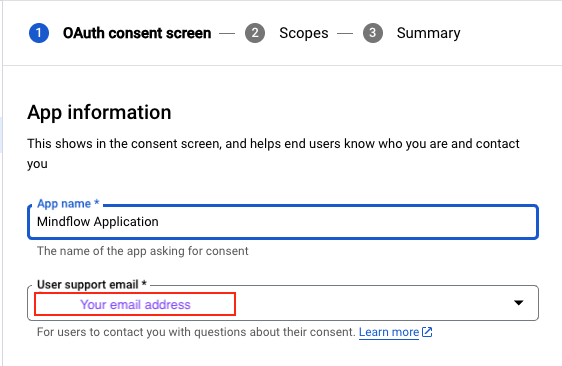
-
and below
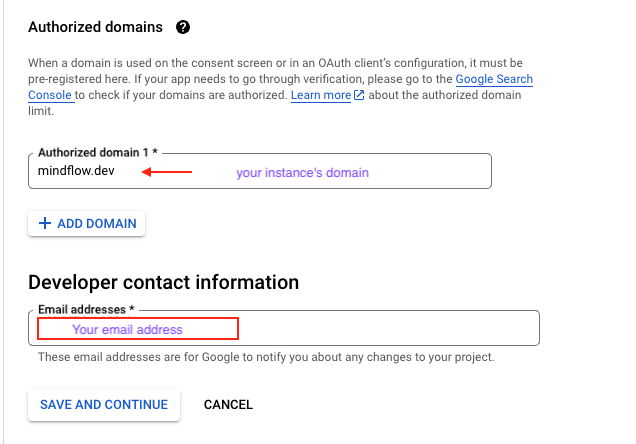
-
We don’t need to configure the scopes, we’ll do it when we create the credentials.
3. Creating an OAuth2.0 Client
Section titled “3. Creating an OAuth2.0 Client”In the console, create an OAuth Clients ID by pressing Create credentials
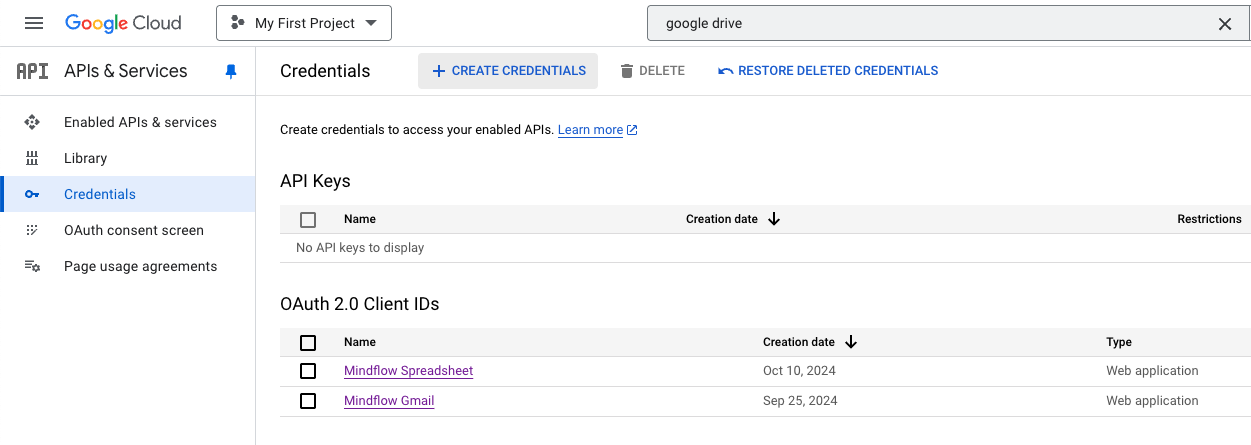
Application Type : Web Application
Name : The Name of your client
Authorized redirect URIs :
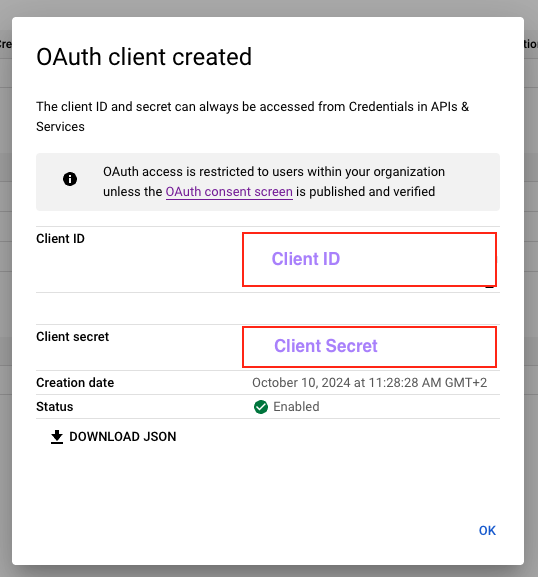
https://credentials-<YOUR INSTANCE URL>/oauth2/callbackOnce created, you must keep the values on the screen under Client ID/Client Secret. If you don’t want to lose them, you can use Download JSON to store them in a text file on your computer.
4. Creating a credential on Mindflow
Section titled “4. Creating a credential on Mindflow”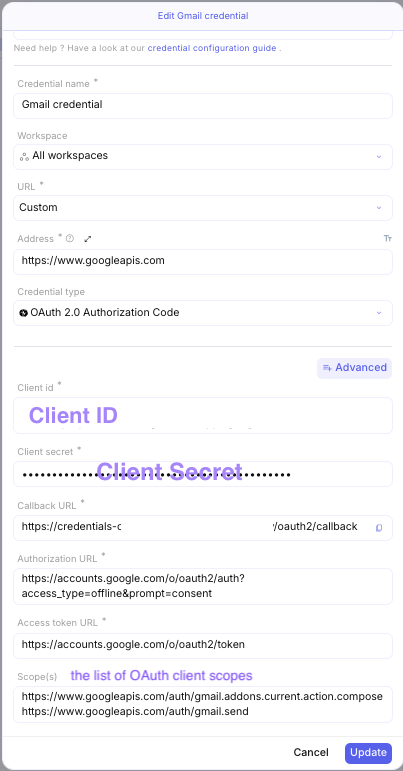
When you press Create, a window will open allowing you to choose the Google account from which the OAuth client will be able to retrieve the data.
2. Create Service Account
Section titled “2. Create Service Account”The Google OAuth 2.0 system supports server-to-server interactions such as those between a web application and a Google service. For this scenario you need a service account, which is an account that belongs to your application instead of to an individual end user.
1. Start with opening the Google Cloud console
2. If you don’t have one already, create a Google Cloud Project: at the top-left, click Menu > IAM & Admin > Create a project.

3. In the Project name **field, enter a descriptive name for your project. Then, in the Organization & Location **fields, choose your domain, then click on Create. The console navigates to the Dashboard page and your project is created within a few minutes.

To access Google Alert Center, you need a Service account.
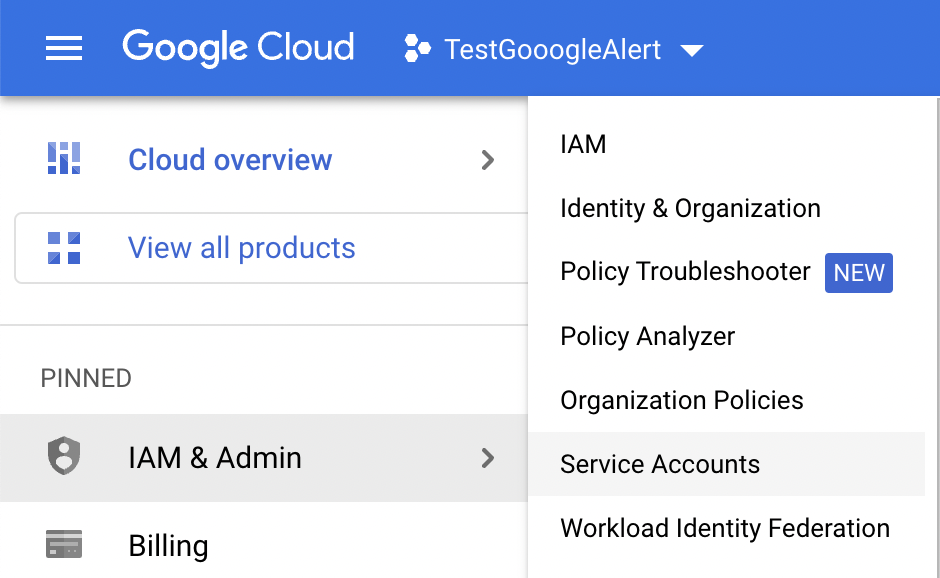
4. At the top-left, click on Menu > IAM & Project > Service Accounts
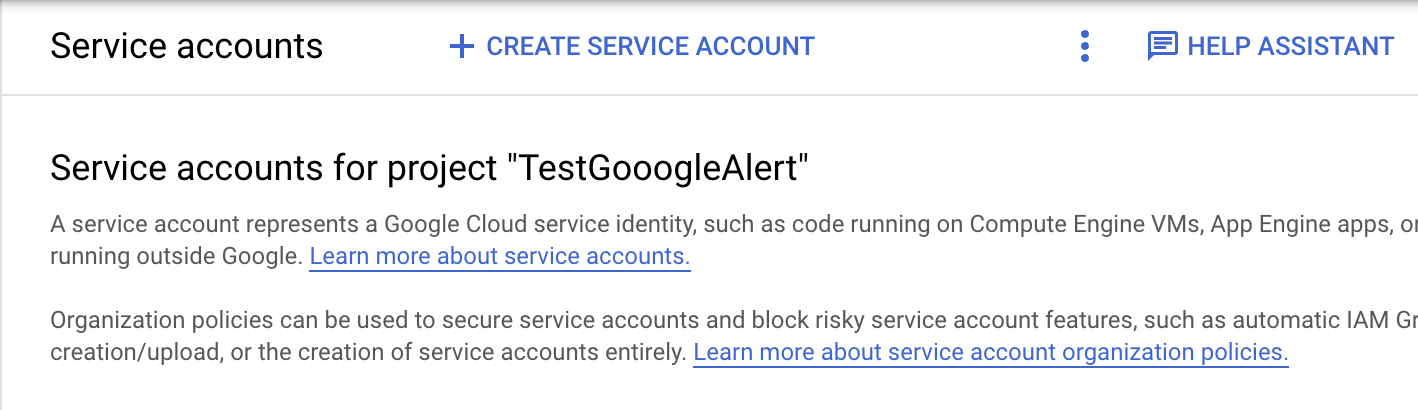
5. Click on Create Service Account
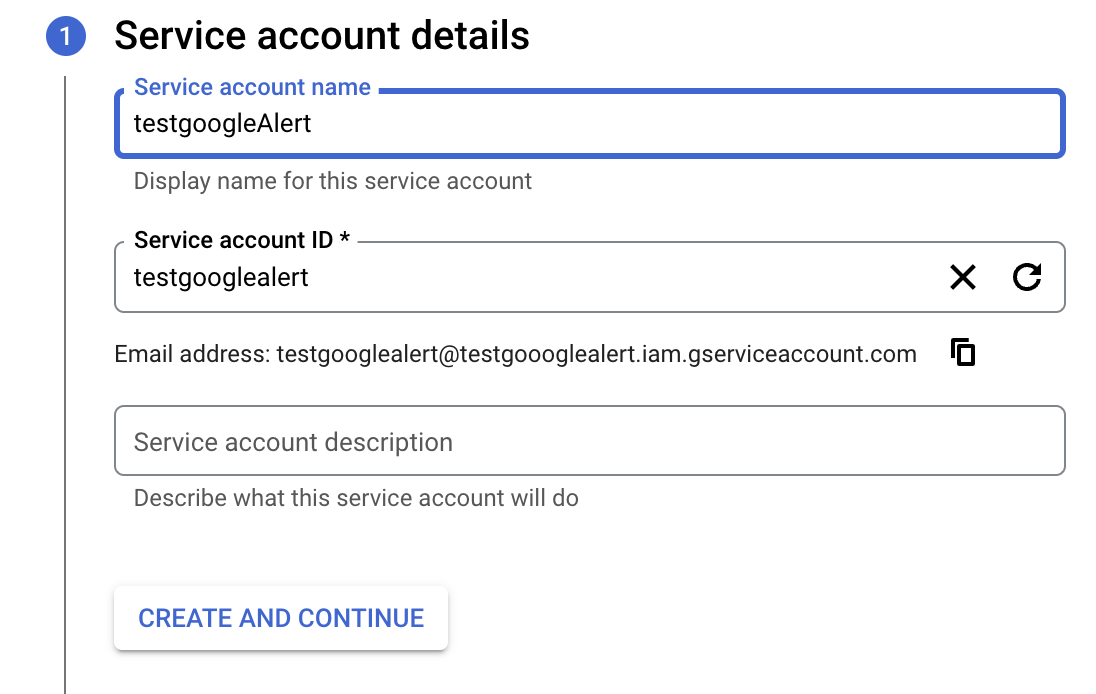
6. Fill in the details before clicking on Create and Continue
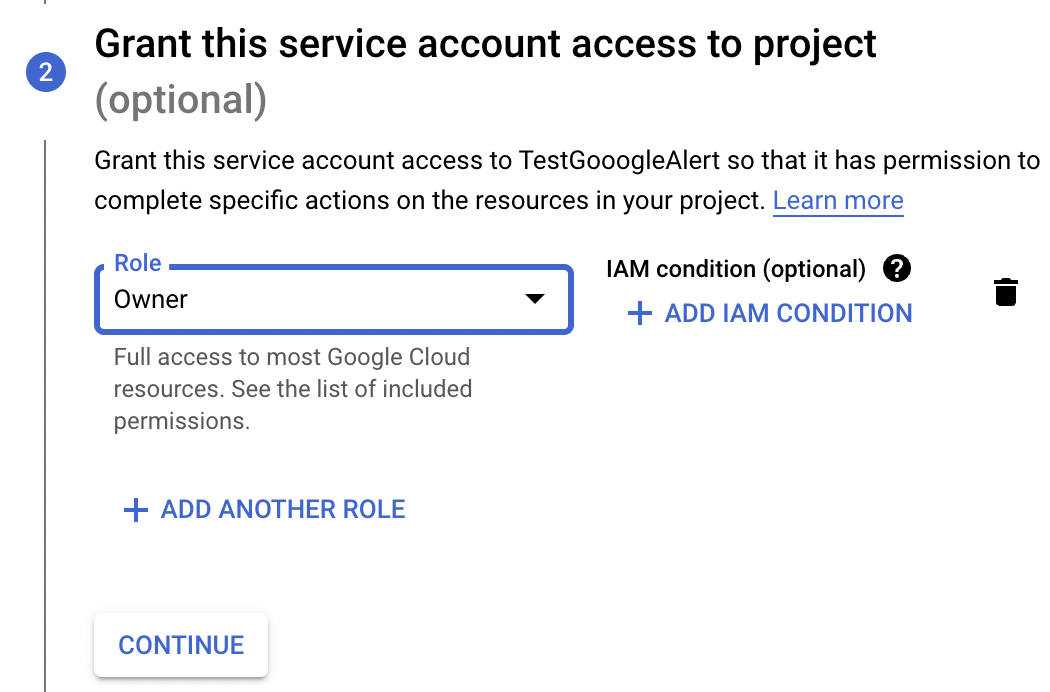
7. Select Owner Role and click on Continue.
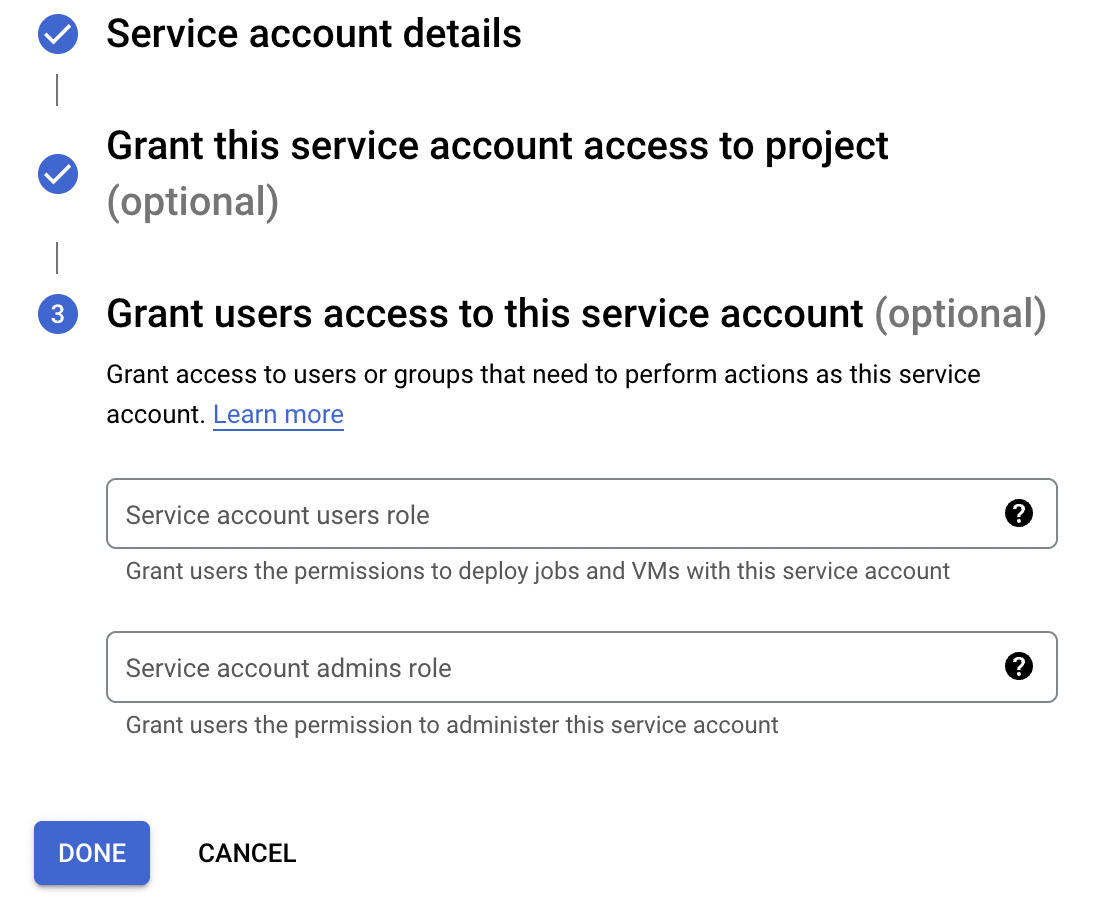
8. Click on the Done button.
9. Click on the Service Account you just created.
10. Click on Keys > Add key > Create new key
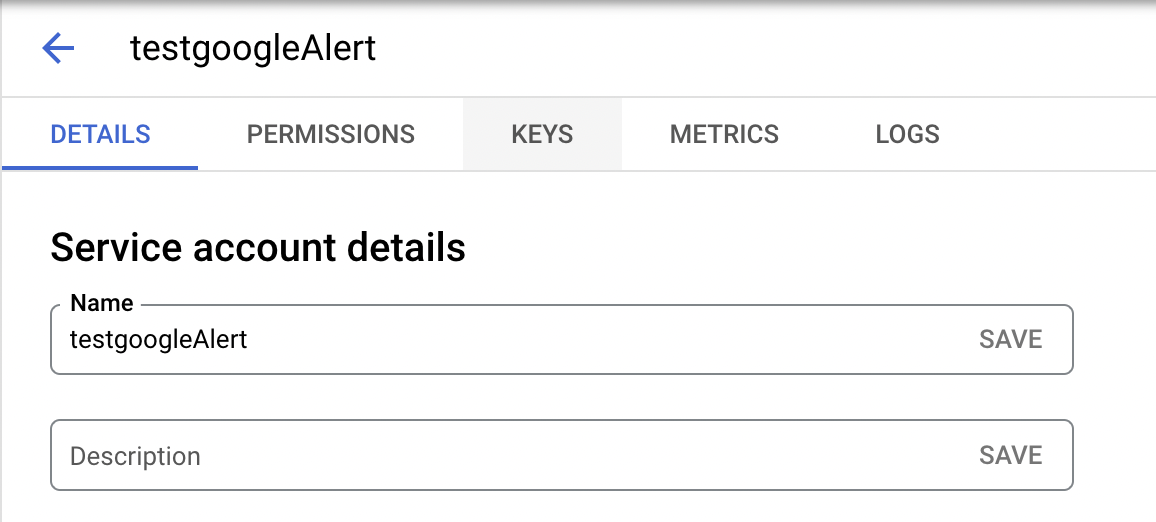
After clicking on Create new key, select Json for the key type. Afterwards, your file is saved in your downloads.
Enable APIs
Section titled “Enable APIs”11. Once in the project, you have to enable the APIs you need:
For example, to use Google Calendar API:
- Click on the search button and search “Google Calendar API”
- Click on the
enablebutton : - Then click on
Enable APIS and services:

You can add whichever ones like Google Sheets API, Admin SDK API, etc. if you think will be useful for you. Be careful to notify admin if you choose a new one so he can authorize it in domain wide-delegation.
Set-up domain-wide delegation for a service account (Part for Google Admin)
Section titled “Set-up domain-wide delegation for a service account (Part for Google Admin)”12. Set-up domain-wide delegation for a service account:
-
Still on your Google Cloud console
-
Click on
Menu>IAM & Admin>Service Account. -
Select your service account and show Advanced Settings.
-
Copy your
Client ID, you’ll need it later. -
Click on View Google Workspace Admin Console.
-
In the Admin console, at the top-left, ****click on
Menu>Security>Access and data control>API controls. -
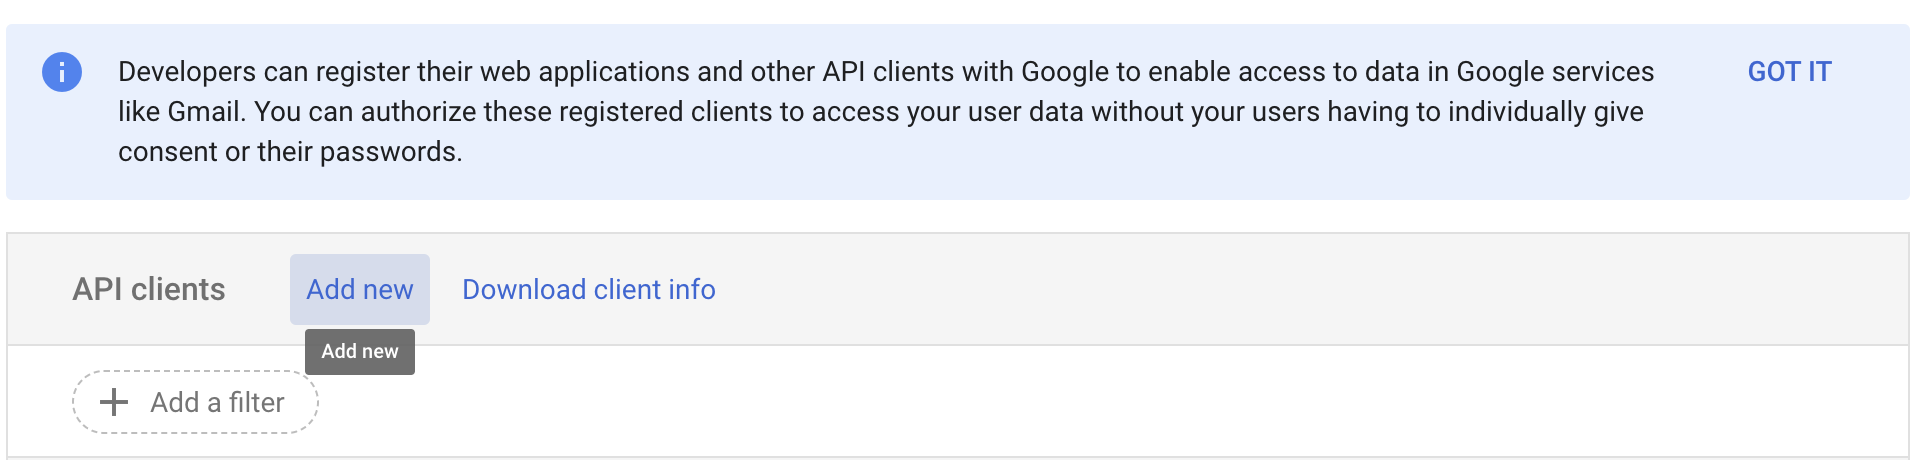
Click on Manage Domain Wide Delegation.
-
Click on Add new.
-
Add the
Client IDyou copied earlier and enter the scopes you need such as https://www.googleapis.com/auth/apps.alerts then click onAuthorize.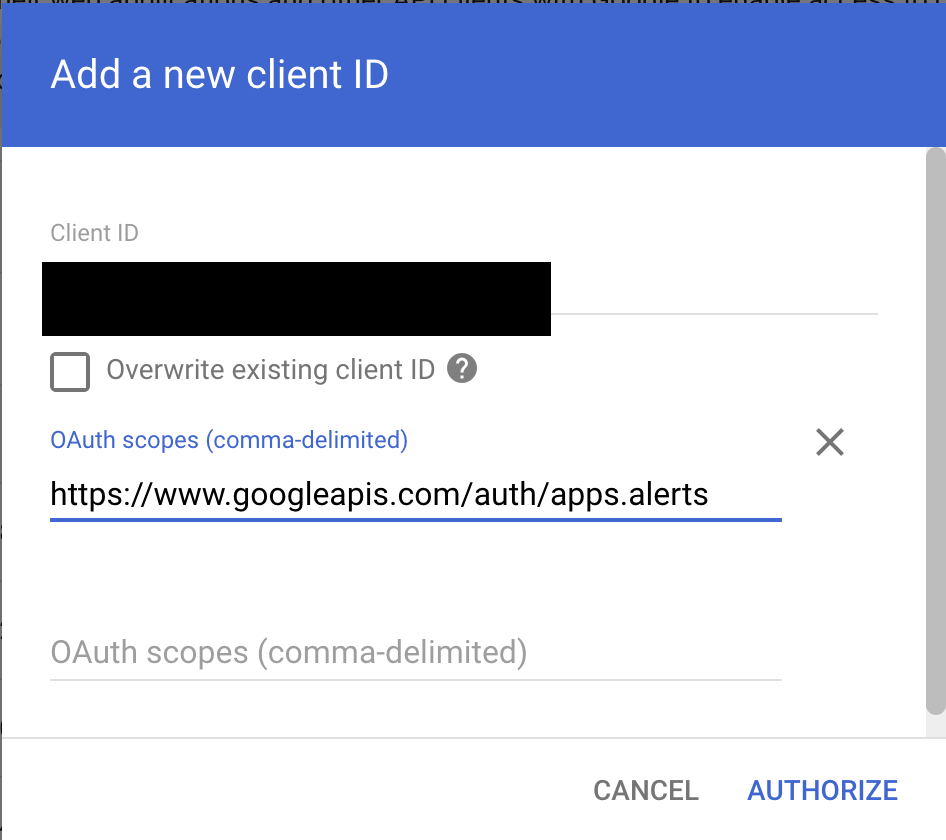
13. Go back on the Mindflow platform.
- Go to Vault.
- Click on Add a new credential.
- Name your credential and choose Google (Vendor) as your attached service.
- Select Google as your credential type.
14. Dig up your Json file you downloaded in step 7.
- Copy your
Client email****you have in your Json file. - Copy your
Private Key. Make sure you include the entire field (everything that’s between quotes). - Put this below in your
Scopesaccording to the ones you wish to use. The scopes are separated with a space.
https://www.googleapis.com/auth/spreadsheets https://www.googleapis.com/auth/admin.directory.user https://www.googleapis.com/auth/calendar https://www.googleapis.com/auth/apps.alerts
-
The
Subjectfield’s mandatory for Admin APIs such as Admin SDK directory. The subject needs to be authorized to access the API. Otherwise, it’s not necessary.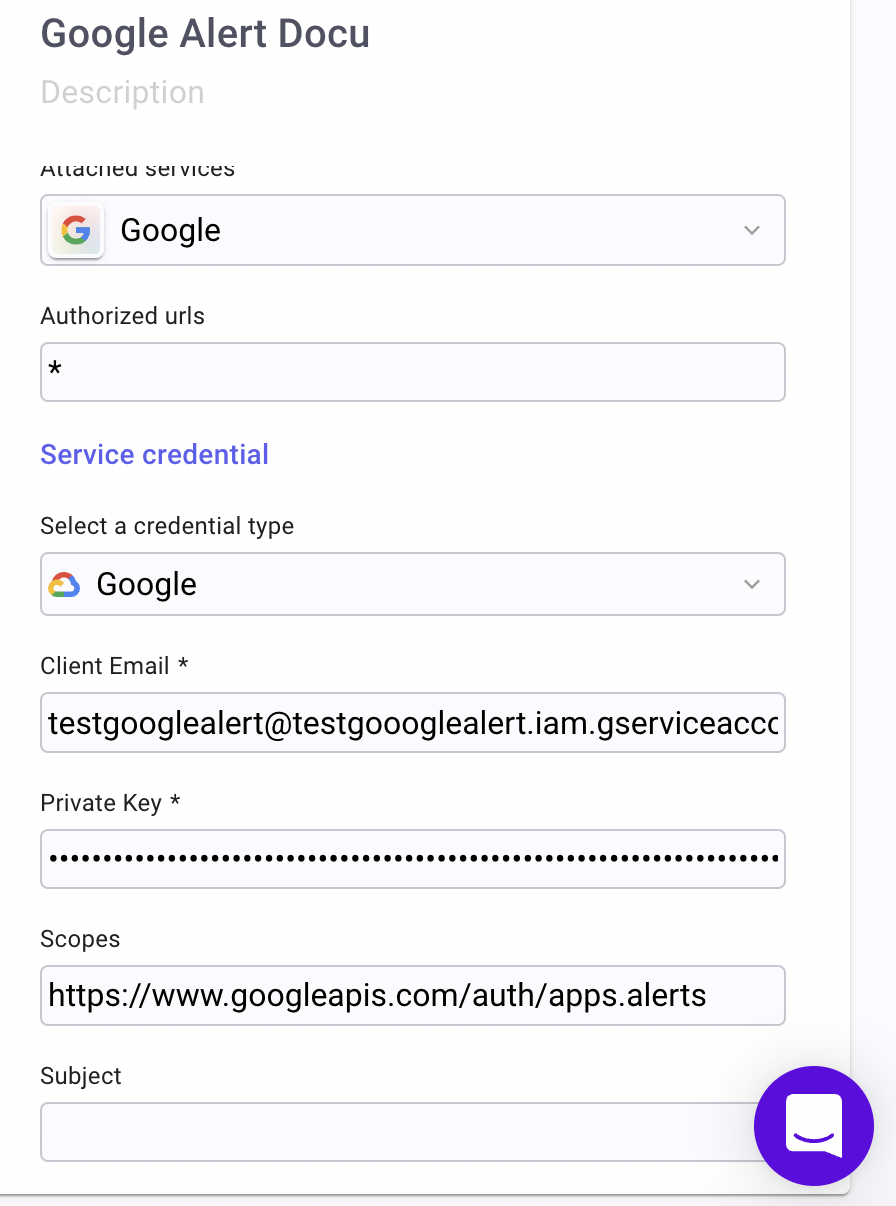
15. Test those credentials in your playbook