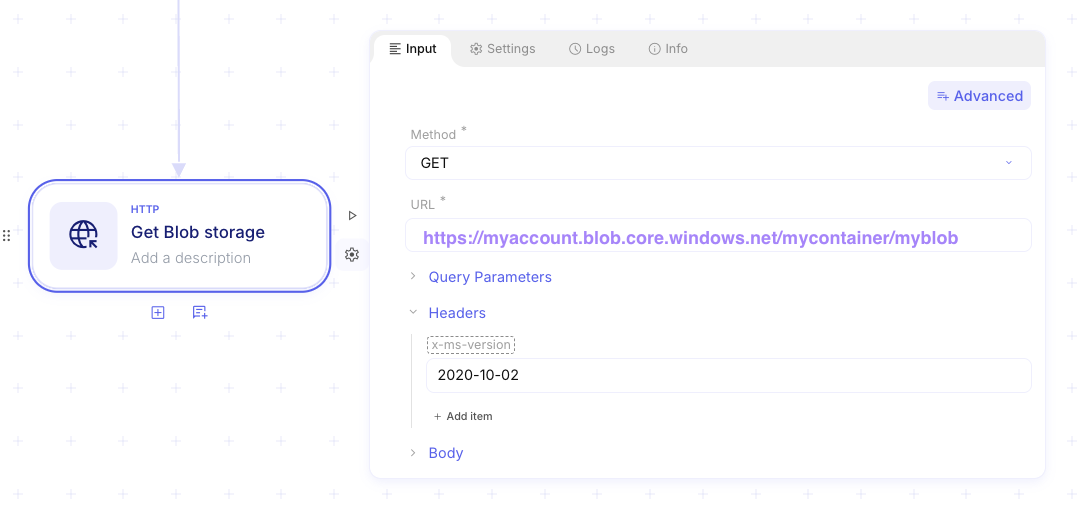
Connecting to an Azure Blob Container
1. Create the Azure Application
Section titled “1. Create the Azure Application”Start by creating an application registration in Azure without assigning any permissions yet.
2. Assign Roles from the Container
Section titled “2. Assign Roles from the Container”From your Azure Blob container, go to Access Control (IAM) and click:
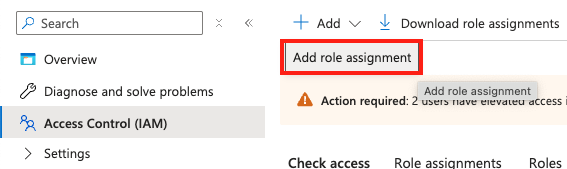
Recommended Roles
Section titled “Recommended Roles”3. Configure the Credential in Mindflow
Section titled “3. Configure the Credential in Mindflow”Set up an OAuth 2.0 (Client Credentials) credential in Mindflow.
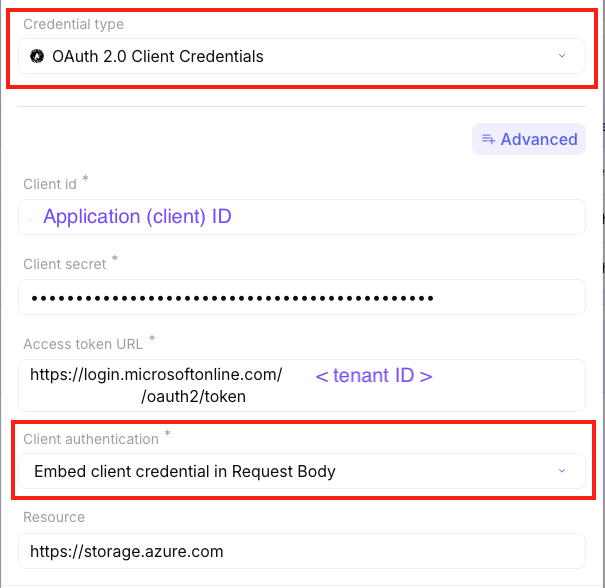
💡 Important:
Ensure that Client Authentication is set to: Embed client credential in Request Body
Resource (scope) to use: https://storage.azure.com
4. Available API Calls
Section titled “4. Available API Calls”📤 PUT Blob (Upload or Update a Blob)
Section titled “📤 PUT Blob (Upload or Update a Blob)”📚 Official Microsoft documentation
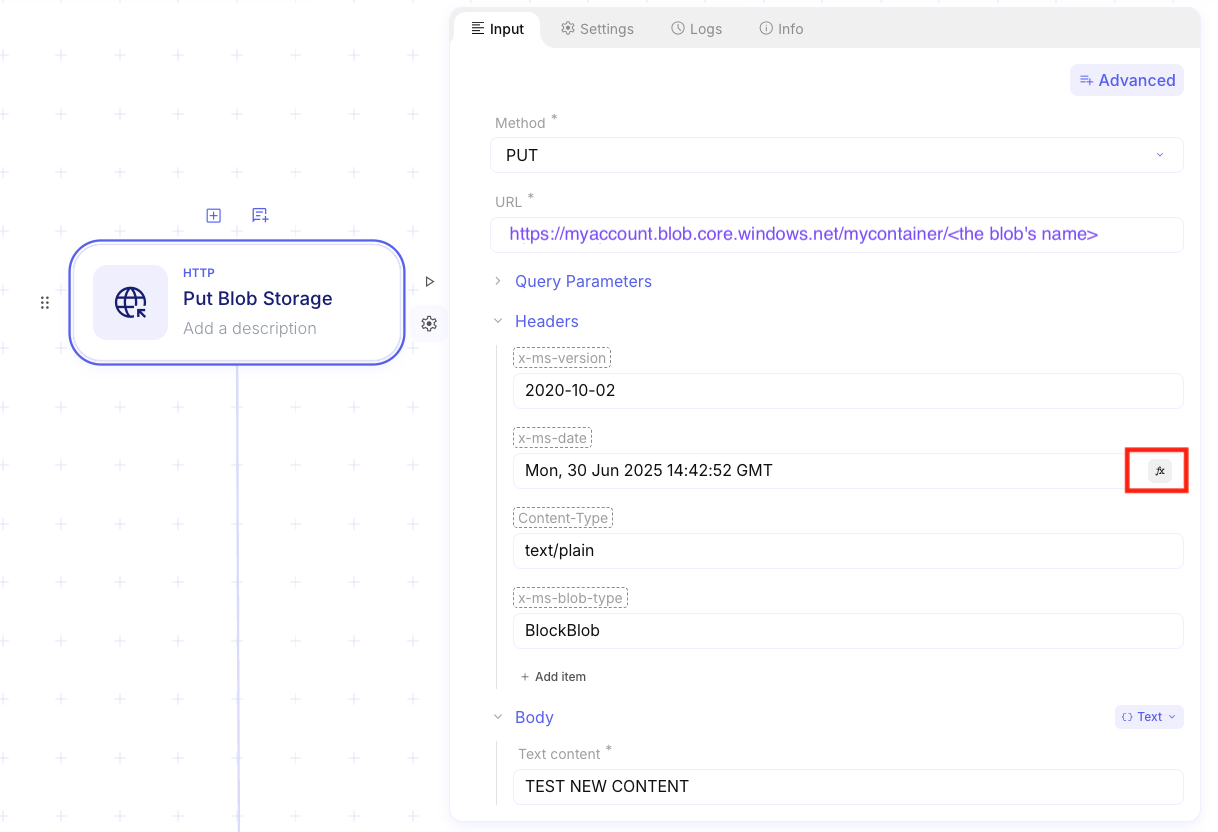
Required Headers
Section titled “Required Headers”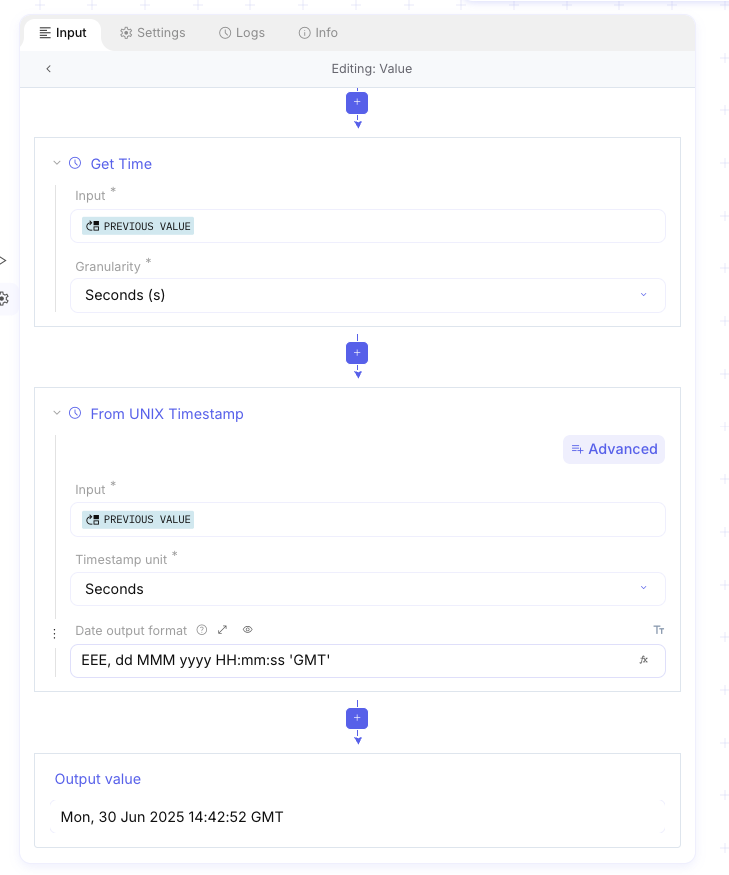
💡 Required format for x-ms-date: EEE, dd MMM yyyy HH:mm:ss 'GMT'
(e.g., Mon, 30 Jun 2025 14:00:00 GMT)
Section titled “(e.g., Mon, 30 Jun 2025 14:00:00 GMT)”🔸 Body: Contains the file content to upload.
📥 GET Blob (Download a Blob)
Section titled “📥 GET Blob (Download a Blob)”📚 Official Microsoft documentation