Client credentials
Introduction
Section titled “Introduction”This walkthrough details the process of registering a Microsoft Entra ID (formerly Azure AD) application, granting it high-level API permissions, and securely connecting it to the Mindflow platform.
On Mindflow, the related credential we will create will be of type OAuth 2.0 Client Credentials
Registering the Application in Azure
Section titled “Registering the Application in Azure”-
To begin, you must register a new application within your Microsoft Entra tenant to establish an identity for the integration.
-
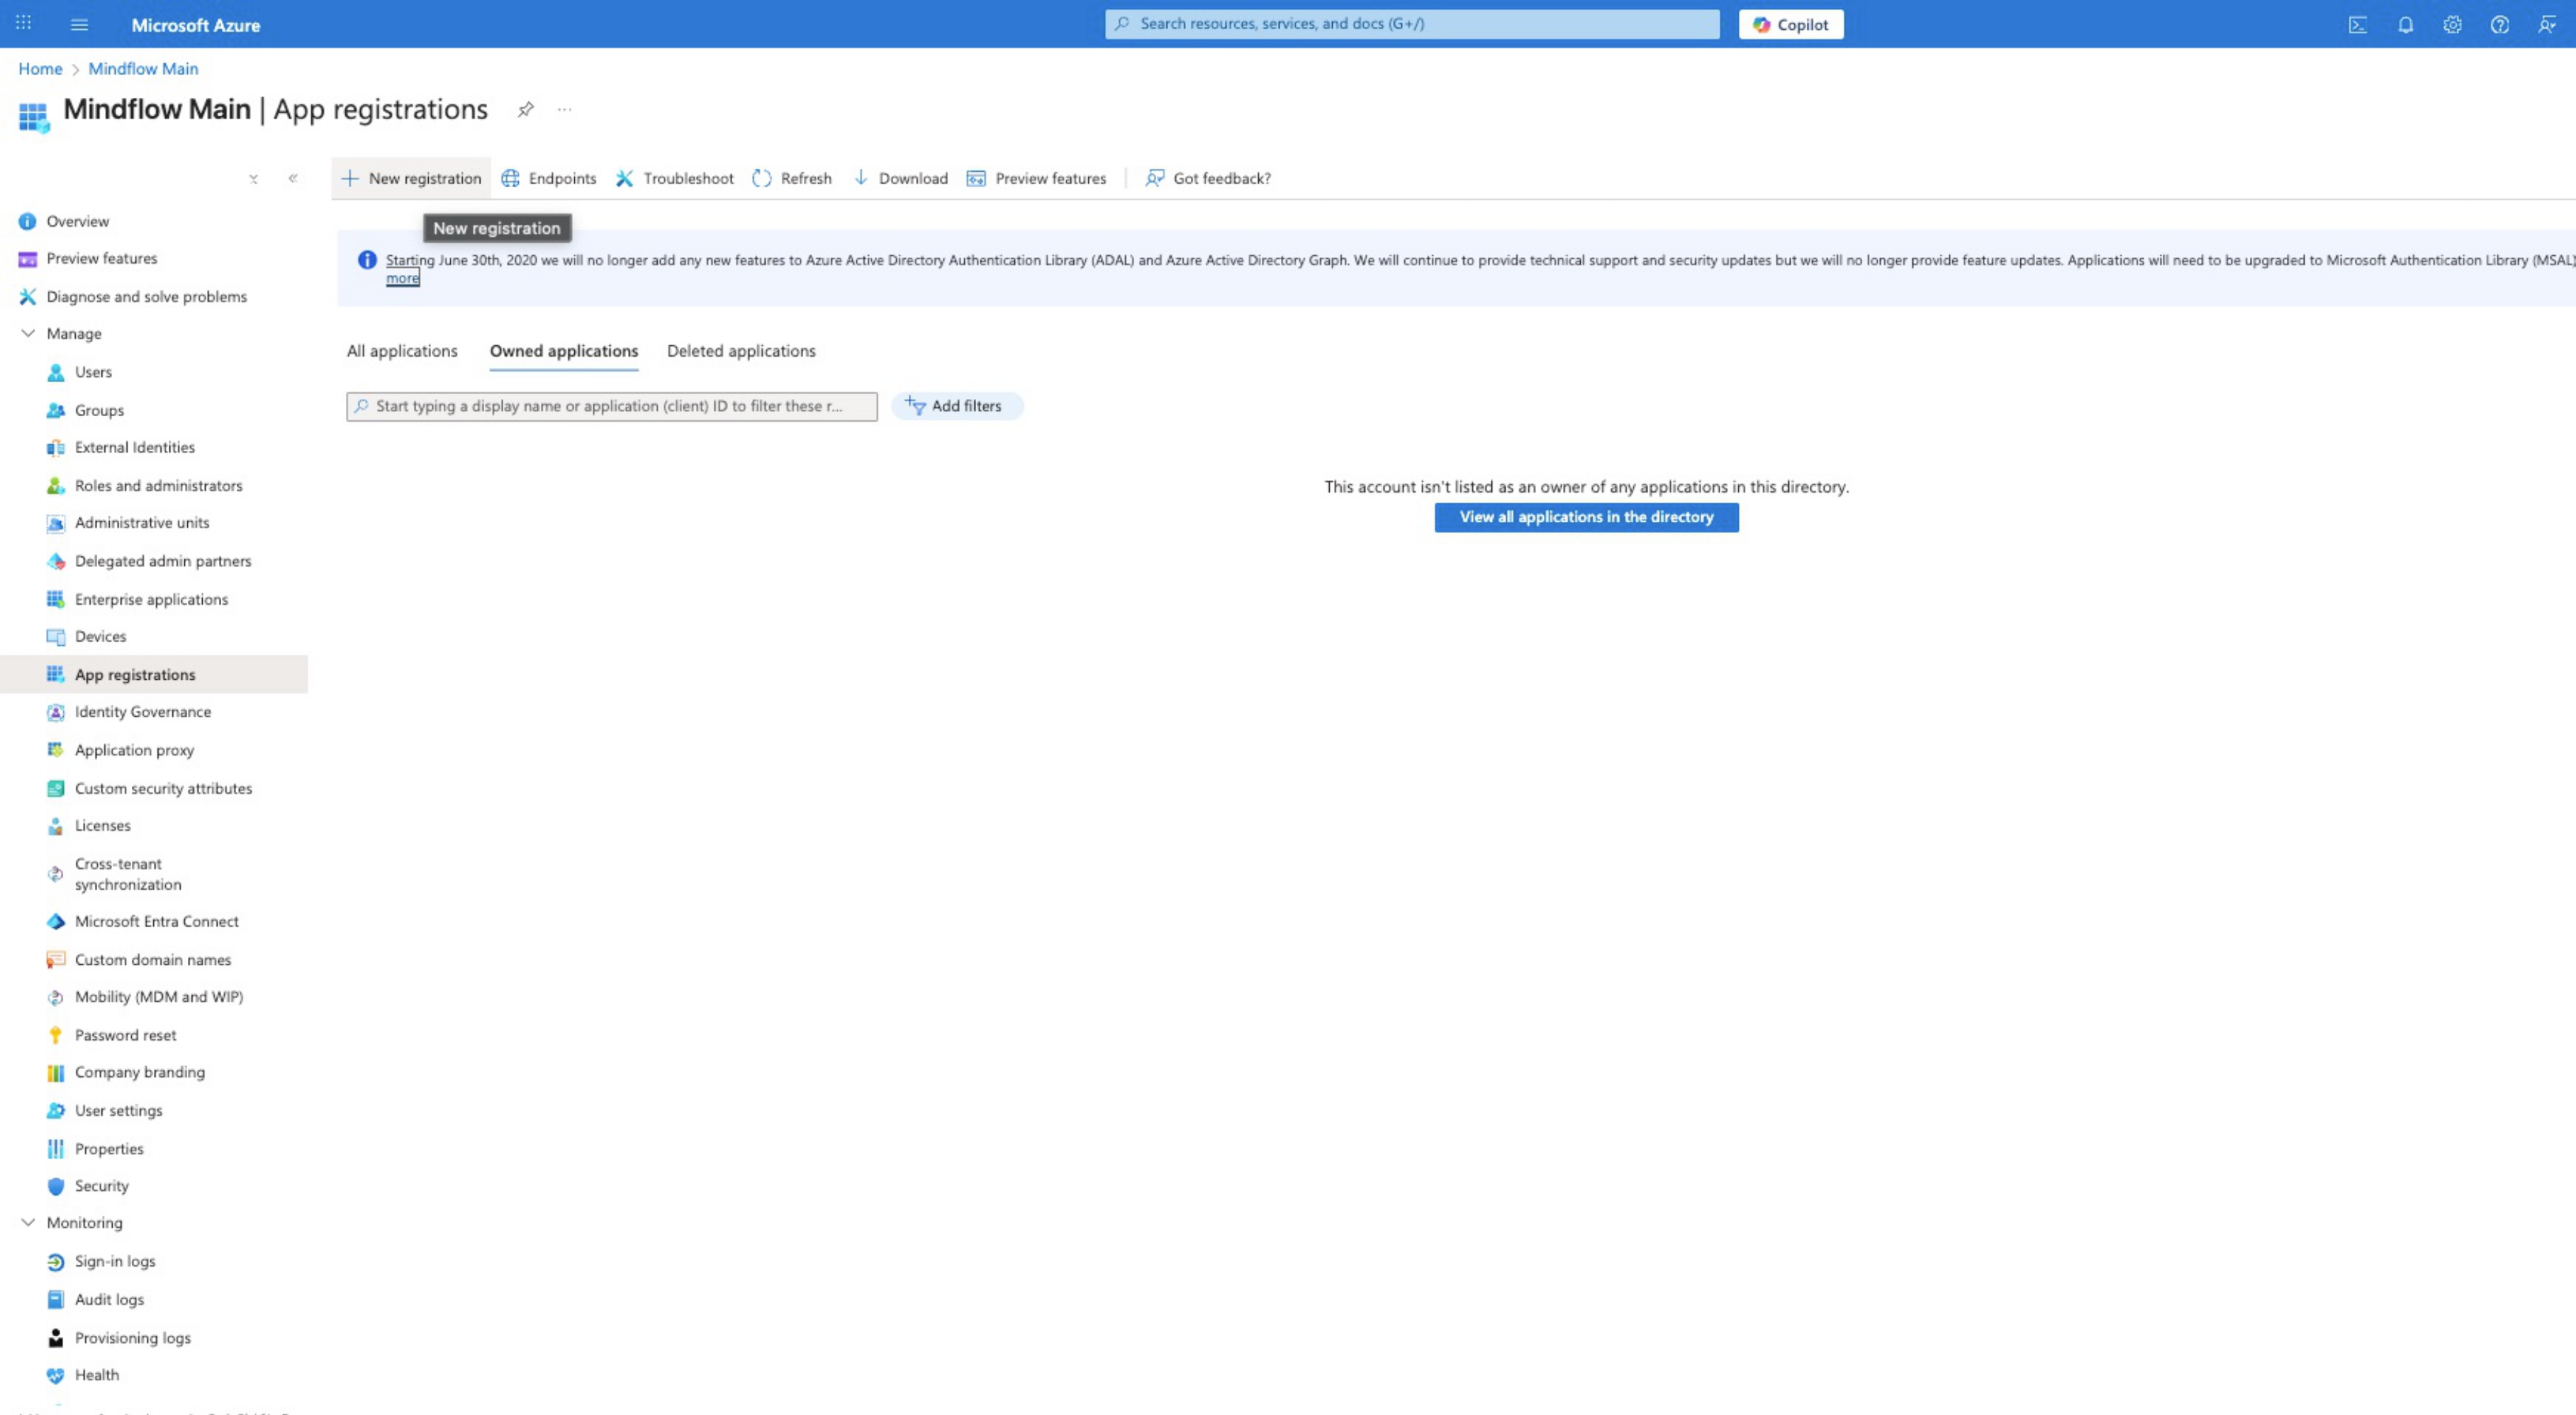
Navigate to App Registrations: In the Microsoft Azure portal, go to the Microsoft Entra ID directory and select App registrations from the sidebar.
-
Create New Registration: Click on + New registration.
-
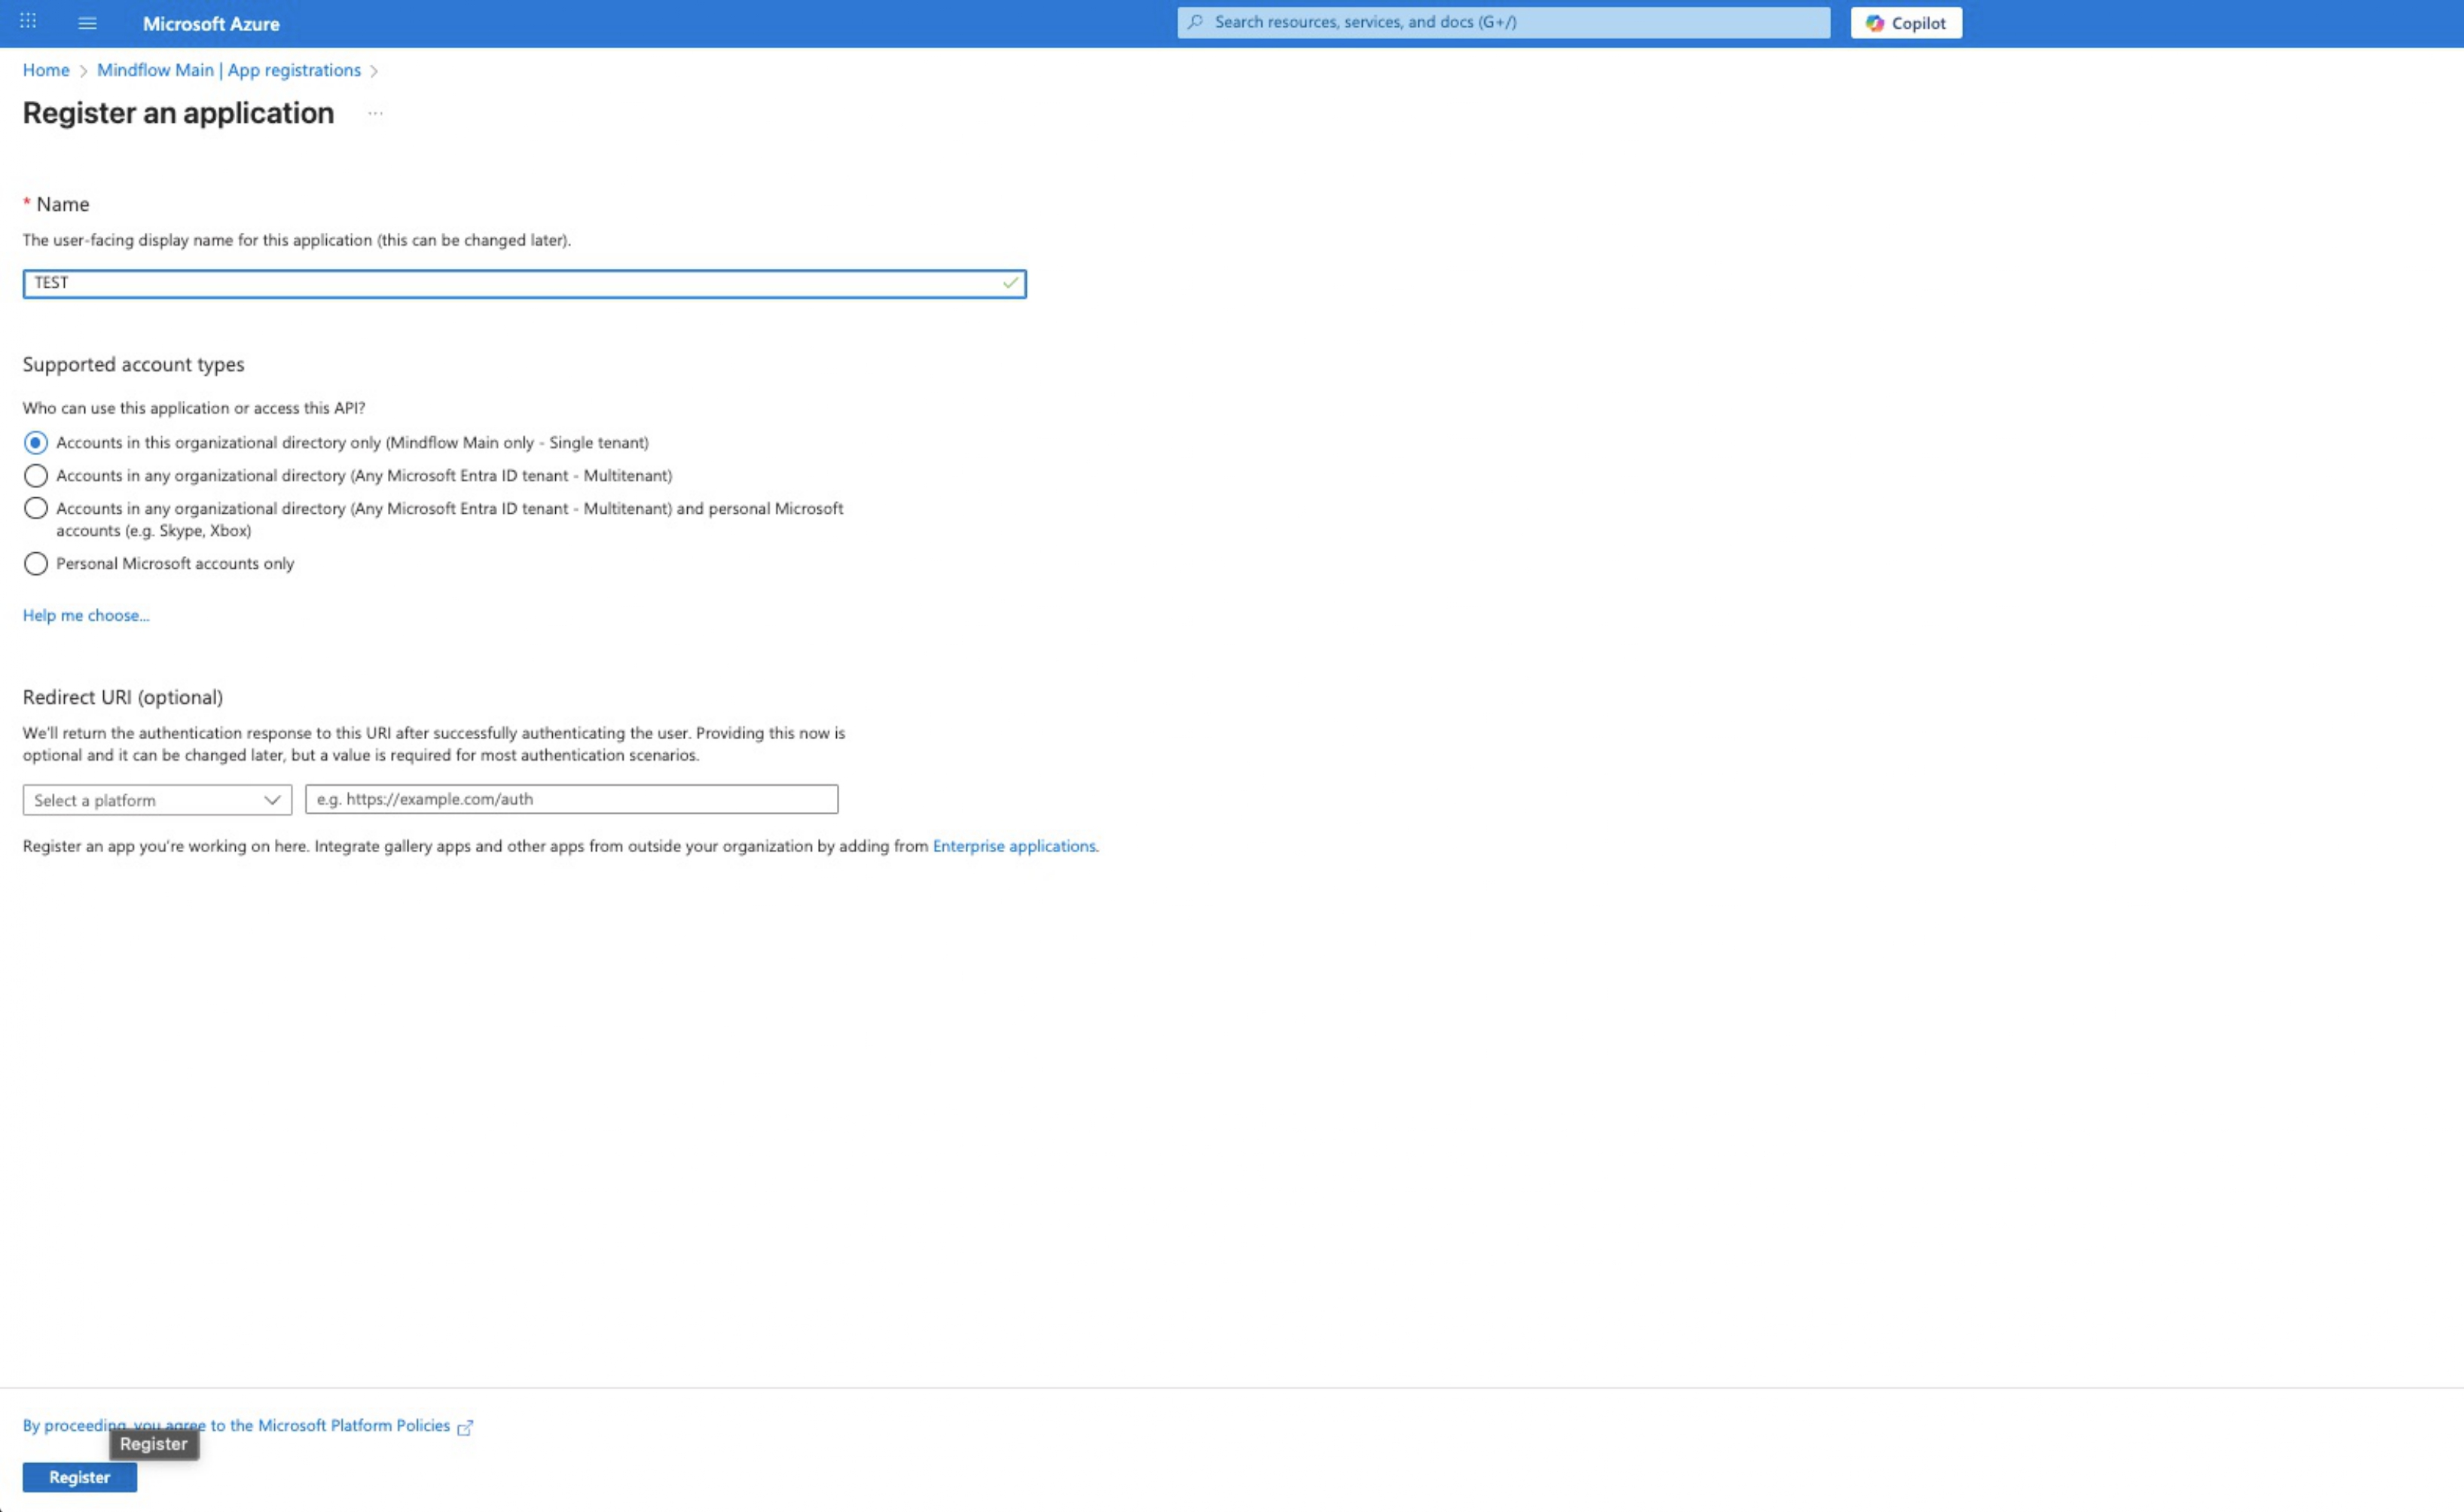
Configure Application Settings:
- Name: Enter a display name, such as “TEST”.
- Supported Account Types: Select Accounts in this organizational directory only (Single tenant).
-
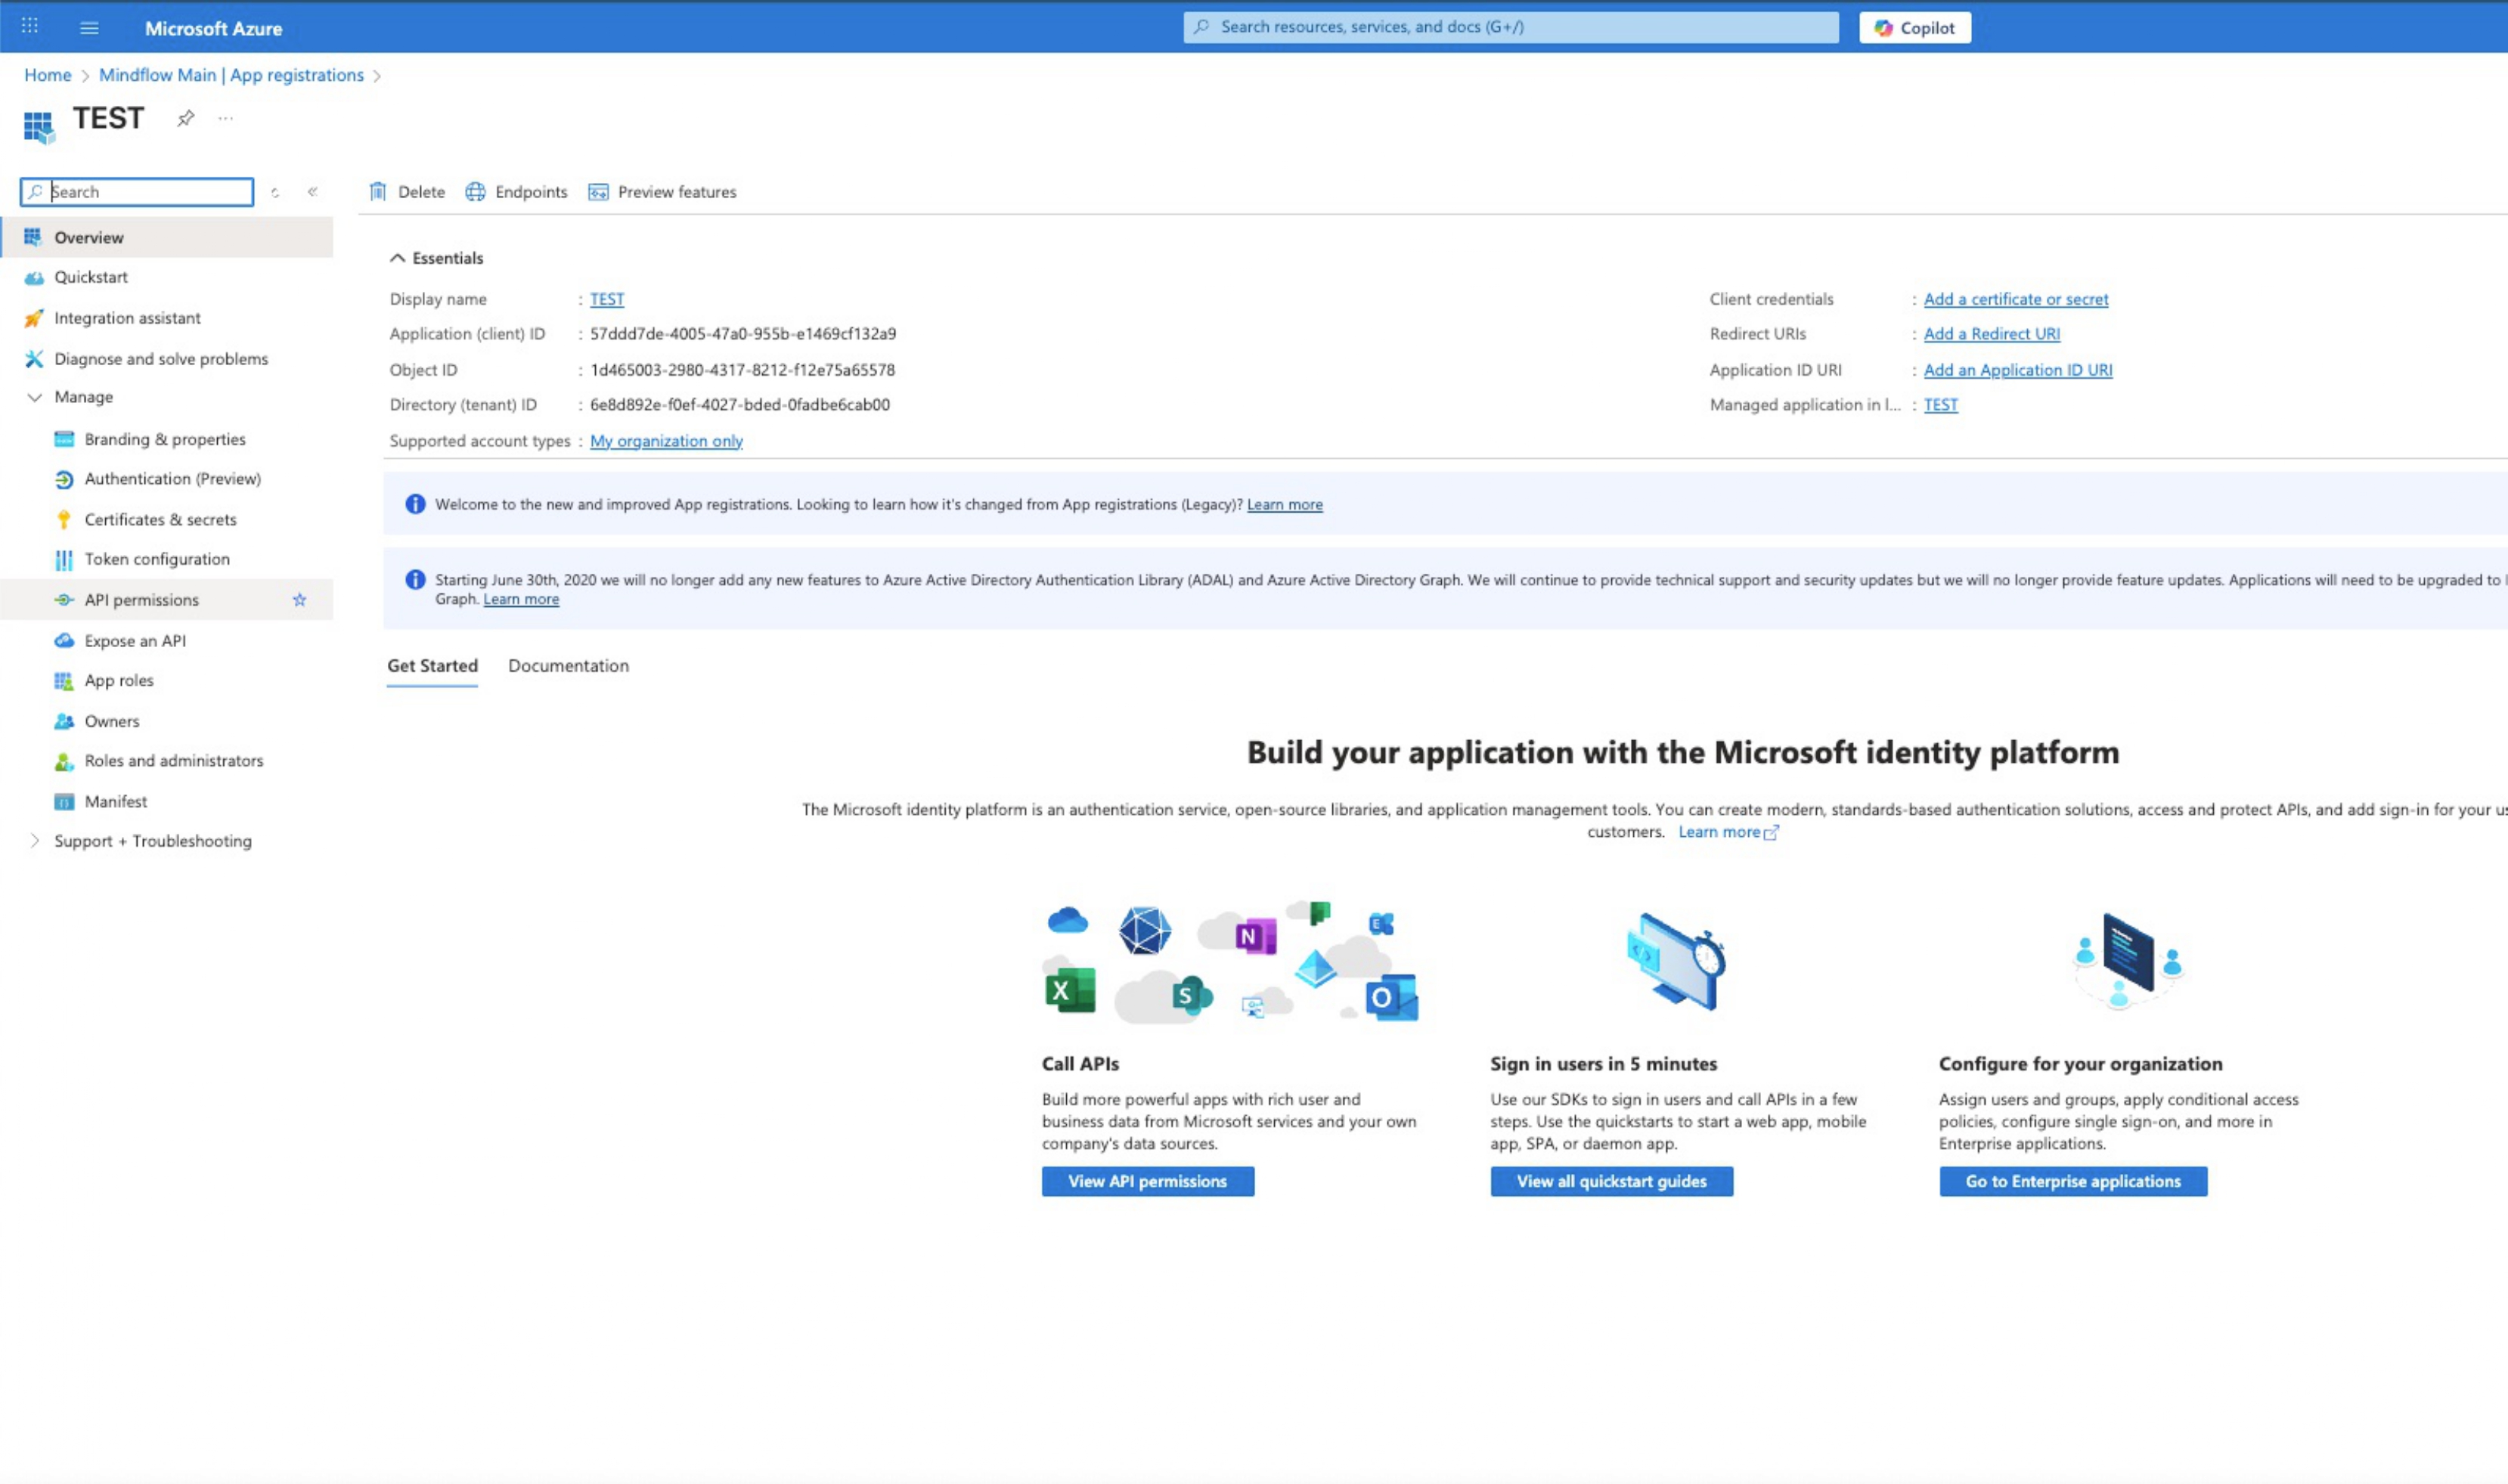
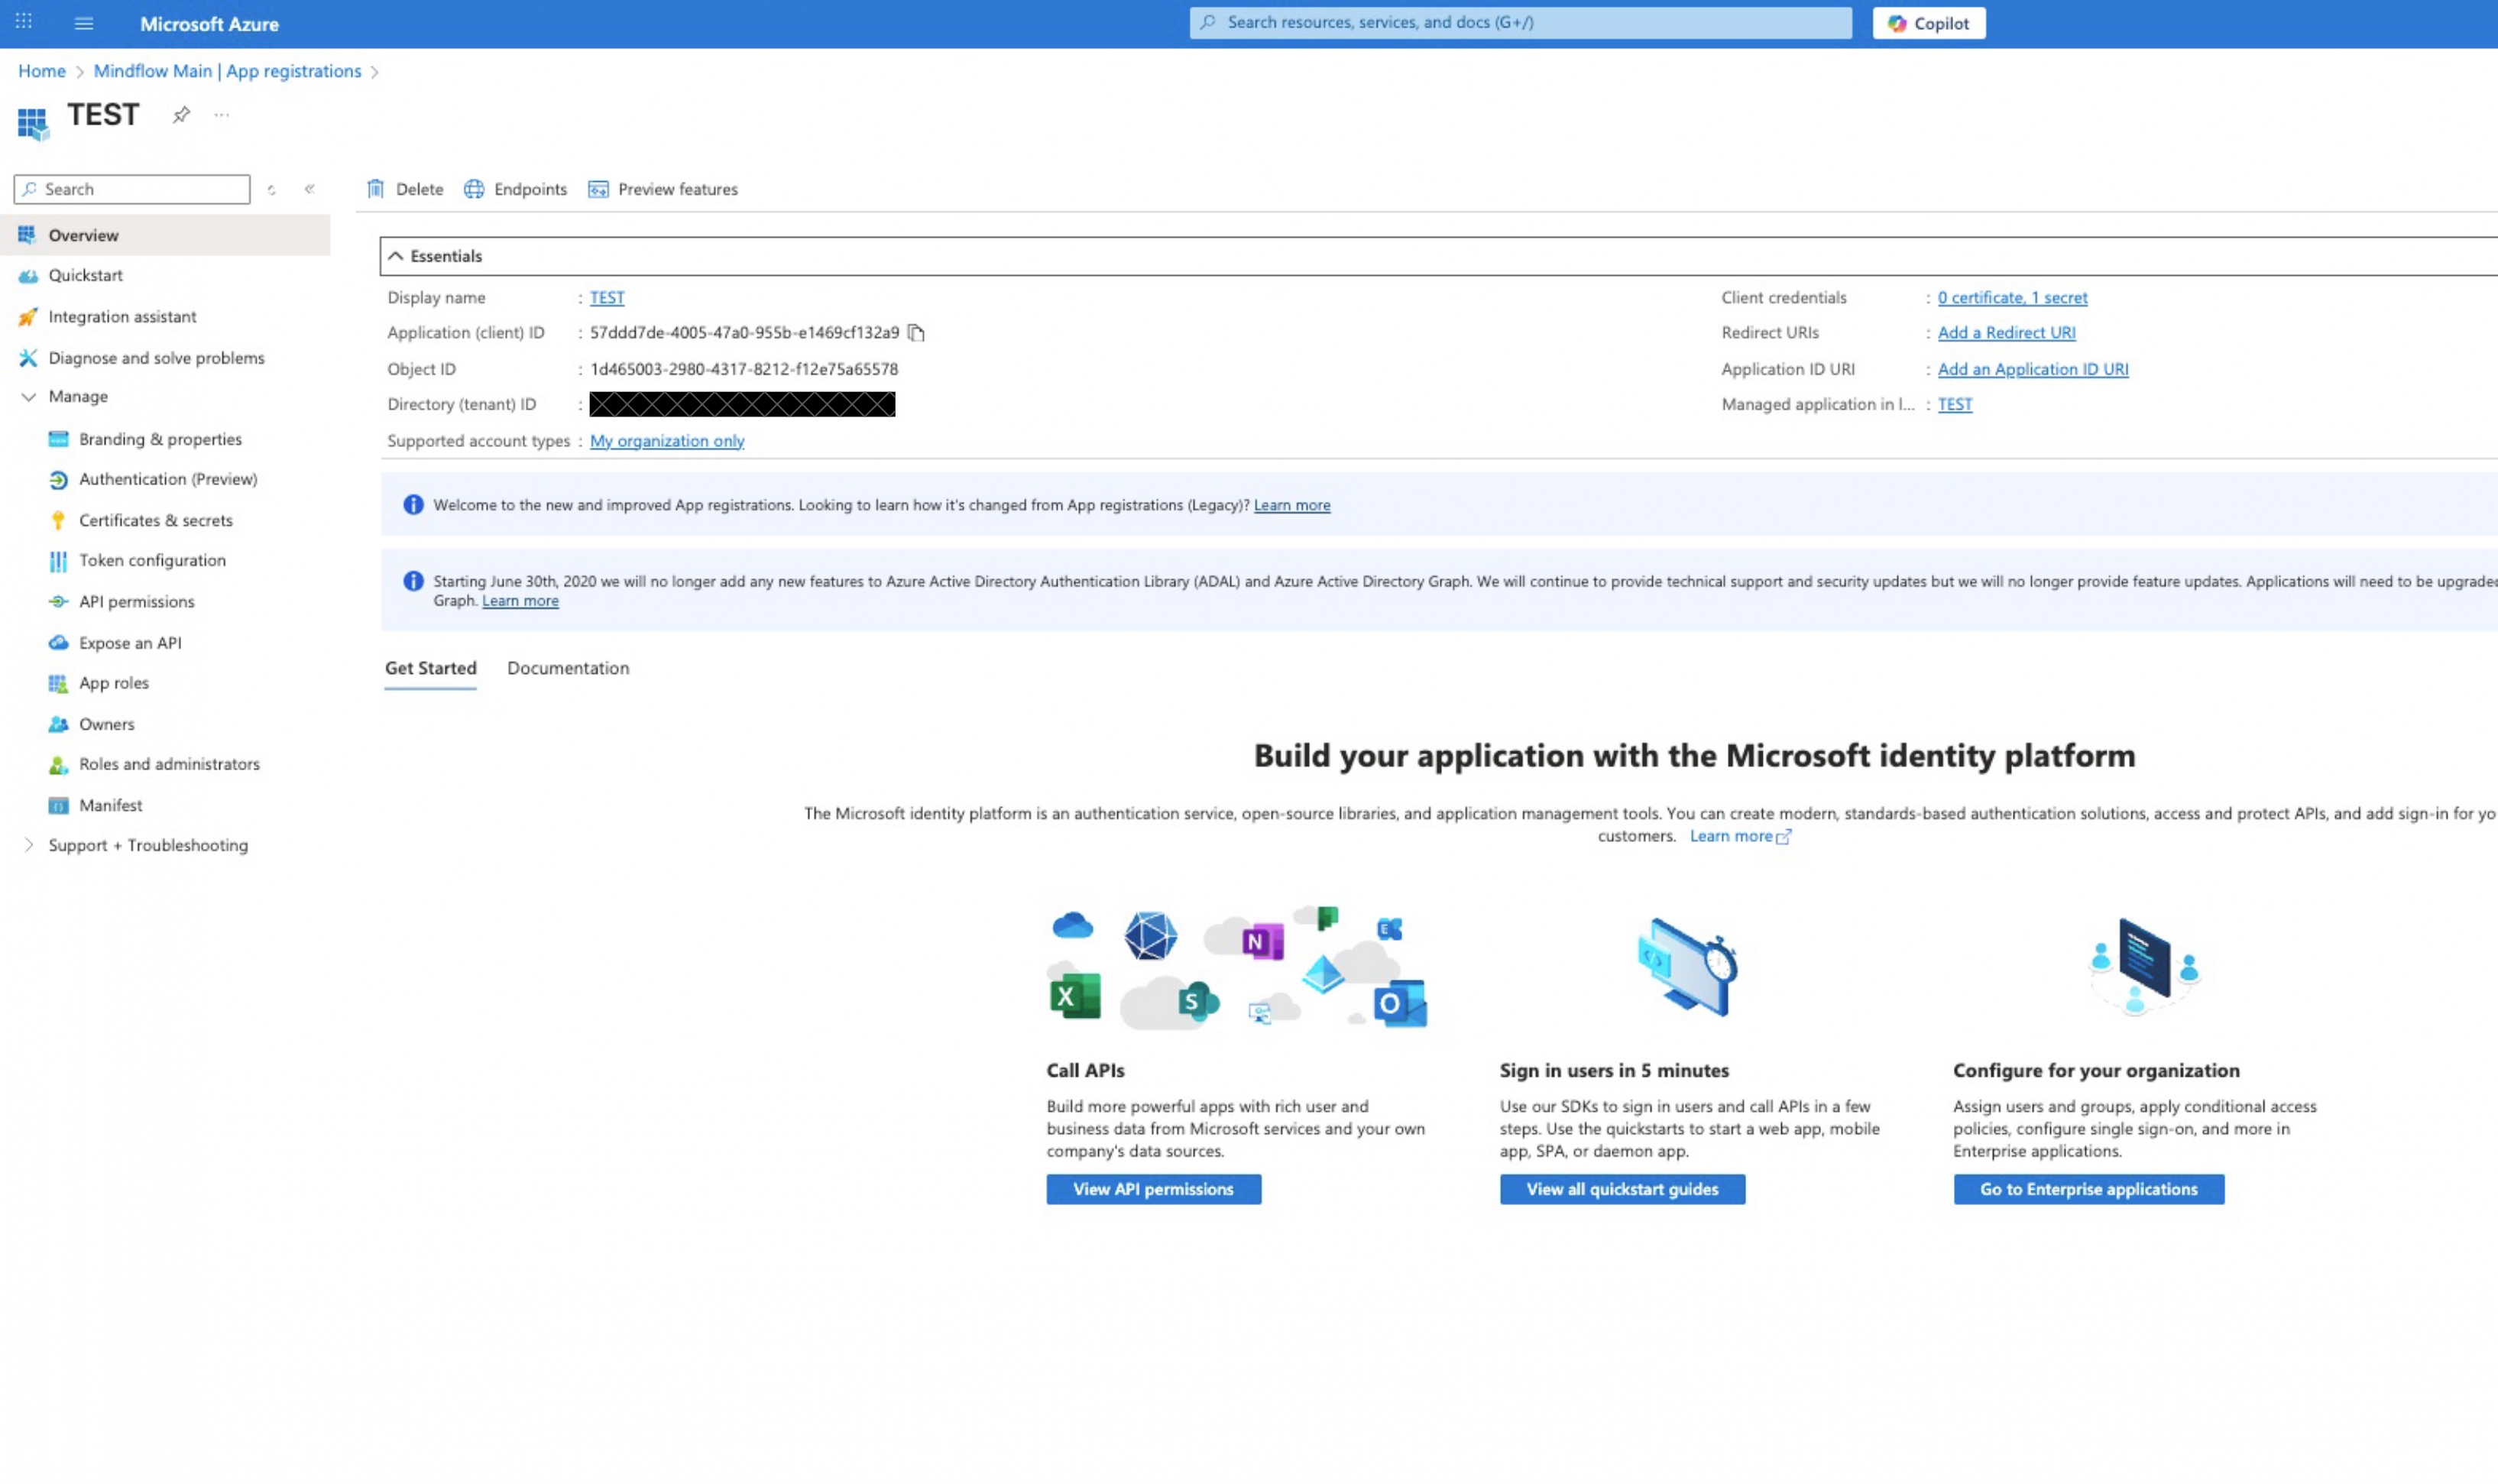
Complete Registration: Click Register. Once created, note the Application (client) ID and Directory (tenant) ID from the Essentials overview for later use.
Configuring API Permissions
Section titled “Configuring API Permissions”-
By default, new apps have limited access. You must explicitly grant the permissions required for the app to interact with Microsoft Graph data.
-
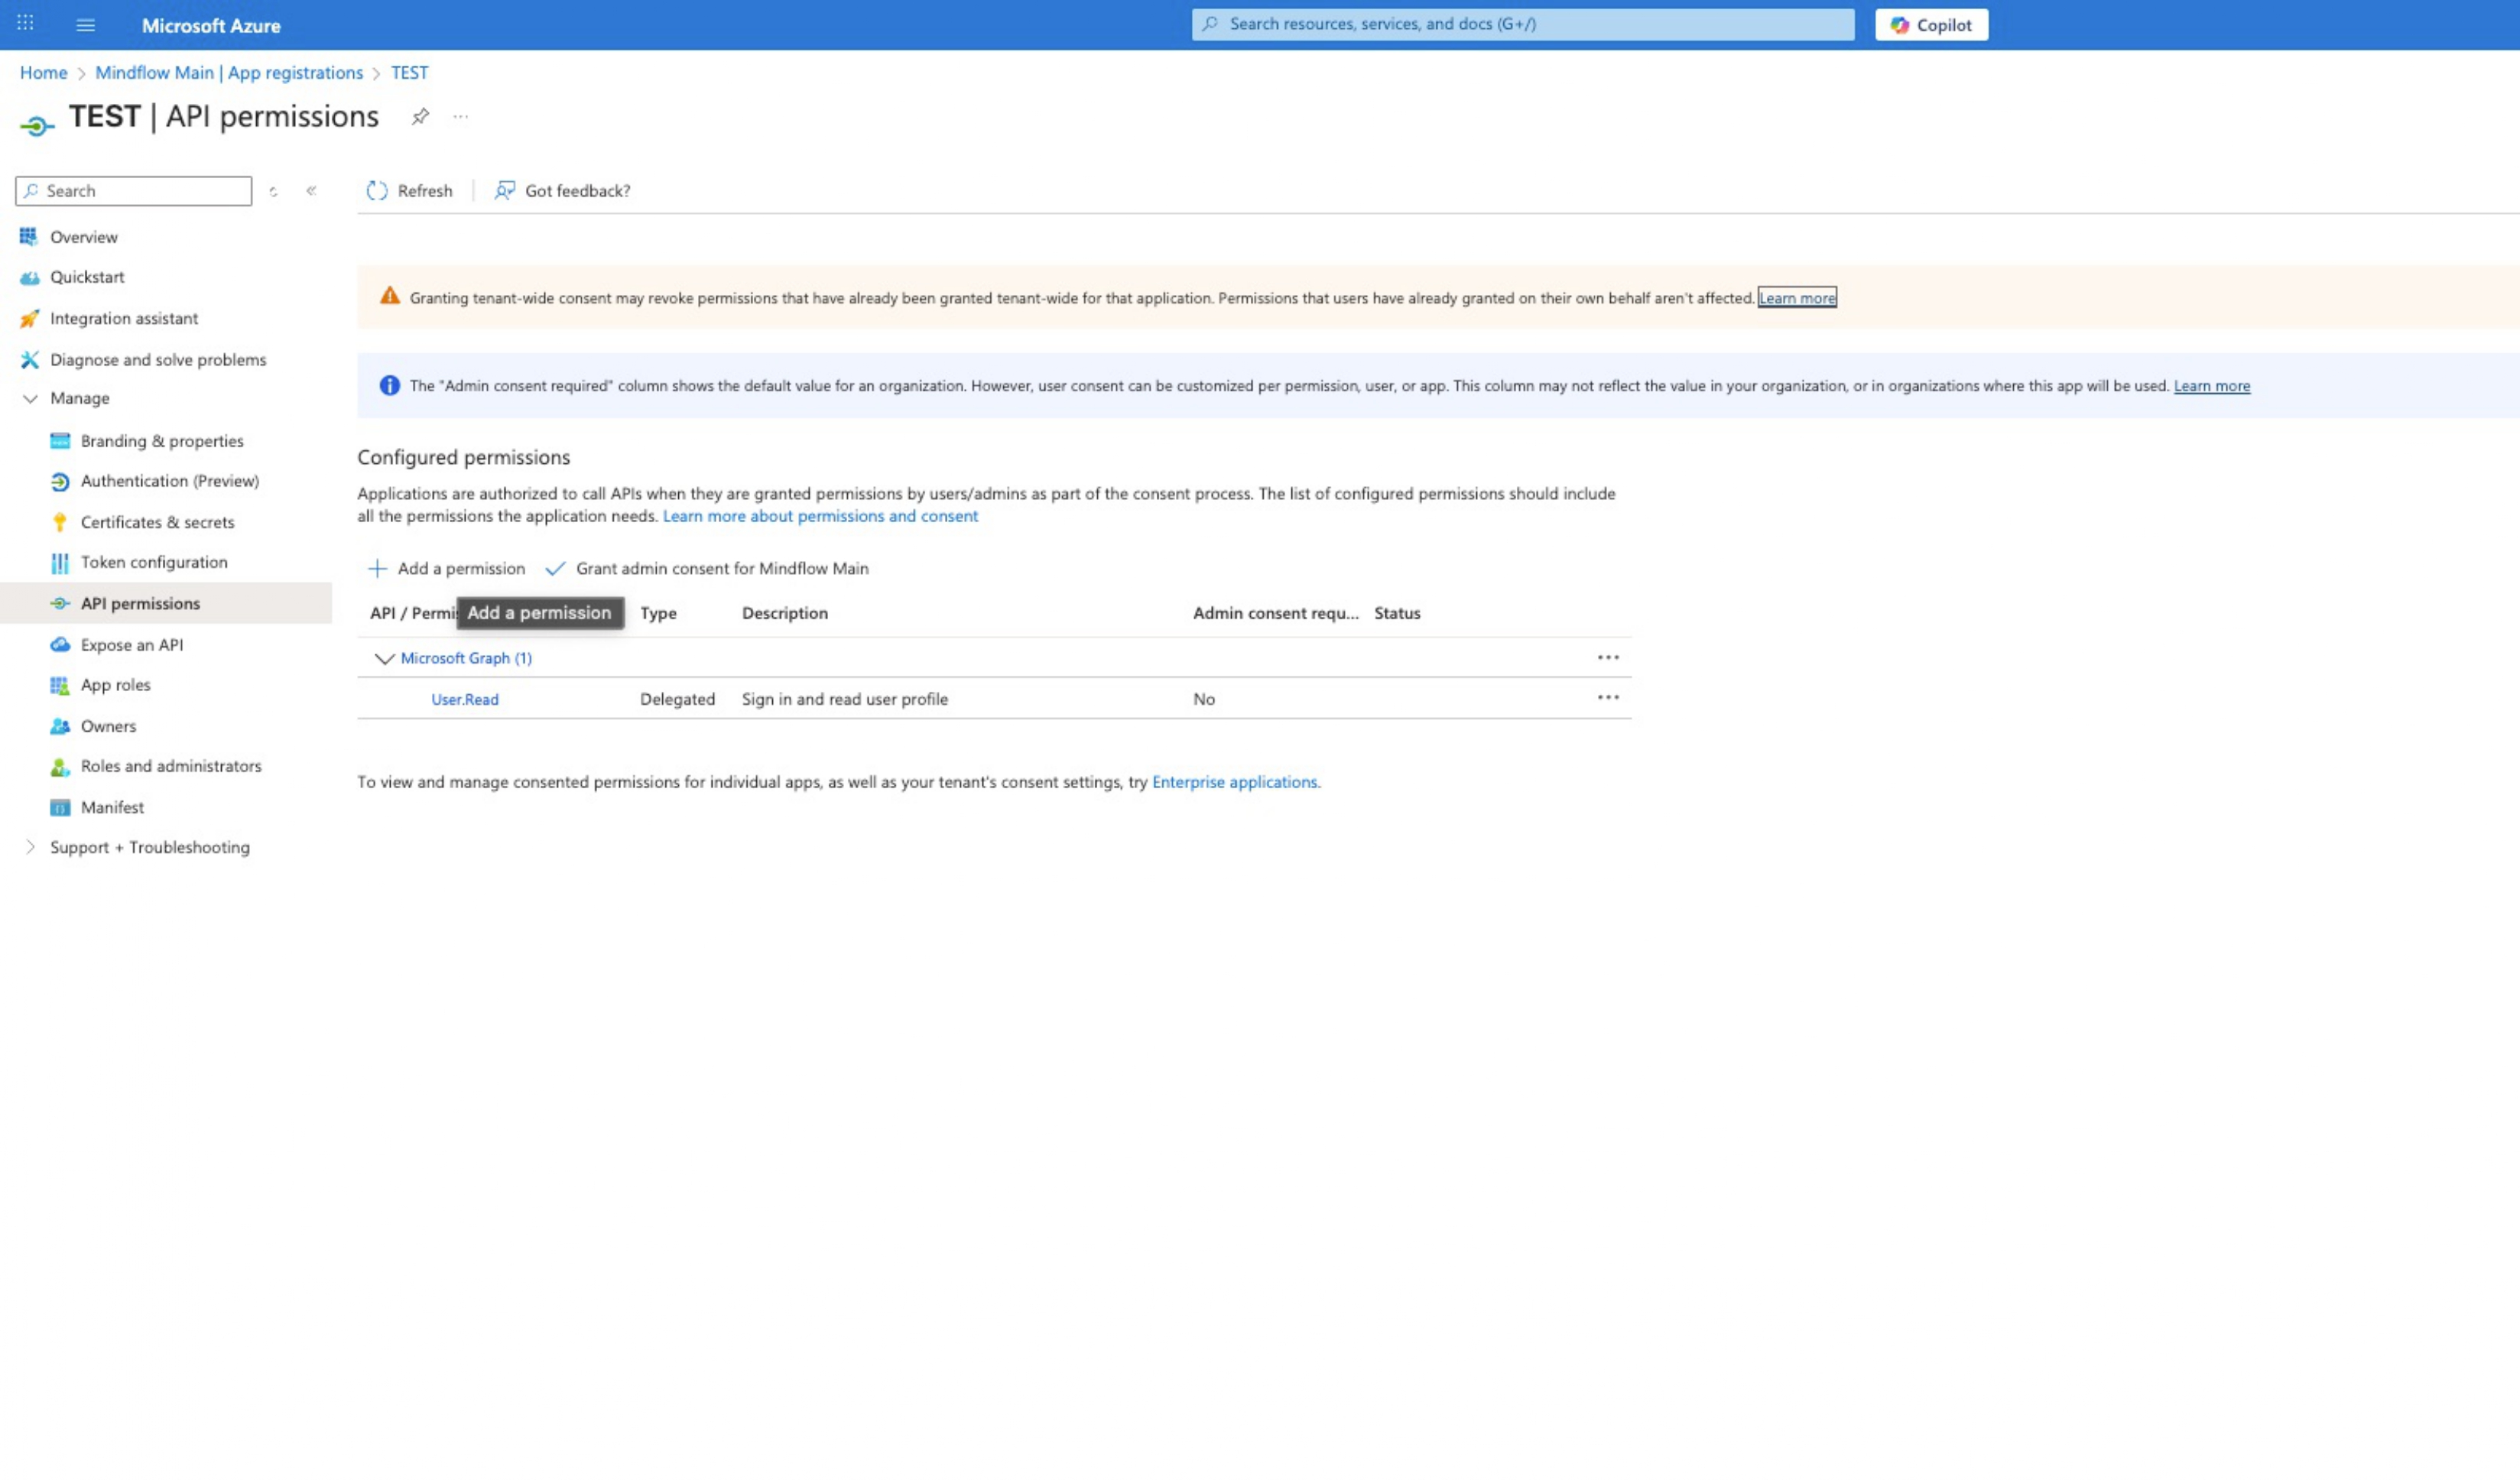
Access Permissions Menu: From the app’s sidebar, select API permissions.
-
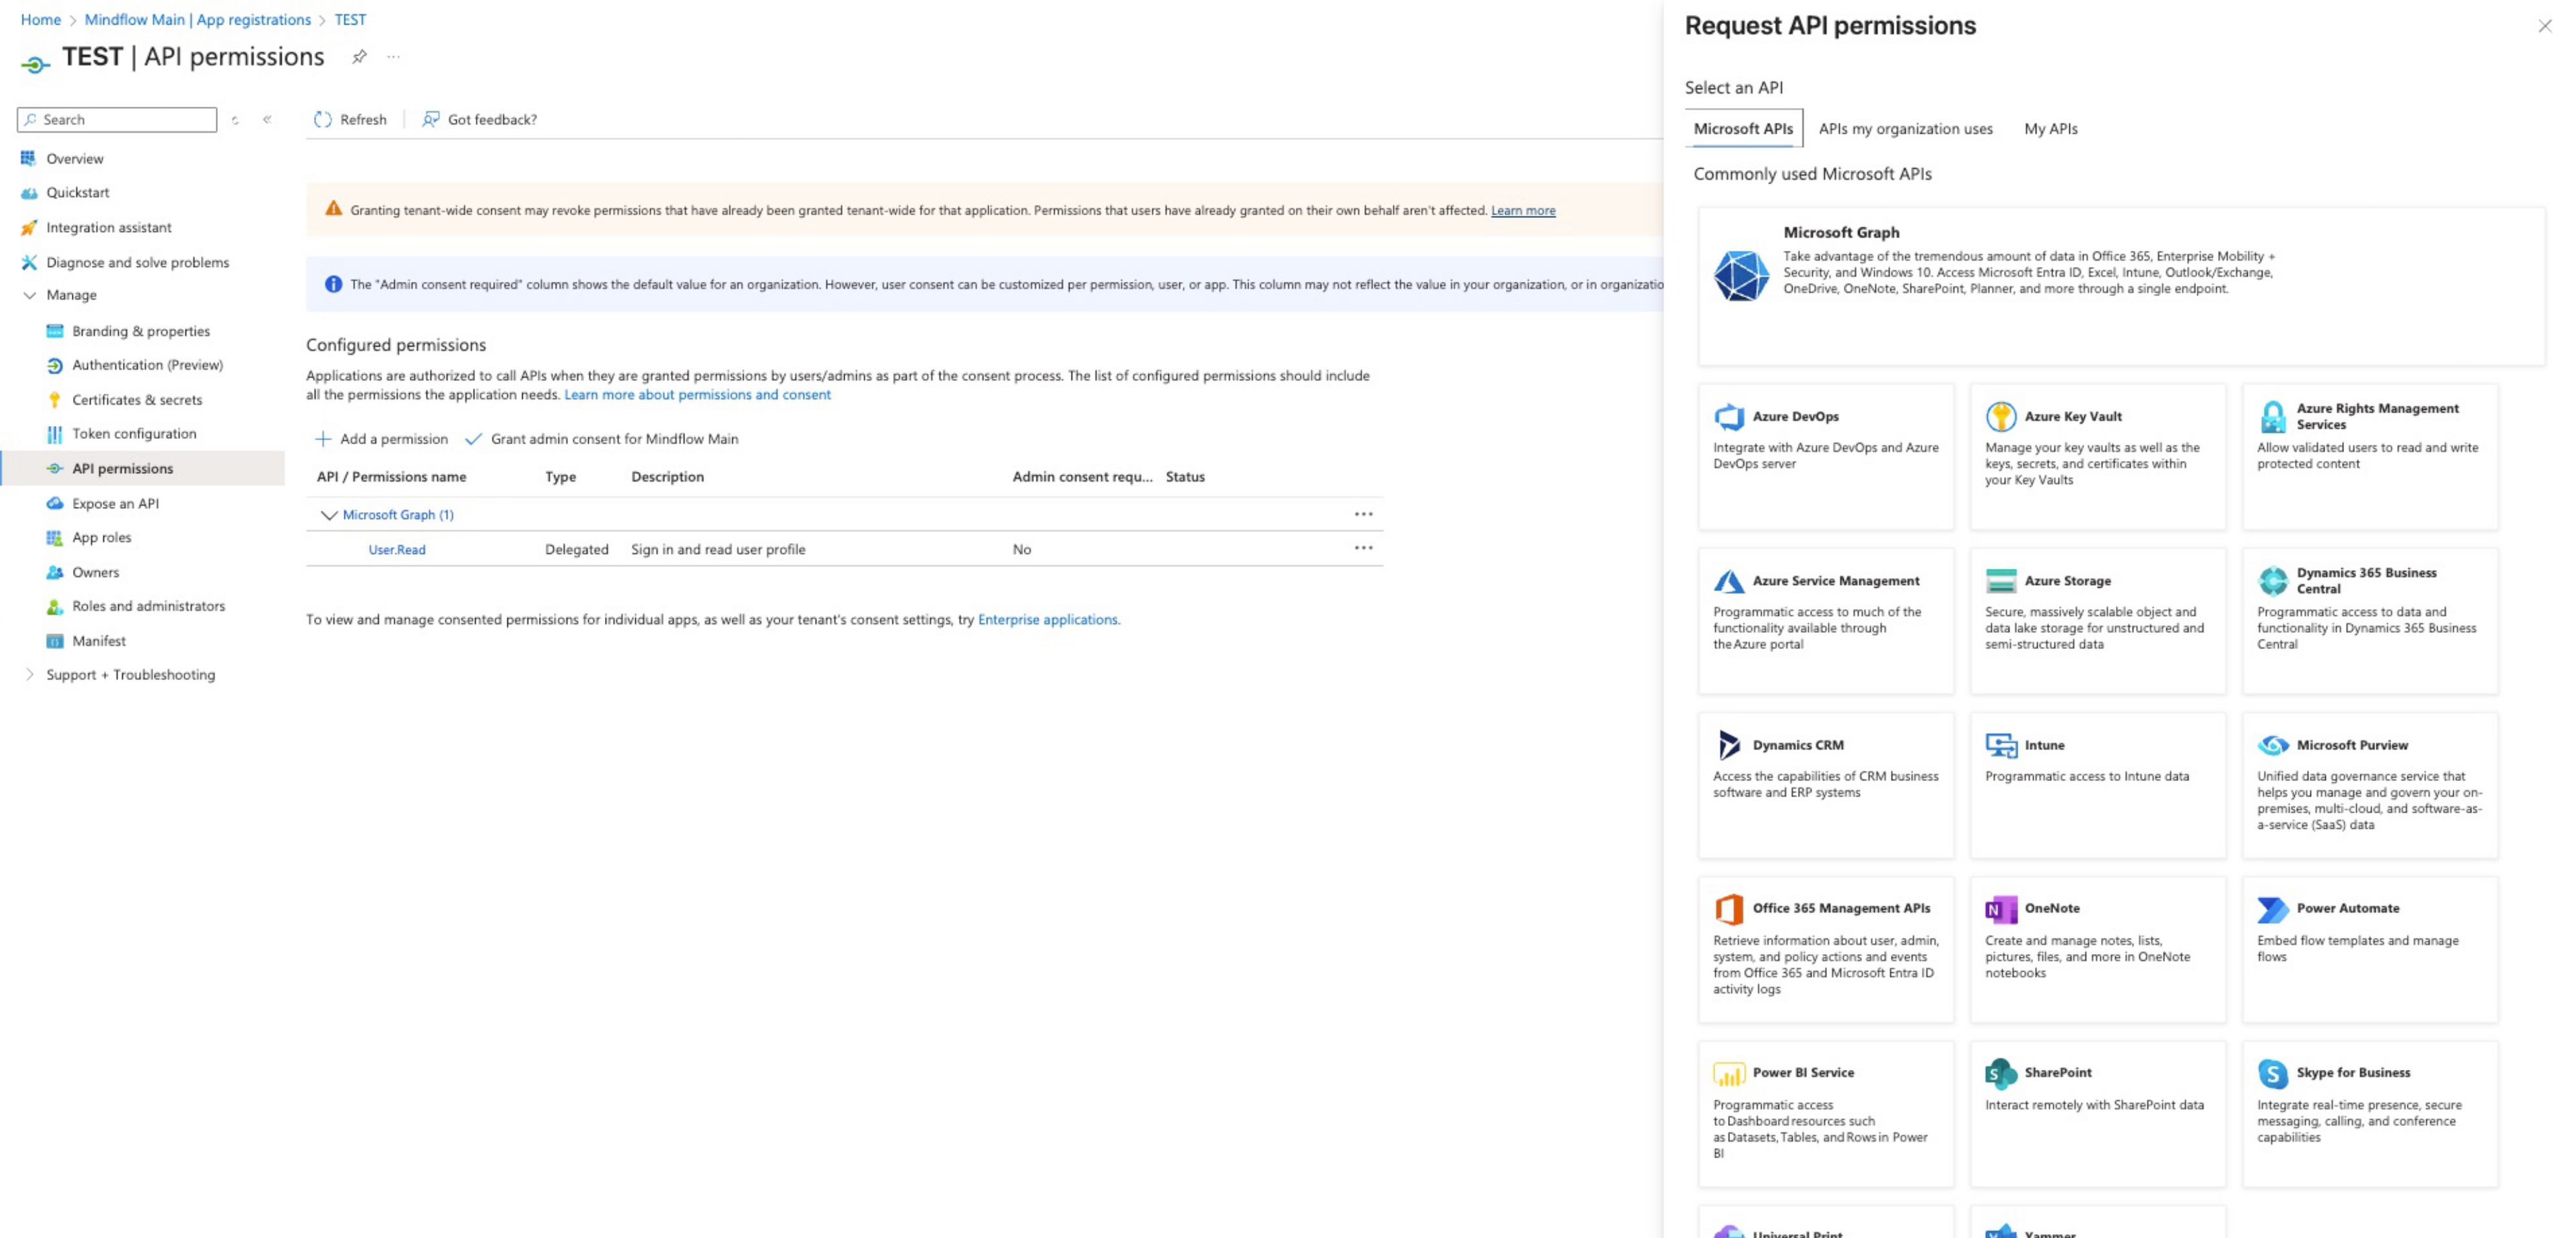
Add Permissions: Click + Add a permission and select Microsoft Graph from the list of commonly used APIs.
-
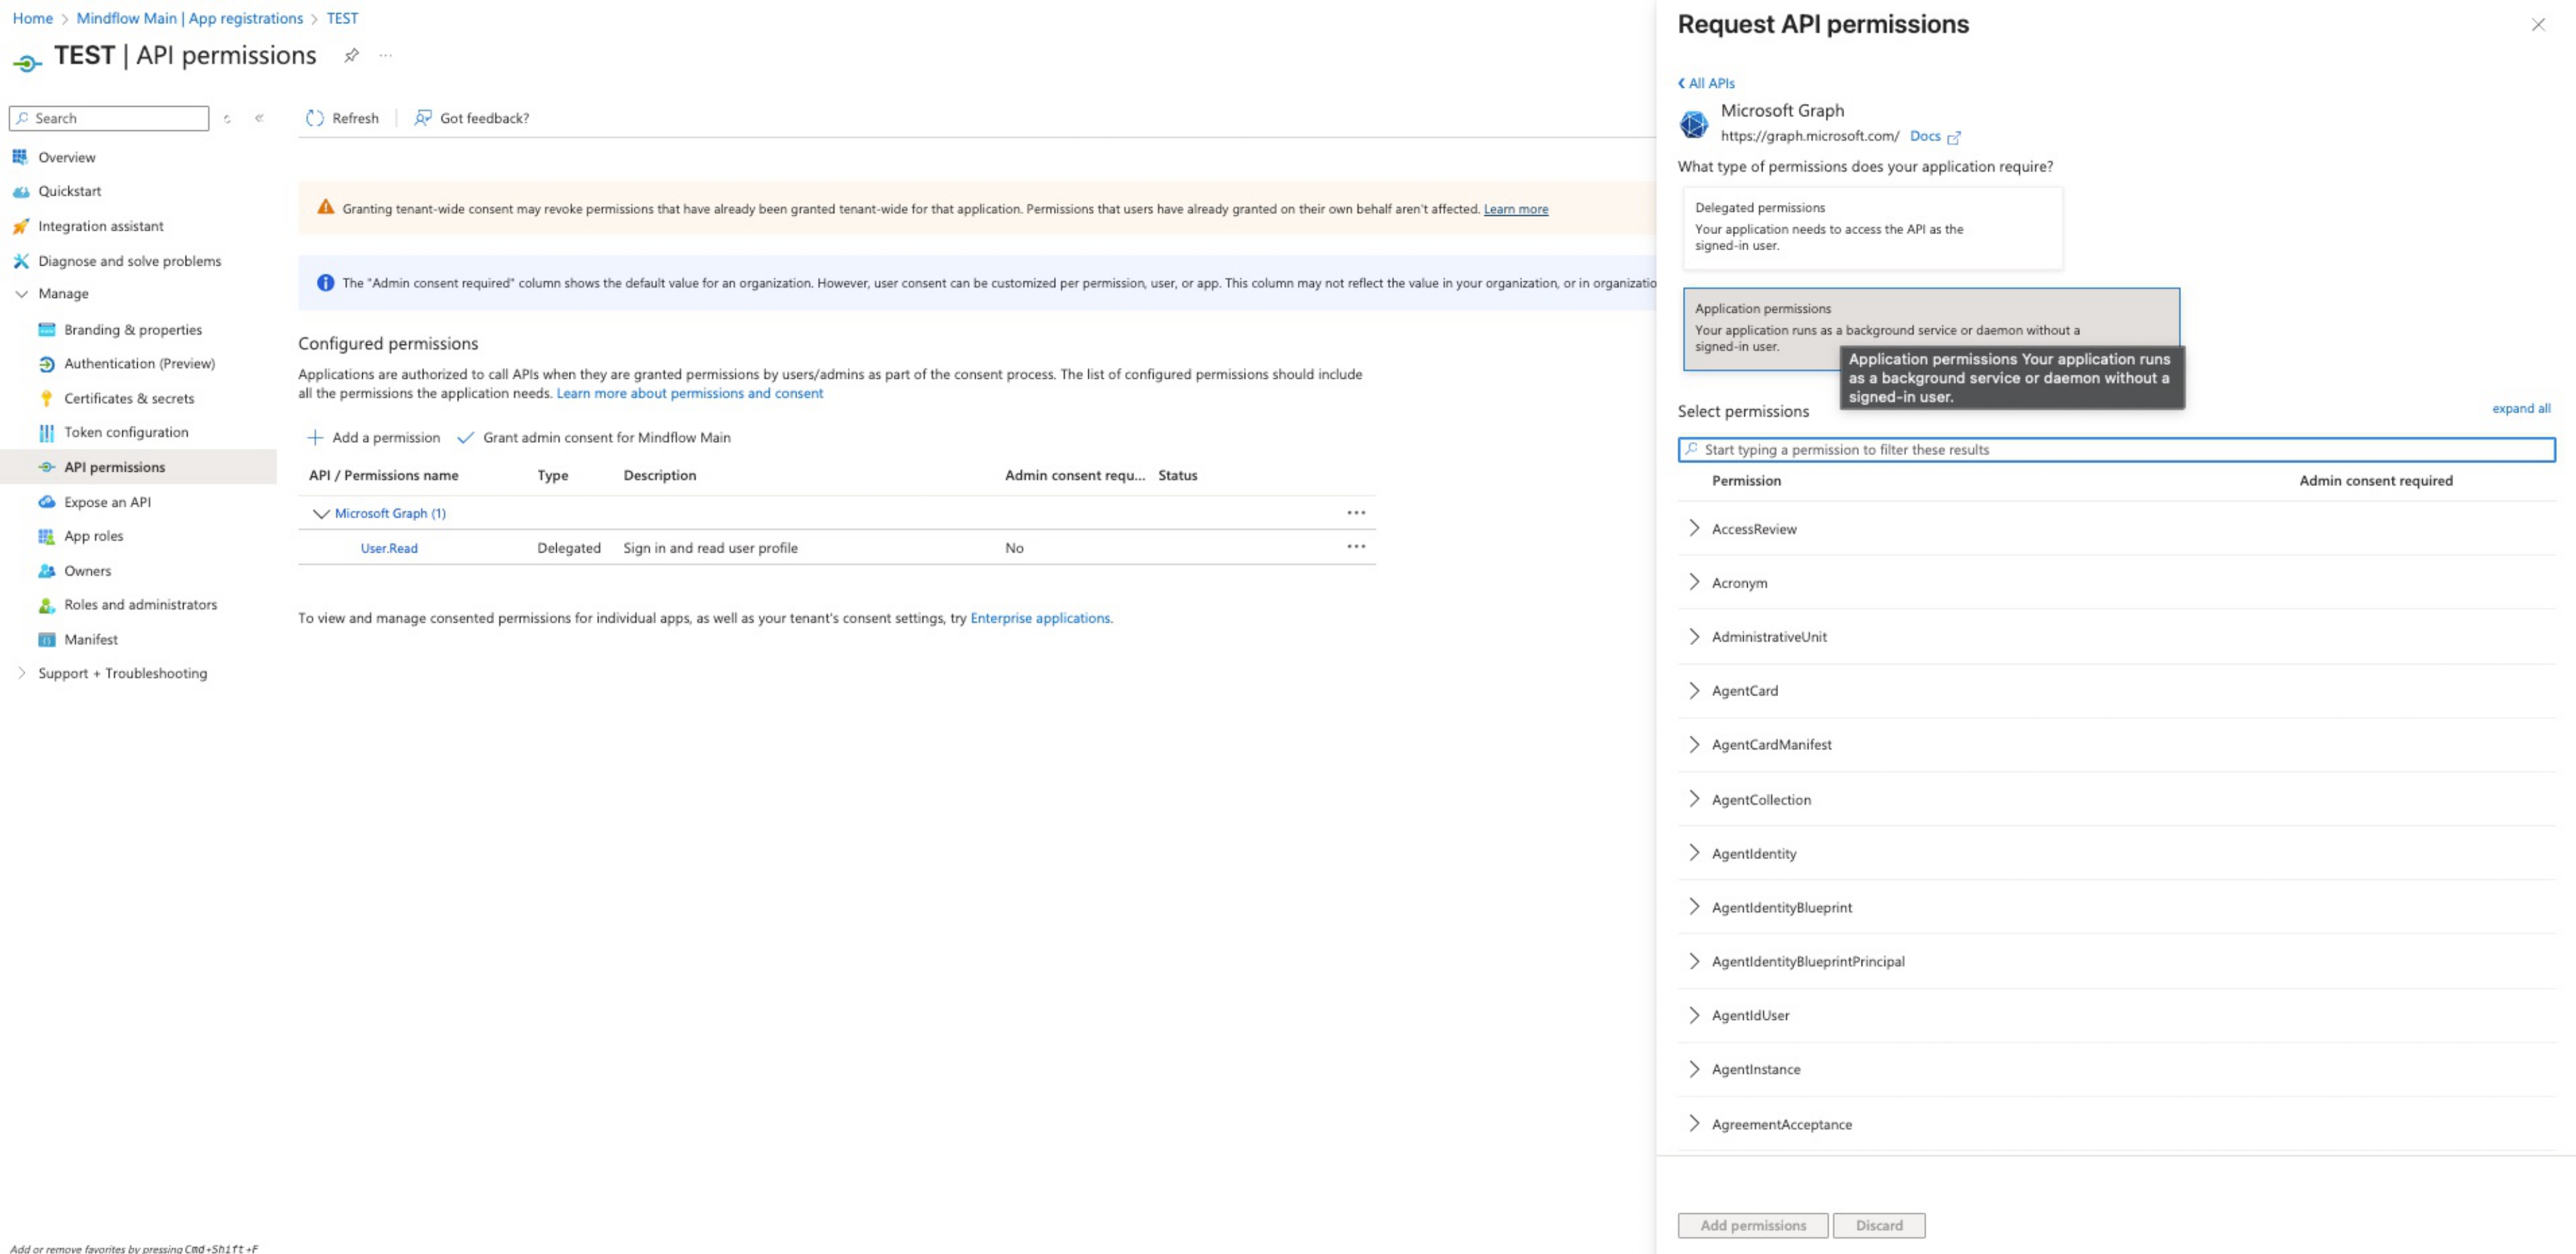
Choose Permission Type: Select Application permissions. This is used for services that run without a signed-in user.
-
Select Specific Scopes:
- Now, lets search for and select user-related permissions. You can either scroll down or search
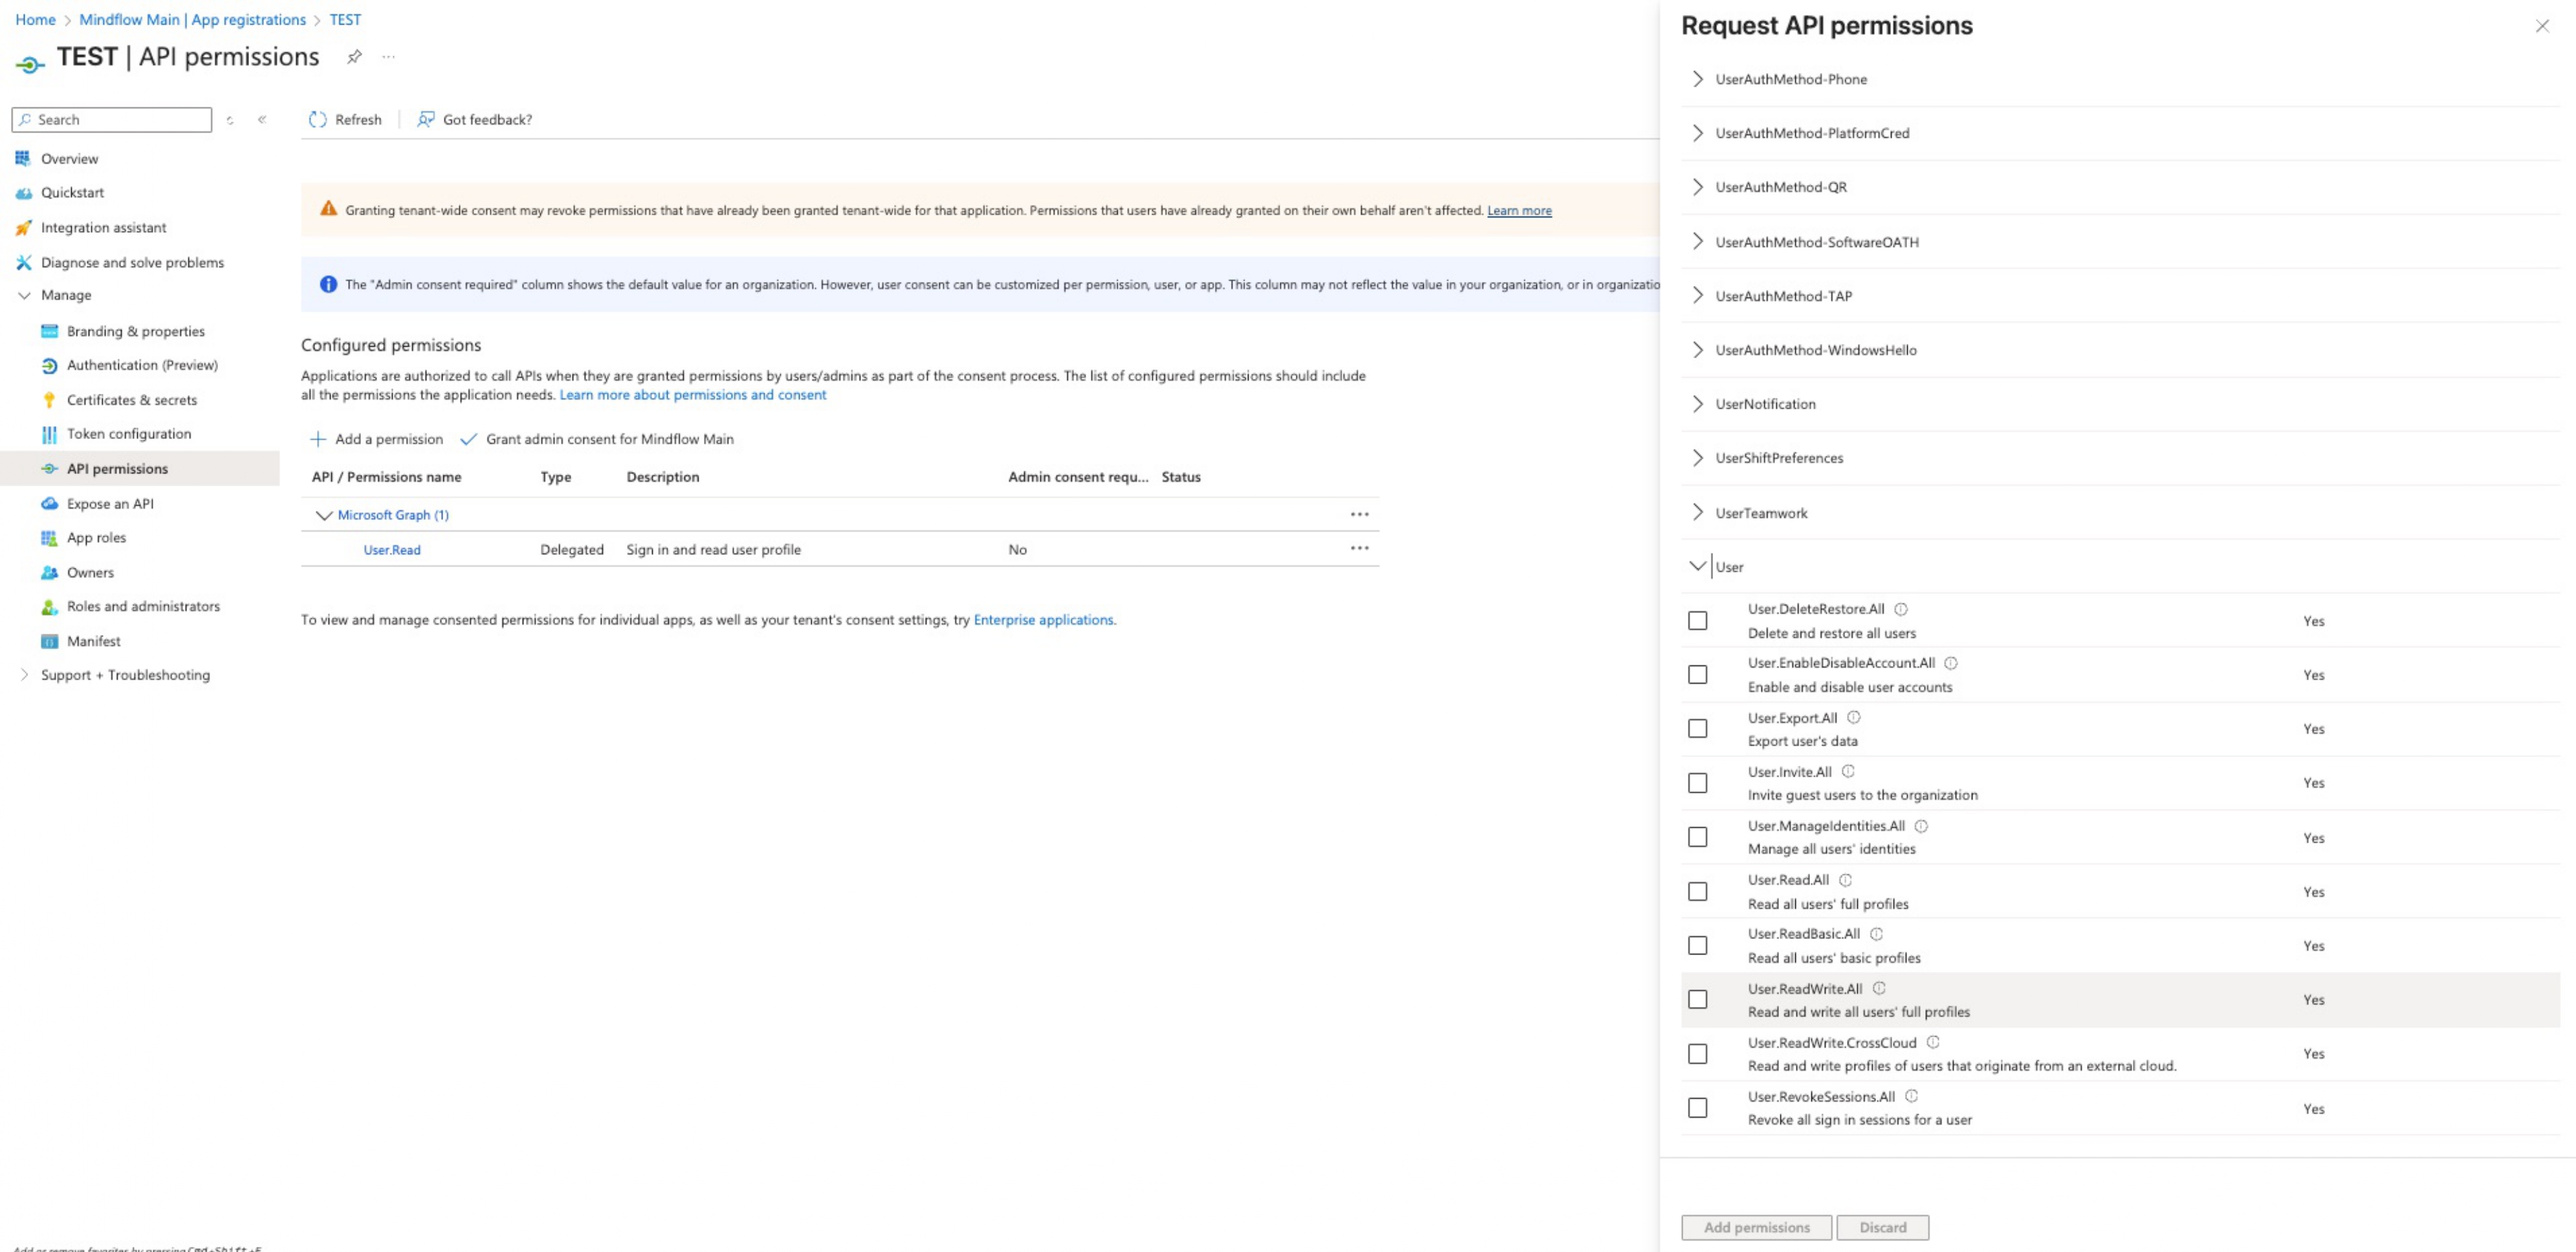
- Look for and select the following permissions: User.ReadWrite.All, User.DeleteRestore.All, and User.RevokeSessions.All.
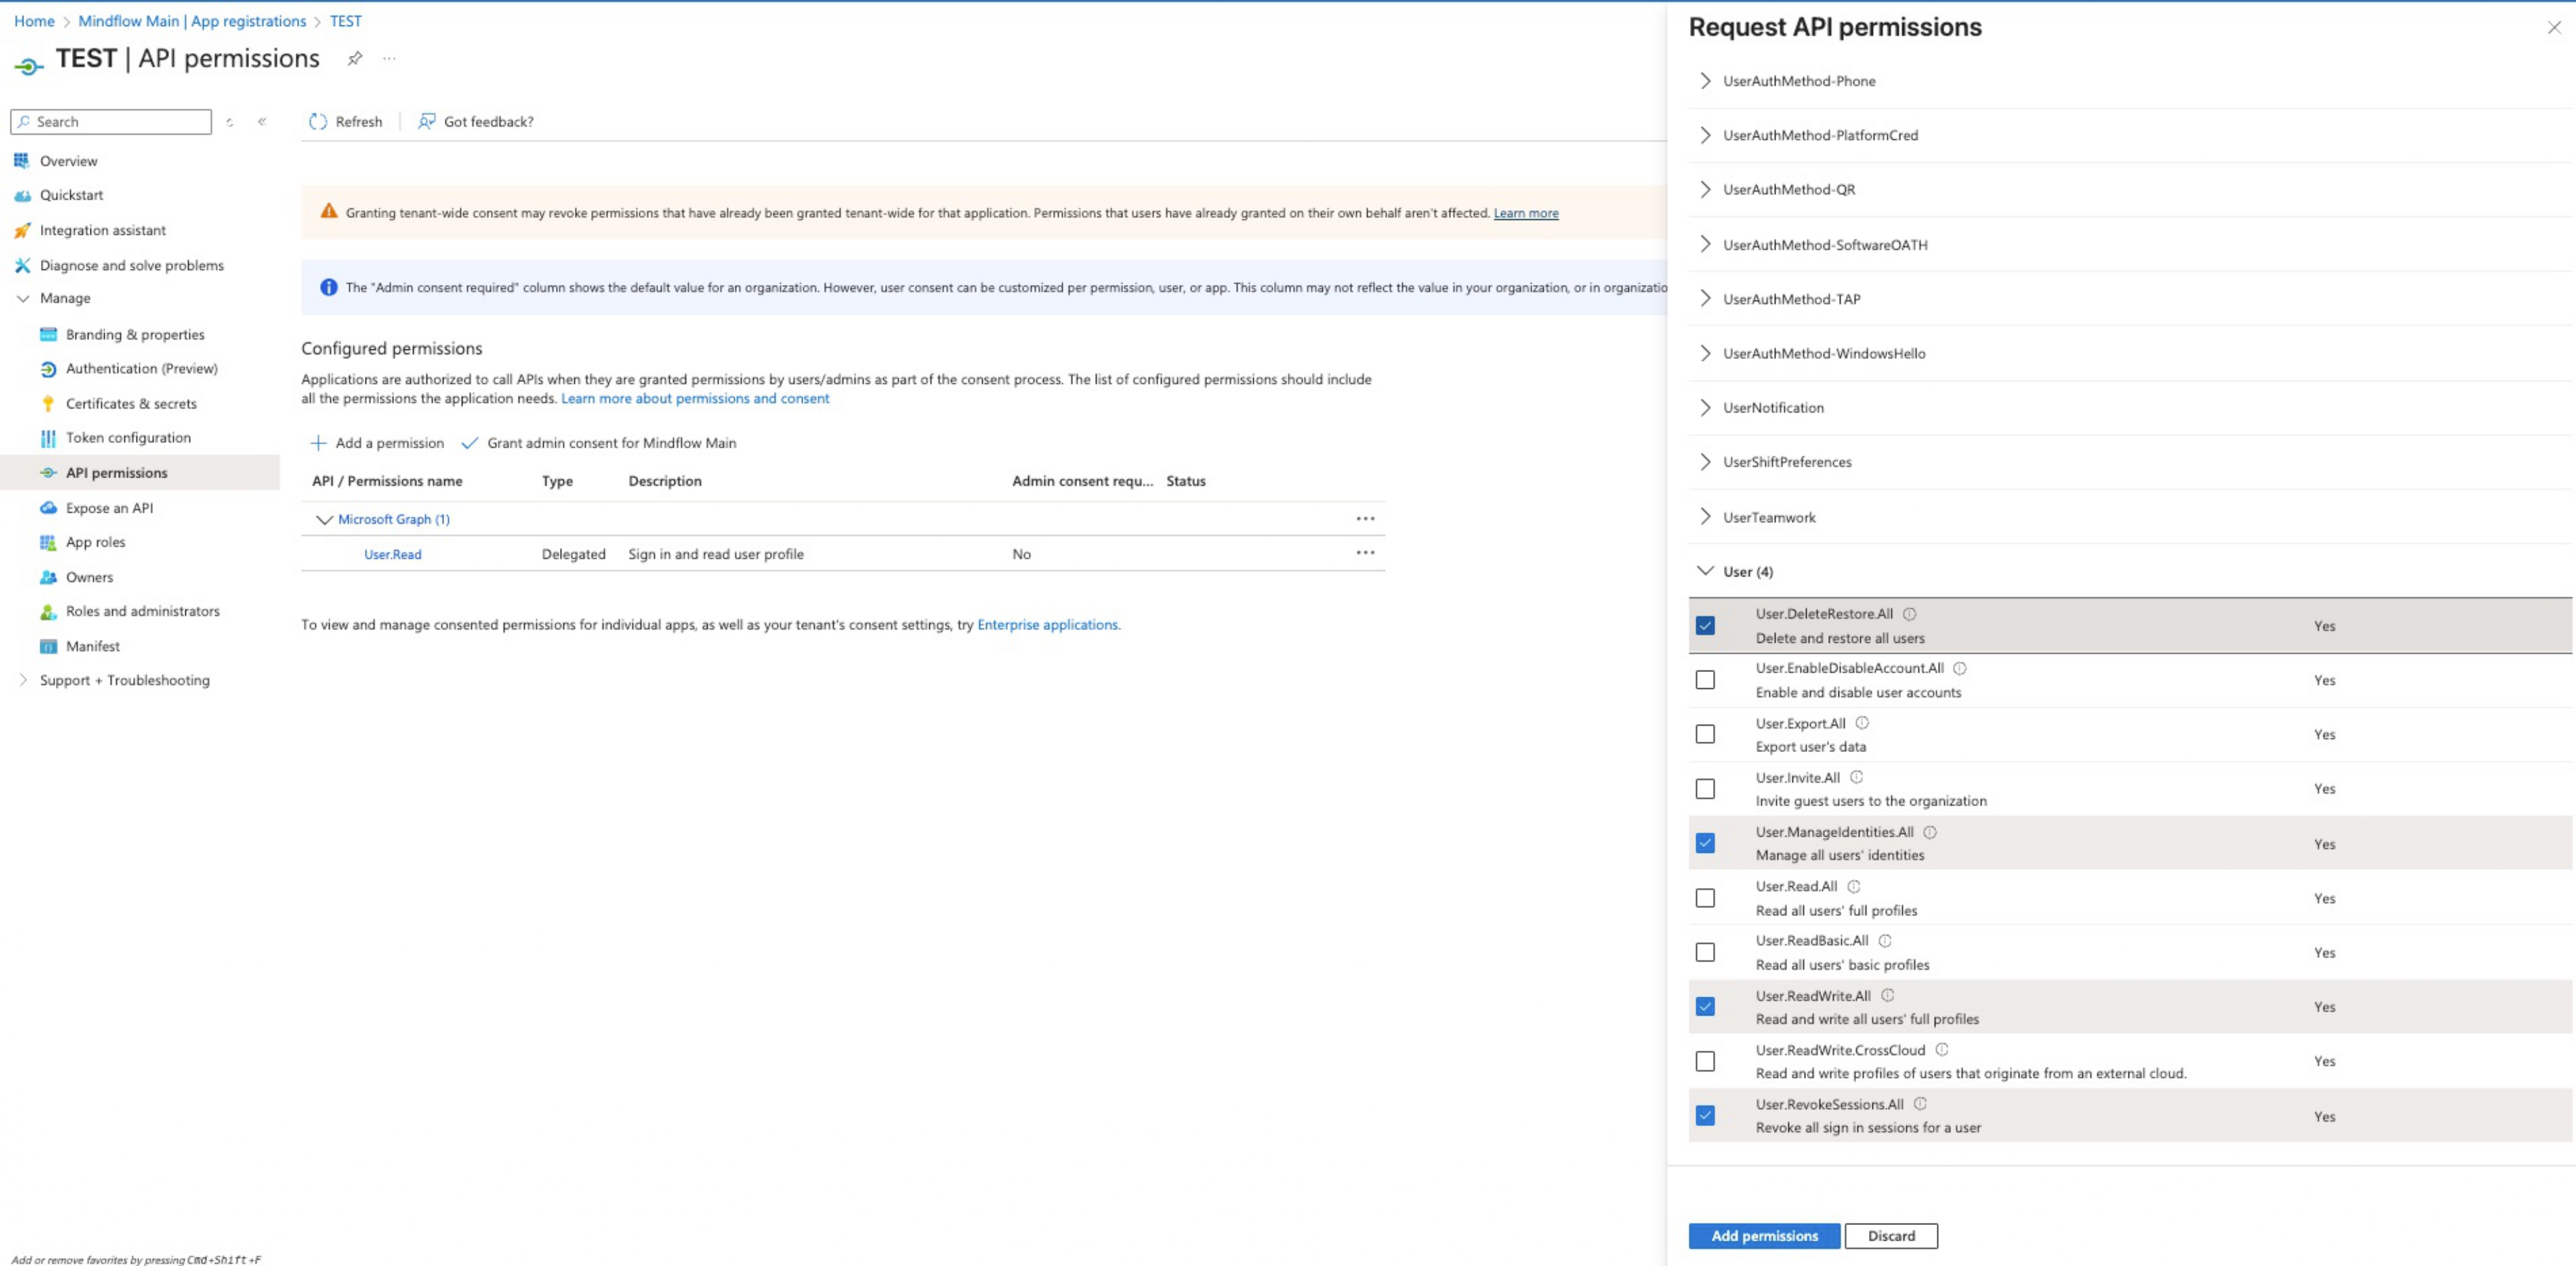
- Click Add permissions at the bottom of the pane.
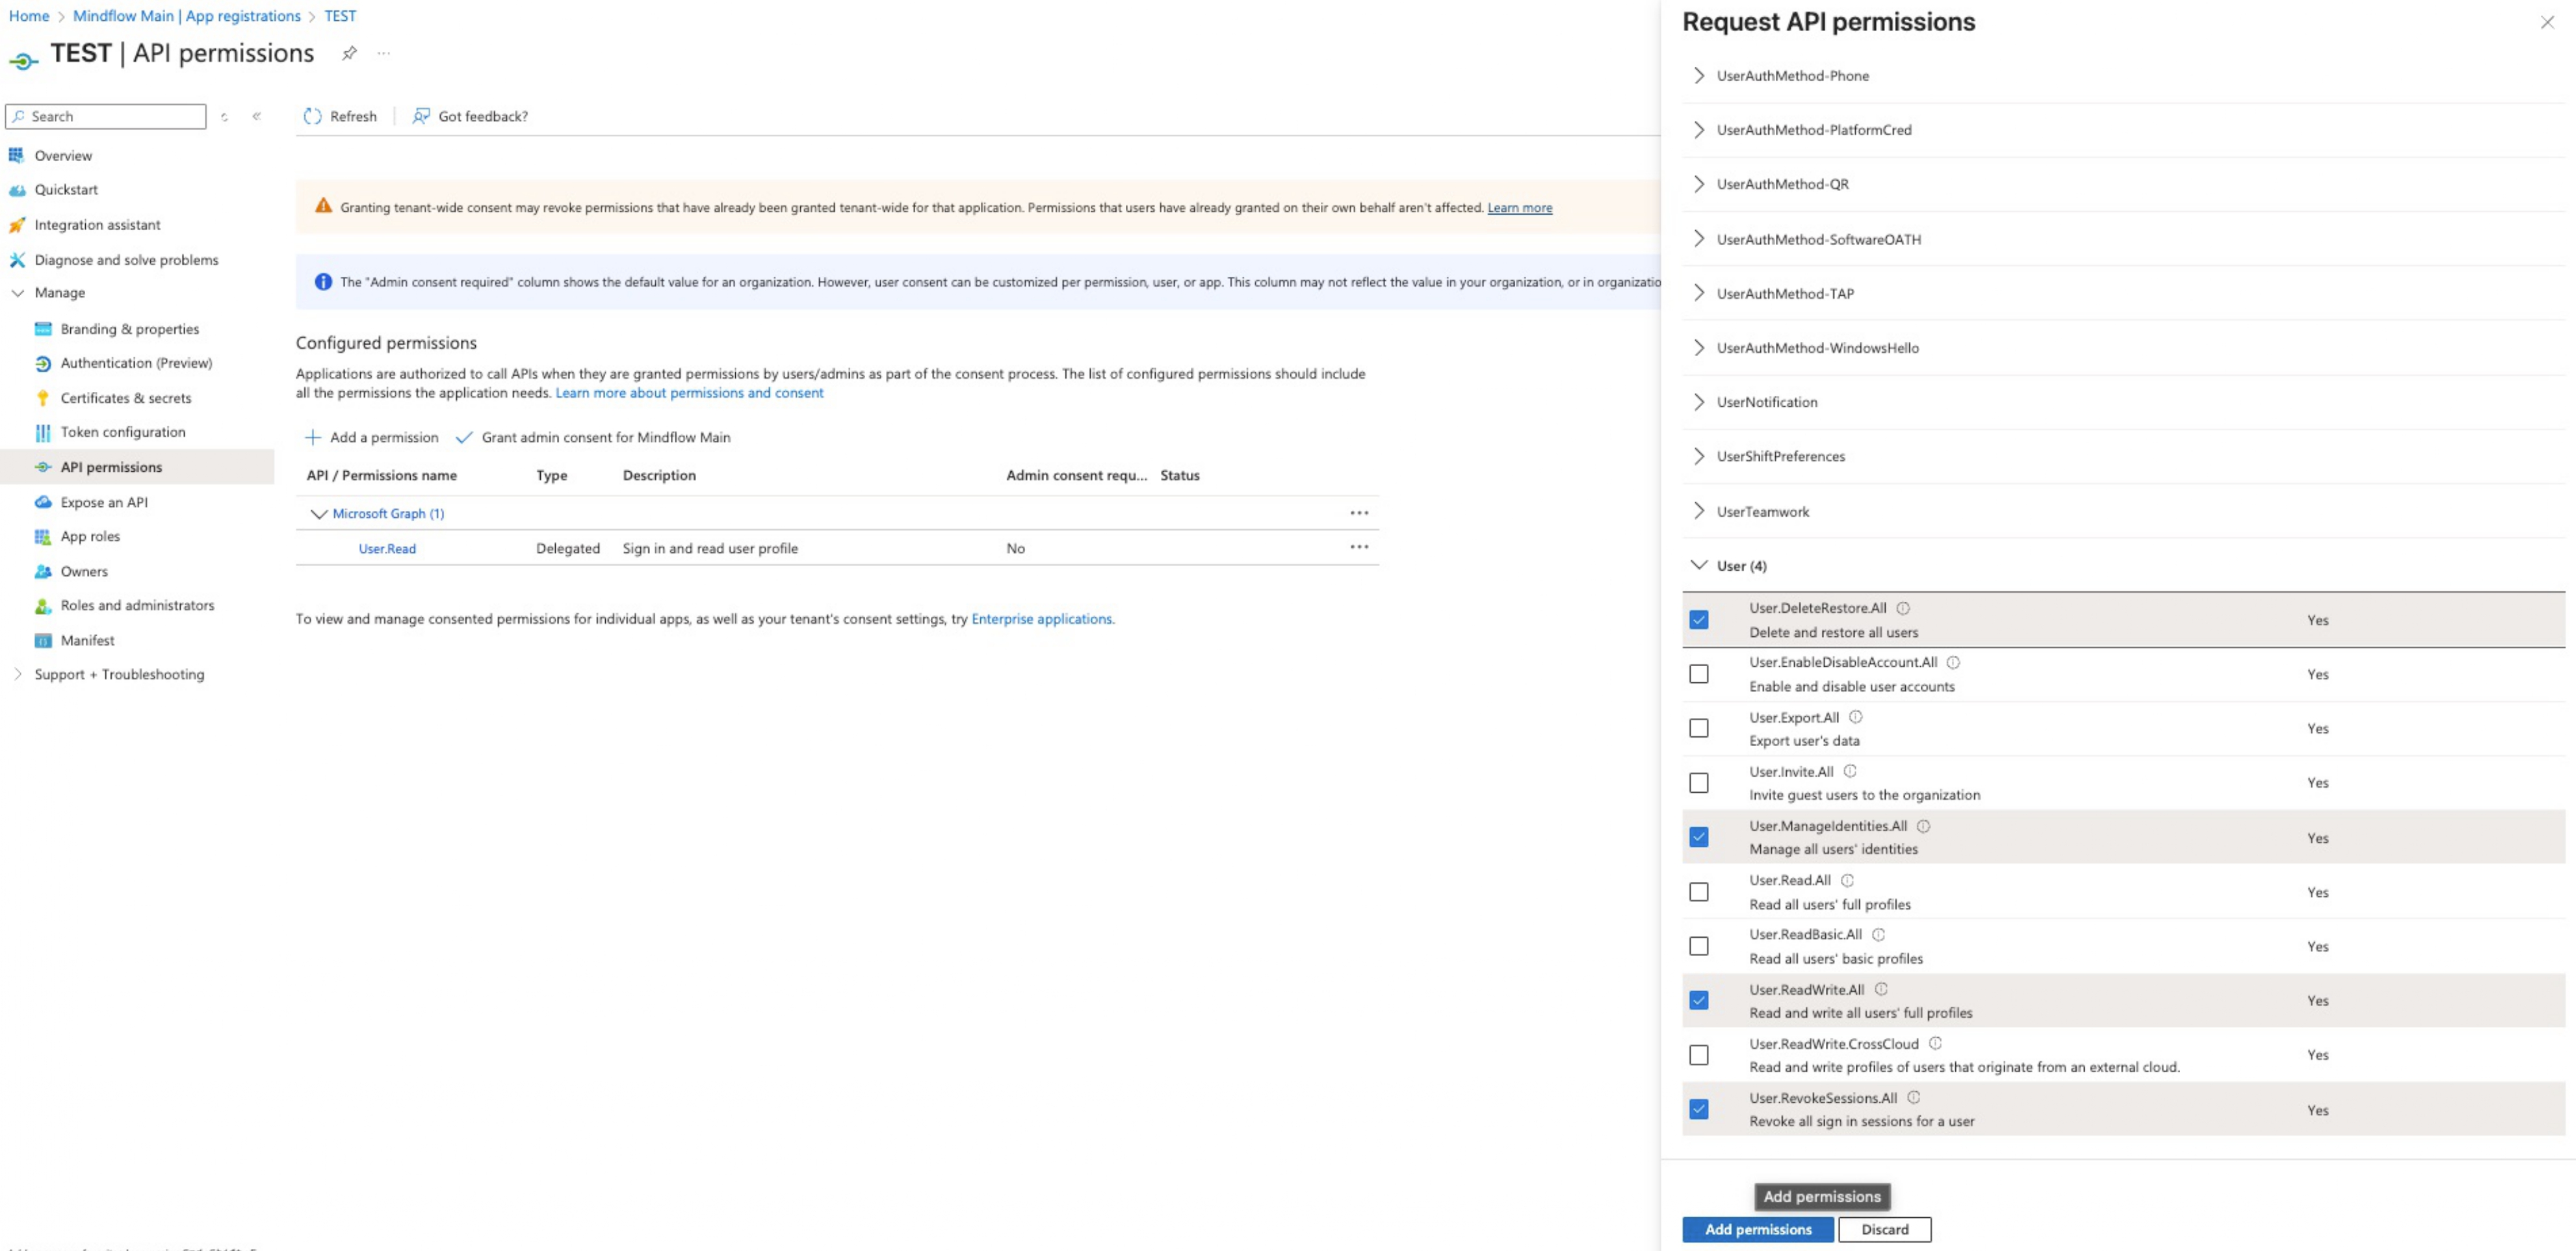
-
Grant Admin Consent: The status will initially show “Not granted”.
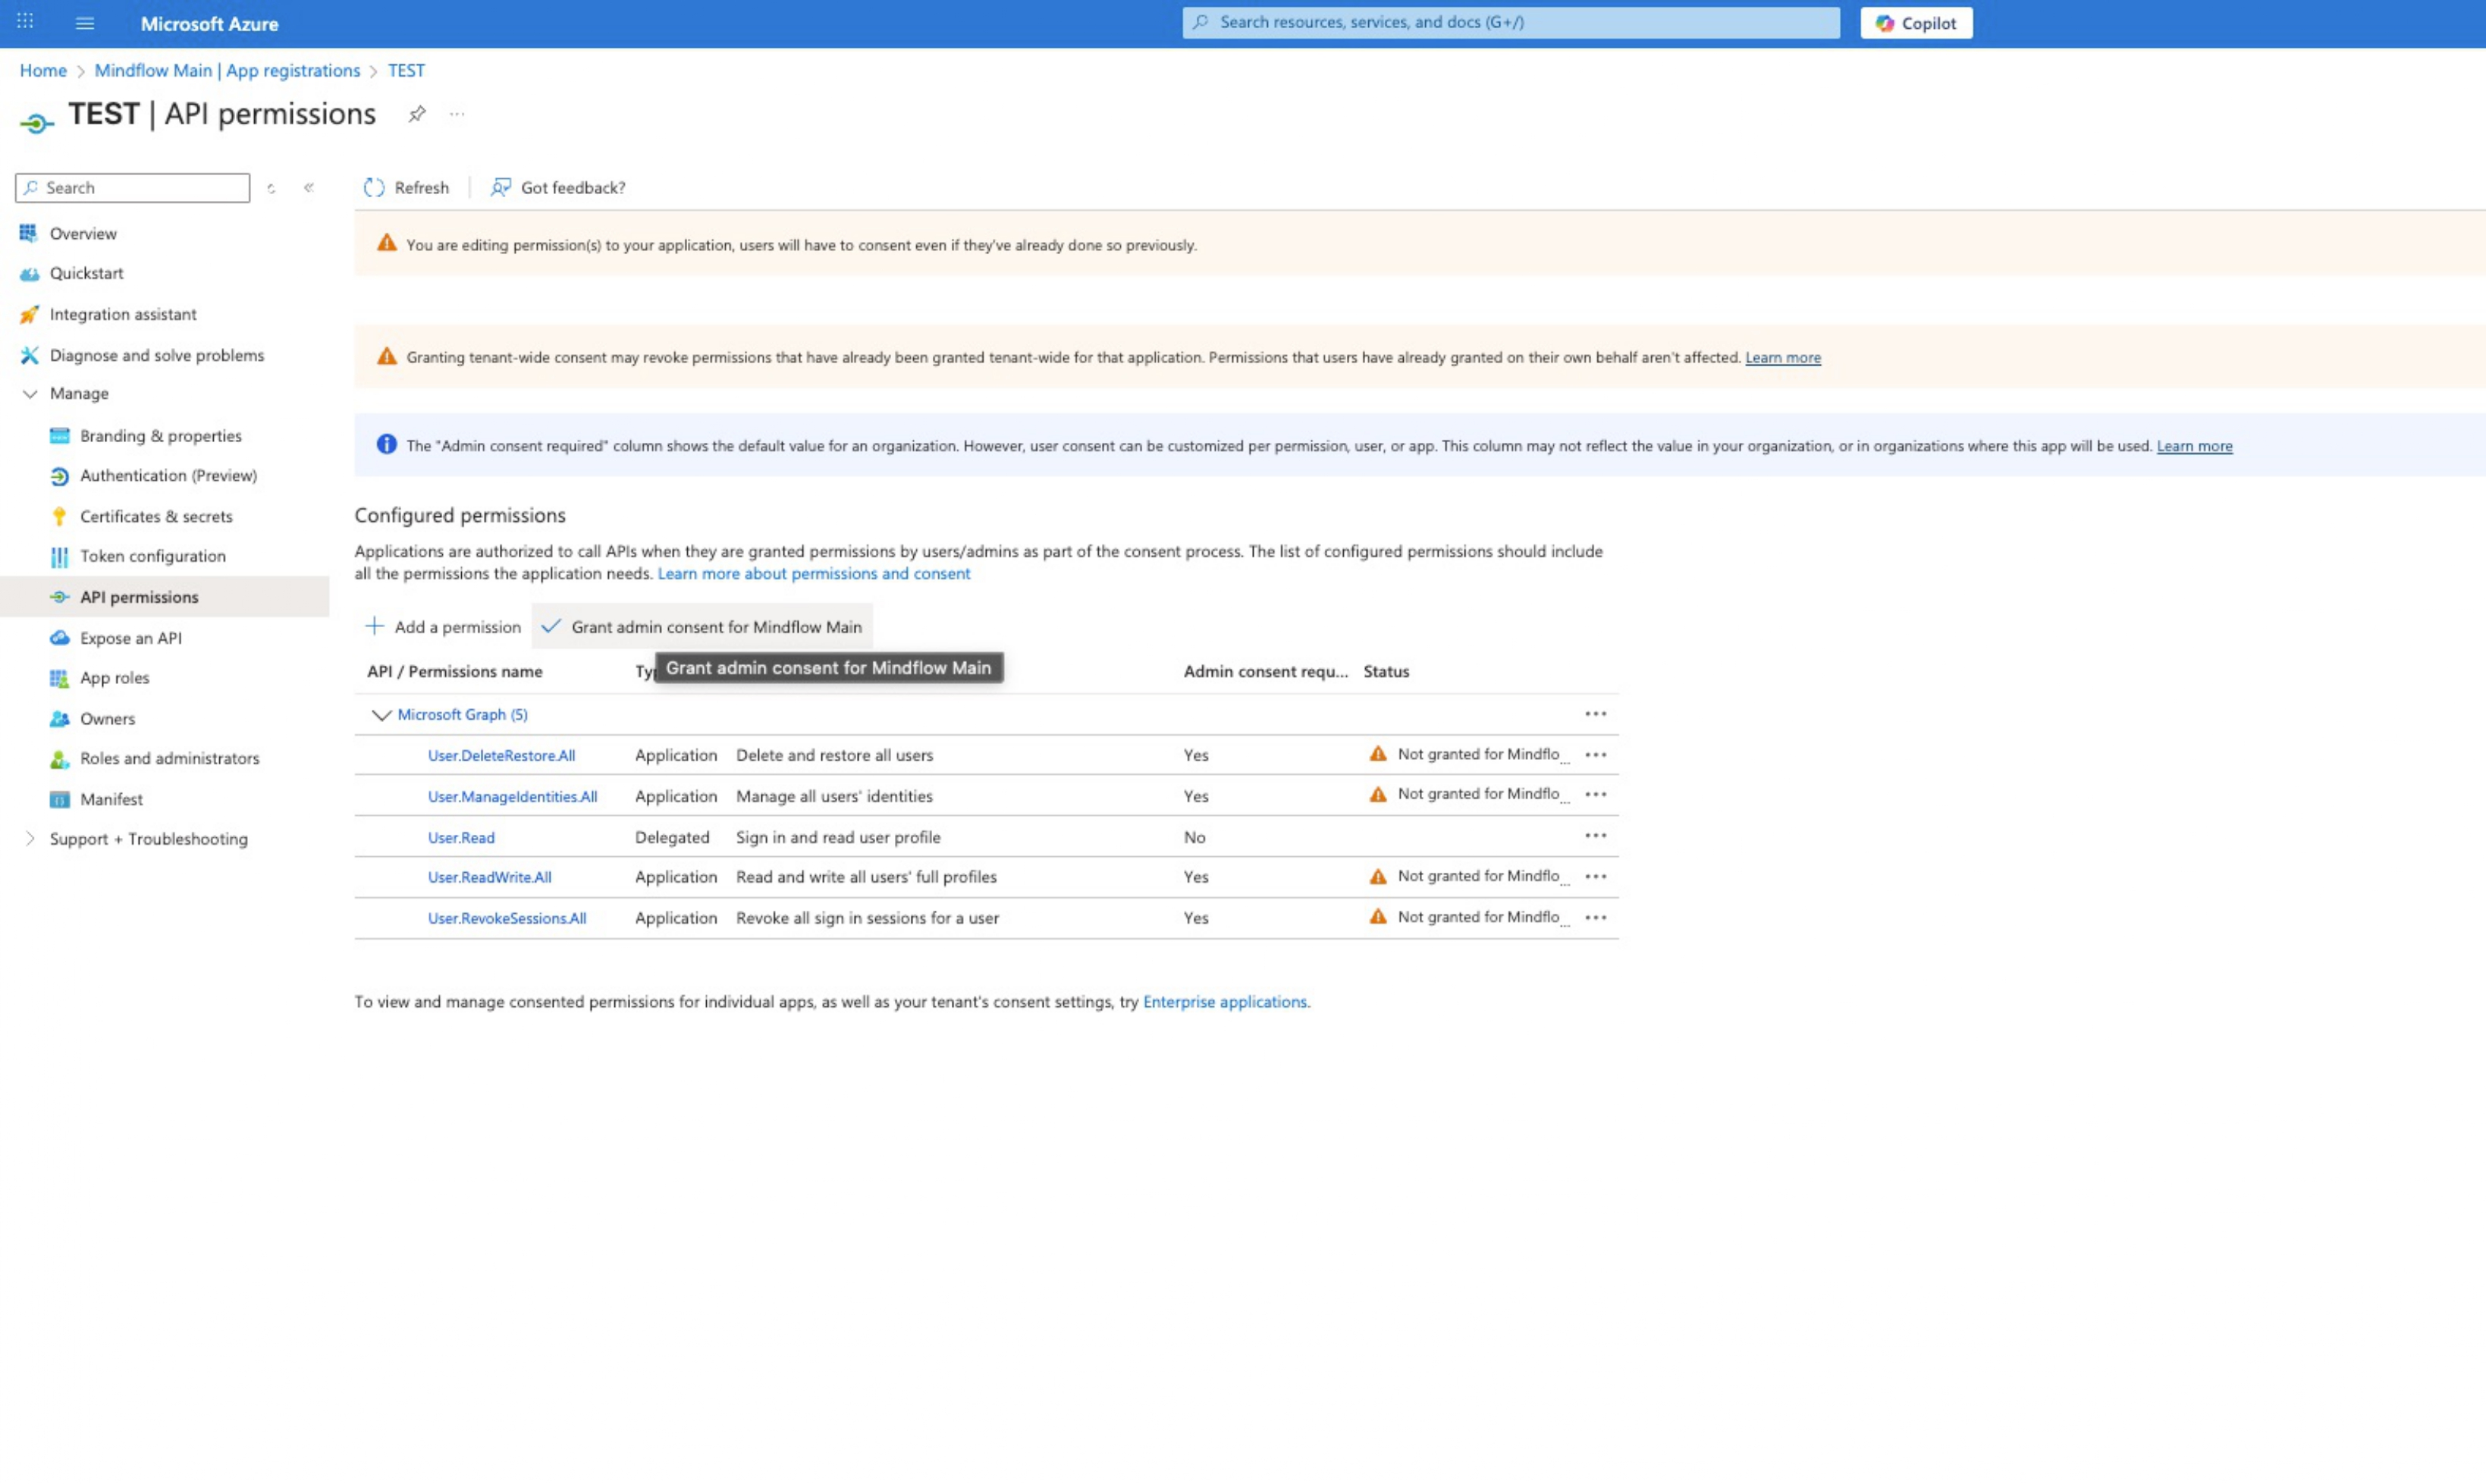
-
Click Grant admin consent and confirm with Yes to authorize these high-level permissions for the entire tenant.
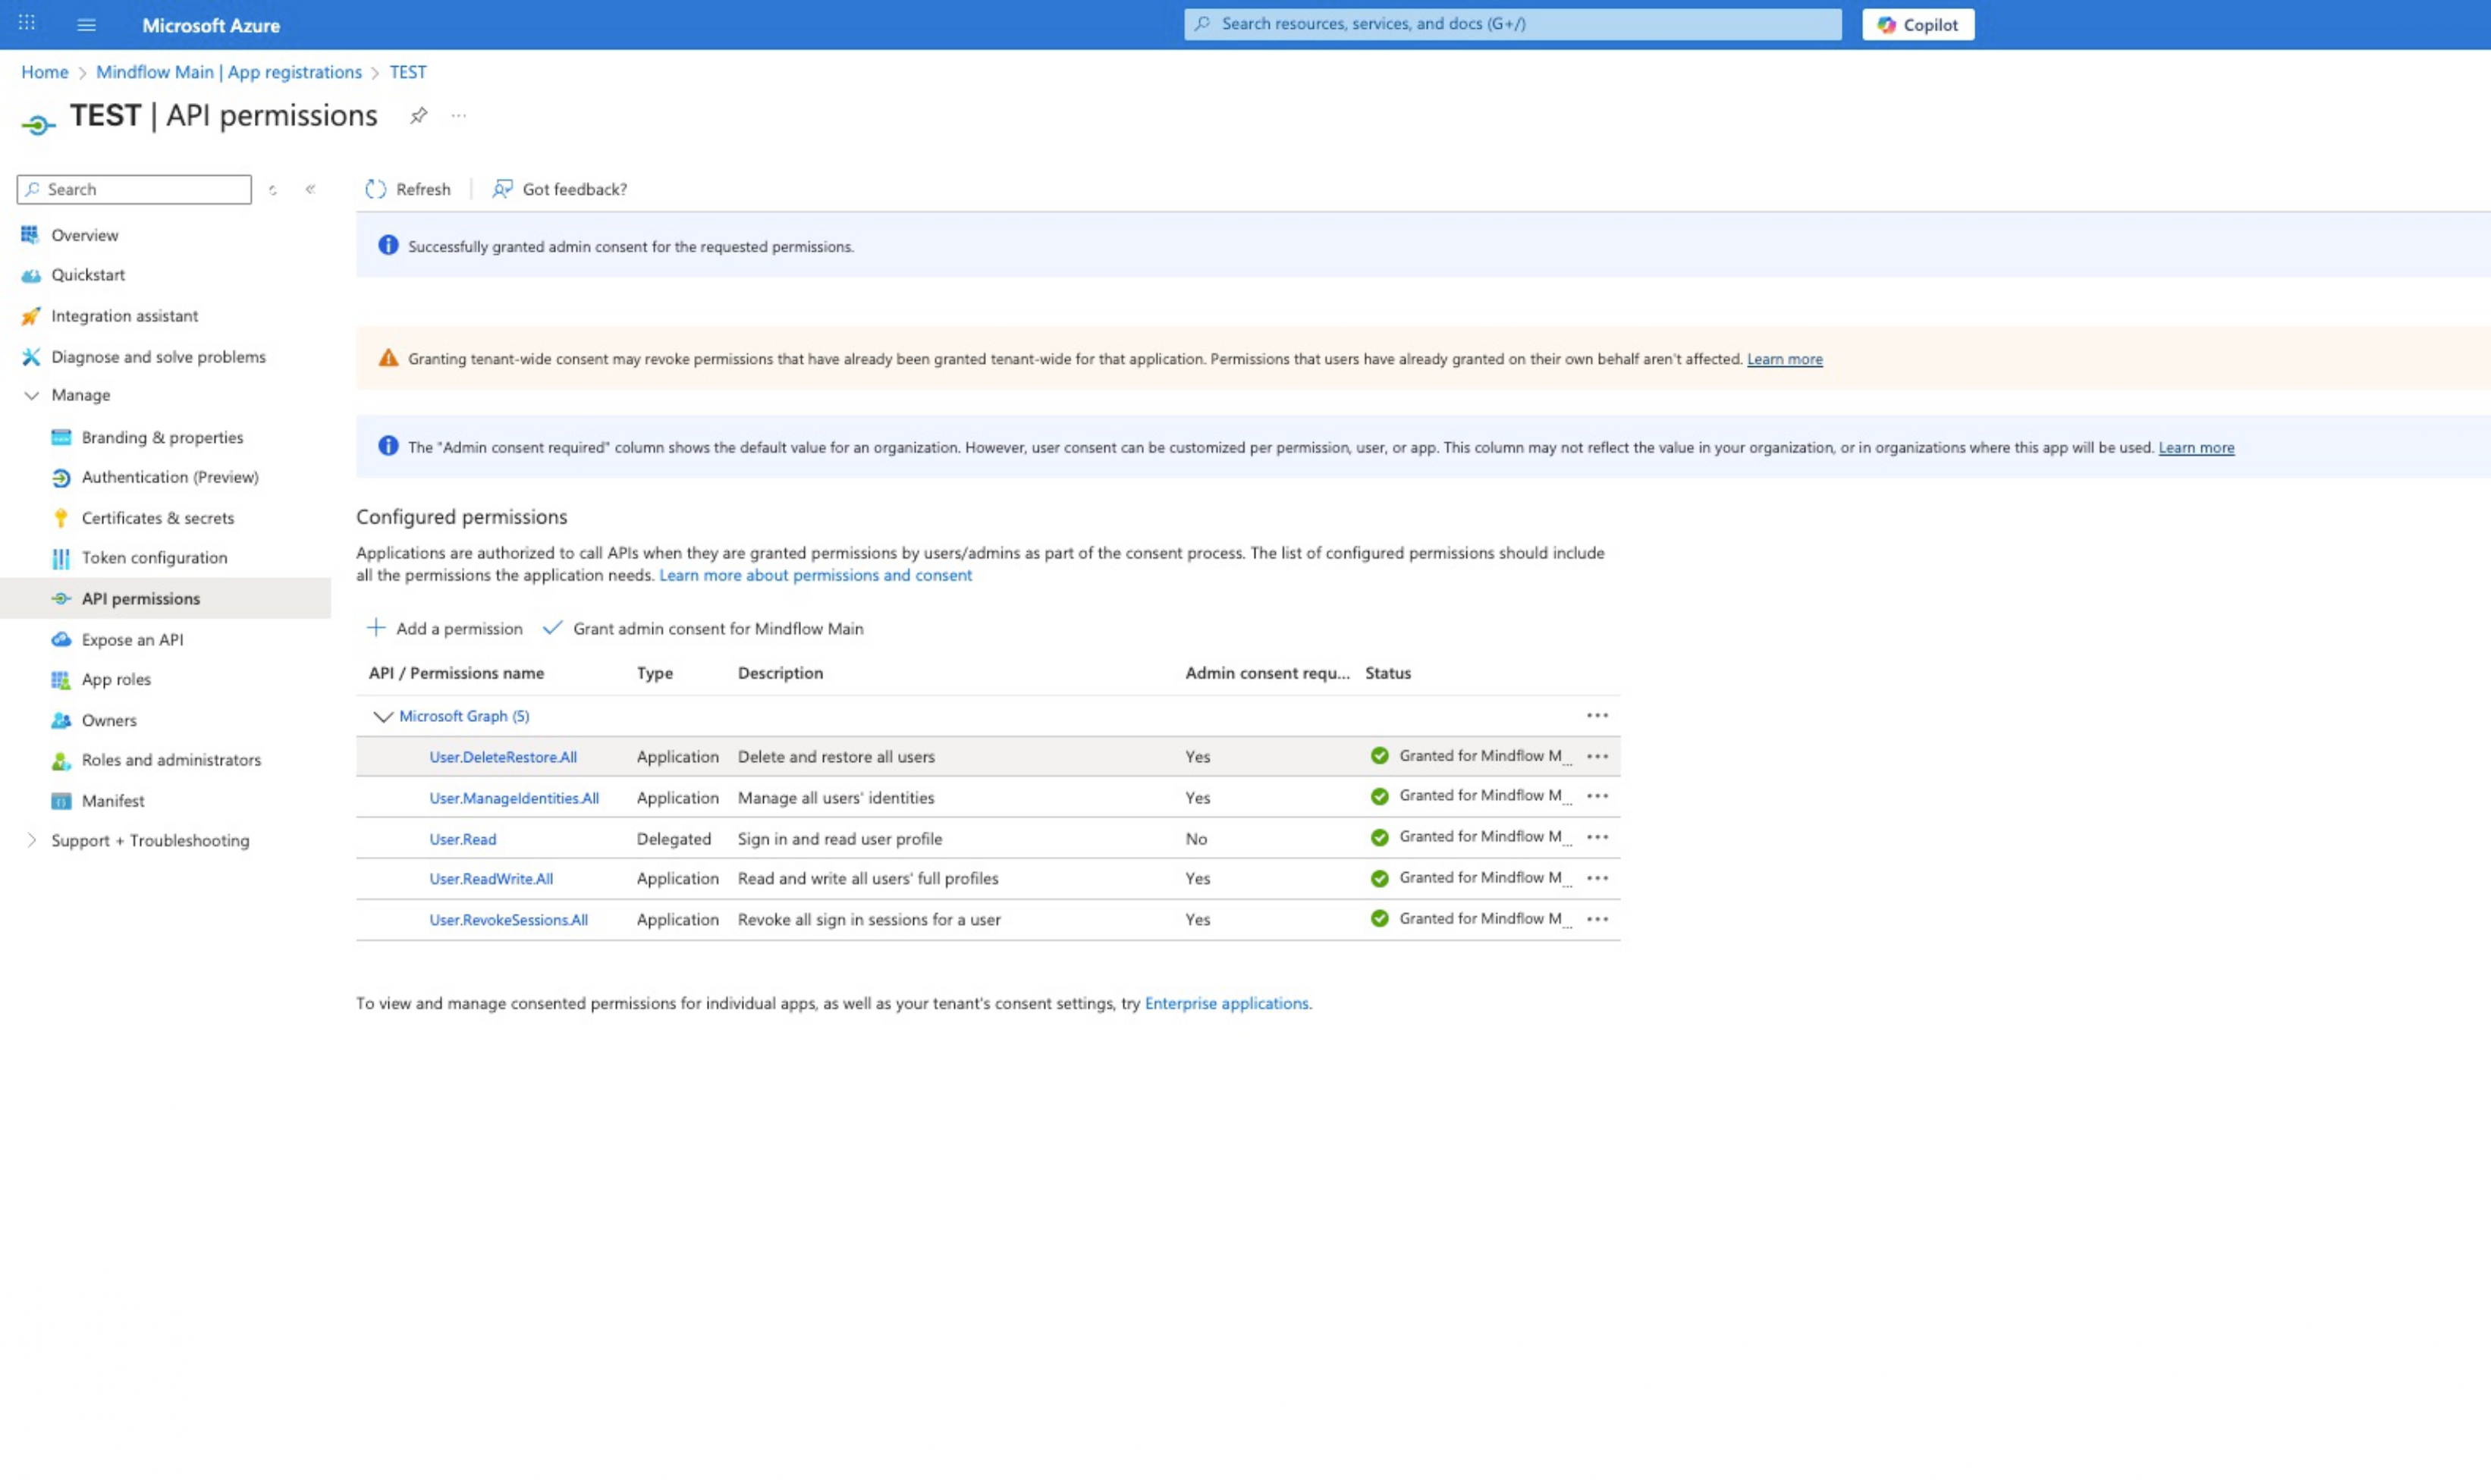
Generating Authentication Credentials
Section titled “Generating Authentication Credentials”To allow Mindflow to authenticate as this application, you must generate a client secret.
-
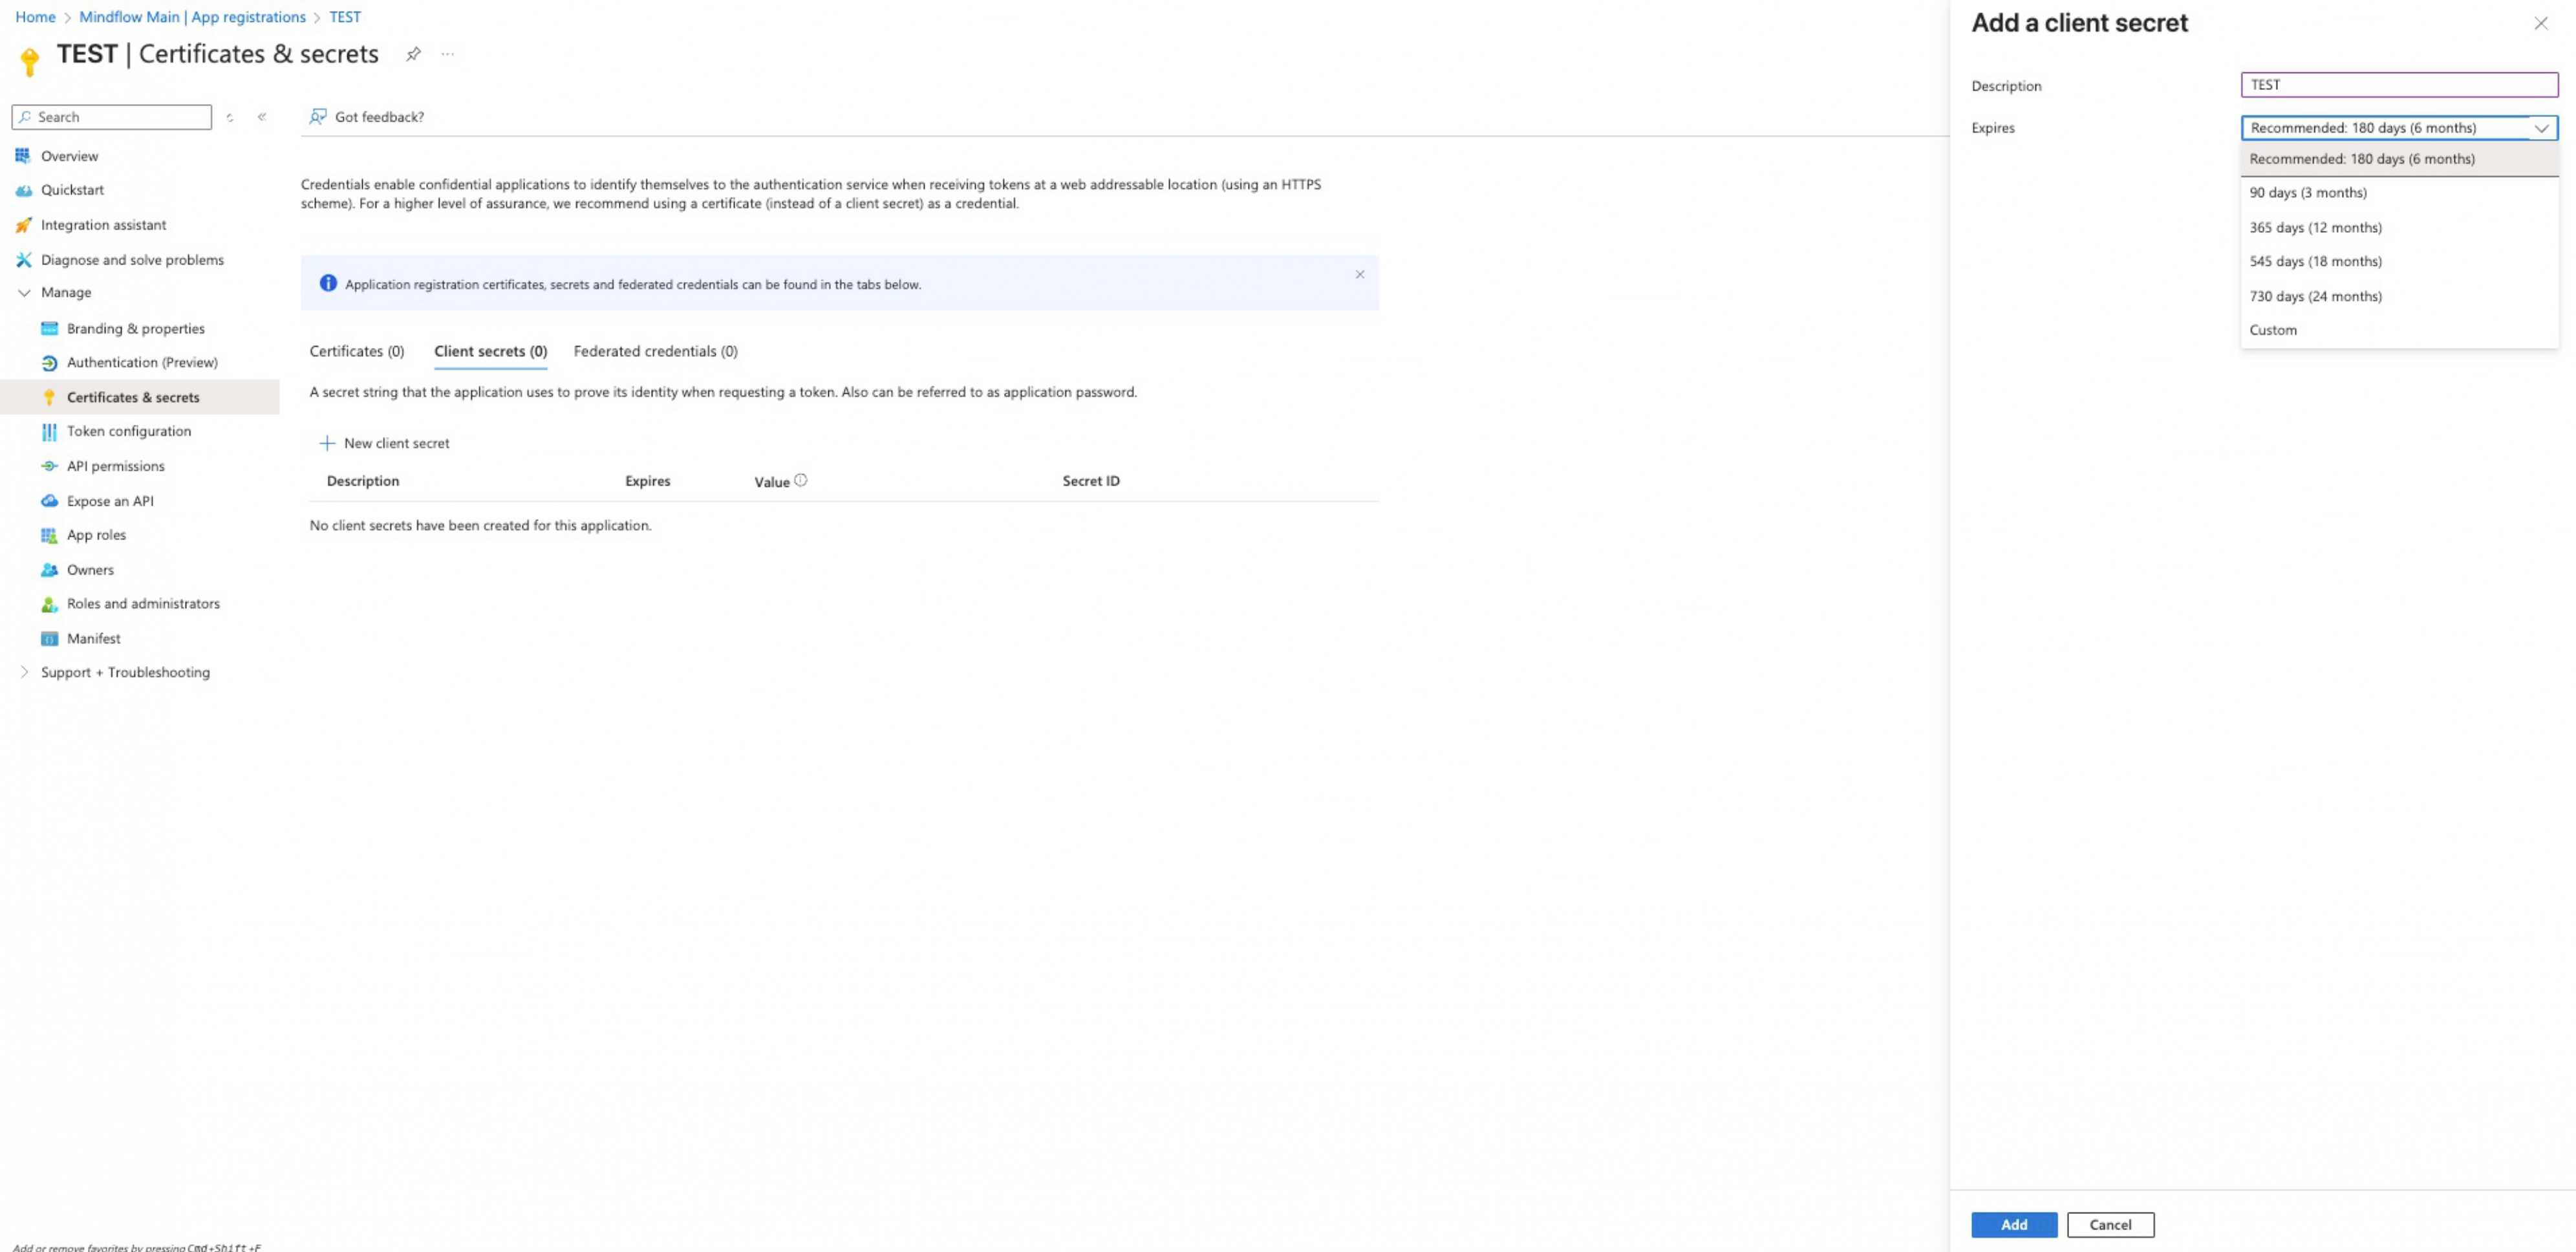
Create Secret: Navigate to Certificates & secrets and click + New client secret.
-
Set Expiration: Provide a description (e.g., “TEST”) and choose an expiration period (recommended: 180 days).
-
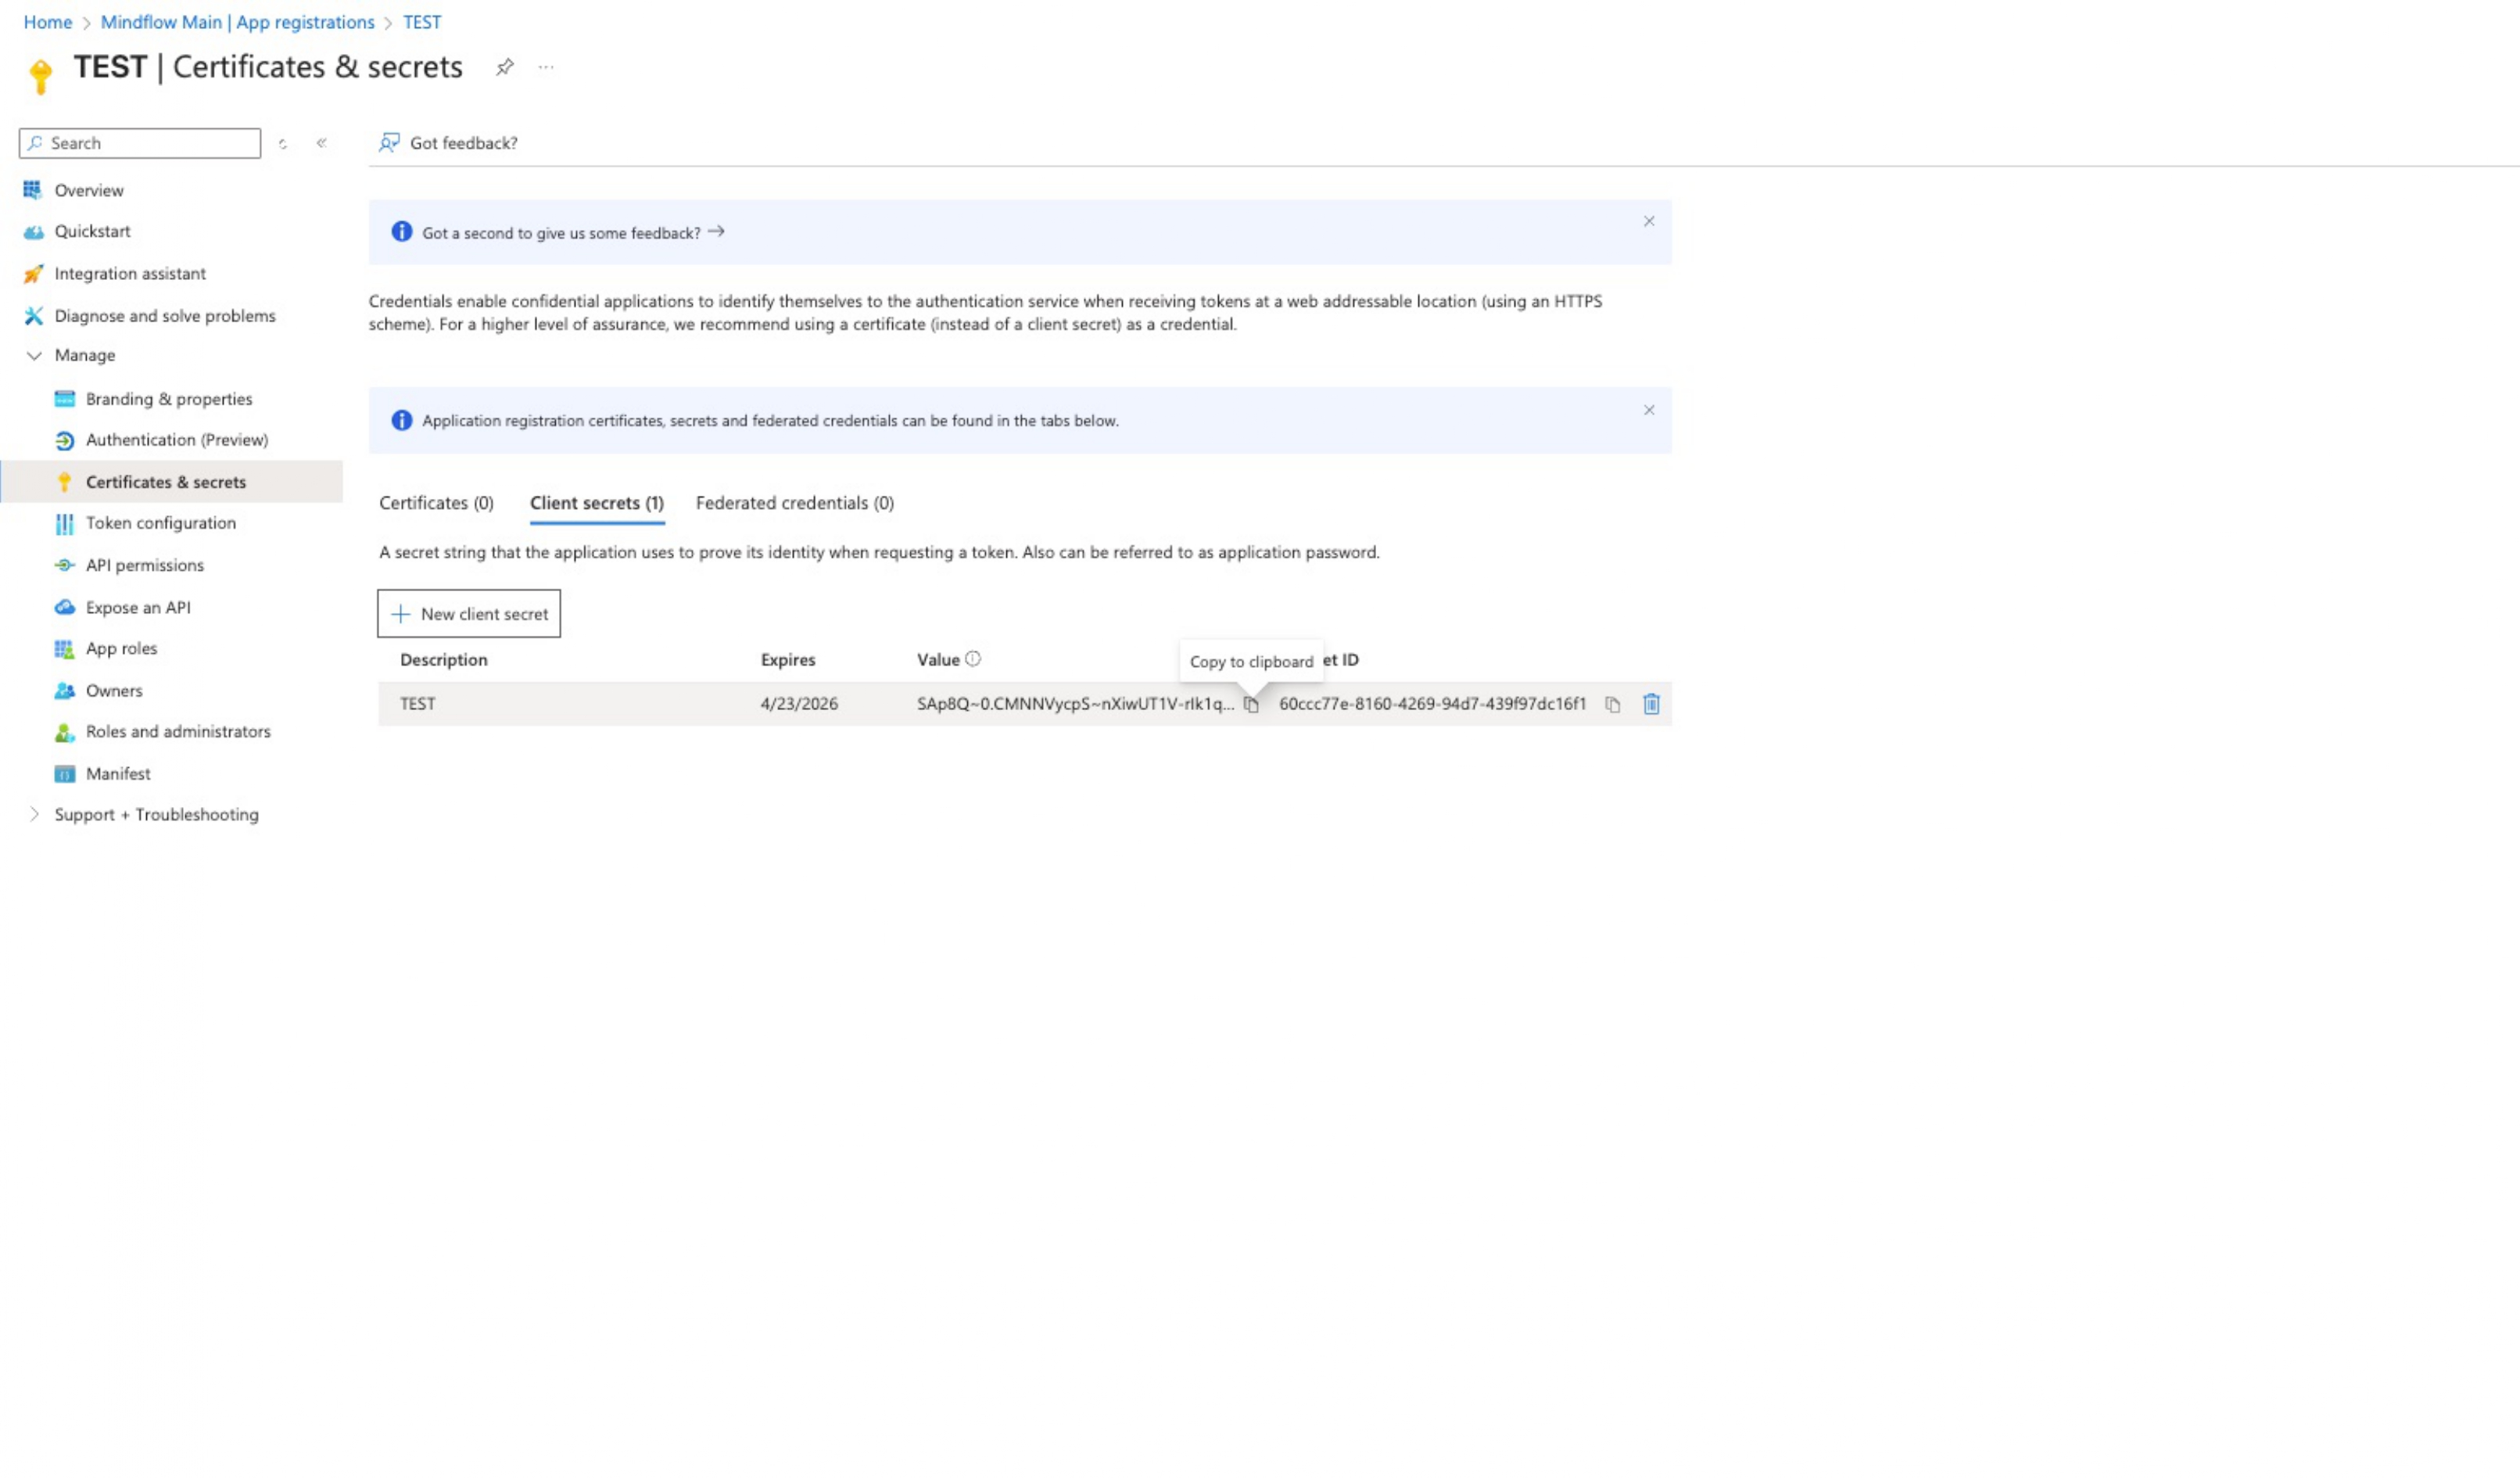
Secure the Value: Immediately copy the Secret Value.
Integrating with Mindflow
Section titled “Integrating with Mindflow”-
Finally, use the Azure details to create a functional credential within Mindflow.
- Secret Value you just generated.
- Application (Client) ID:
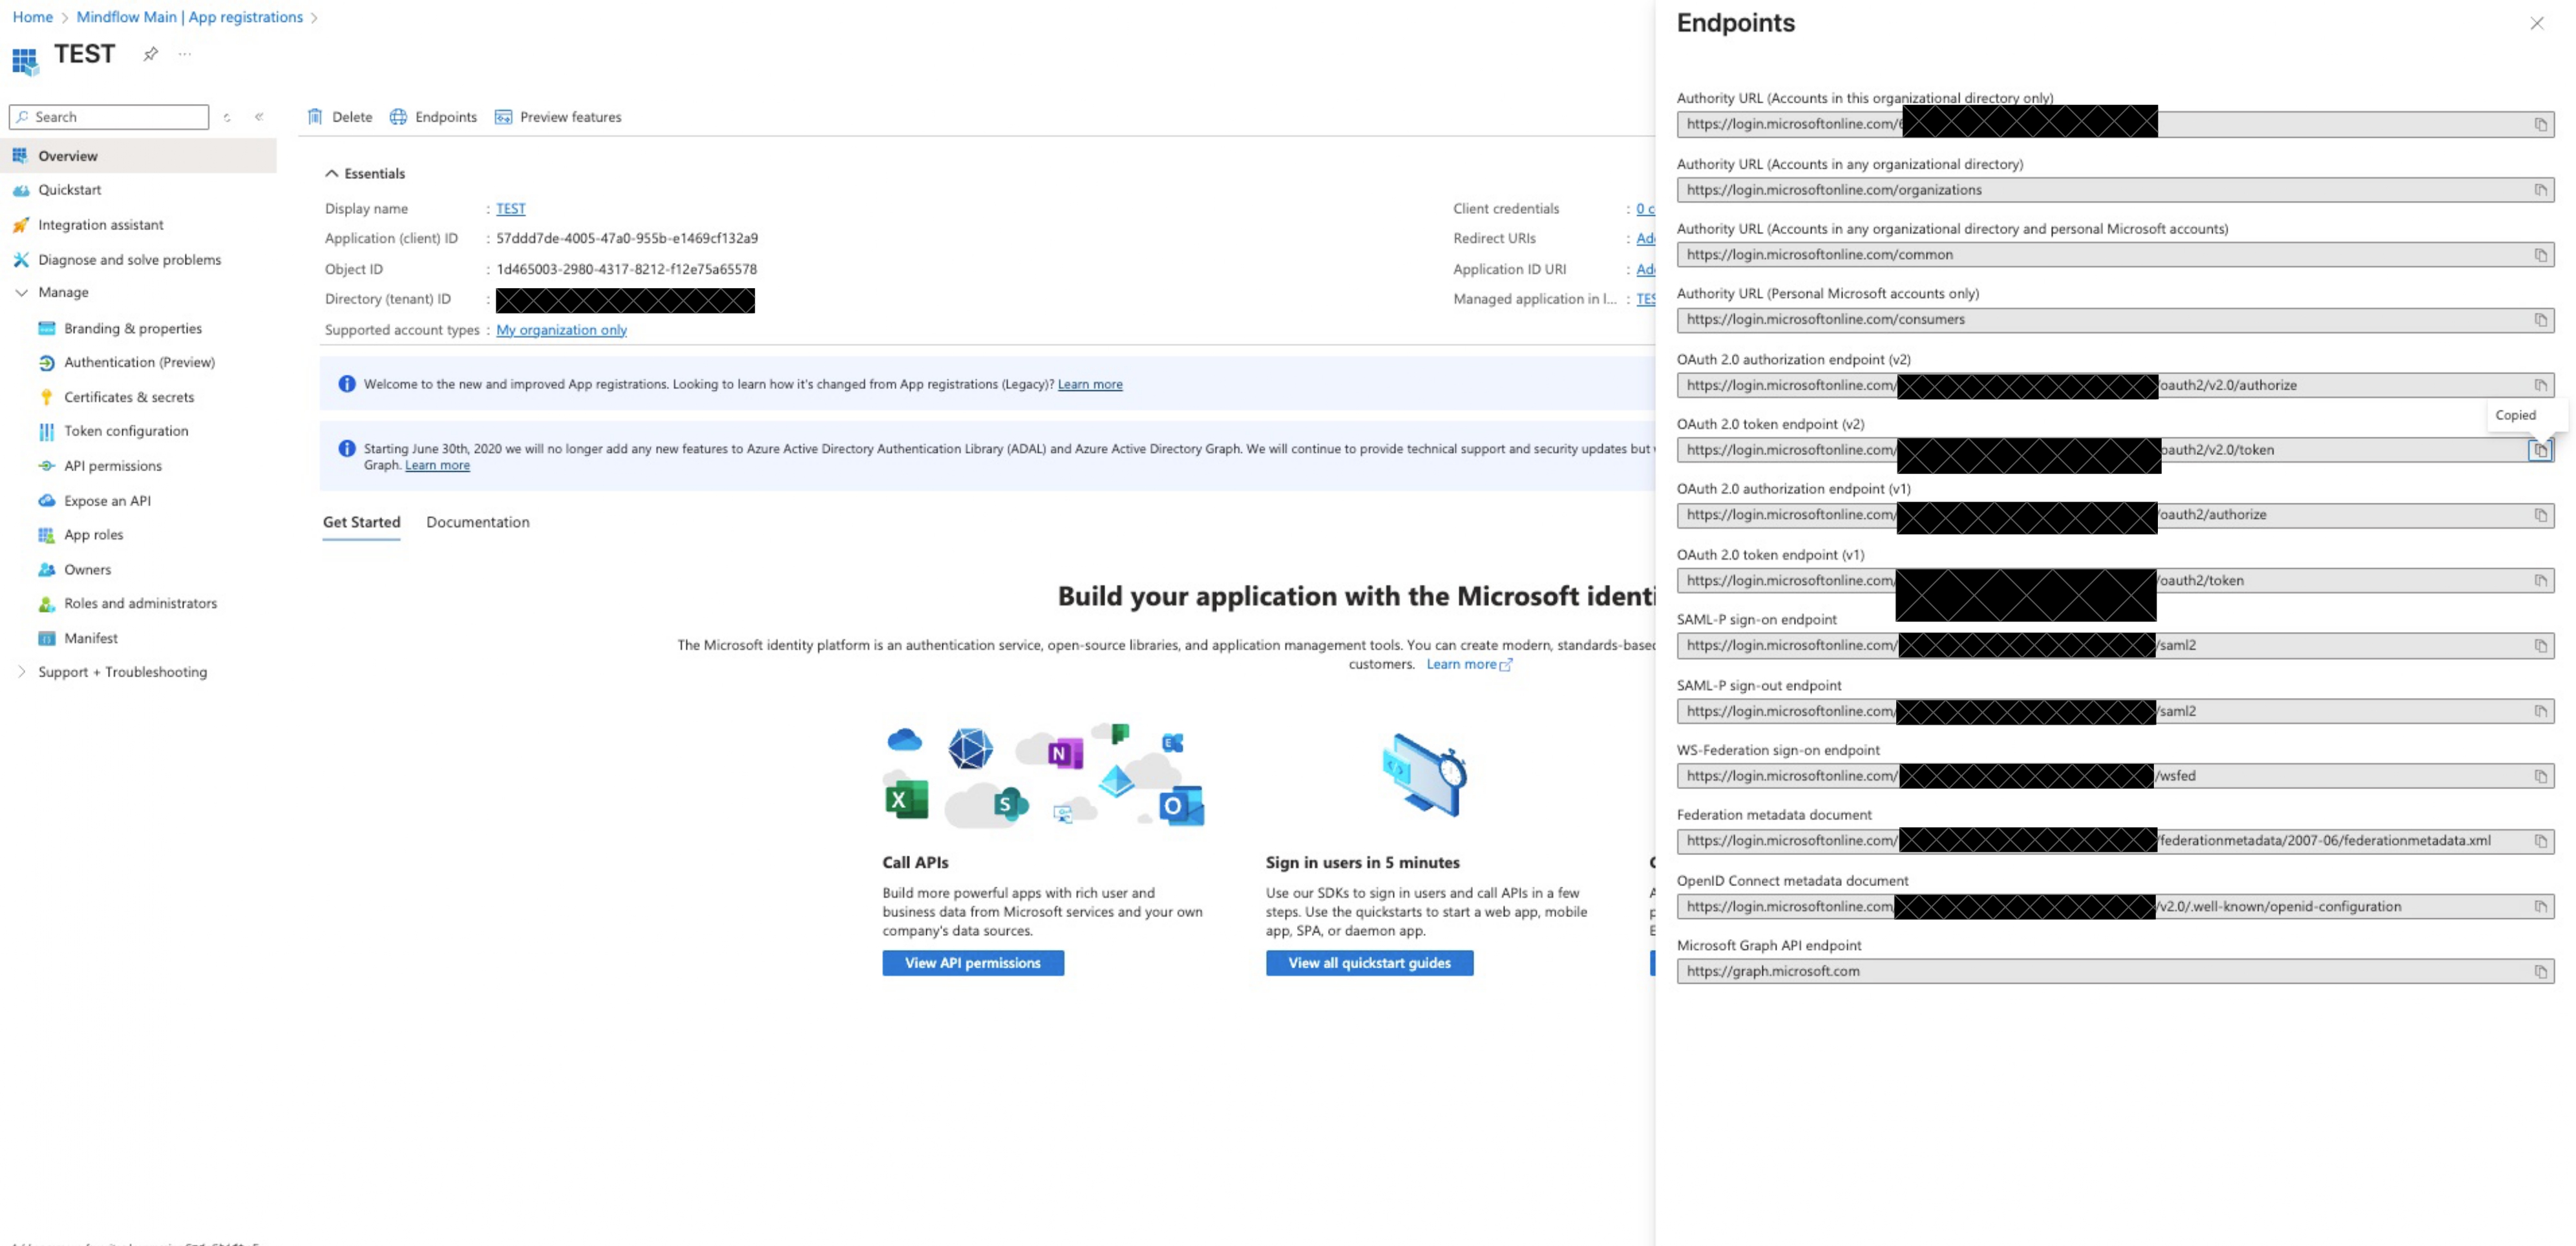
- OAuth Token URL
-
In Mindflow, open the Environments panel and, within the Global Environment or a specific one, click the
+icon to create a credentials. -
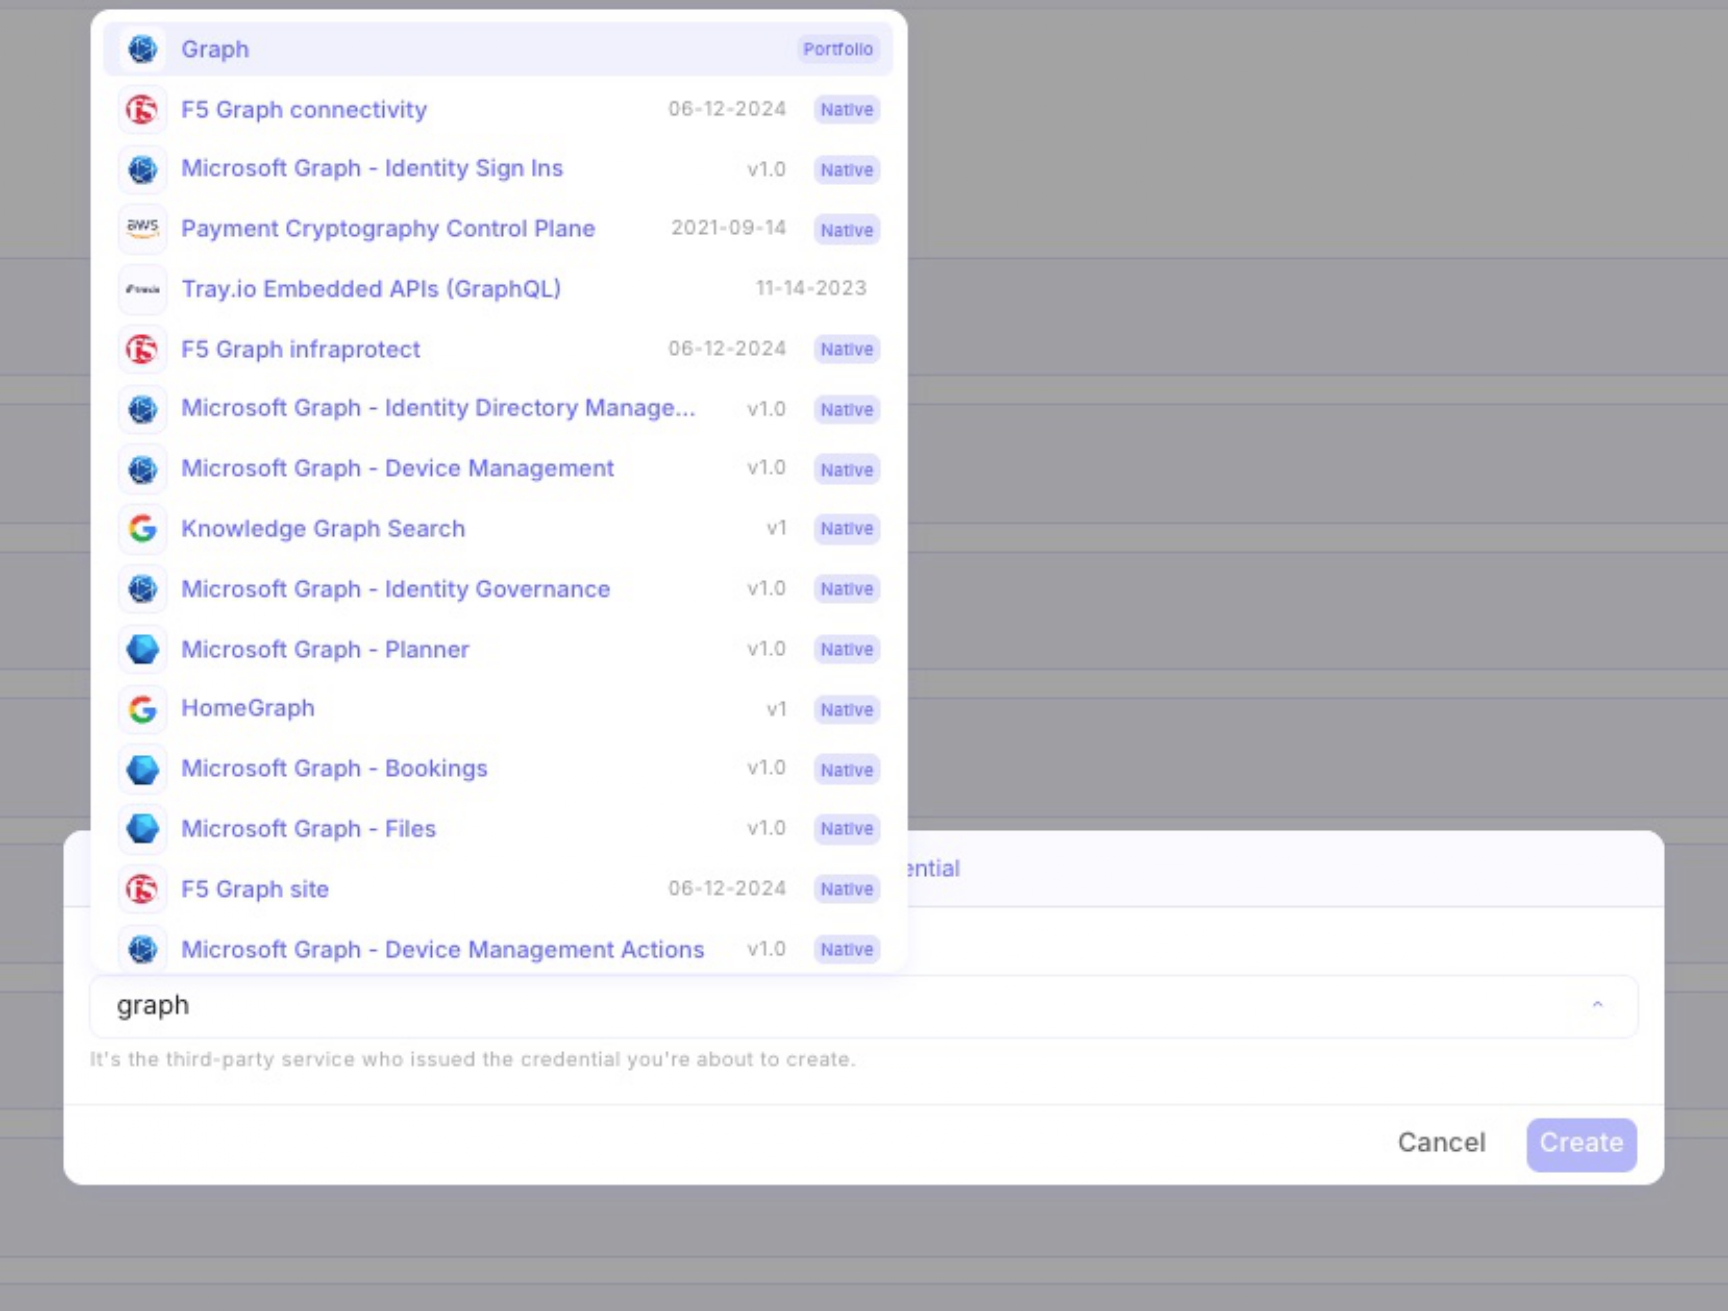
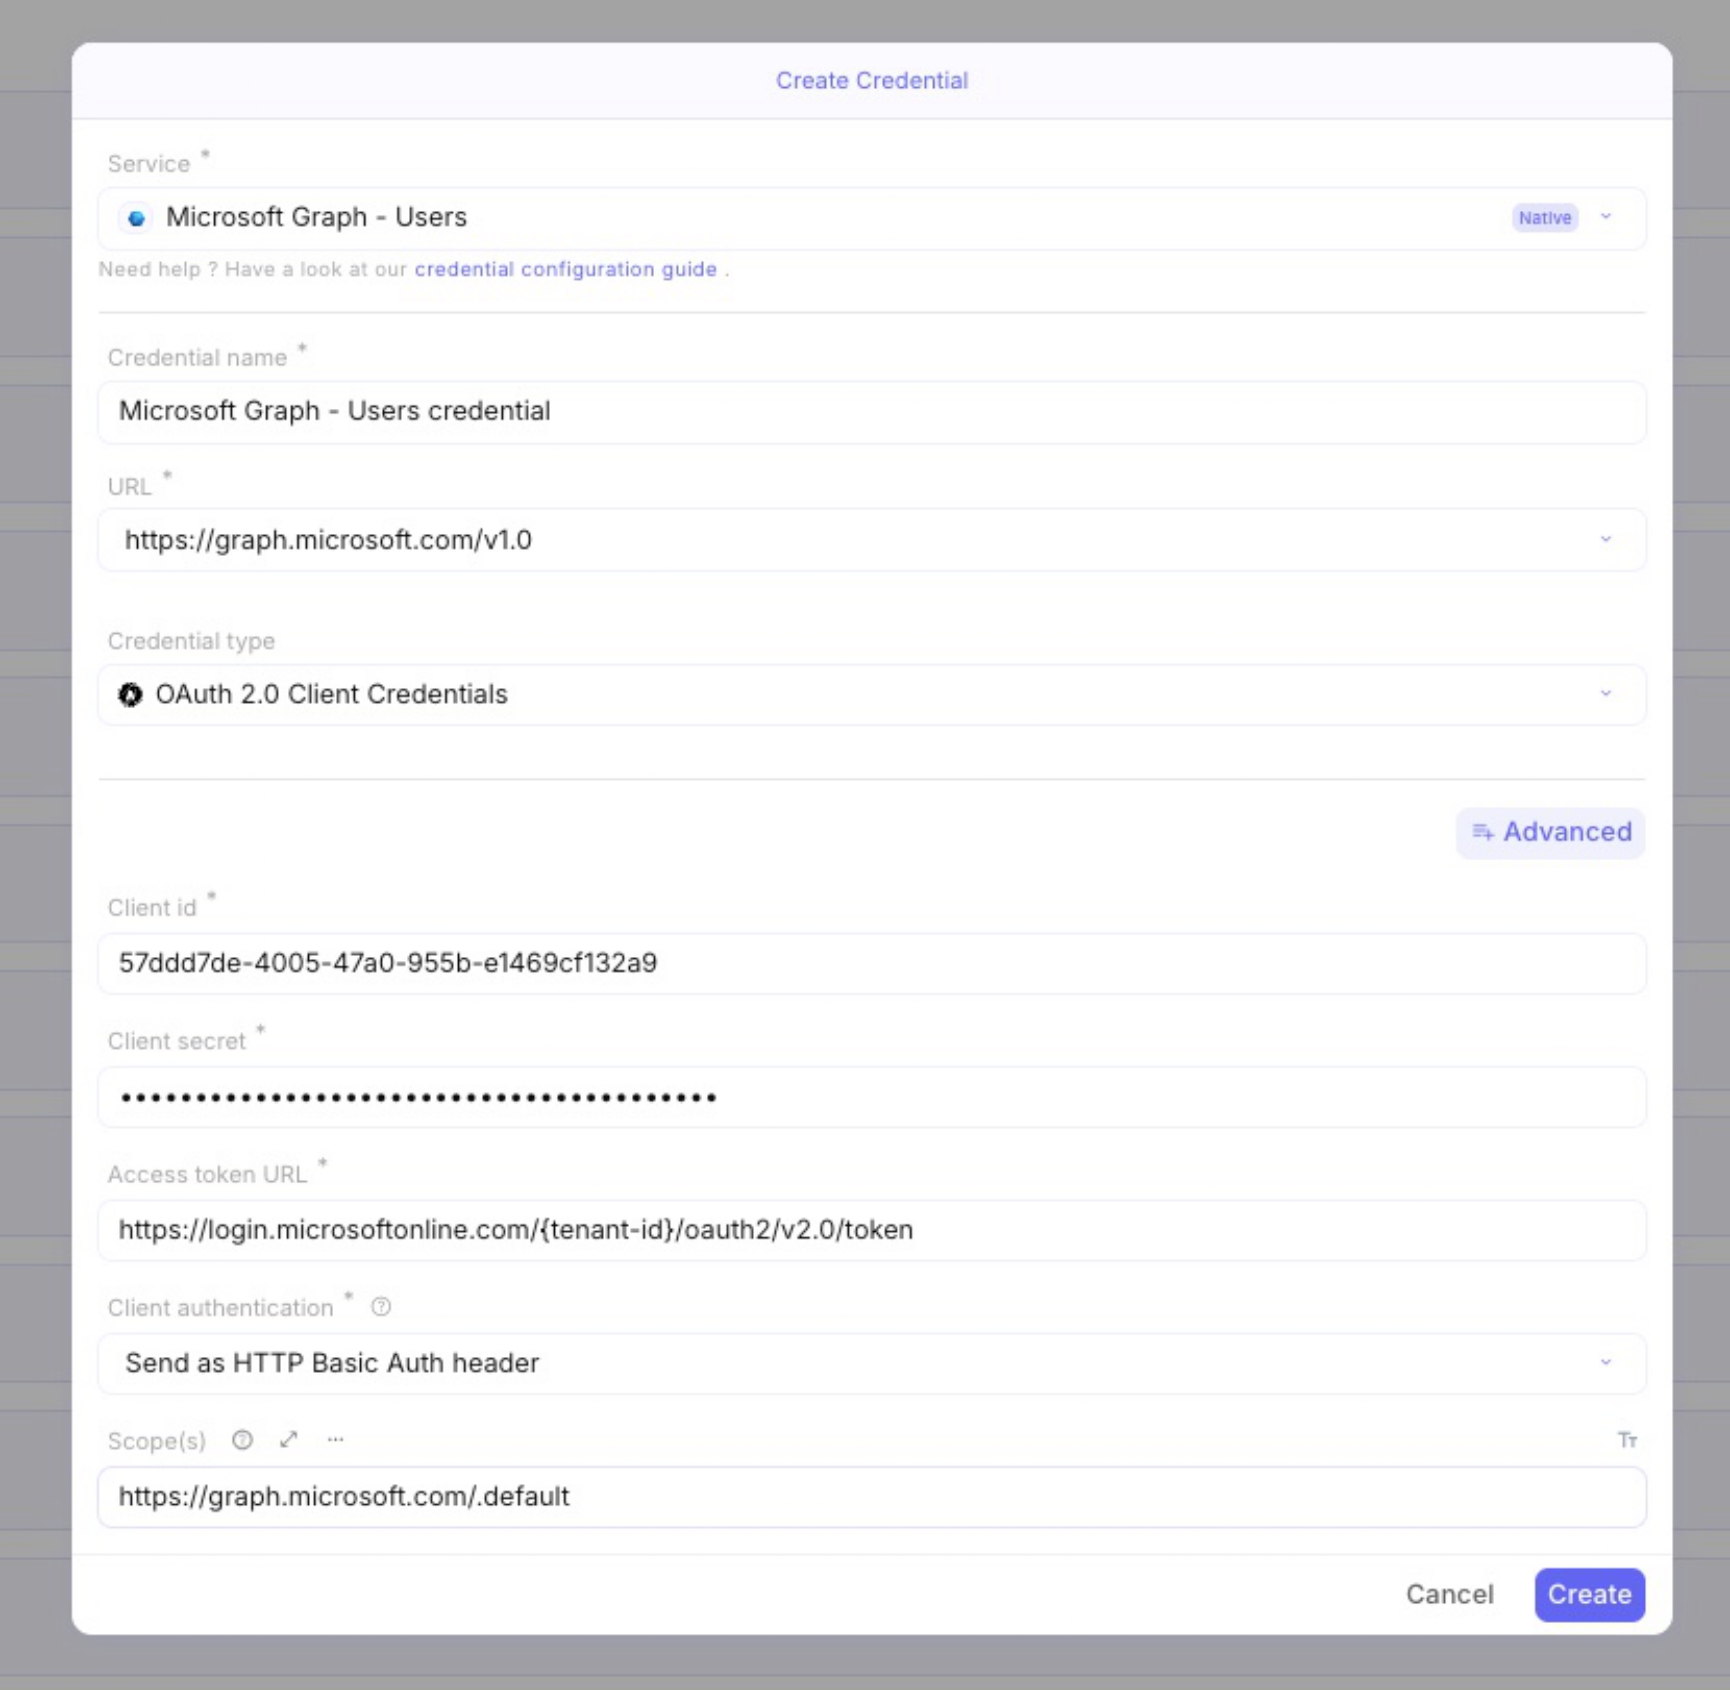
Select Service. Either:
- Graph (Portfolio): If you want to be able to use this credential for all API comprised within Graph (Users, Mail, Files, Sites, Devices, etc.)
- Microsoft Graph - Users: If you want to only allow this credential to be used with MsGraph - Users endpoints.
-
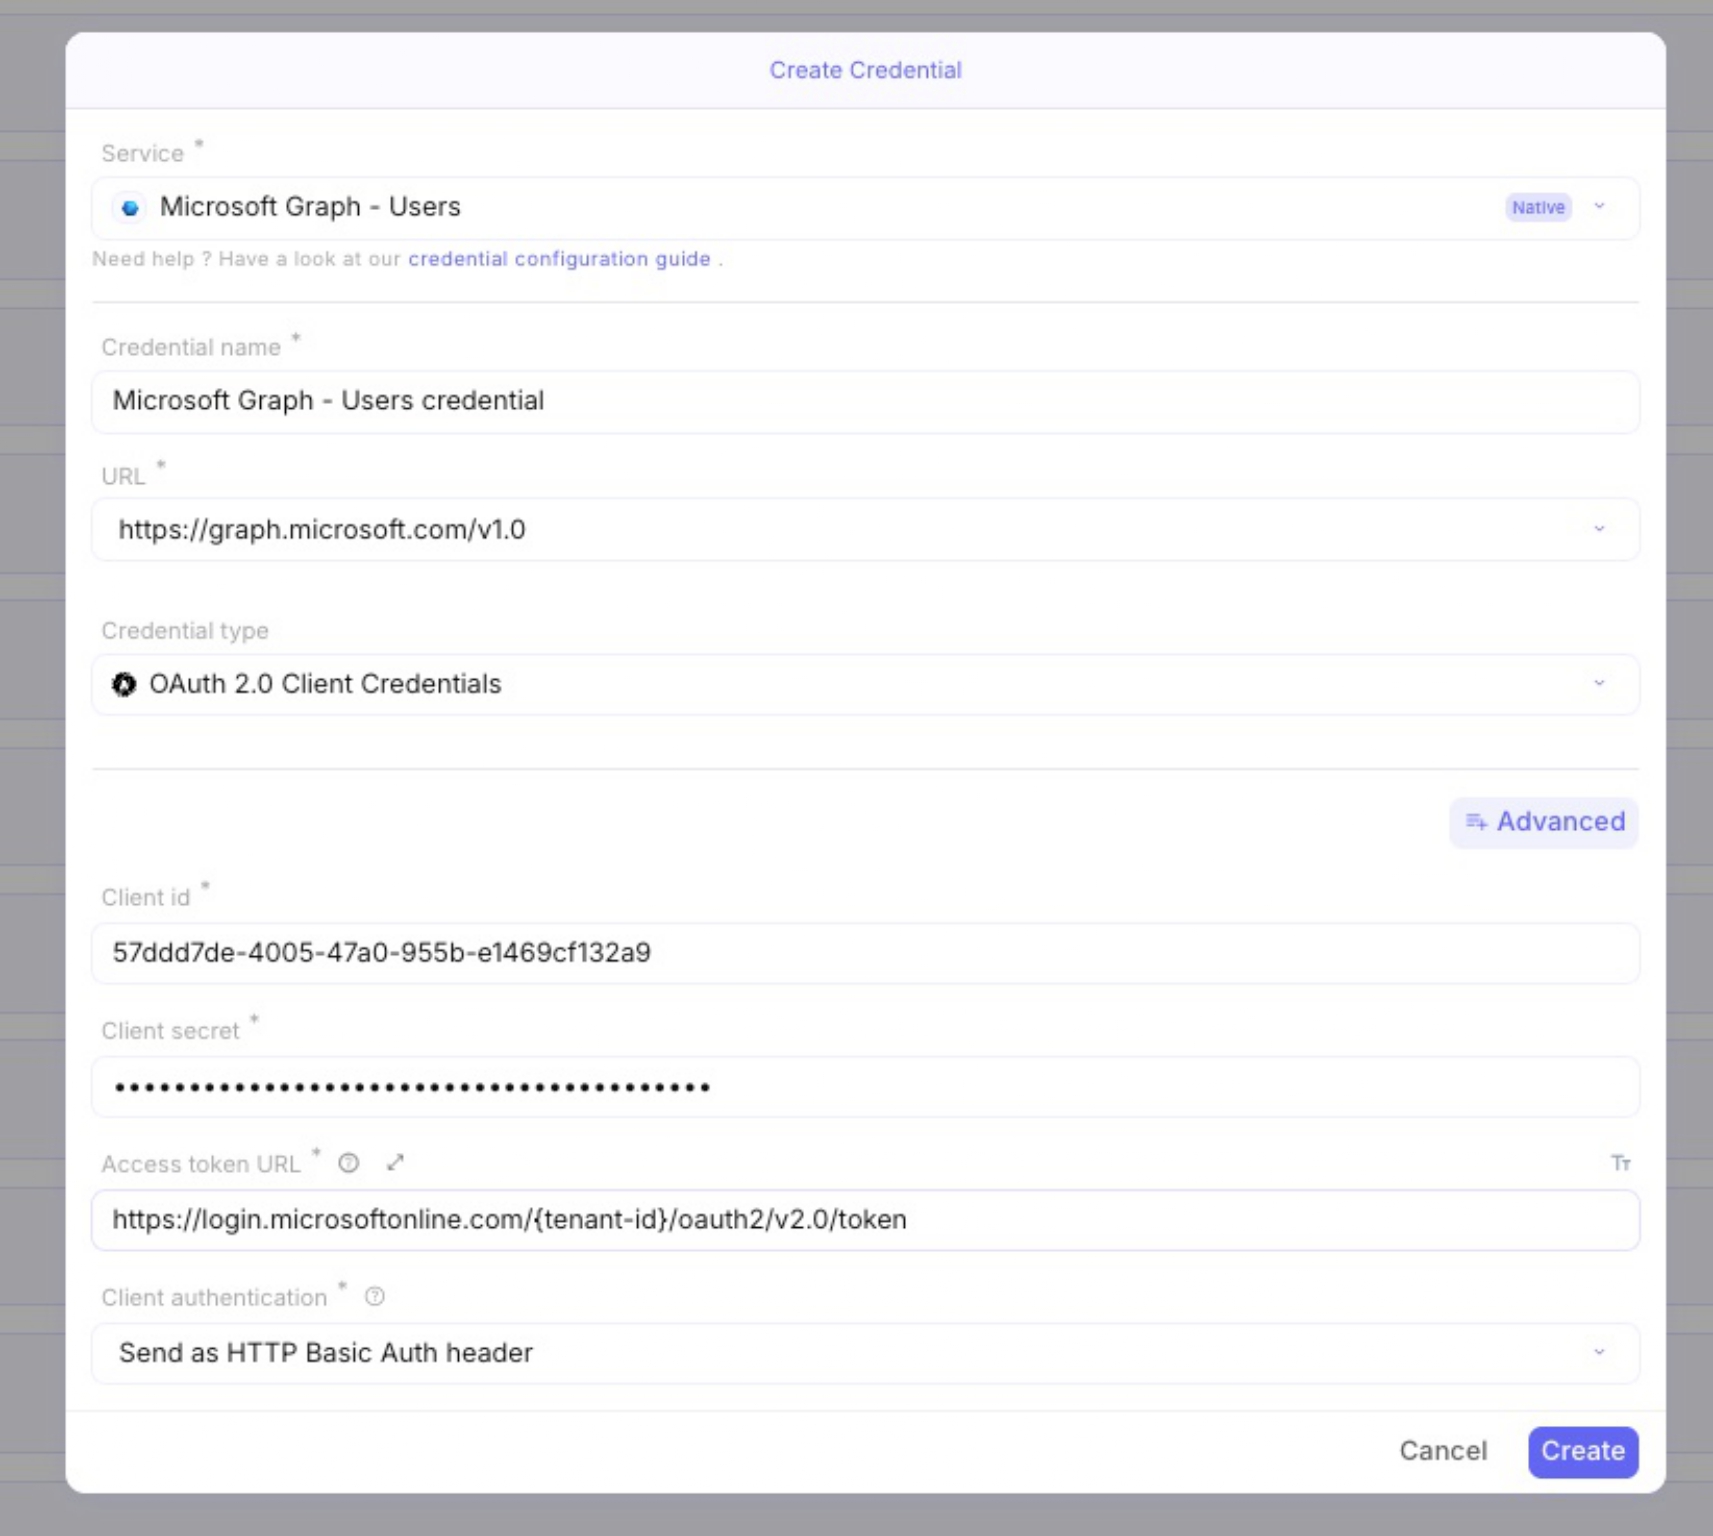
Configure Connection: Create a new credential and fill in the following:
- Credential Type: OAuth 2.0 Client Credentials.
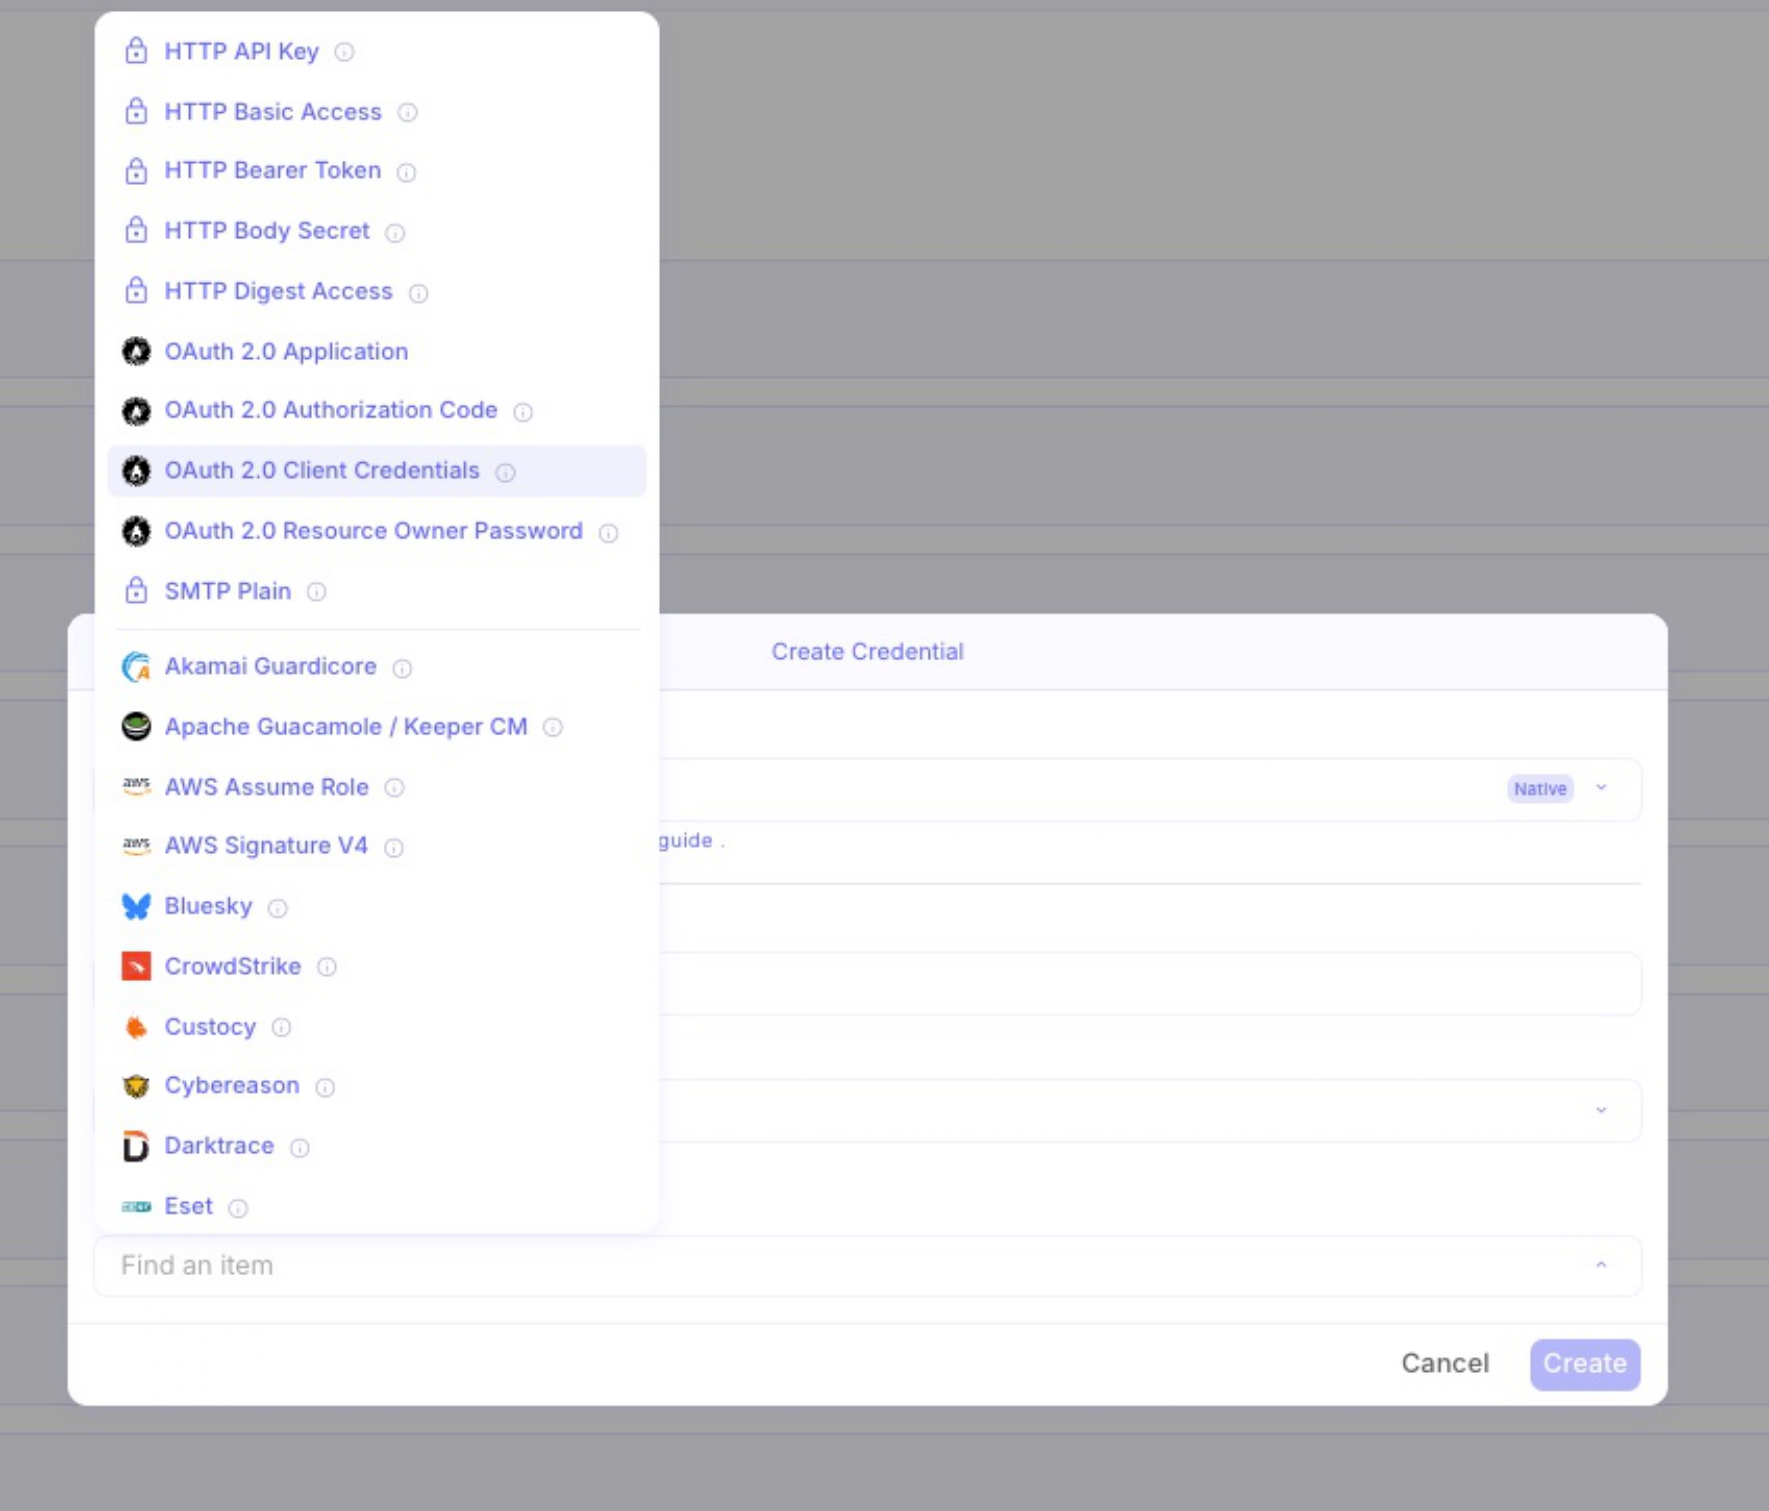
- Client ID: Paste the Application ID from Phase 1.
- Client Secret: Paste the Secret Value from Phase 3.
- Access Token URL: Use the format
https://login.microsoftonline.com/{tenant-id}/oauth2/v2.0/token, replacing{tenant-id}with your actual Directory ID.
- Then, click
Advancedto enableScopes
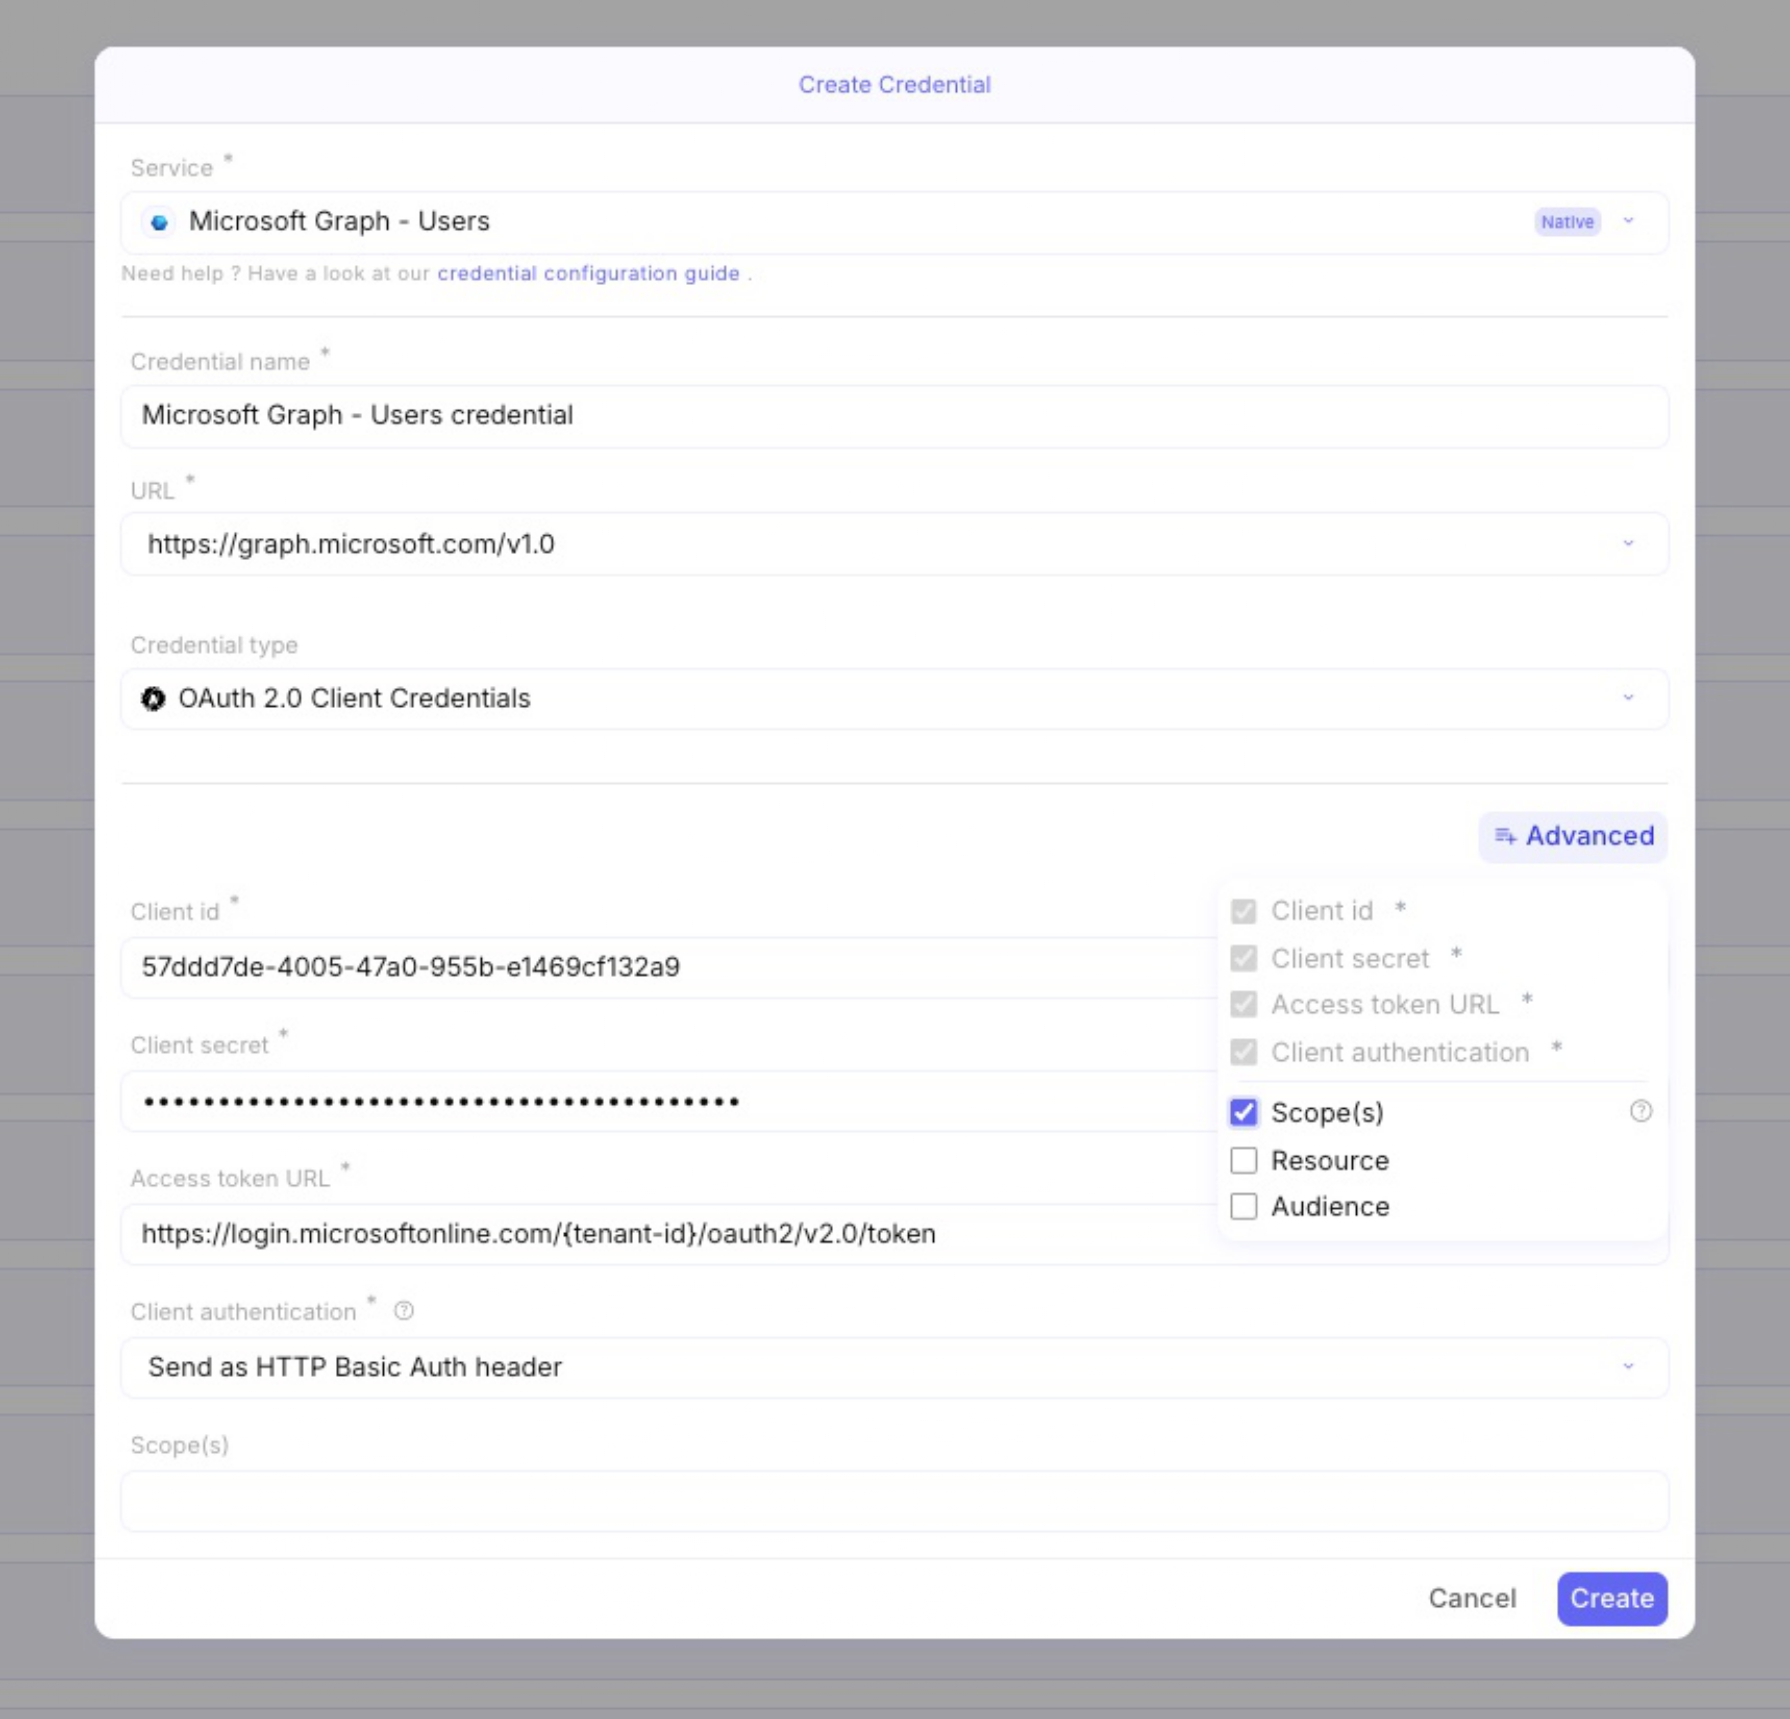
- Enter
https://graph.microsoft.com/.default.
-
Test the Action: Once the credential is saved, you can run a “List users” action. Don’t forget to assign the newly created credential to the step within
Settingstab!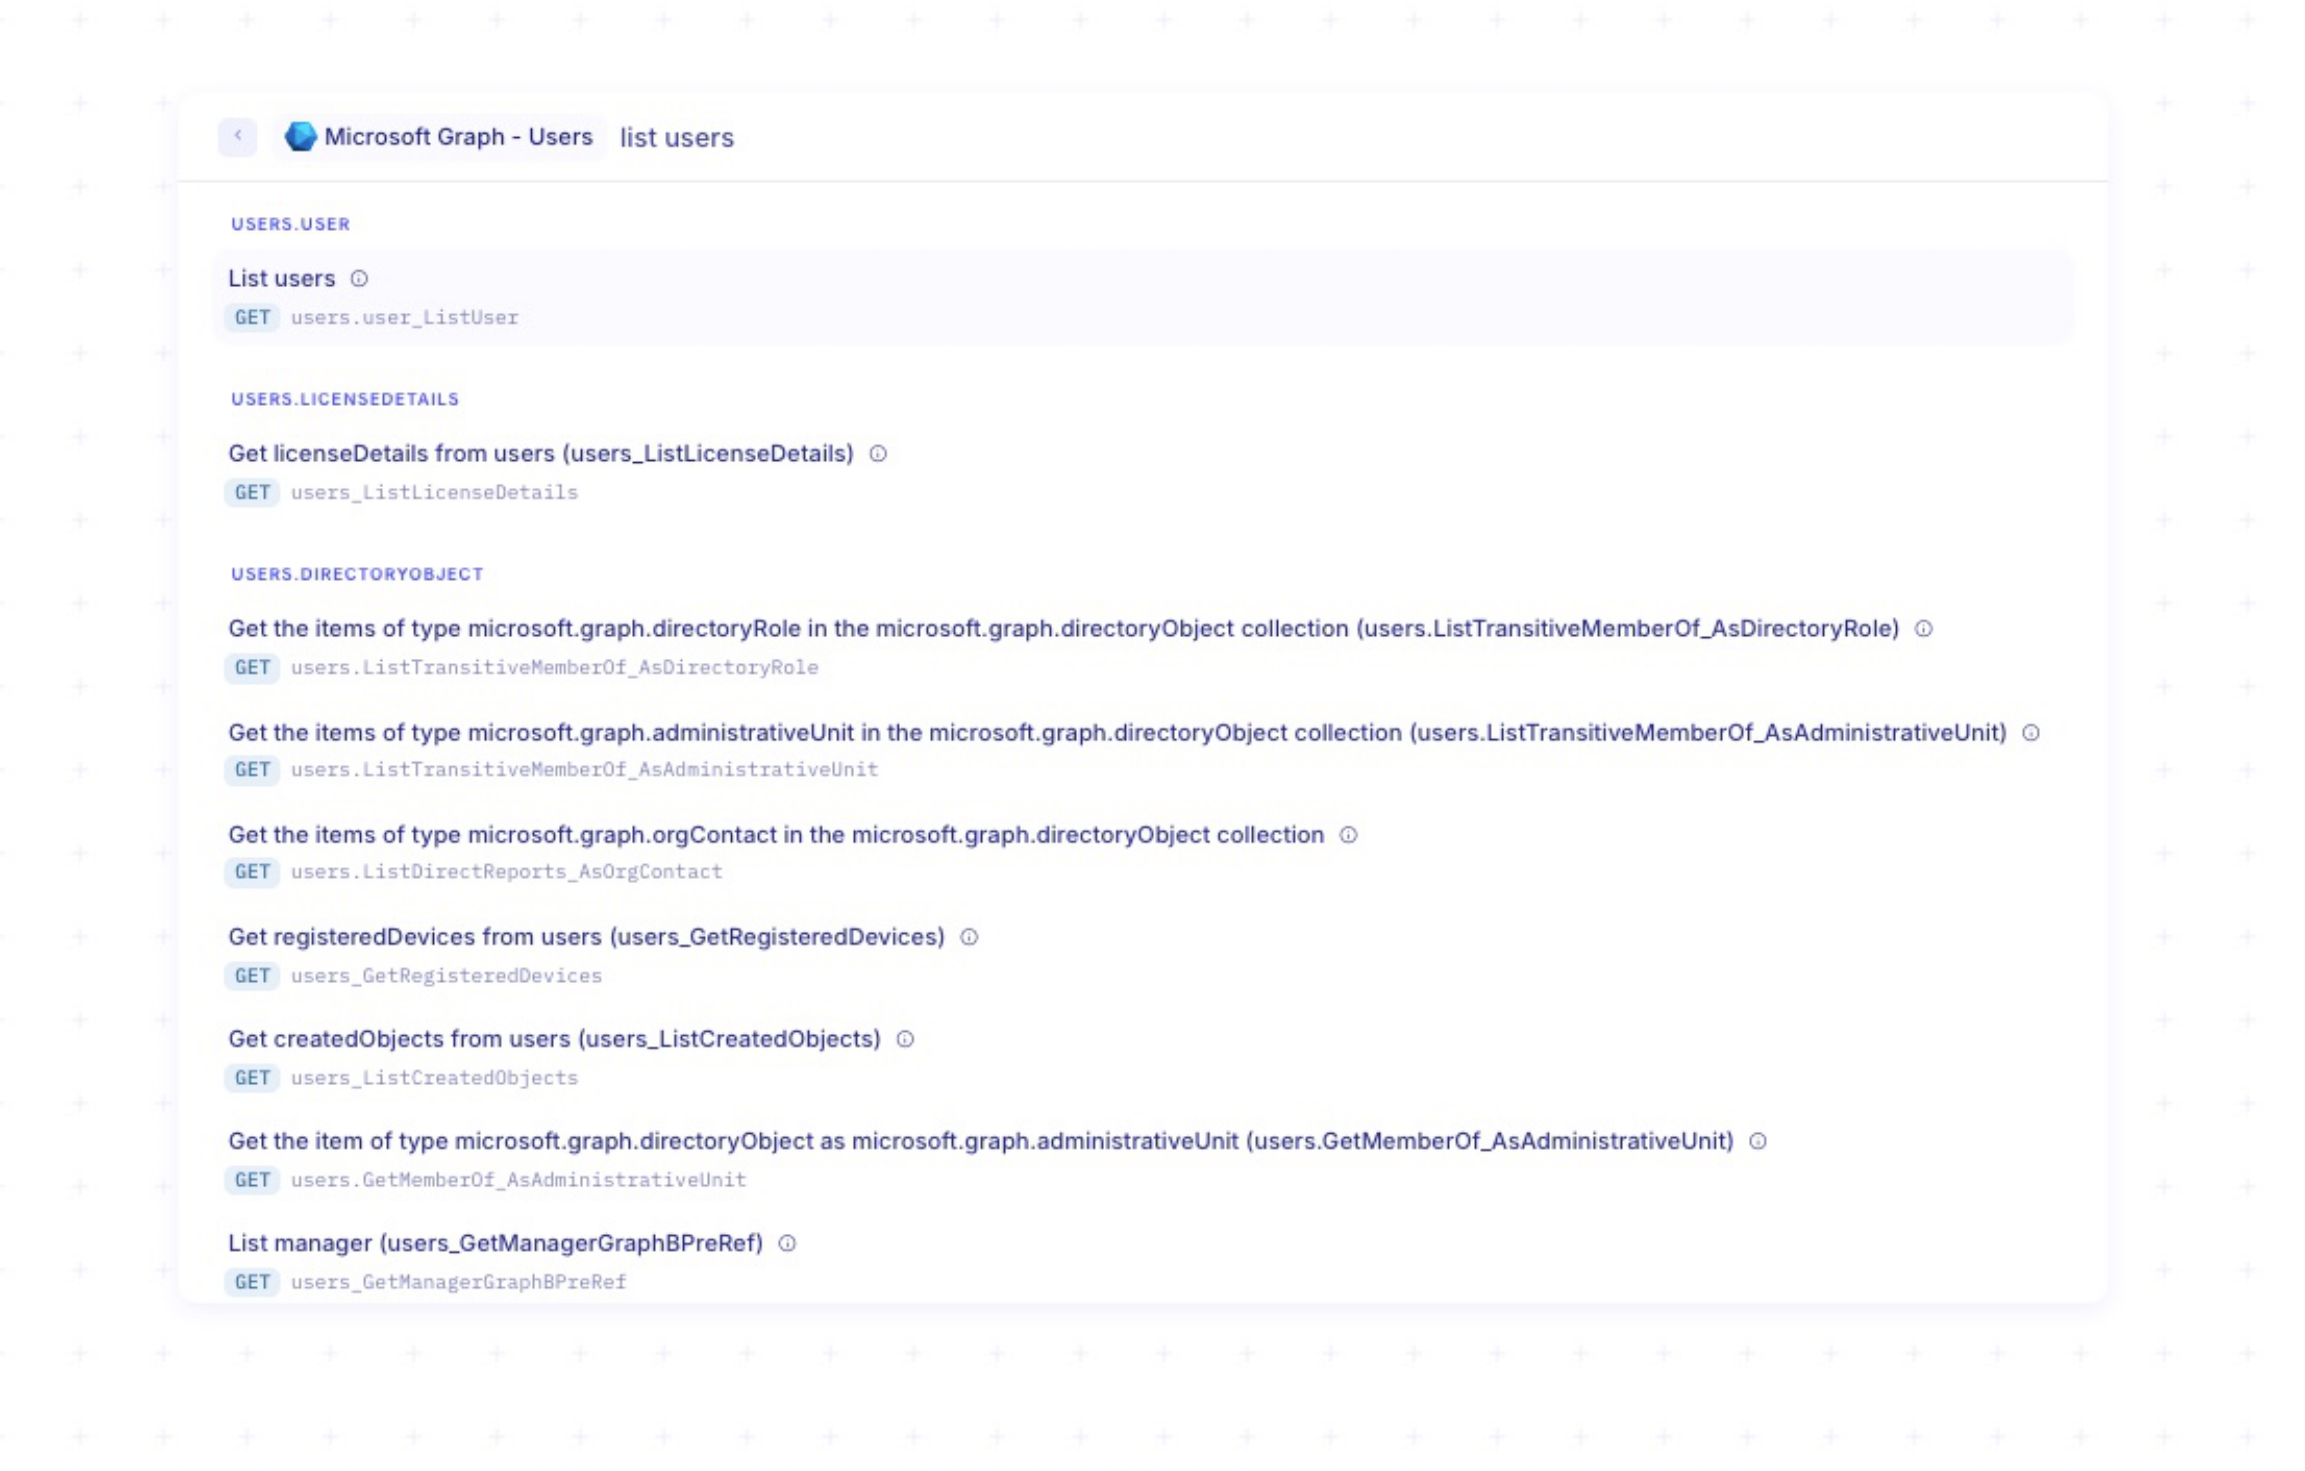
-
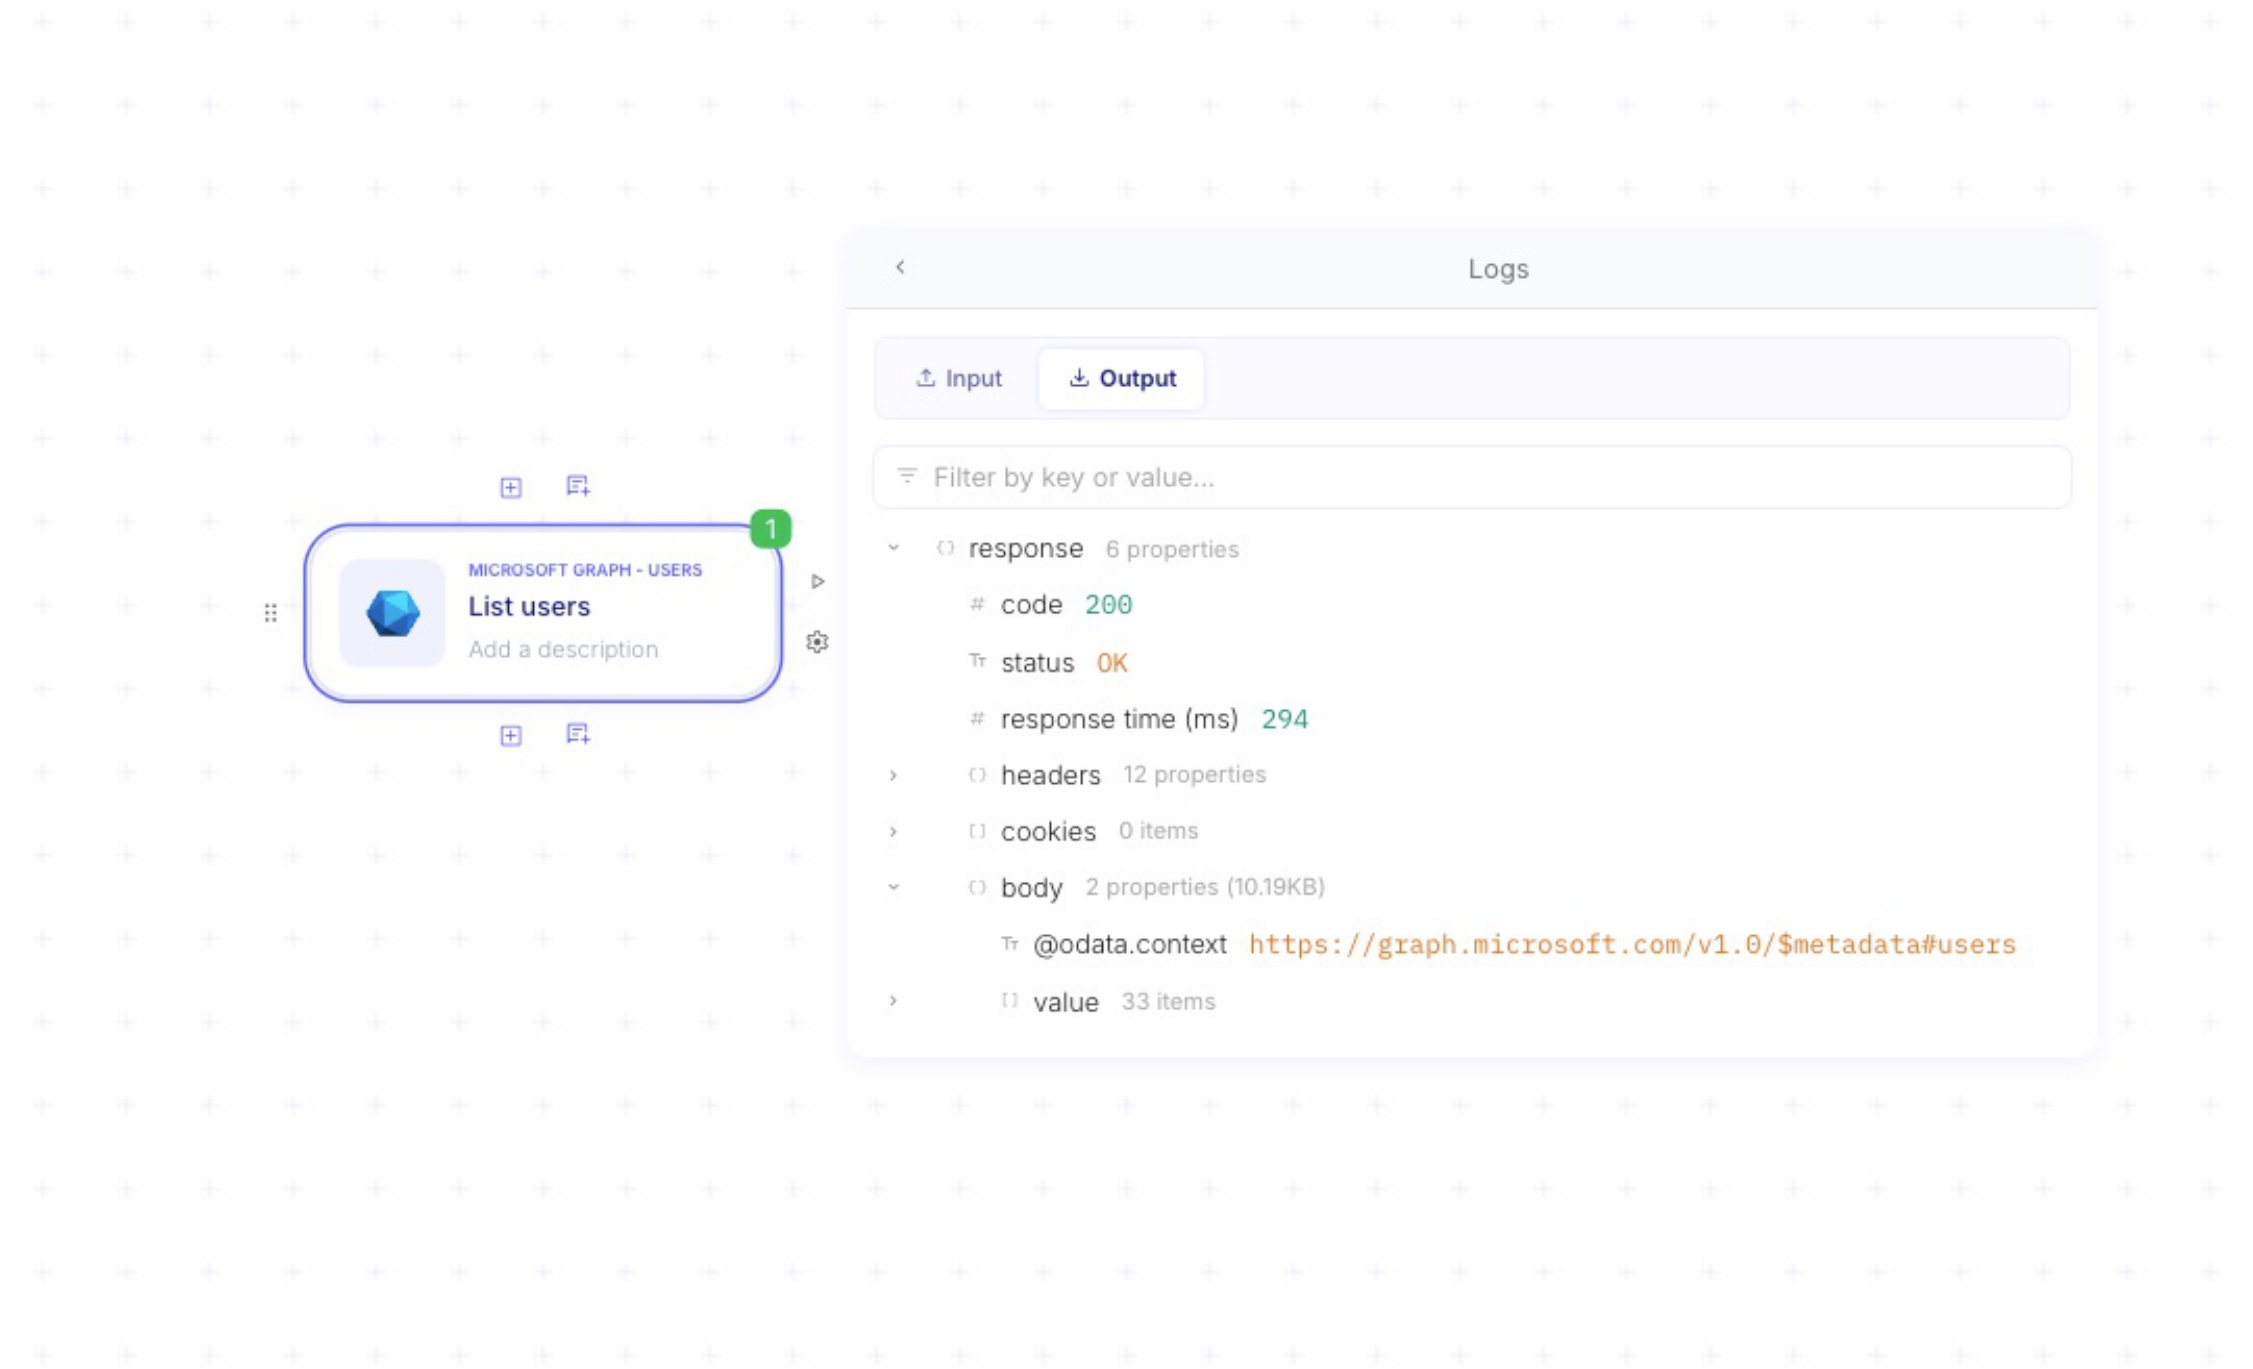
A successful integration will return a 200 OK status and the user data in the output logs.