

Atlassian OAuth 2.0 Application
OAuth 2.0 allows external applications and services to access Atlassian product APIs on a user’s behalf.
In order to create and manage an application to do OAuth 2.0. you need to connect to the developer console.
→ https://developer.atlassian.com/console/myapps/
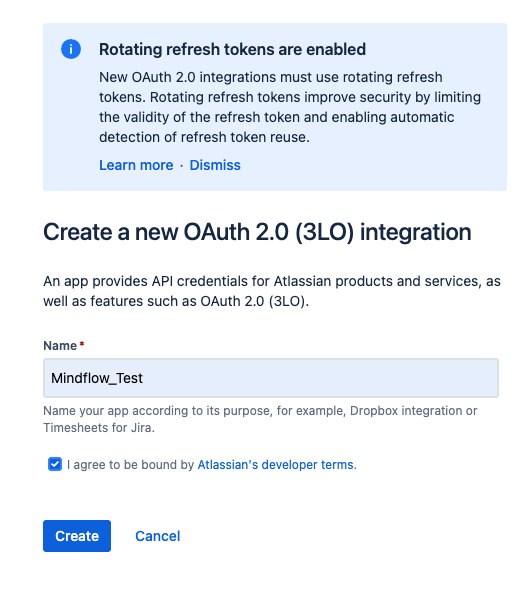
From the console, you need to Create a new OAuth 2.0 Integration.

Then define the name of your Application.
From the navigation bar :
-
Authorization

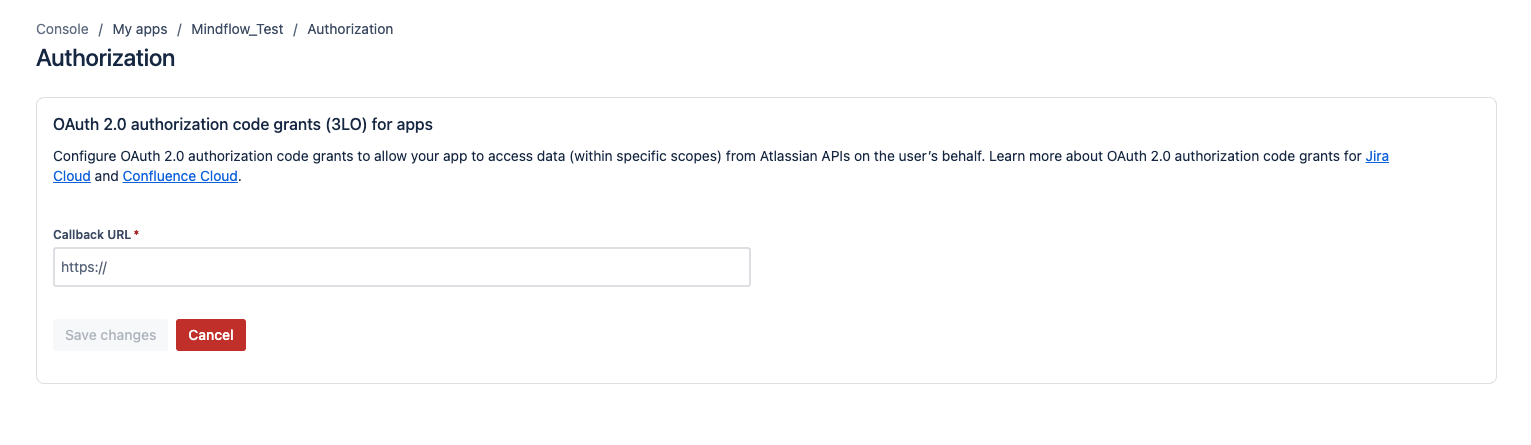
Add the URL callback:
https://credentials-[YOUR-INSTANCE-NAME].mindflow.dev/oauth2/callback -
then go to permissions :
-
You can set your application permissions for all of the following Atlassian products:
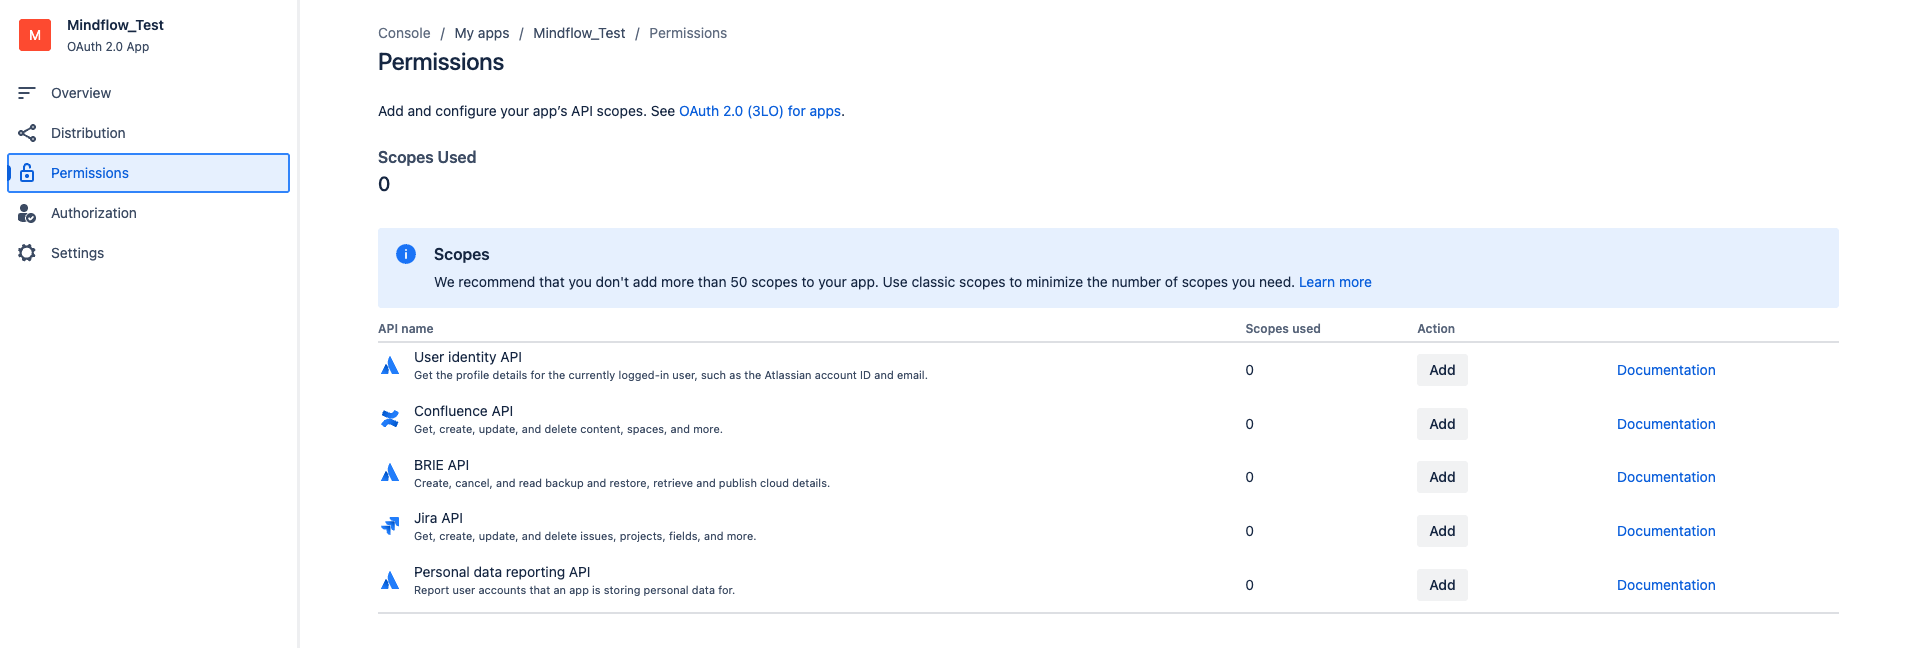
For example, if I select Jira :
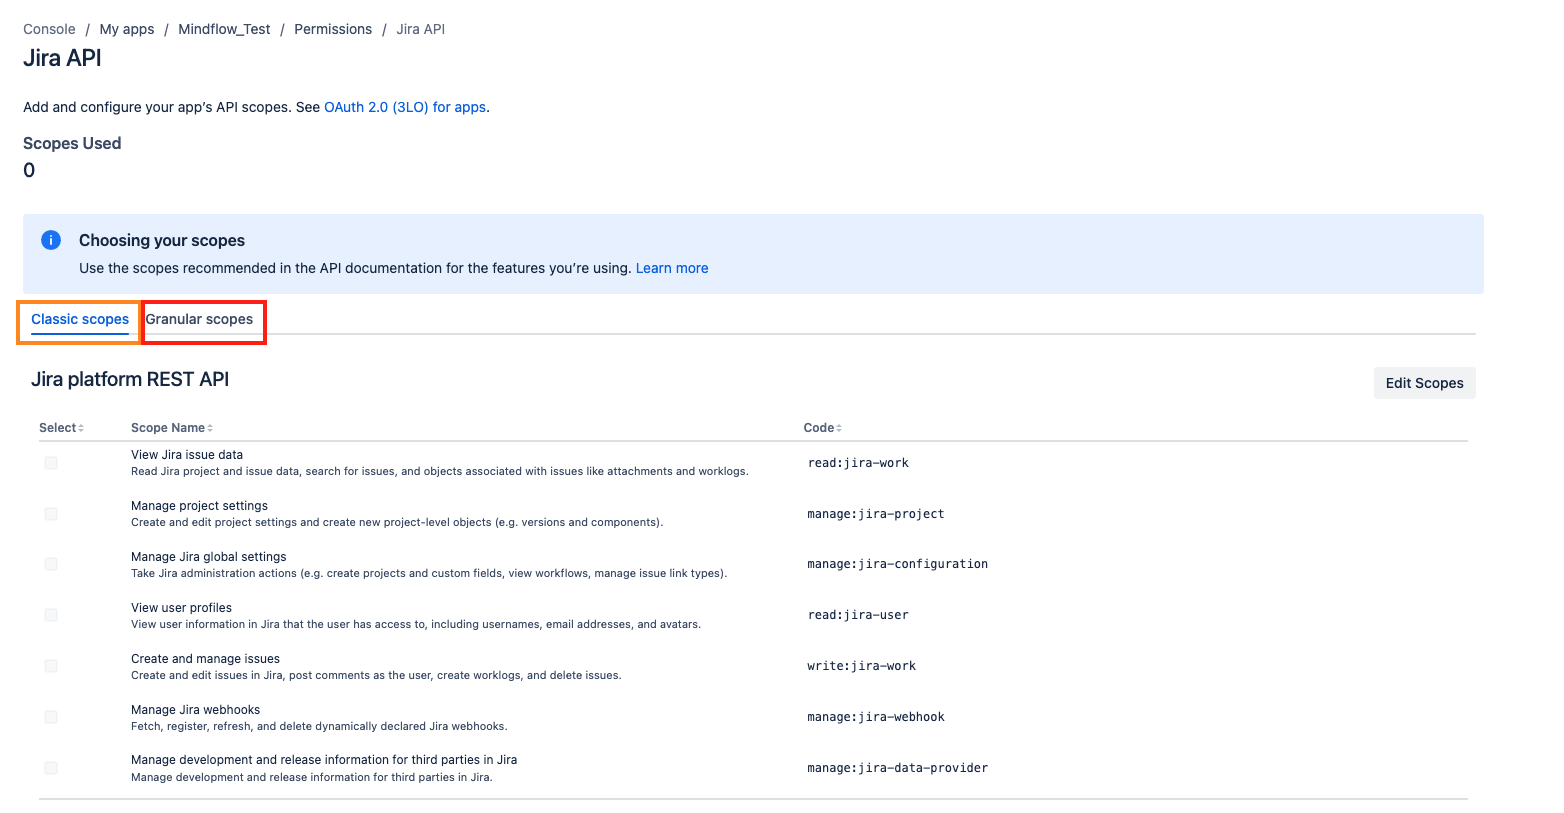
Scopes can be selected:
- Classic: general scopes on a resource
- Granular scope: define read/write access for each feature
- Then Settings :
- You can copy the Client ID/Secret to create the account in Mindflow
Now, in Mindflow, you can create a credential on a specific service or on the Atlassian portfolio so that your credential can be used on all Atlassian products. Then in Credential Type, you must select OAuth 2.0 Authorization Code
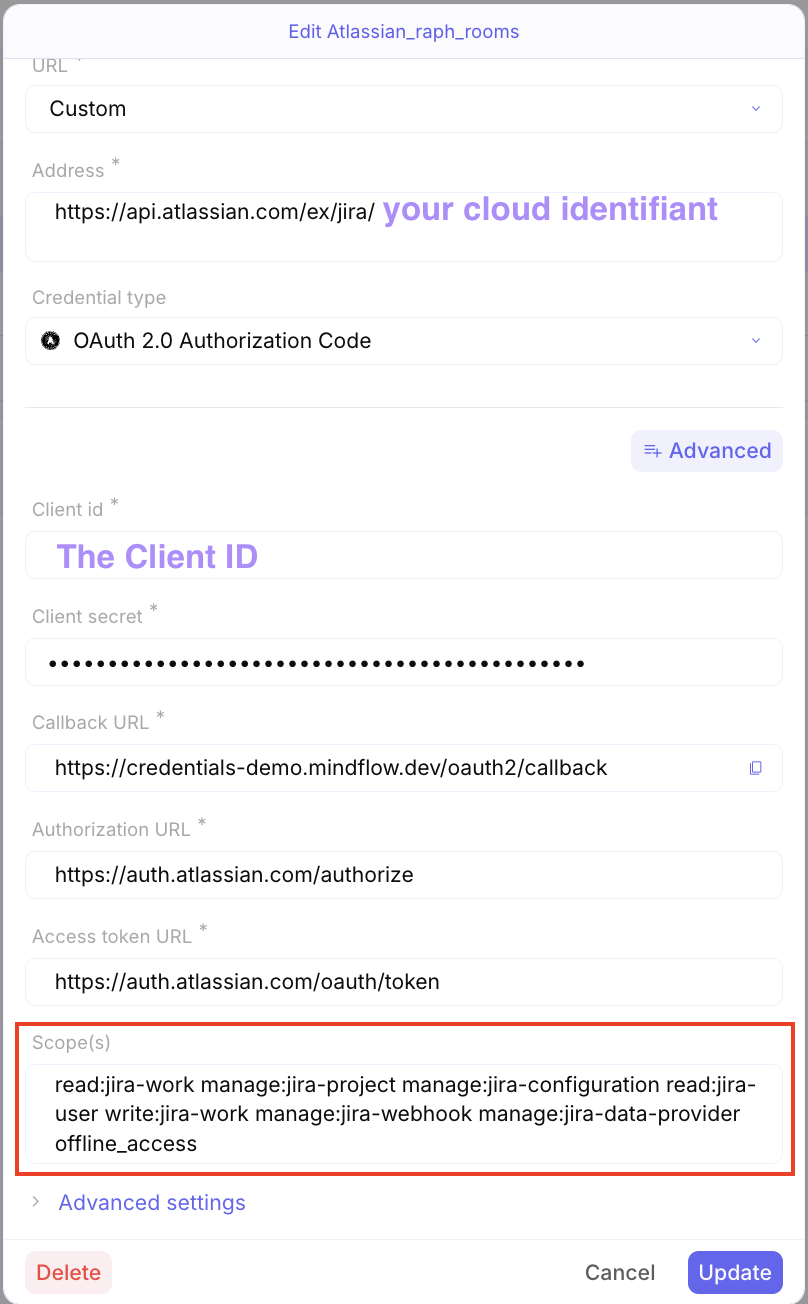
To retrieve your tenant’s cloud ID**: https://[your-instance-name].atlassian.net/_edge/tenant_info**
Add the following url with the cloudId retrieved from the previous page to the Address field :
https://api.atlassian.com/ex/jira/[cloudId]For the scopes, you need to copy all the selected classic scopes and then add offline_access as an additional scope.
When you click Authorize, an Atlassian window will open and you can define which organisation you want to authorize the application for from the list of organisations.
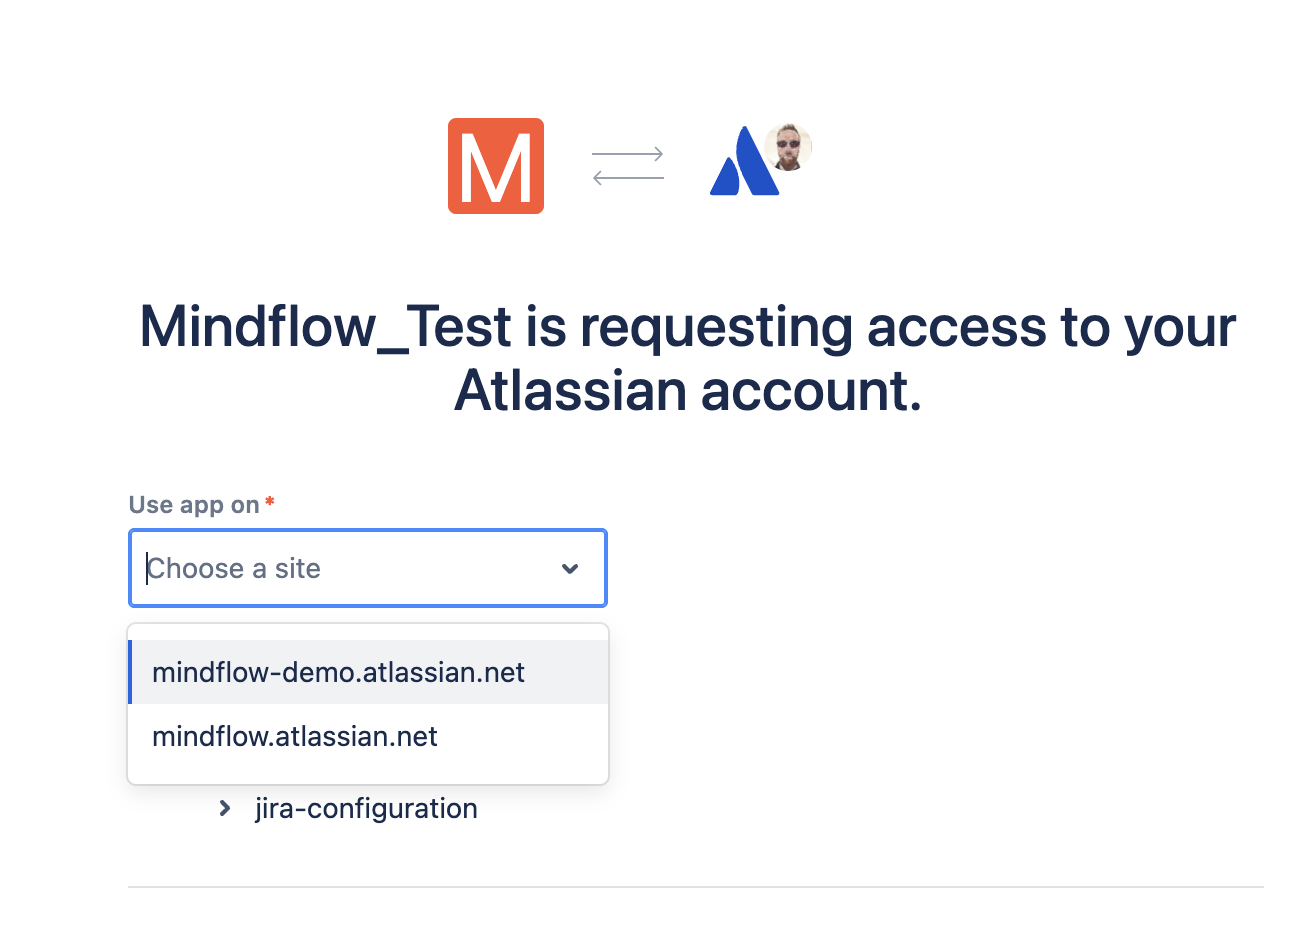
then Accept.