

Azure Sentinel
Introduction
Section titled “Introduction”This guide explains how to trigger Mindflow after creating a rule. Two methods are presented: via subscription to a rule and using a playbook to automate the process.
1. Triggering Mindflow via Subscription to a Rule for each alert
Section titled “1. Triggering Mindflow via Subscription to a Rule for each alert”Step 1: Create an App Registration with the Correct Permissions
Section titled “Step 1: Create an App Registration with the Correct Permissions”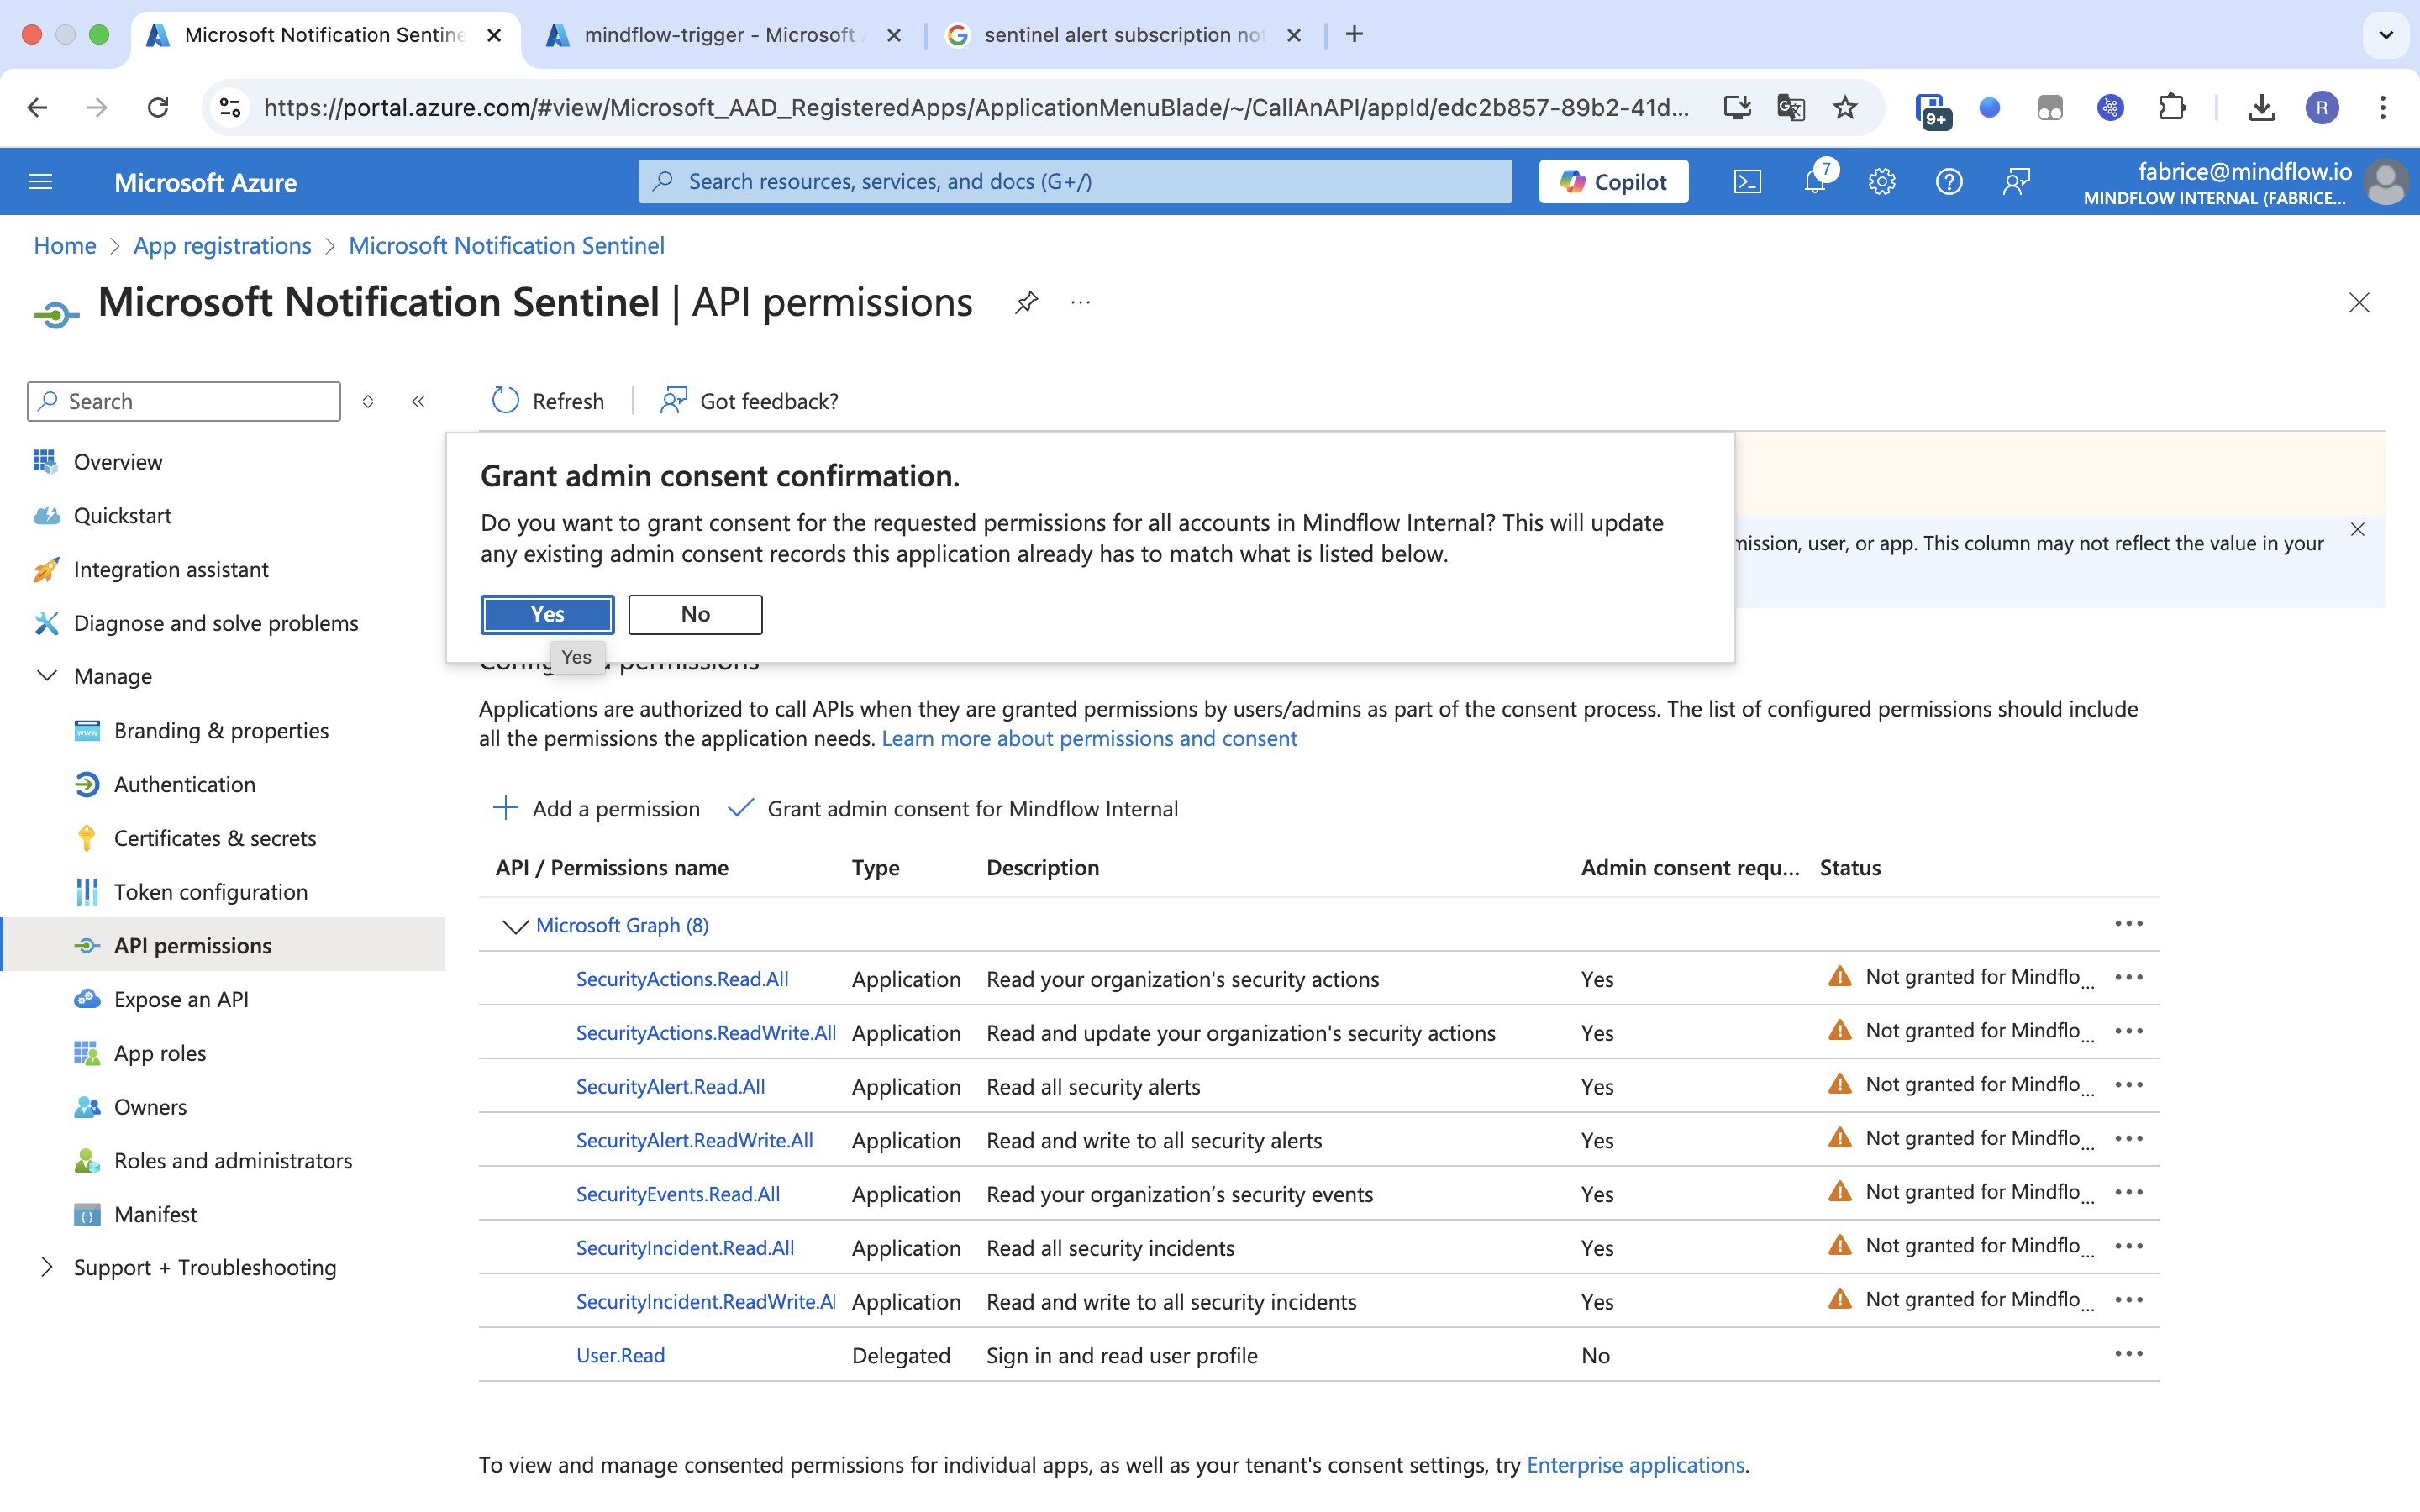
Step 2: Configure Authentication in Mindflow
Section titled “Step 2: Configure Authentication in Mindflow”-
Retrieve the client ID and Secret.
-
Create a credential in Mindflow using this information.
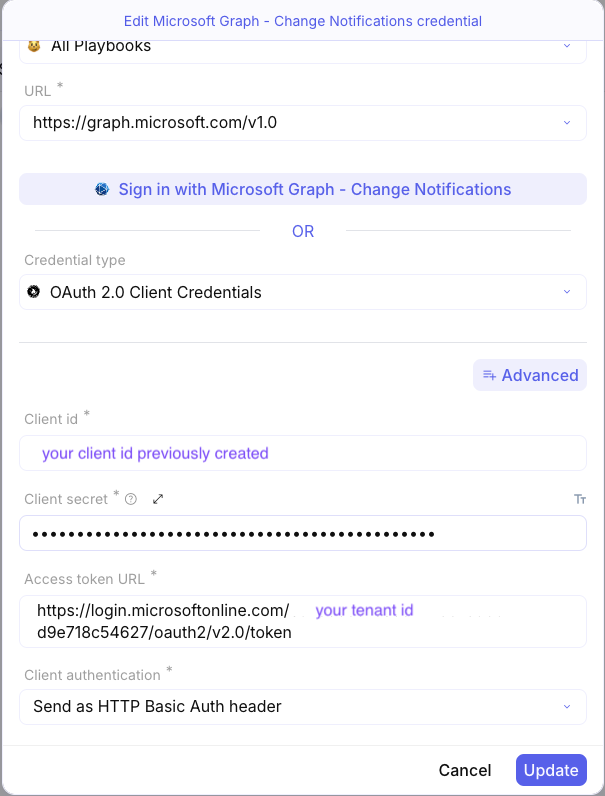
Step 3: Create the main playbook to Respond to Incidents
Section titled “Step 3: Create the main playbook to Respond to Incidents”-
First of all, add a token validation branch at the beginning of the main playbook to validate the
validationTokenwhen creating the subscription.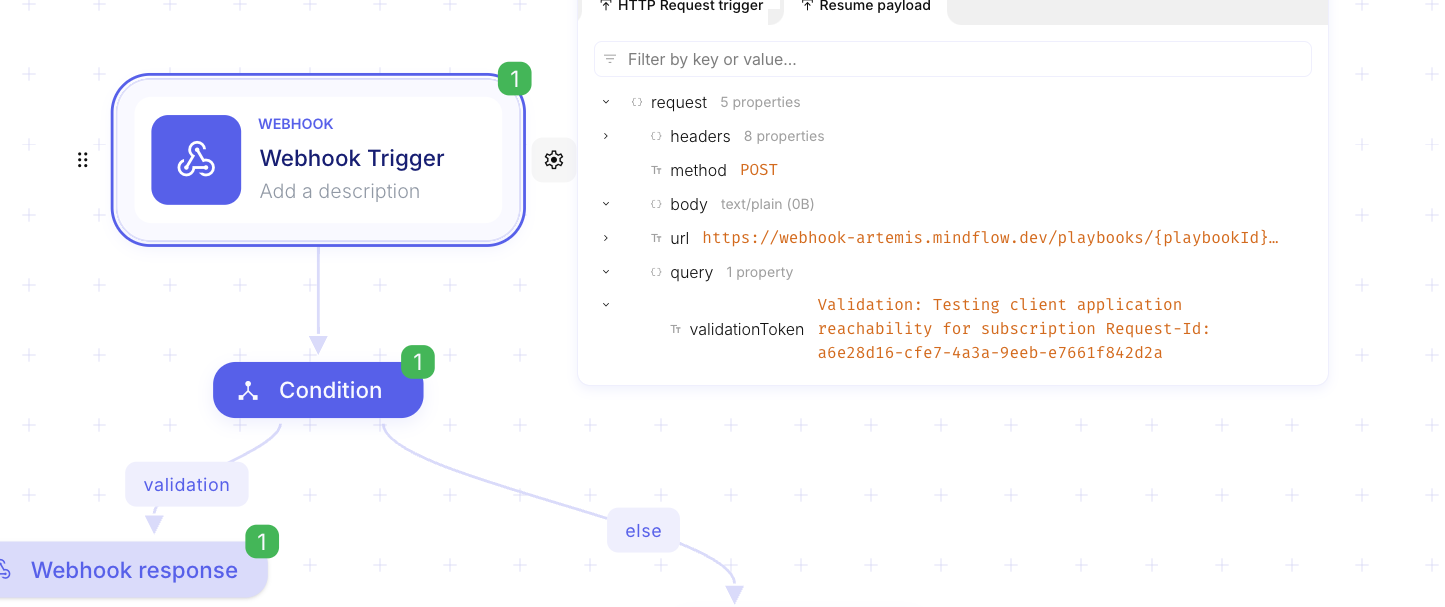
At the time of subscription creation, Microsoft sends a request to the main playbook to validate the token. Therefore, a branch needs to be implemented to handle this case.
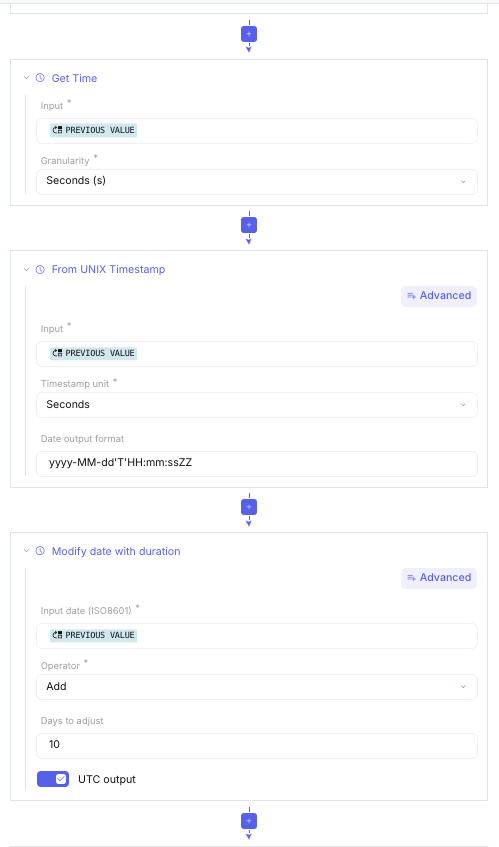
Step 4: Set Up a Playbook for Subscription Renewal
Section titled “Step 4: Set Up a Playbook for Subscription Renewal”- The maximum duration of a subscription is 30 days.
- Create a playbook that runs at regular intervals to renew the subscription.
- Use the Create a Subscription operation with the following parameters:
- **Change Type**: `updated` - **Expiration date time**: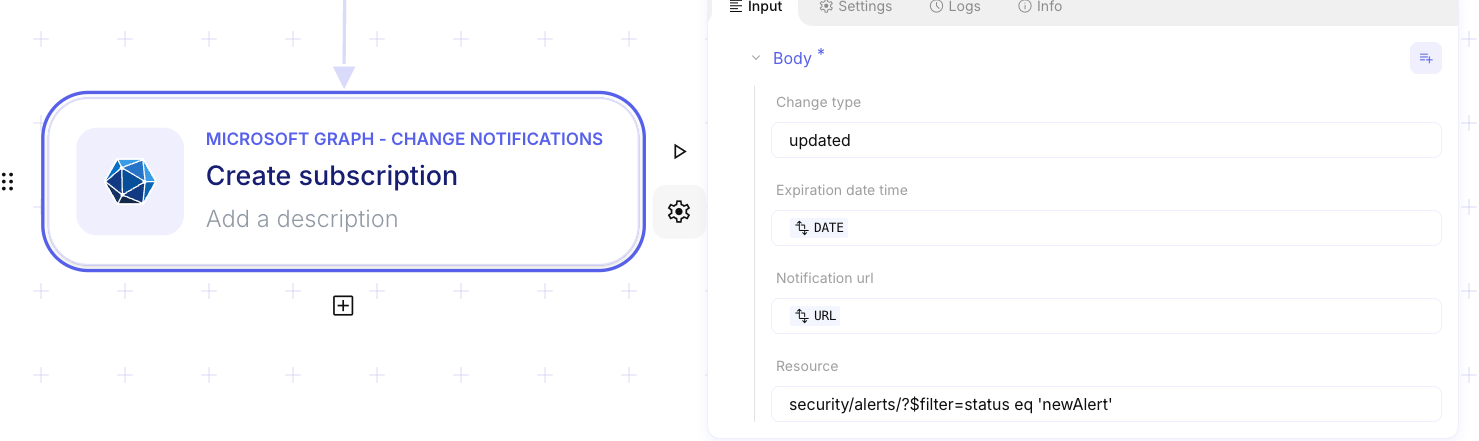 - **Notification URL**: synchronous URL of the main playbook - **Resource**: `security/alerts/?$filter=status eq 'newAlert'`
### Step 5: Handle New Alerts via Webhook
- Once the subscription is created, each new alert generates a **webhook request**.- This request contains a **unique incident ID**.
<div class="docs-screenshot-compact">

</div>
- Use the **Get Alert** operation to retrieve all the alert properties.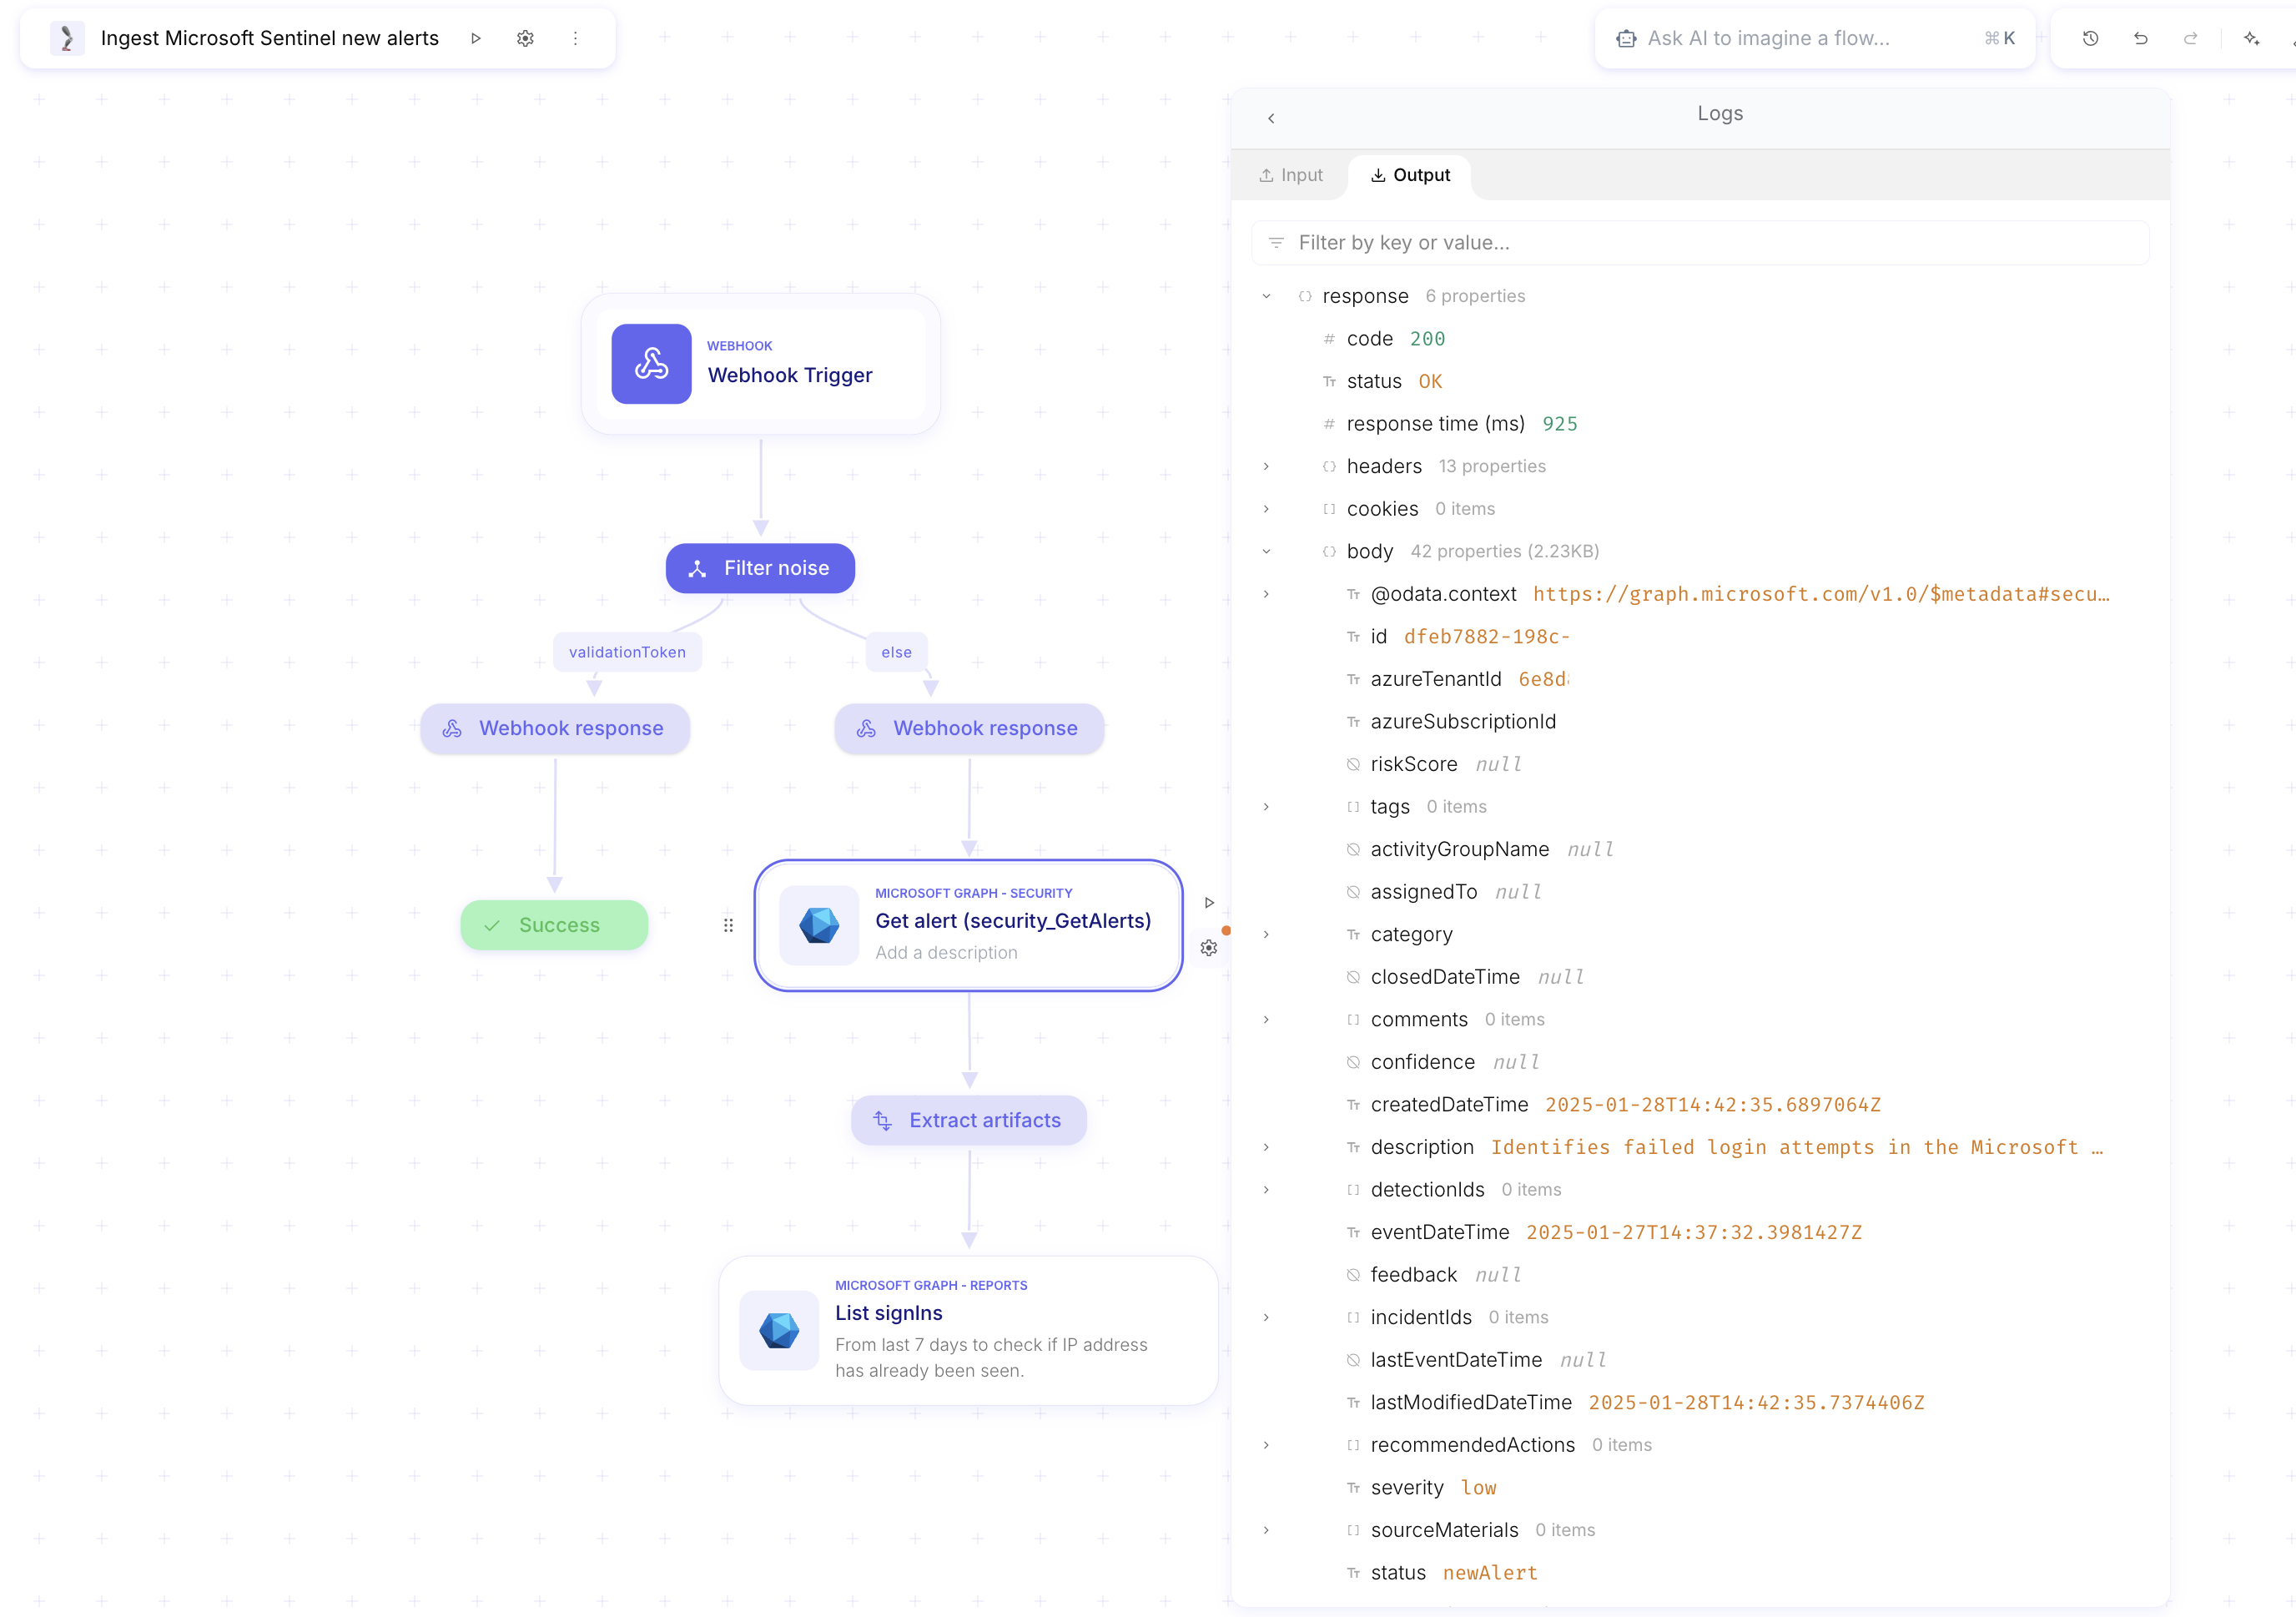
2. Triggering Mindflow for every incident
Section titled “2. Triggering Mindflow for every incident”In the example, we will send all incidents to automation, but it is possible to create rules that tag incidents based on their incident type and filter alerts through a condition to determine which ones will trigger automation.
1. Via LogicApps by Creating an Automation rule
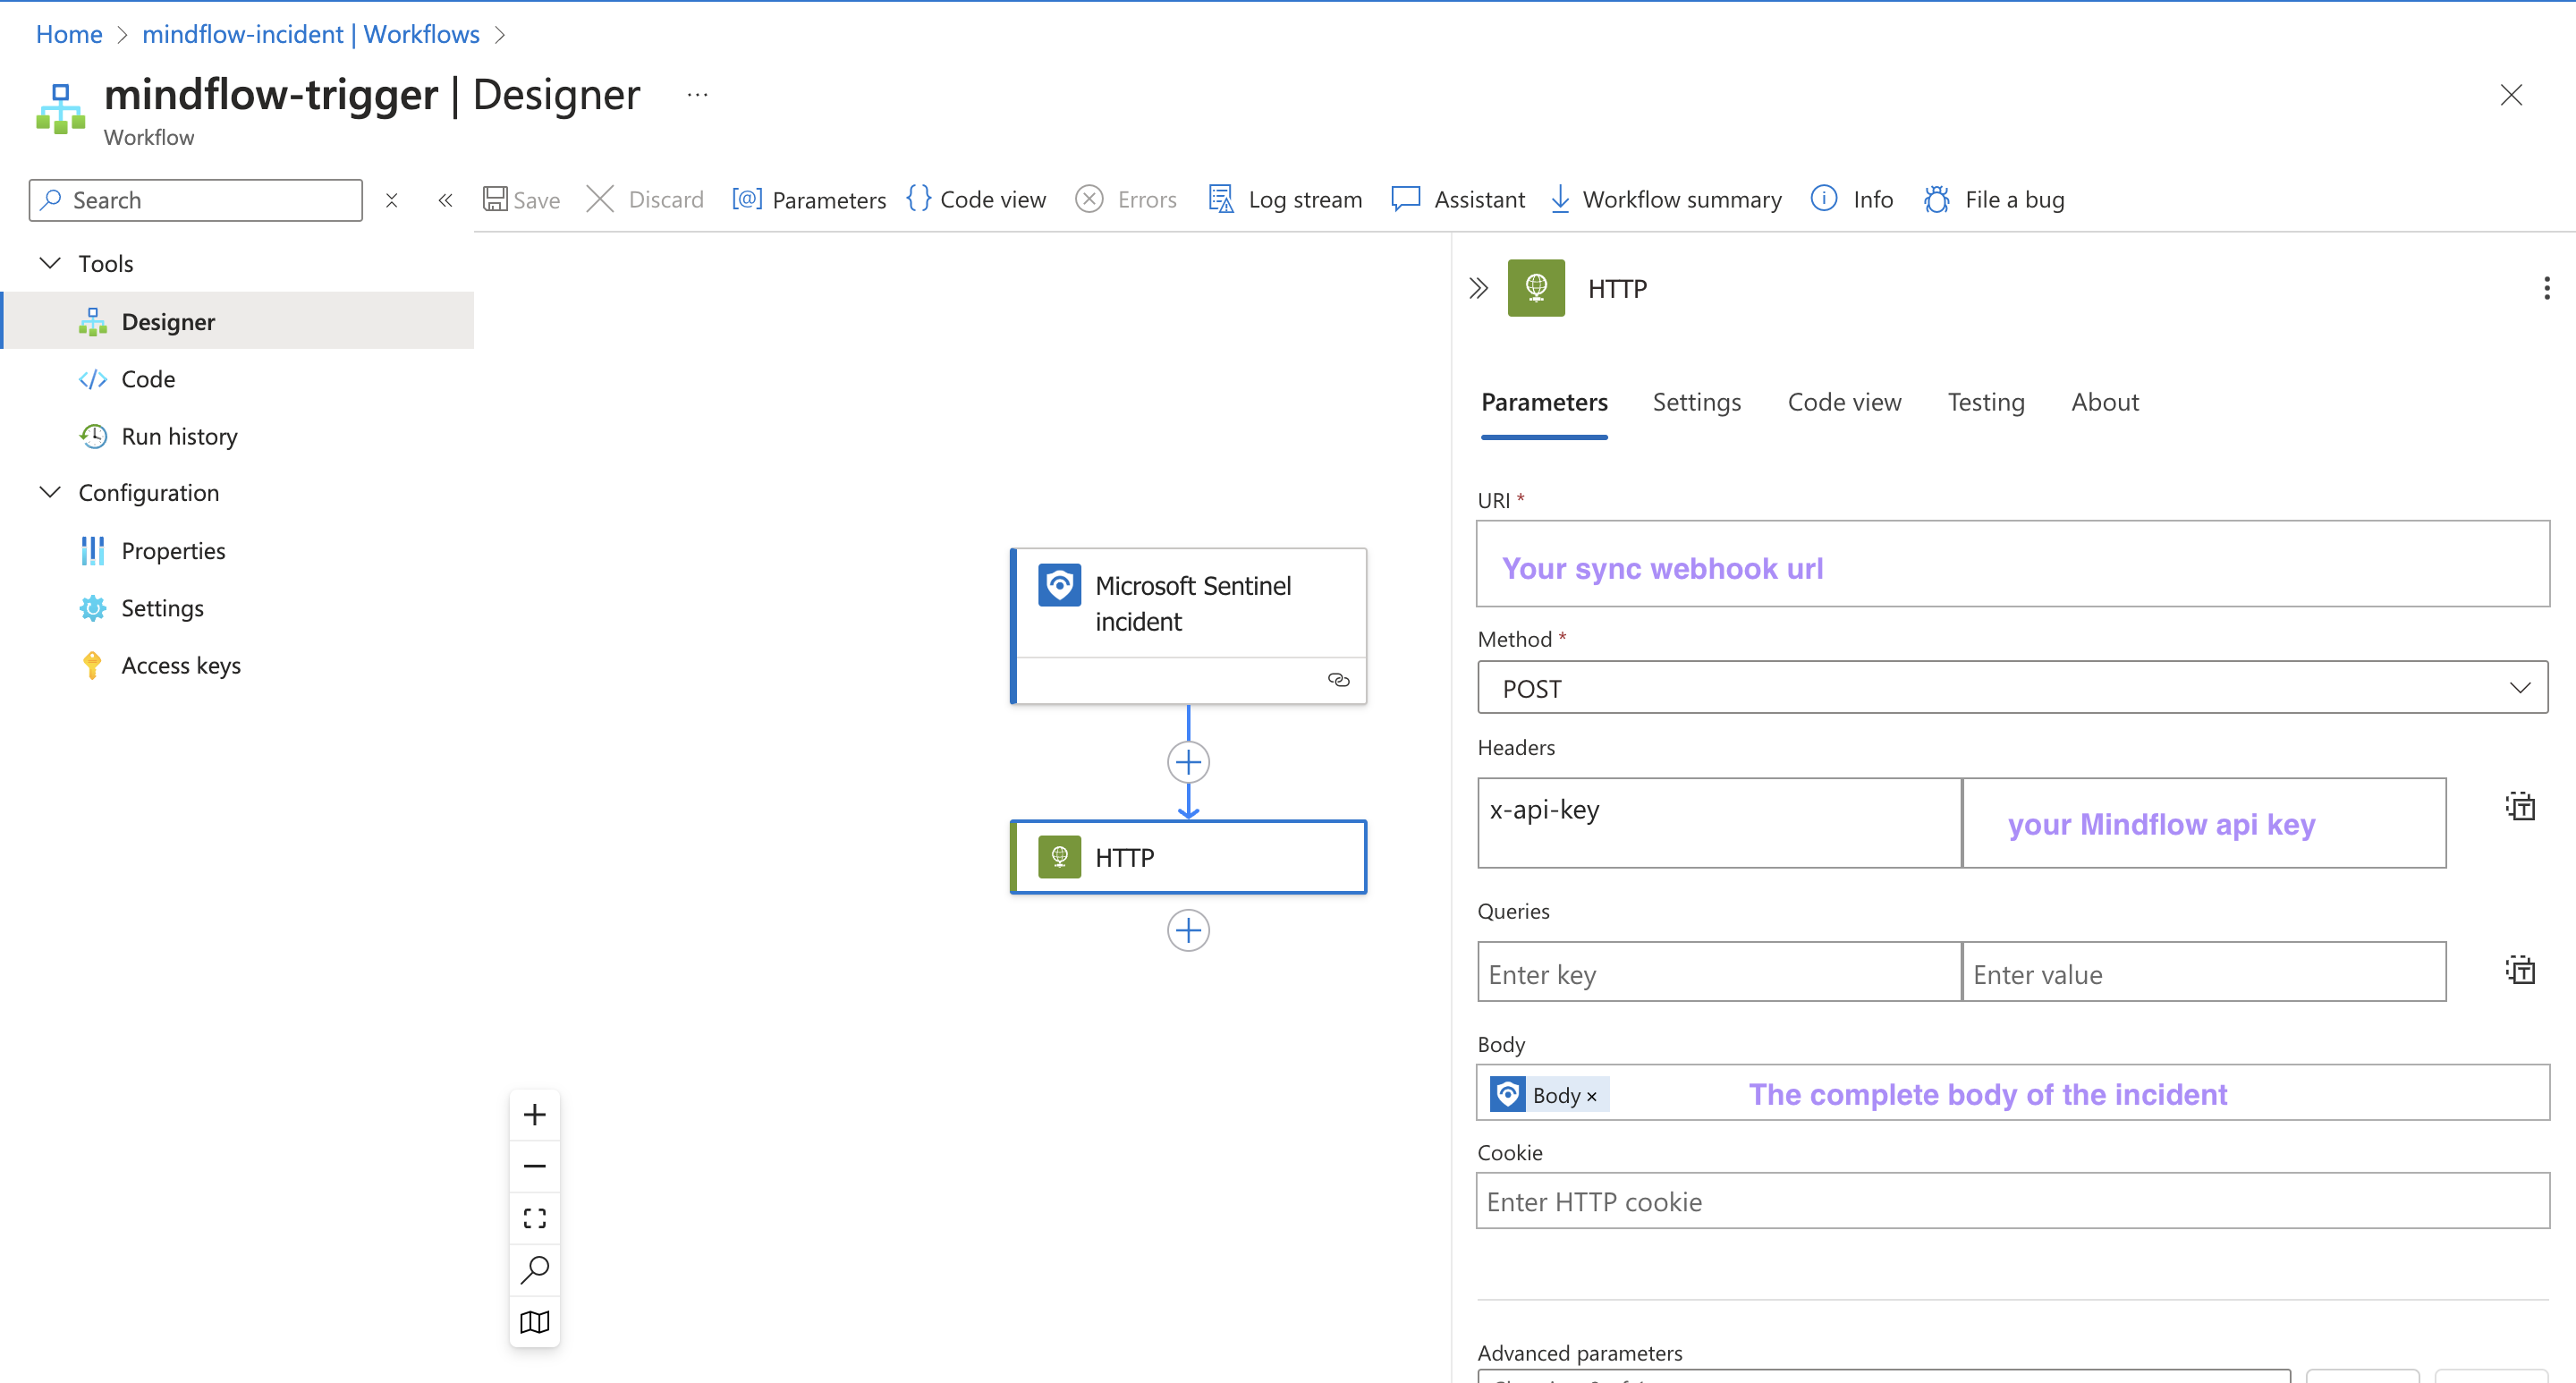
Section titled “1. Via LogicApps by Creating an Automation rule”Step 1: Set Up a Stateful Workflow in Logic Apps
Section titled “Step 1: Set Up a Stateful Workflow in Logic Apps”-
First of all, you must create a stateful workflow, then use Microsoft Sentinel Incident as a trigger. (cf screenshot)
Step 2: Grant Permissions in Sentinel Automation
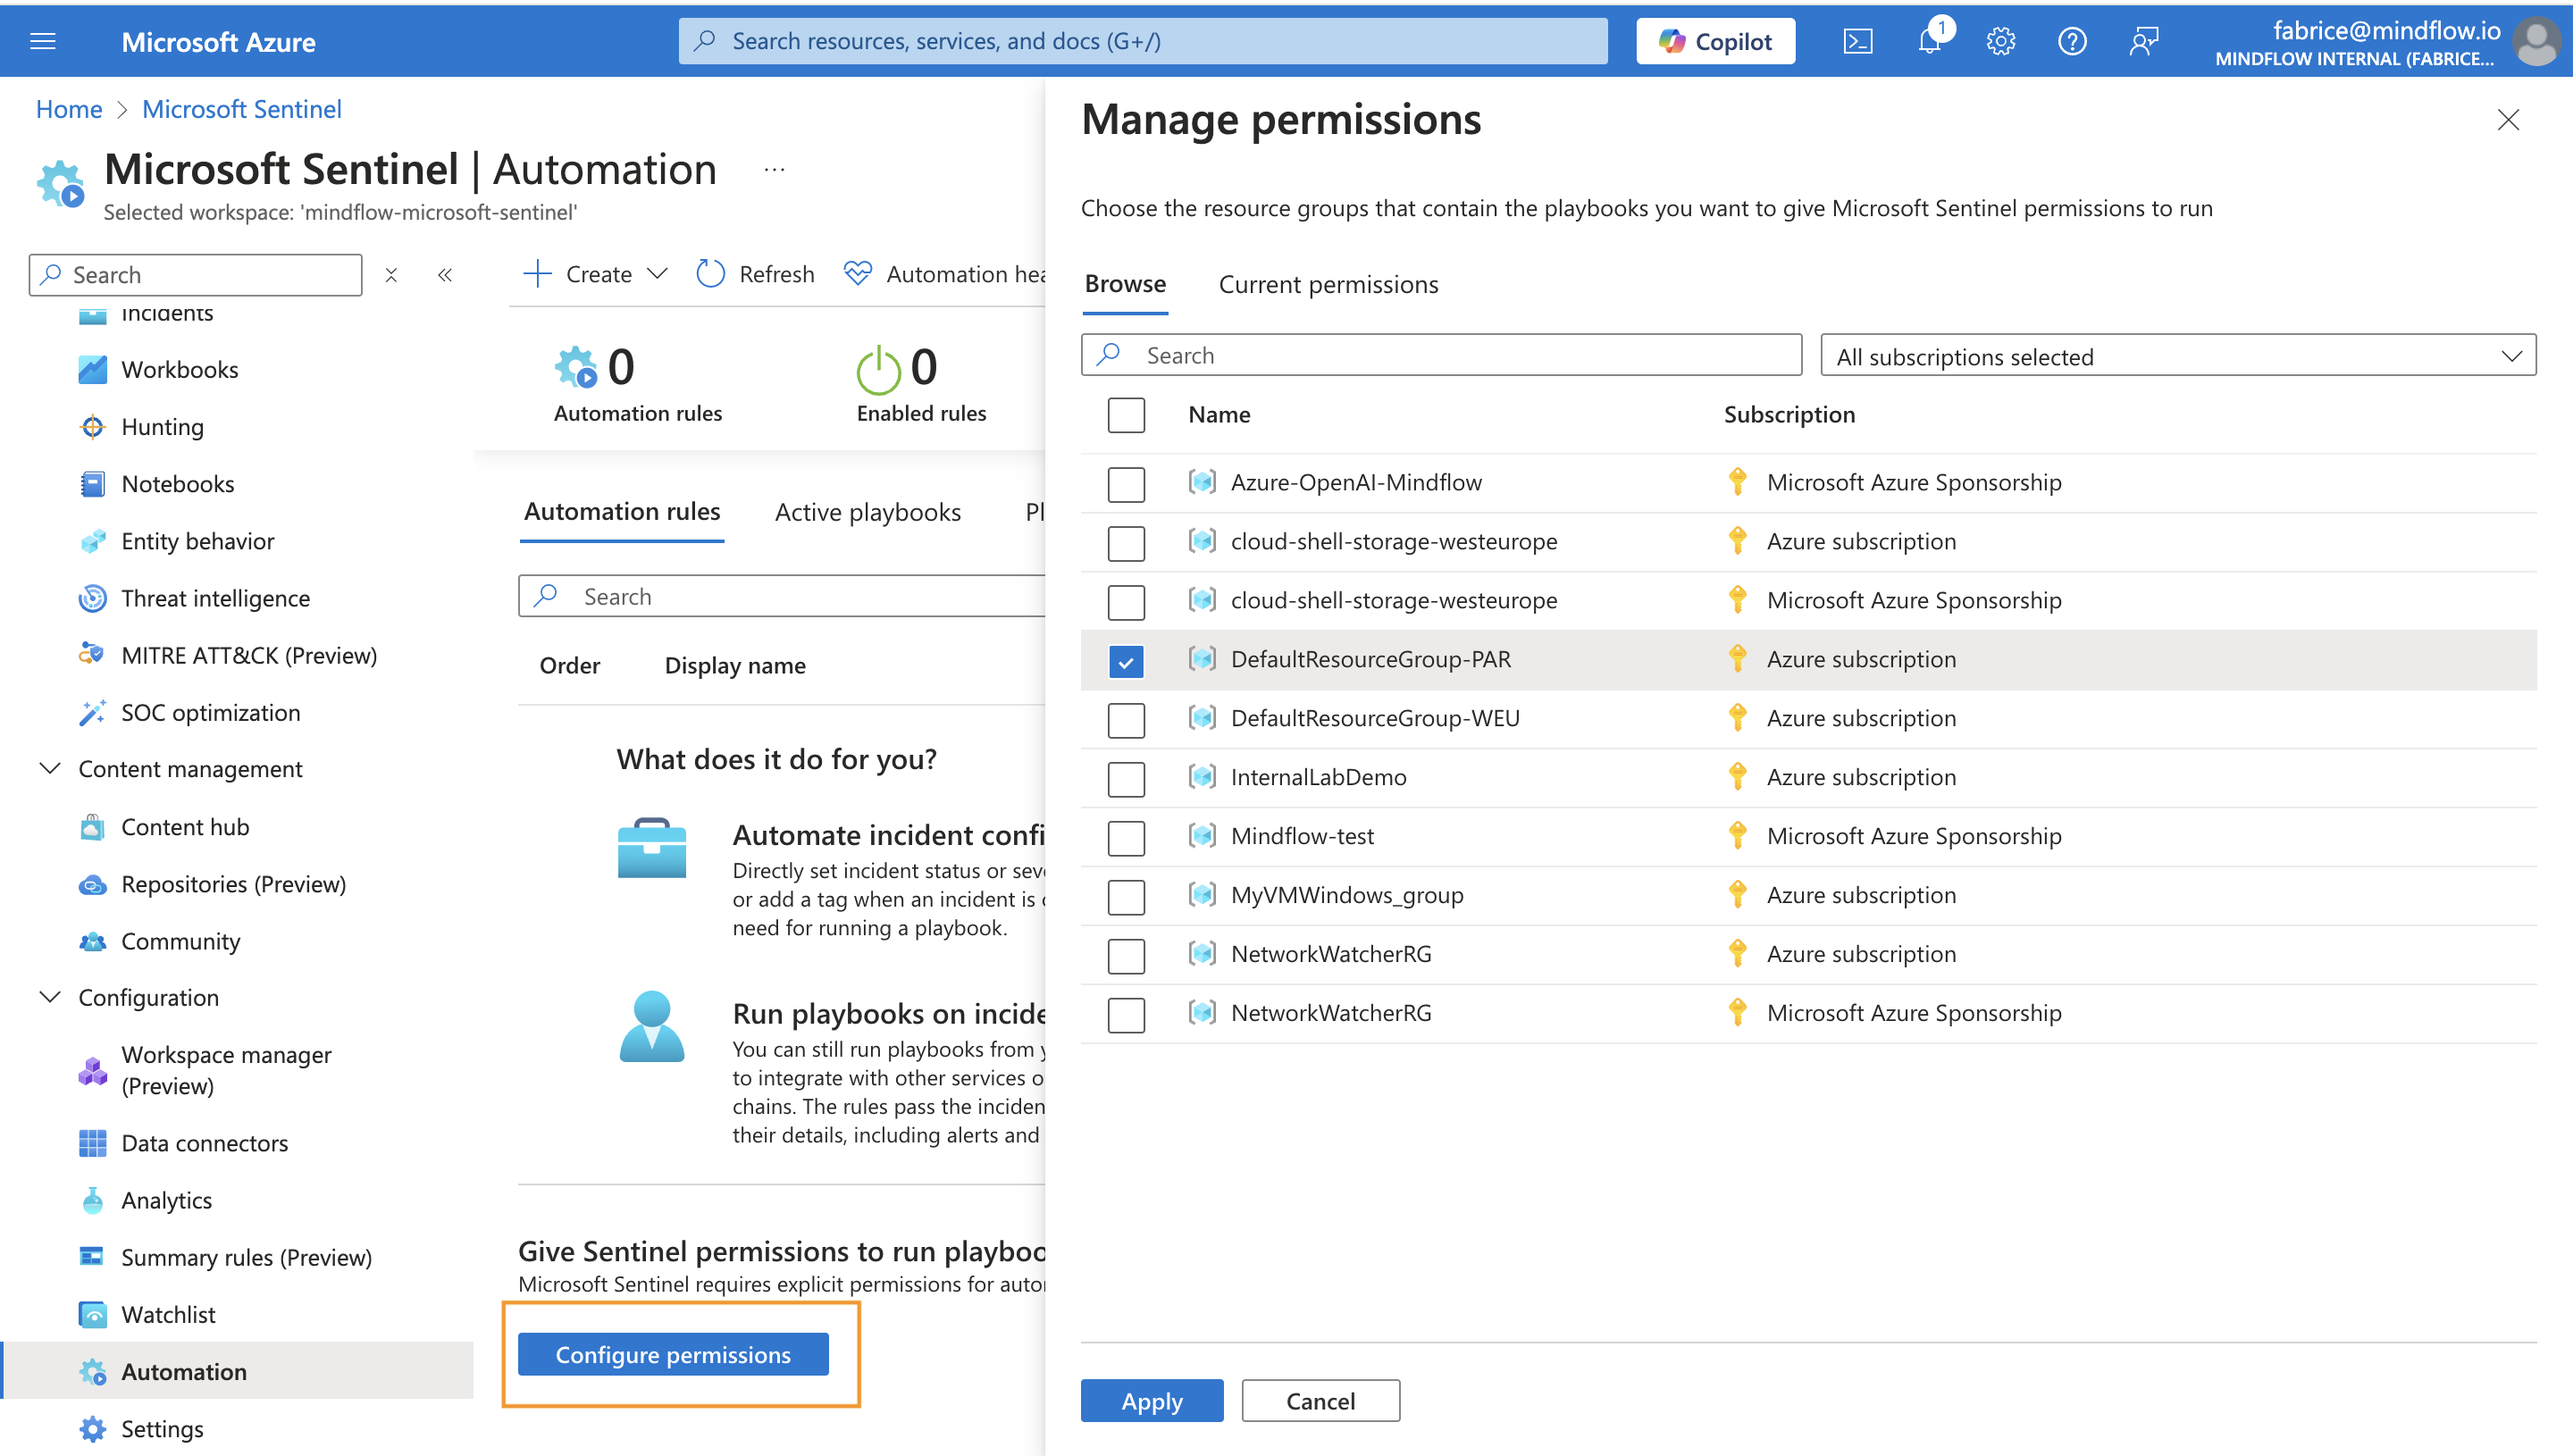
Section titled “Step 2: Grant Permissions in Sentinel Automation”-
Select the subscription of your Logic App Workflow and grant the required permissions.
-
Then set up automation for the workflow.
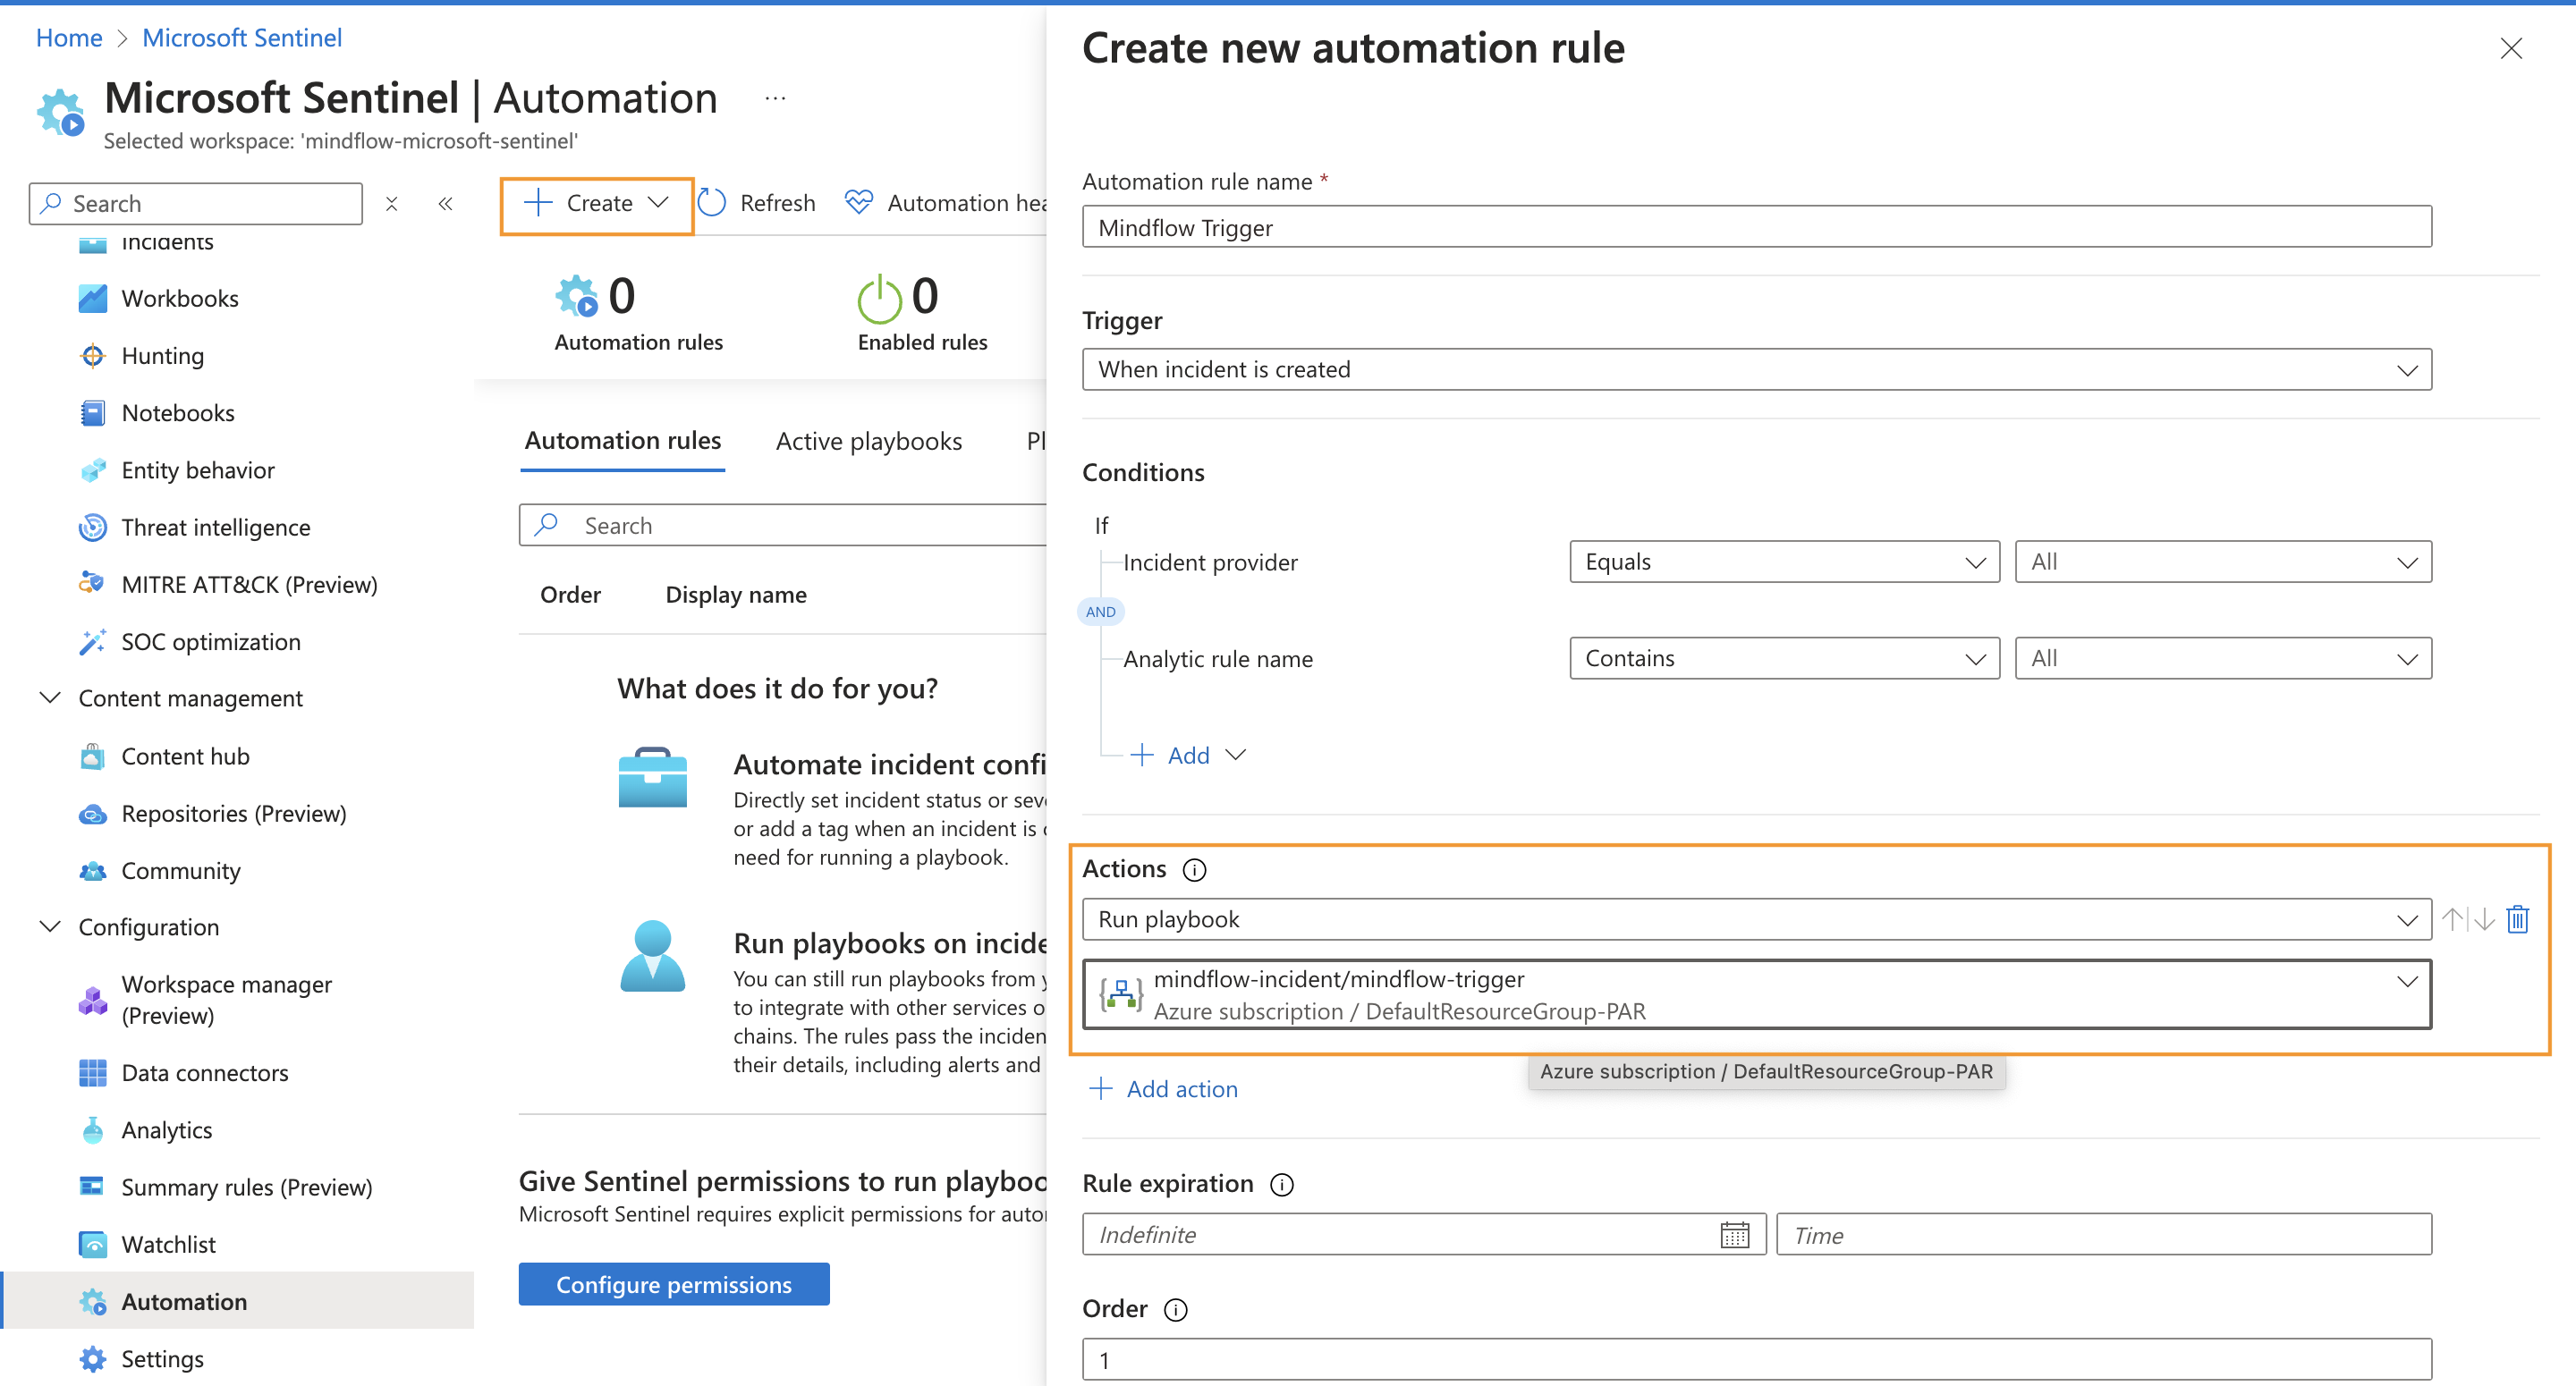
Step 3: Configure Mindflow Integration
Section titled “Step 3: Configure Mindflow Integration”-
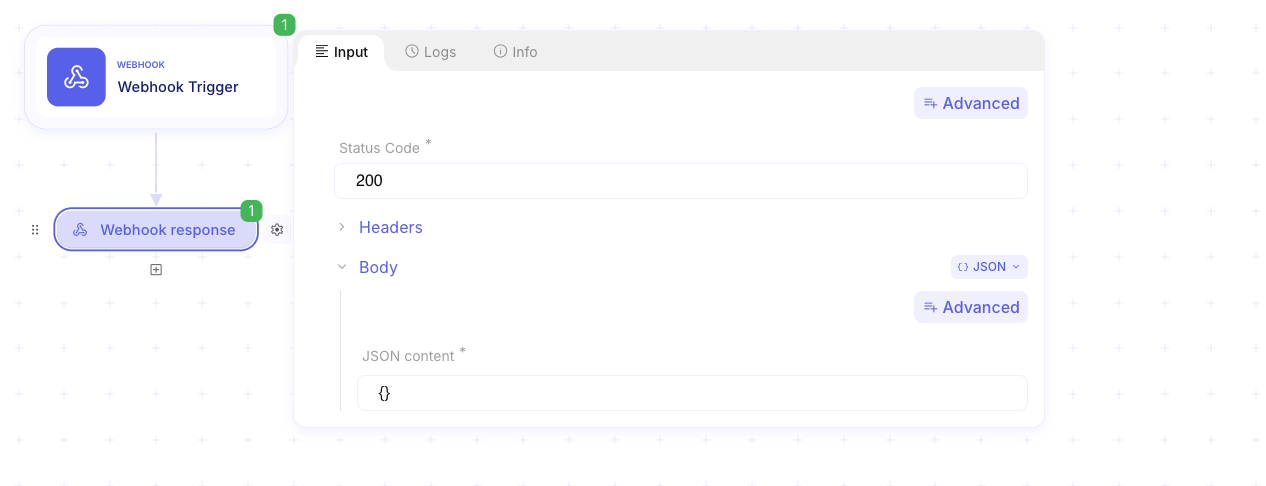
Ensure synchronization to use the Webhook response step since LogicApps expects JSON in return, whereas Mindflow sends text by default.
-
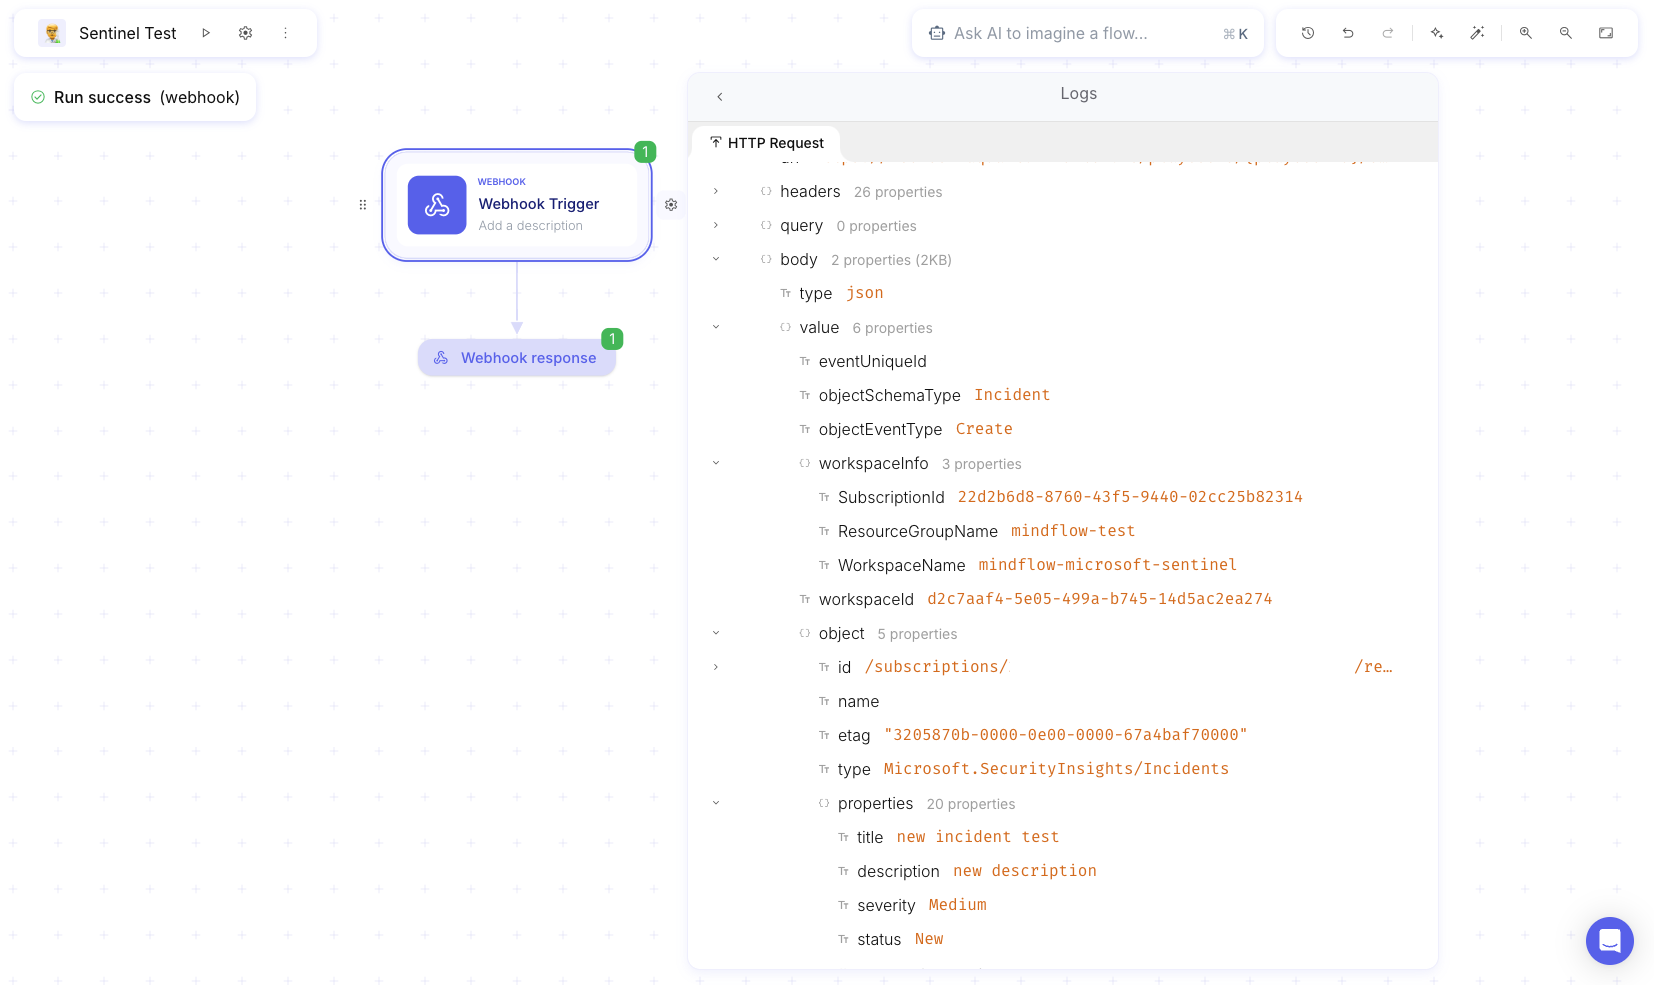
Once an incident is created (either automatically via a rule or manually), the workflow will handle it accordingly. (cf screenshot)
2. Via Mindflow playbook
Section titled “2. Via Mindflow playbook”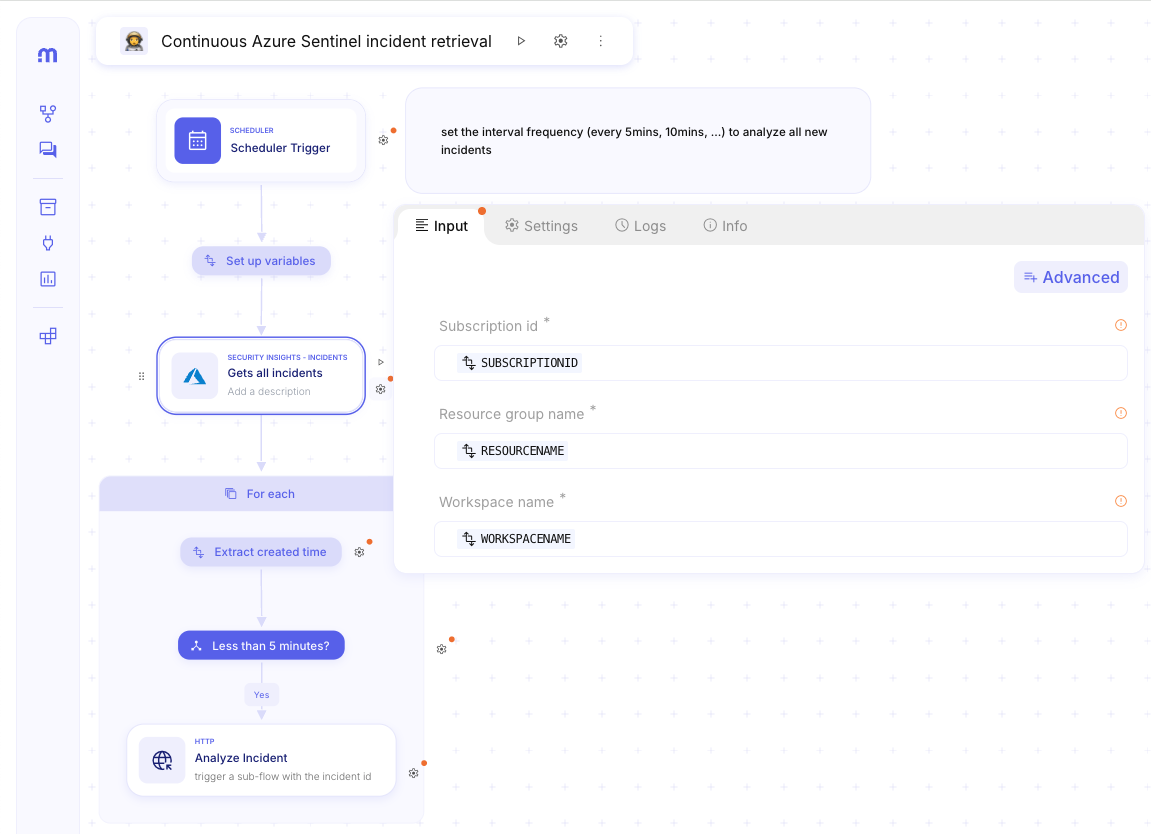
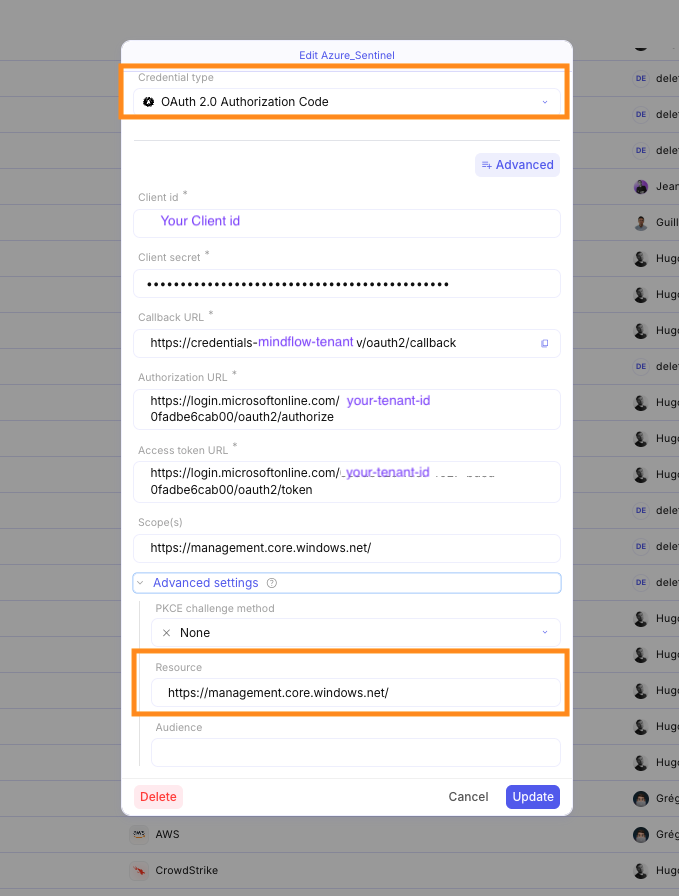
To retrieve the list of incidents, you need to create a new credential in Mindflow with the OAuth 2.0 Authorization Code authentication type.
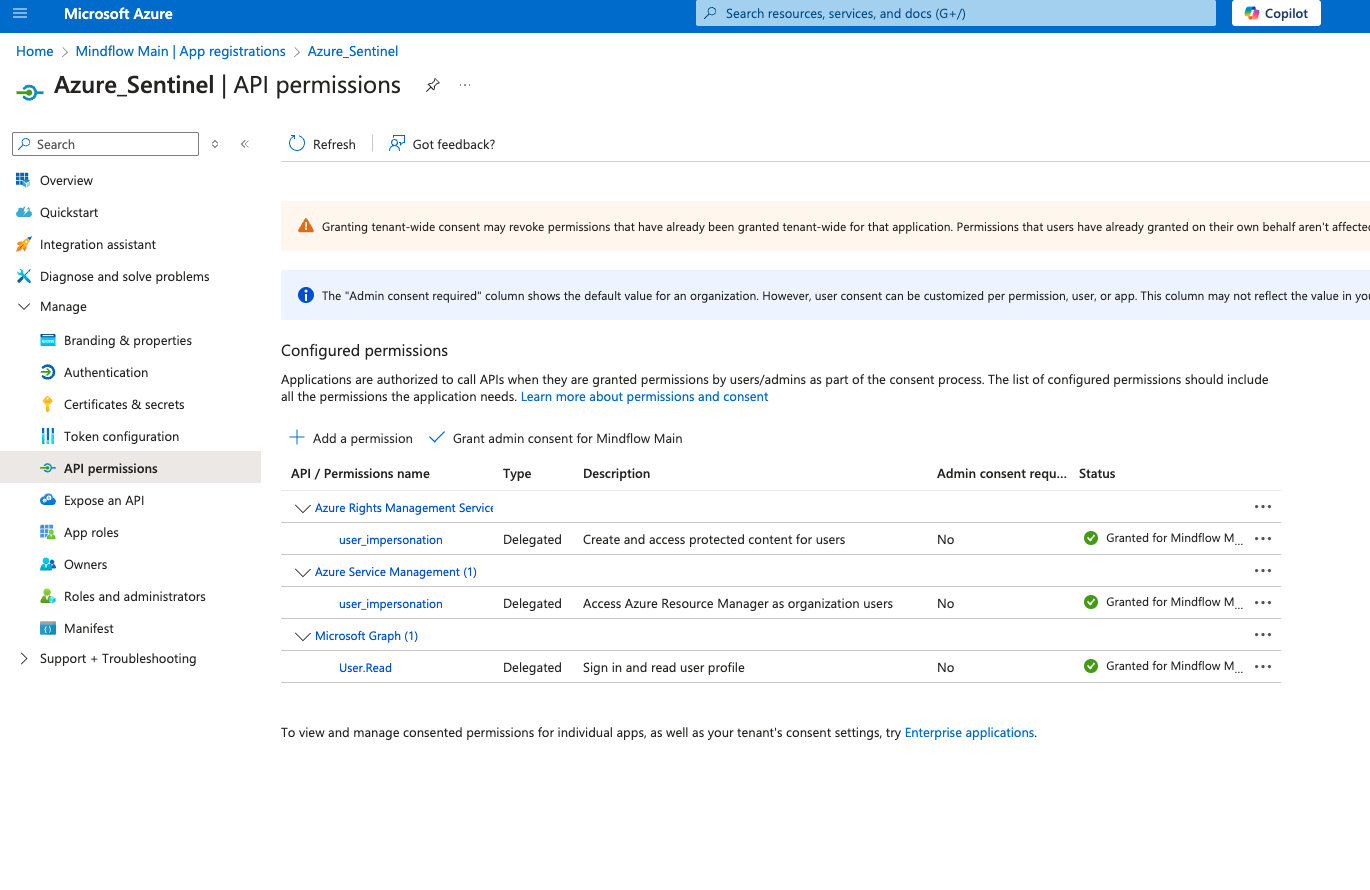
On Microsoft side, the application requires the following list of permissions.
-
Once an incident is created (either automatically via a rule or manually), the sub-workflow will handle it accordingly. (cf screenshot)