Authorization code
Introduction
Section titled “Introduction”This walkthrough details the process of registering a Microsoft Entra ID application, granting it high-level API permissions, and securely connecting it to the Mindflow platform based on the provided documentation.
Registering the Application in Azure
Section titled “Registering the Application in Azure”-
To establish an identity for the integration, you must first register the application within your Microsoft Entra tenant.
-
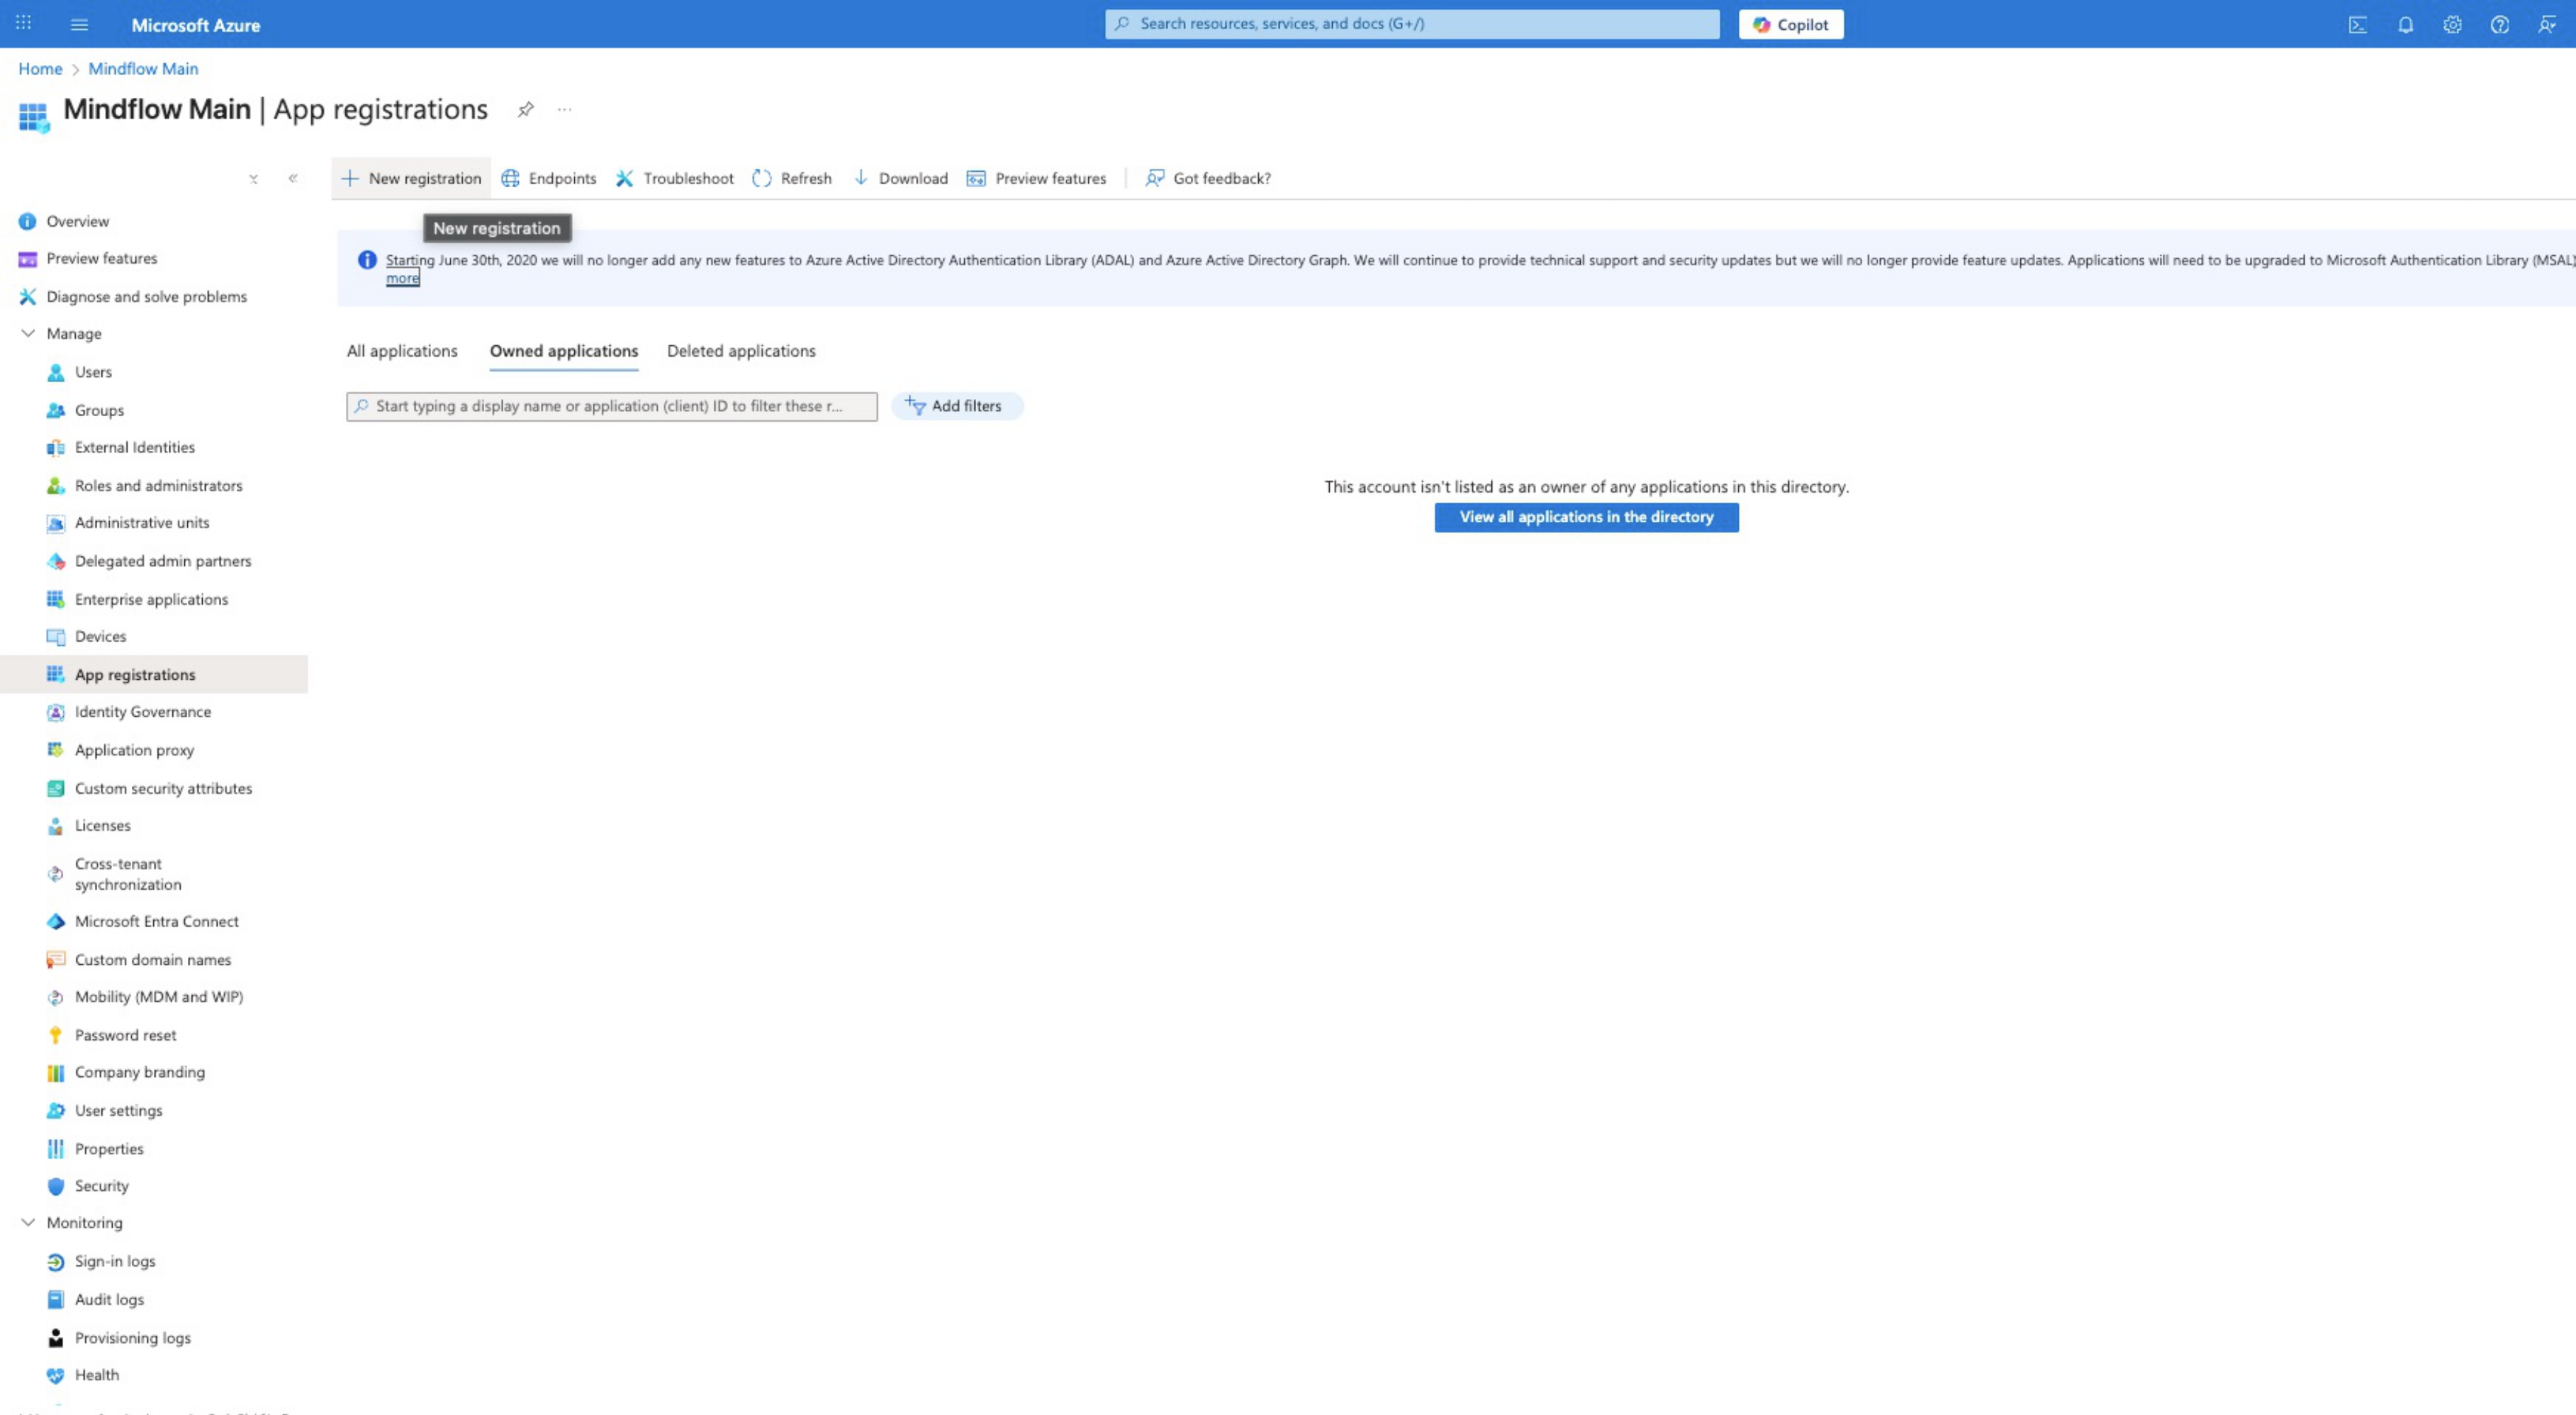
Navigate to App Registrations: In the Microsoft Azure portal, go to Microsoft Entra ID directory and select App registrations from the sidebar.
-
Create New Registration: Click on + New registration.
-
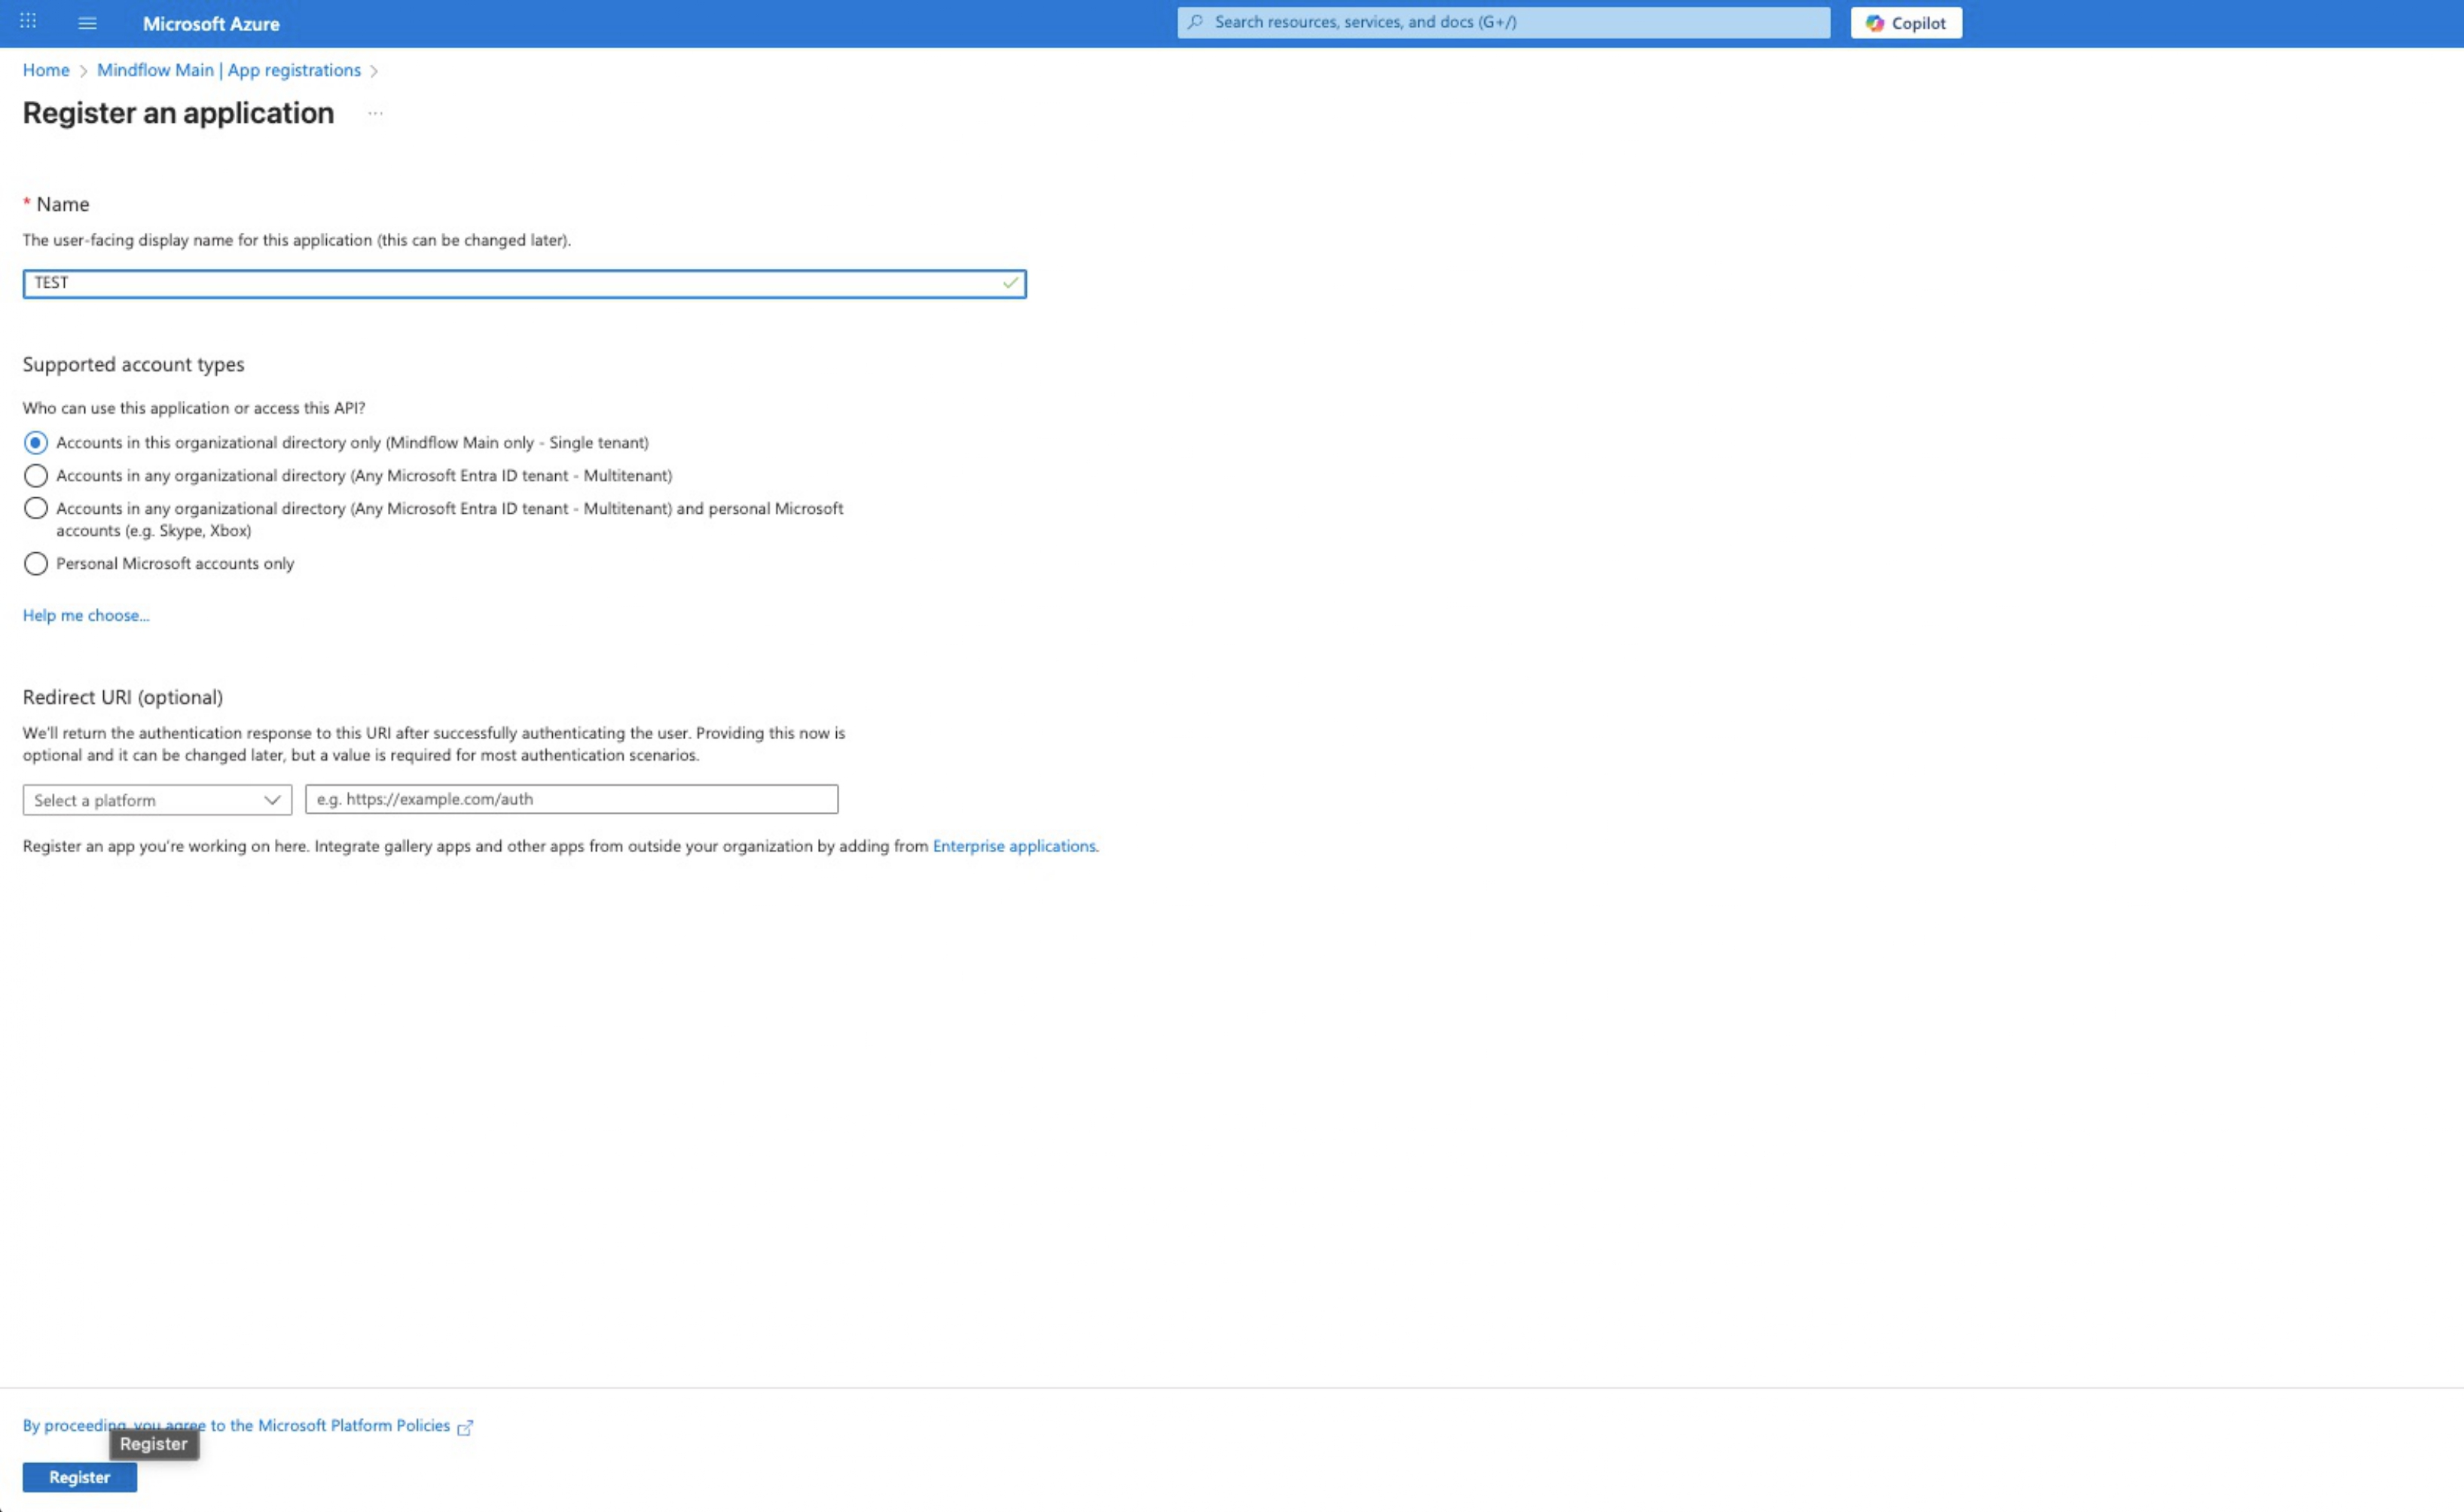
Configure Application Settings:
- Name: Enter a display name, such as “TEST”.
- Supported Account Types: Select Accounts in this organizational directory only (Single tenant).
-
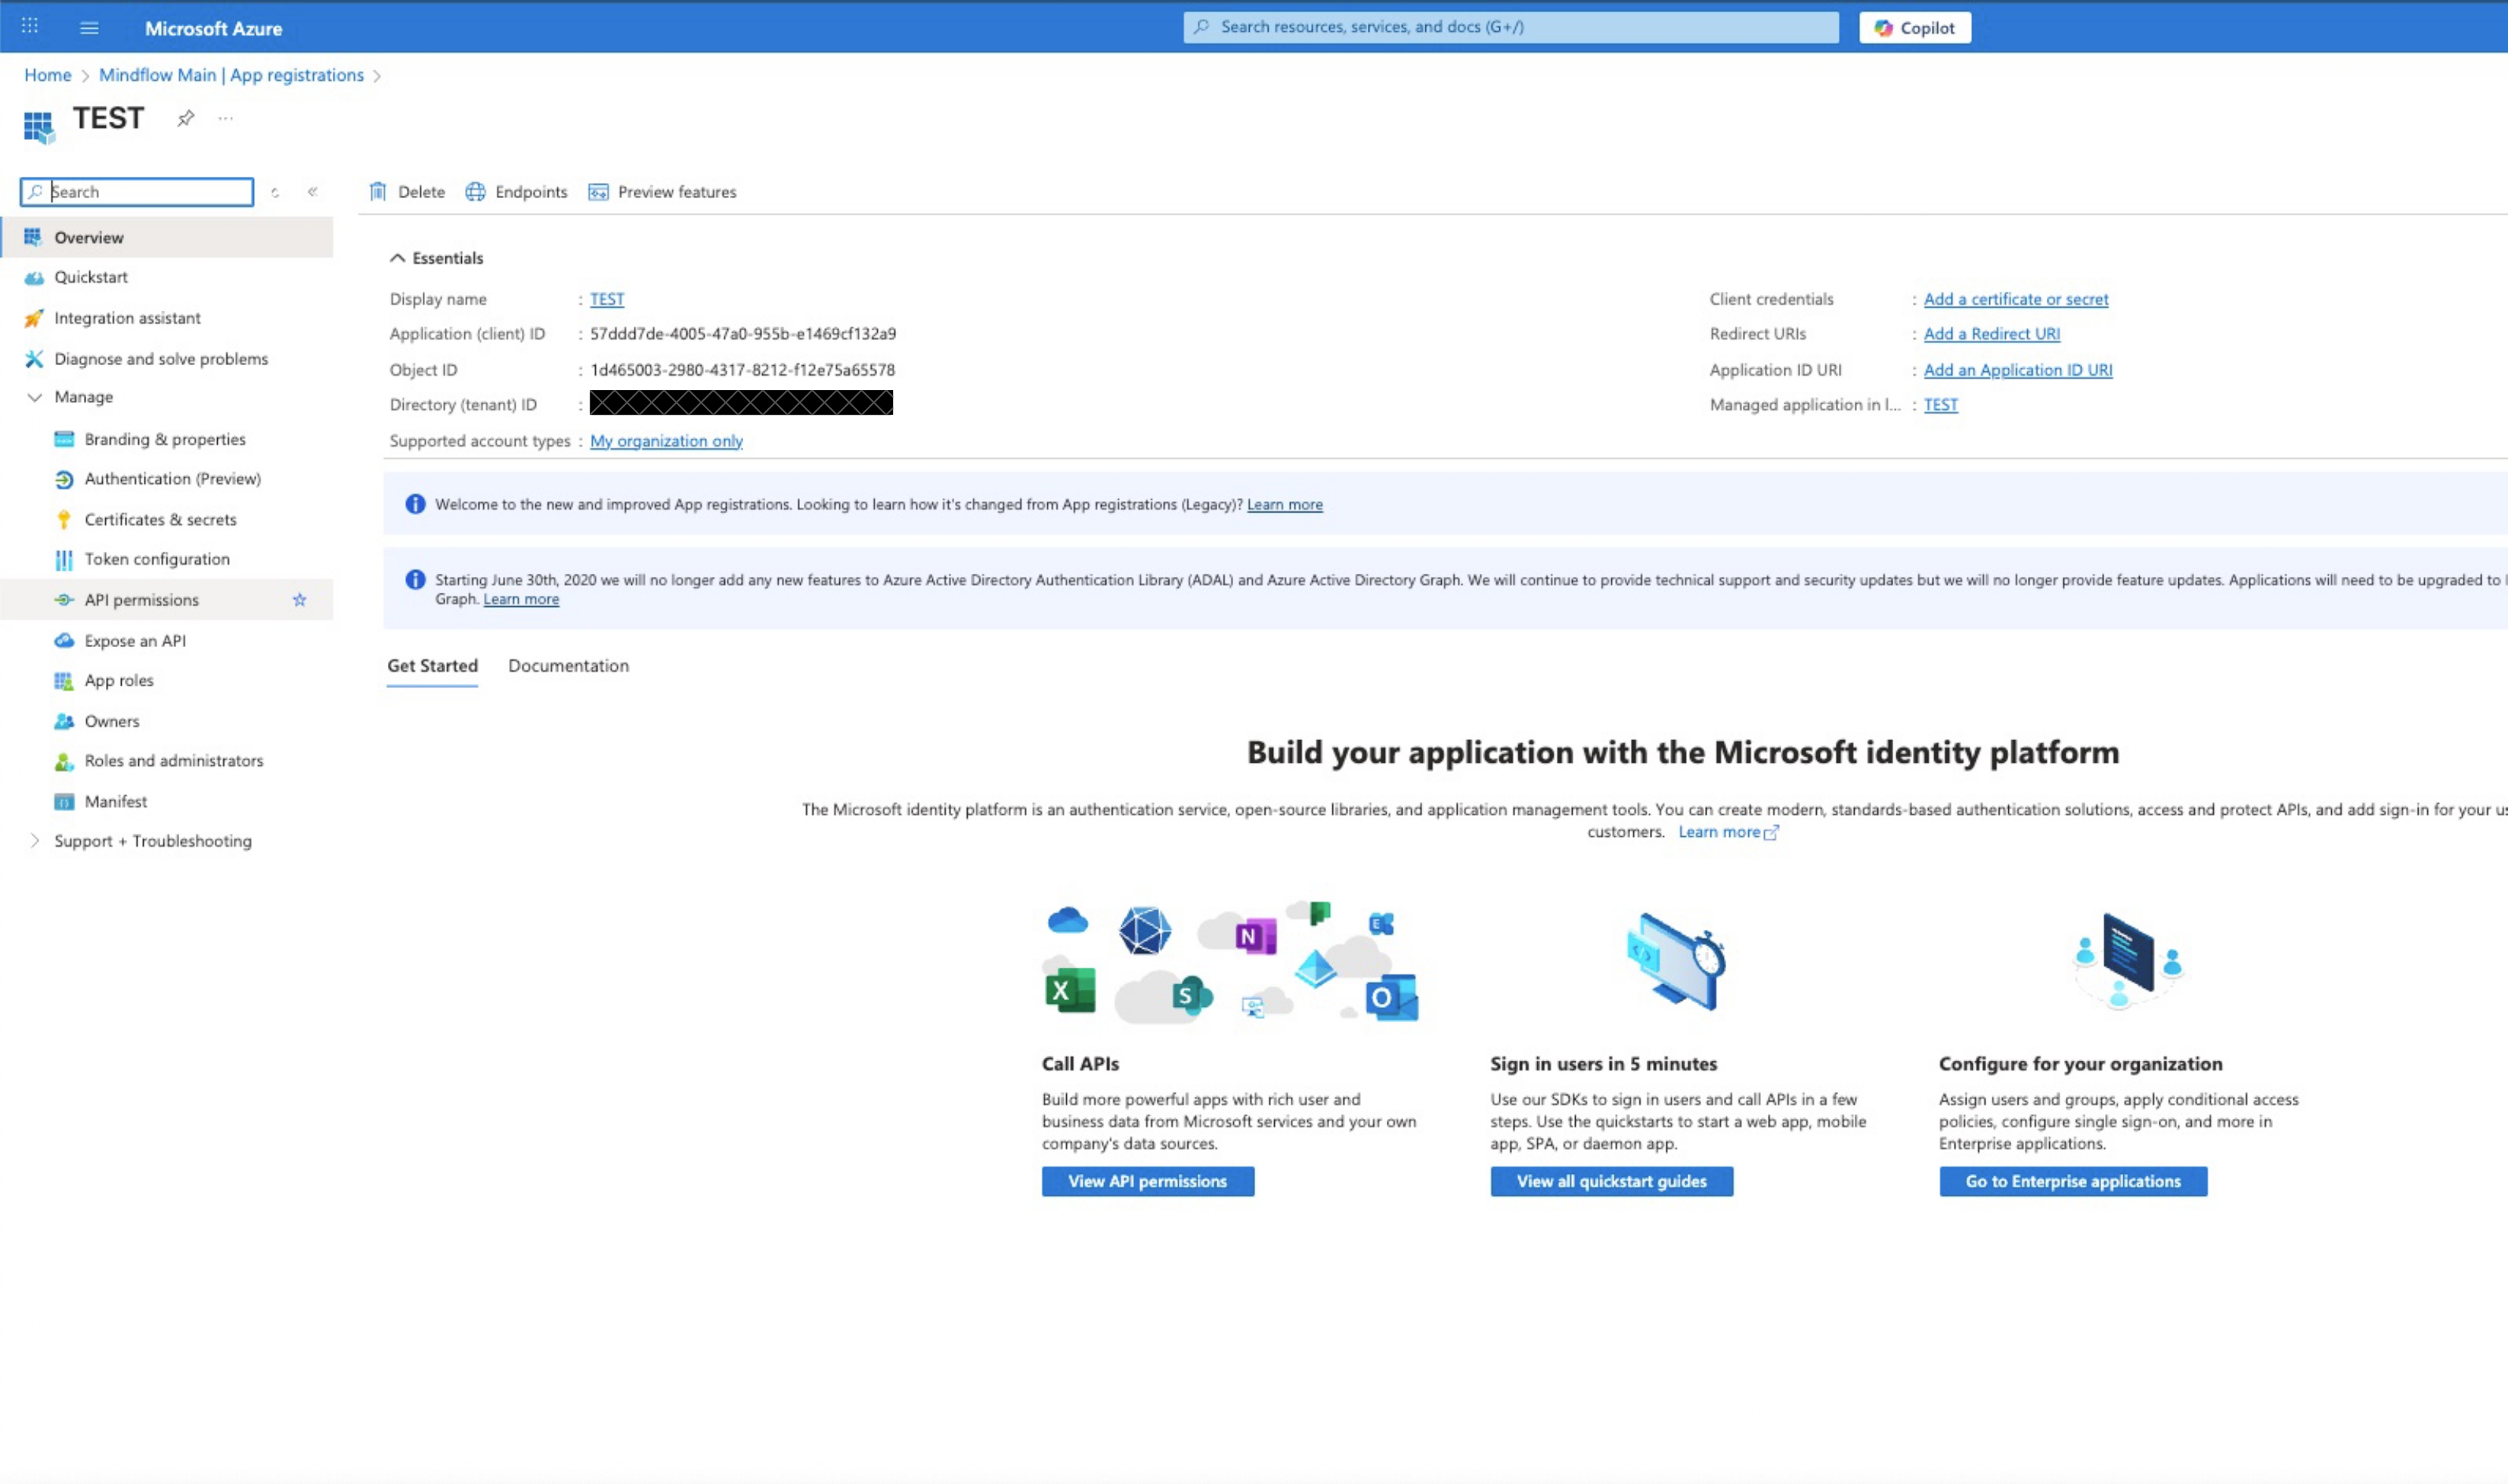
Complete Registration: Click Register. Once created, note the Application (client) ID and Directory (tenant) ID from the Essentials section for later use.
Configuring API Permissions
Section titled “Configuring API Permissions”-
Explicitly grant permissions to allow the app to interact with Microsoft Graph data.
-
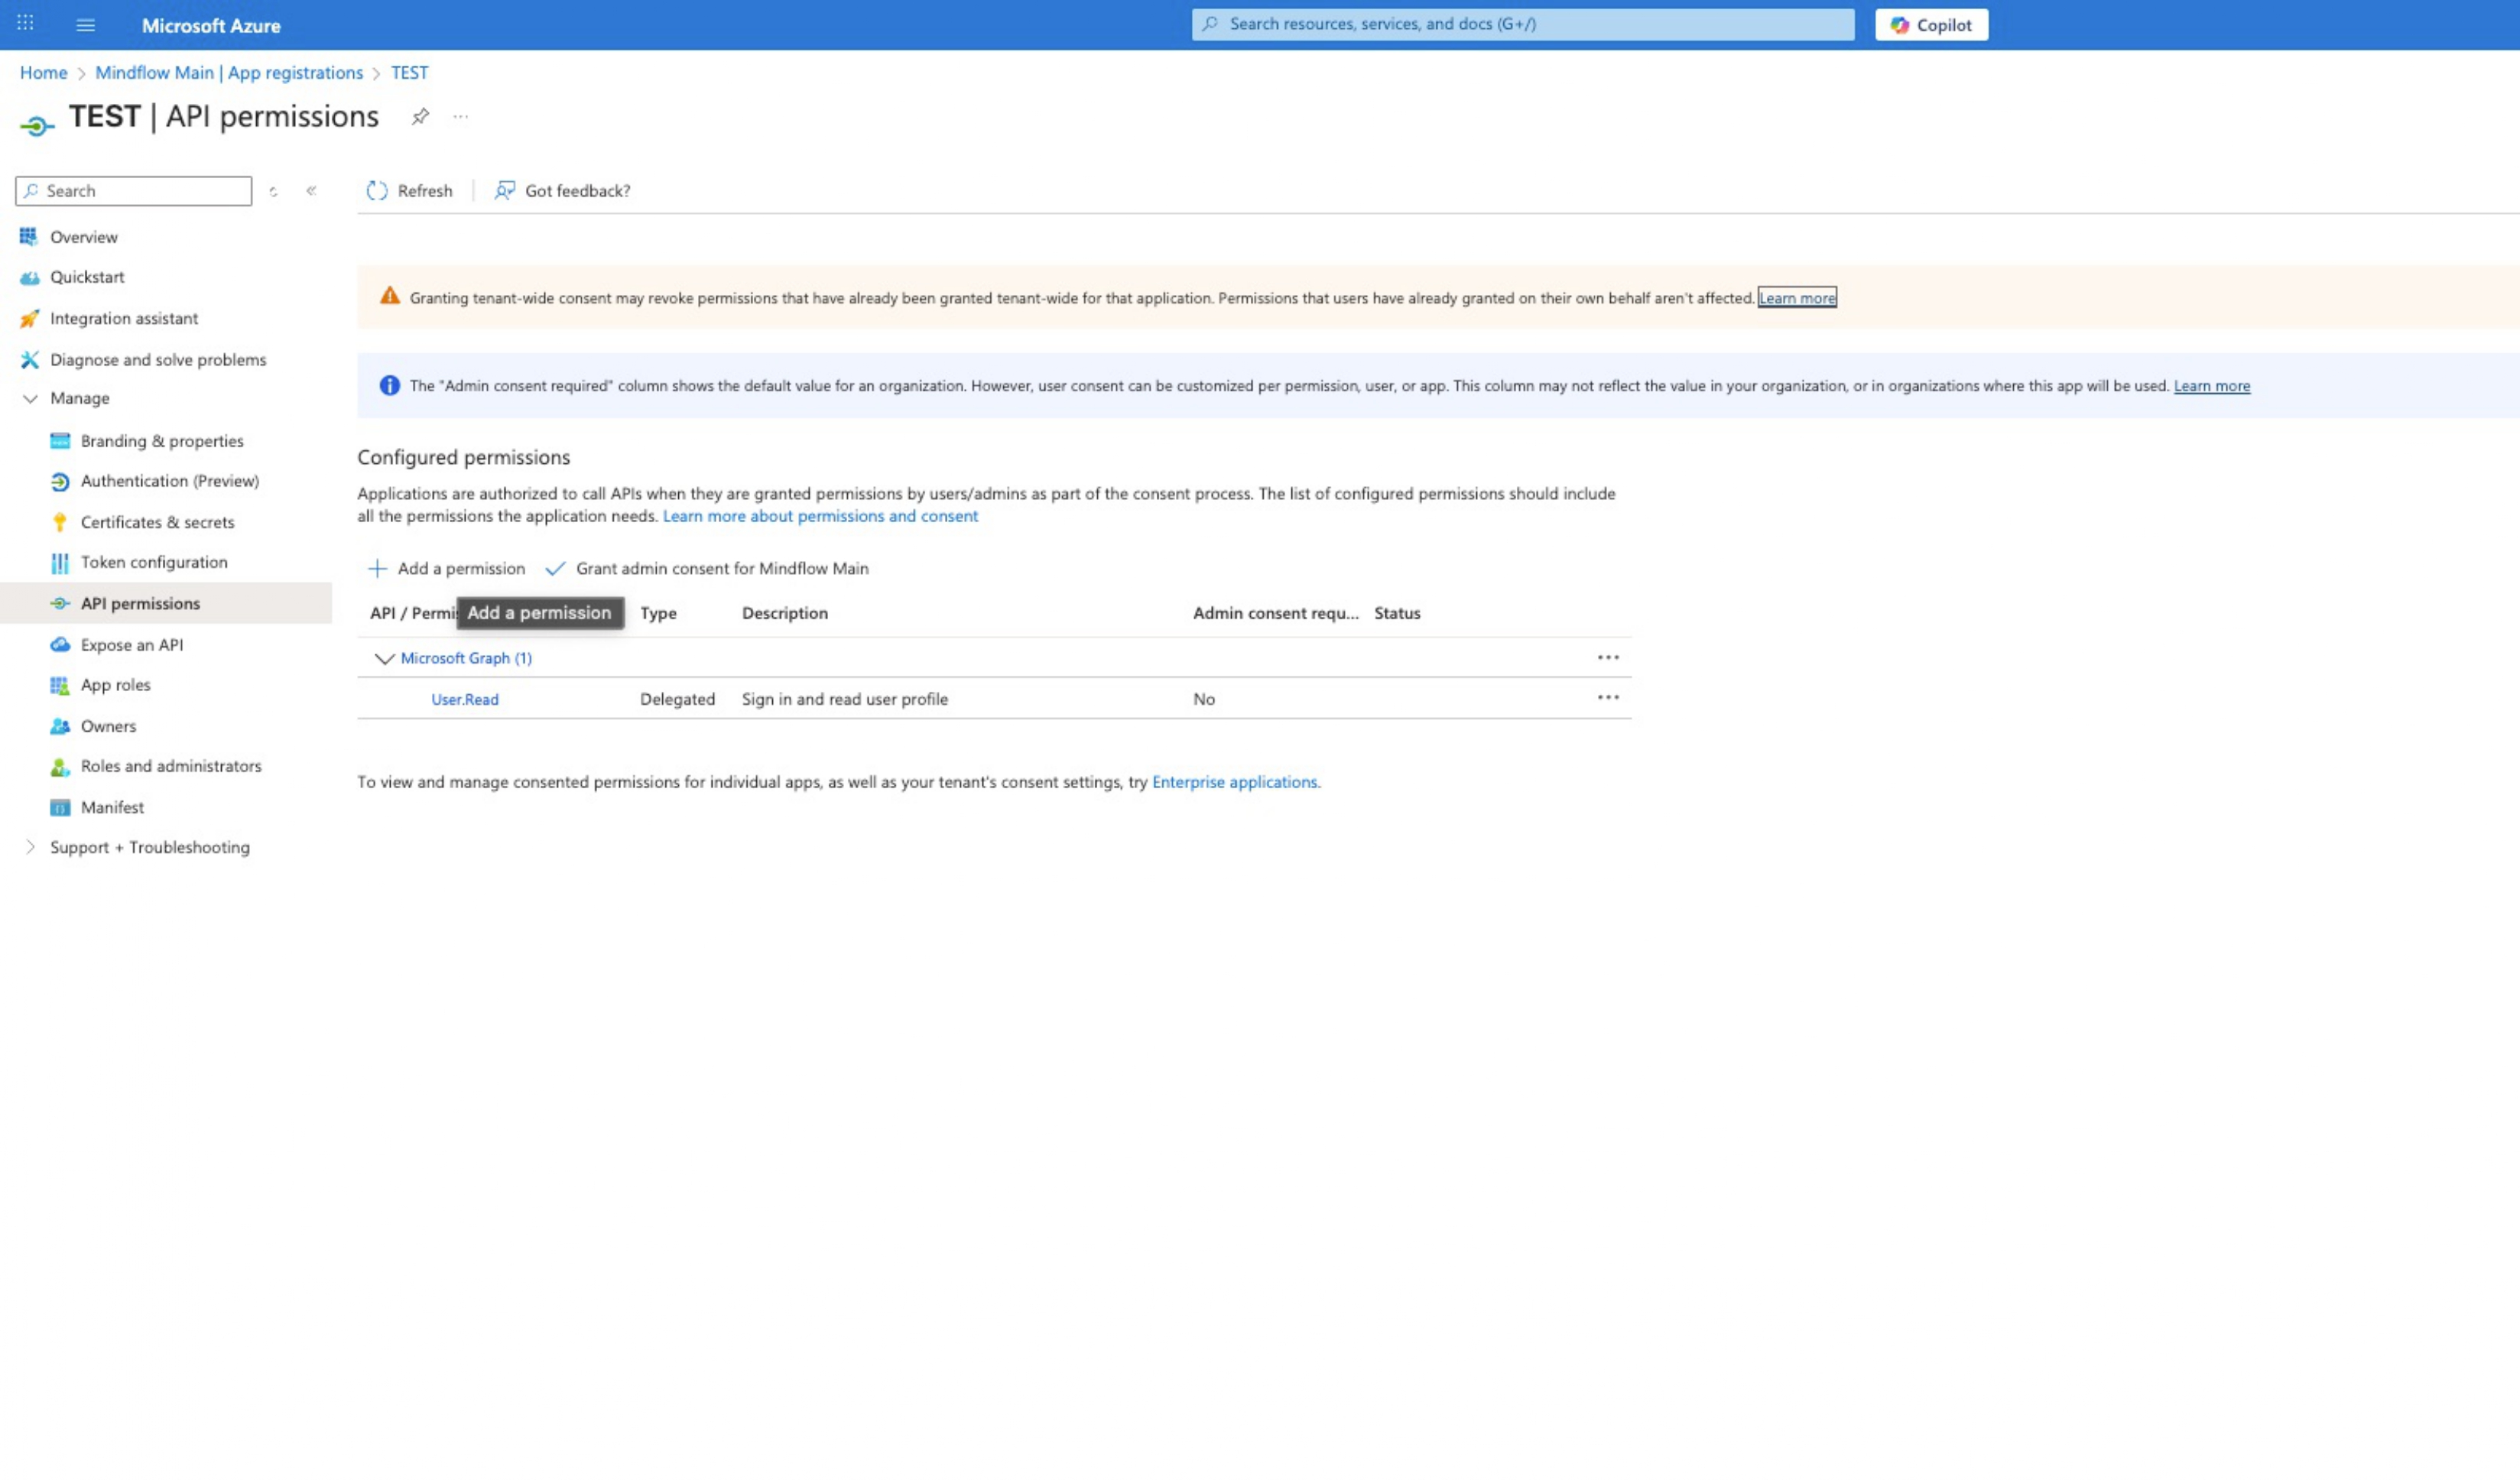
Access Permissions Menu: From the application sidebar, select API permissions.
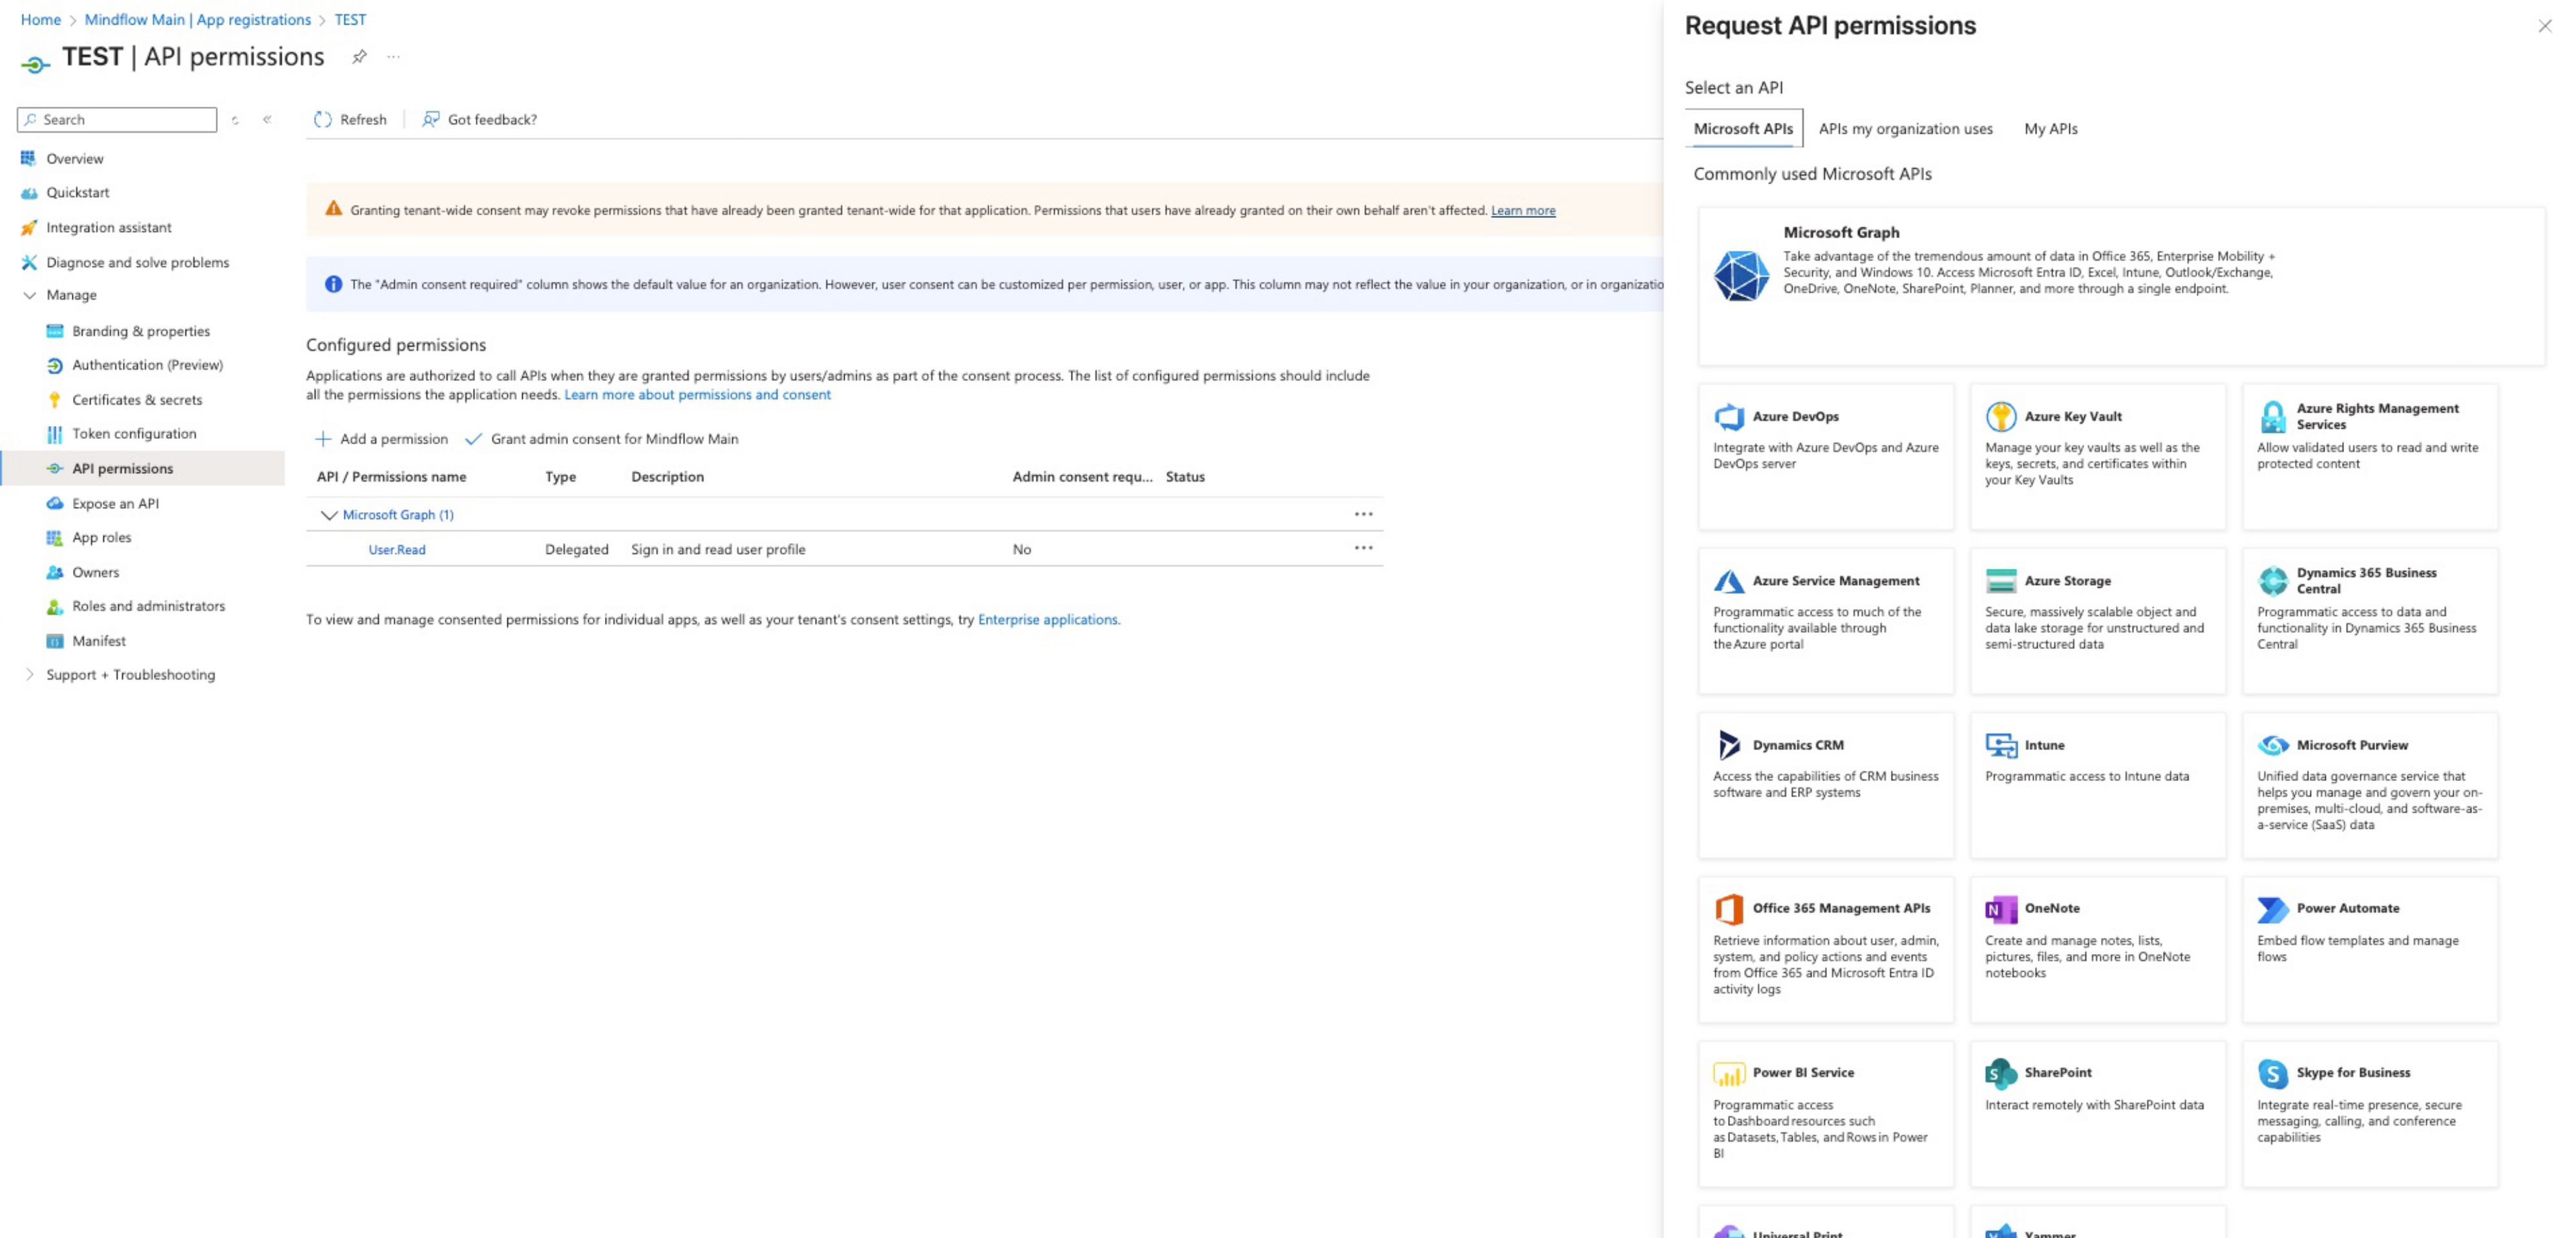
-
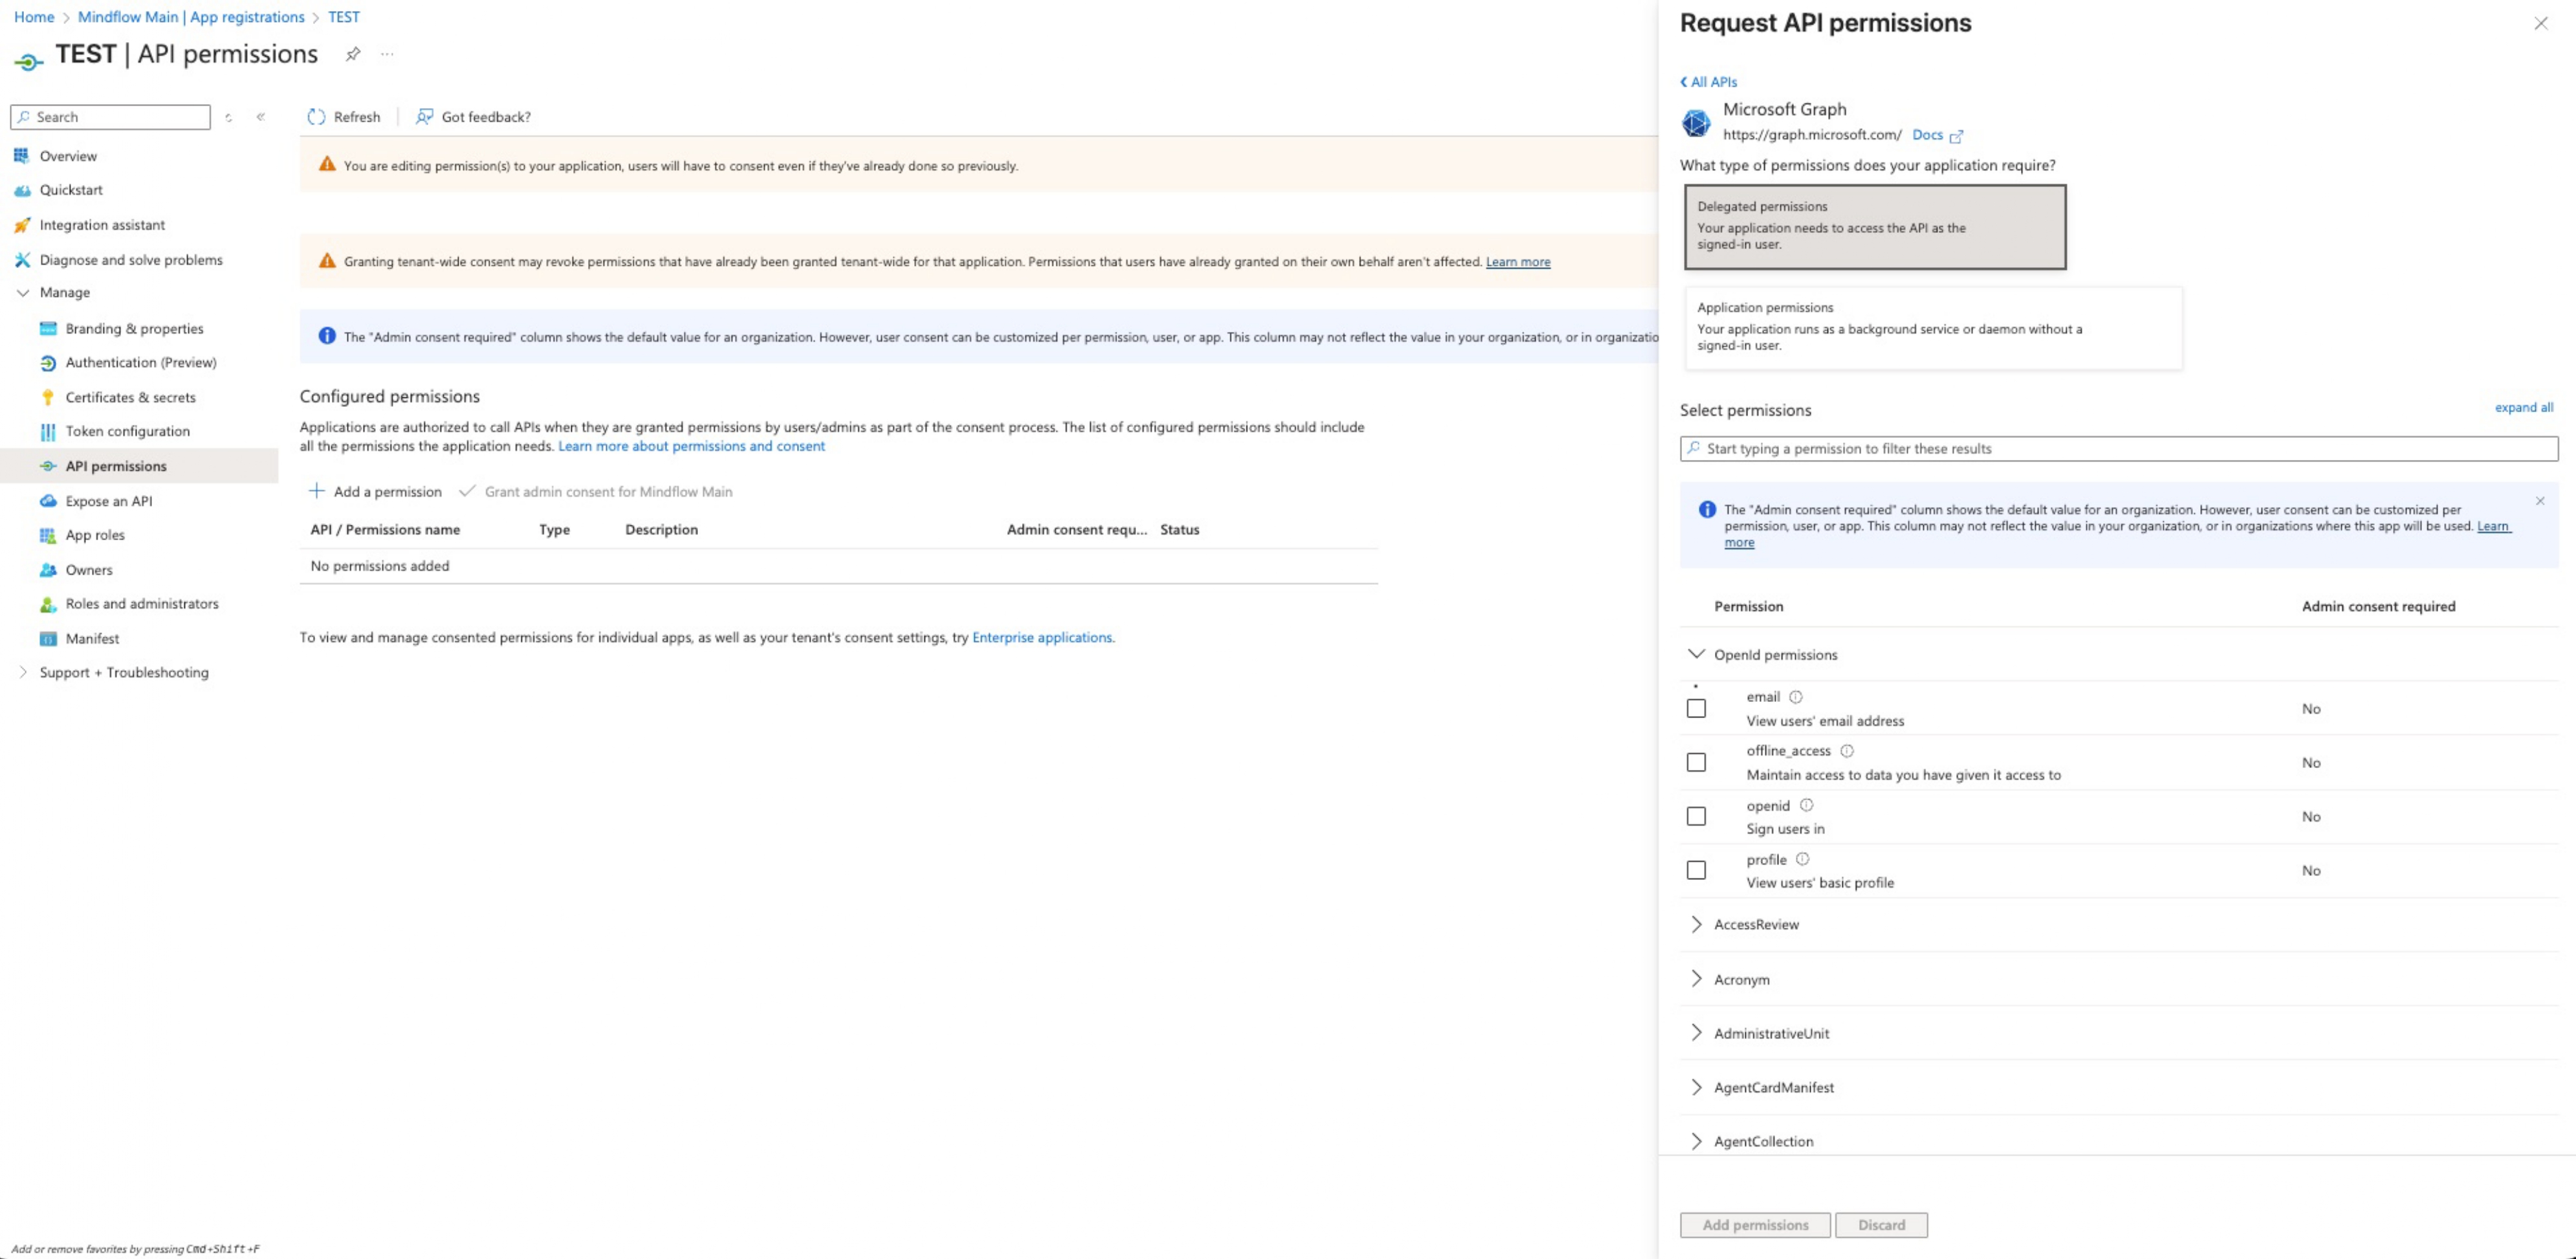
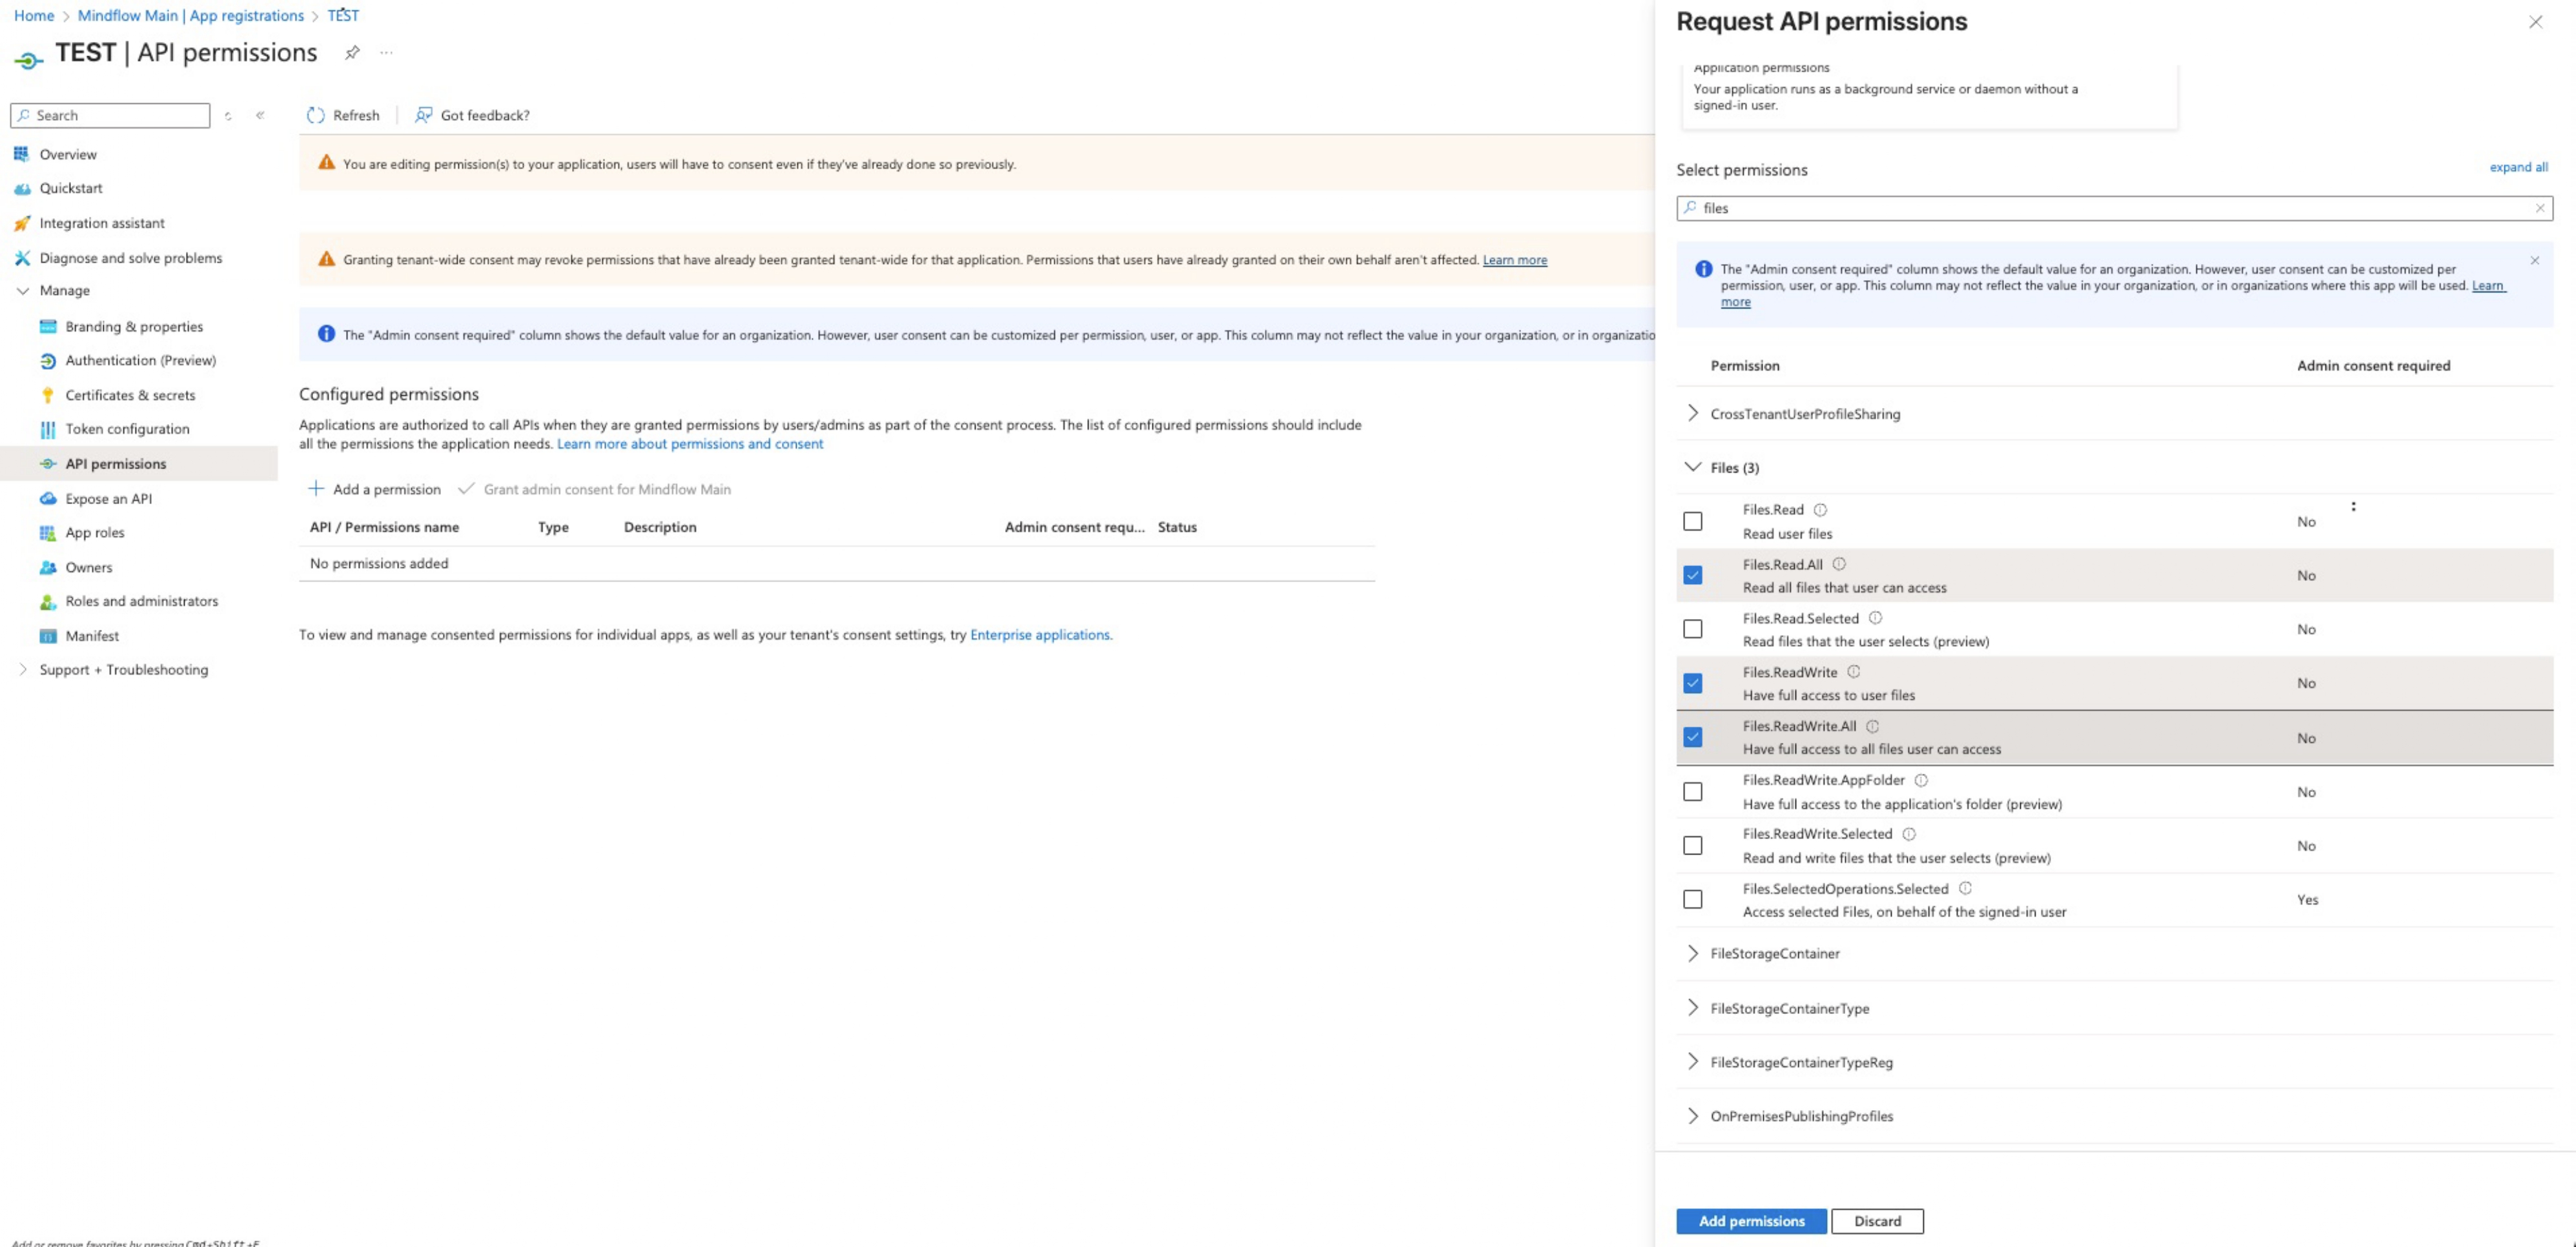
Choose Permission Type: Select Delegated permissions. This is used for services requiring the sign in of a user.
-
Select Specific Scopes:
- Search for and select required permissions such as Files.Read.All, Files.ReadWrite, and Files.ReadWrite.All.
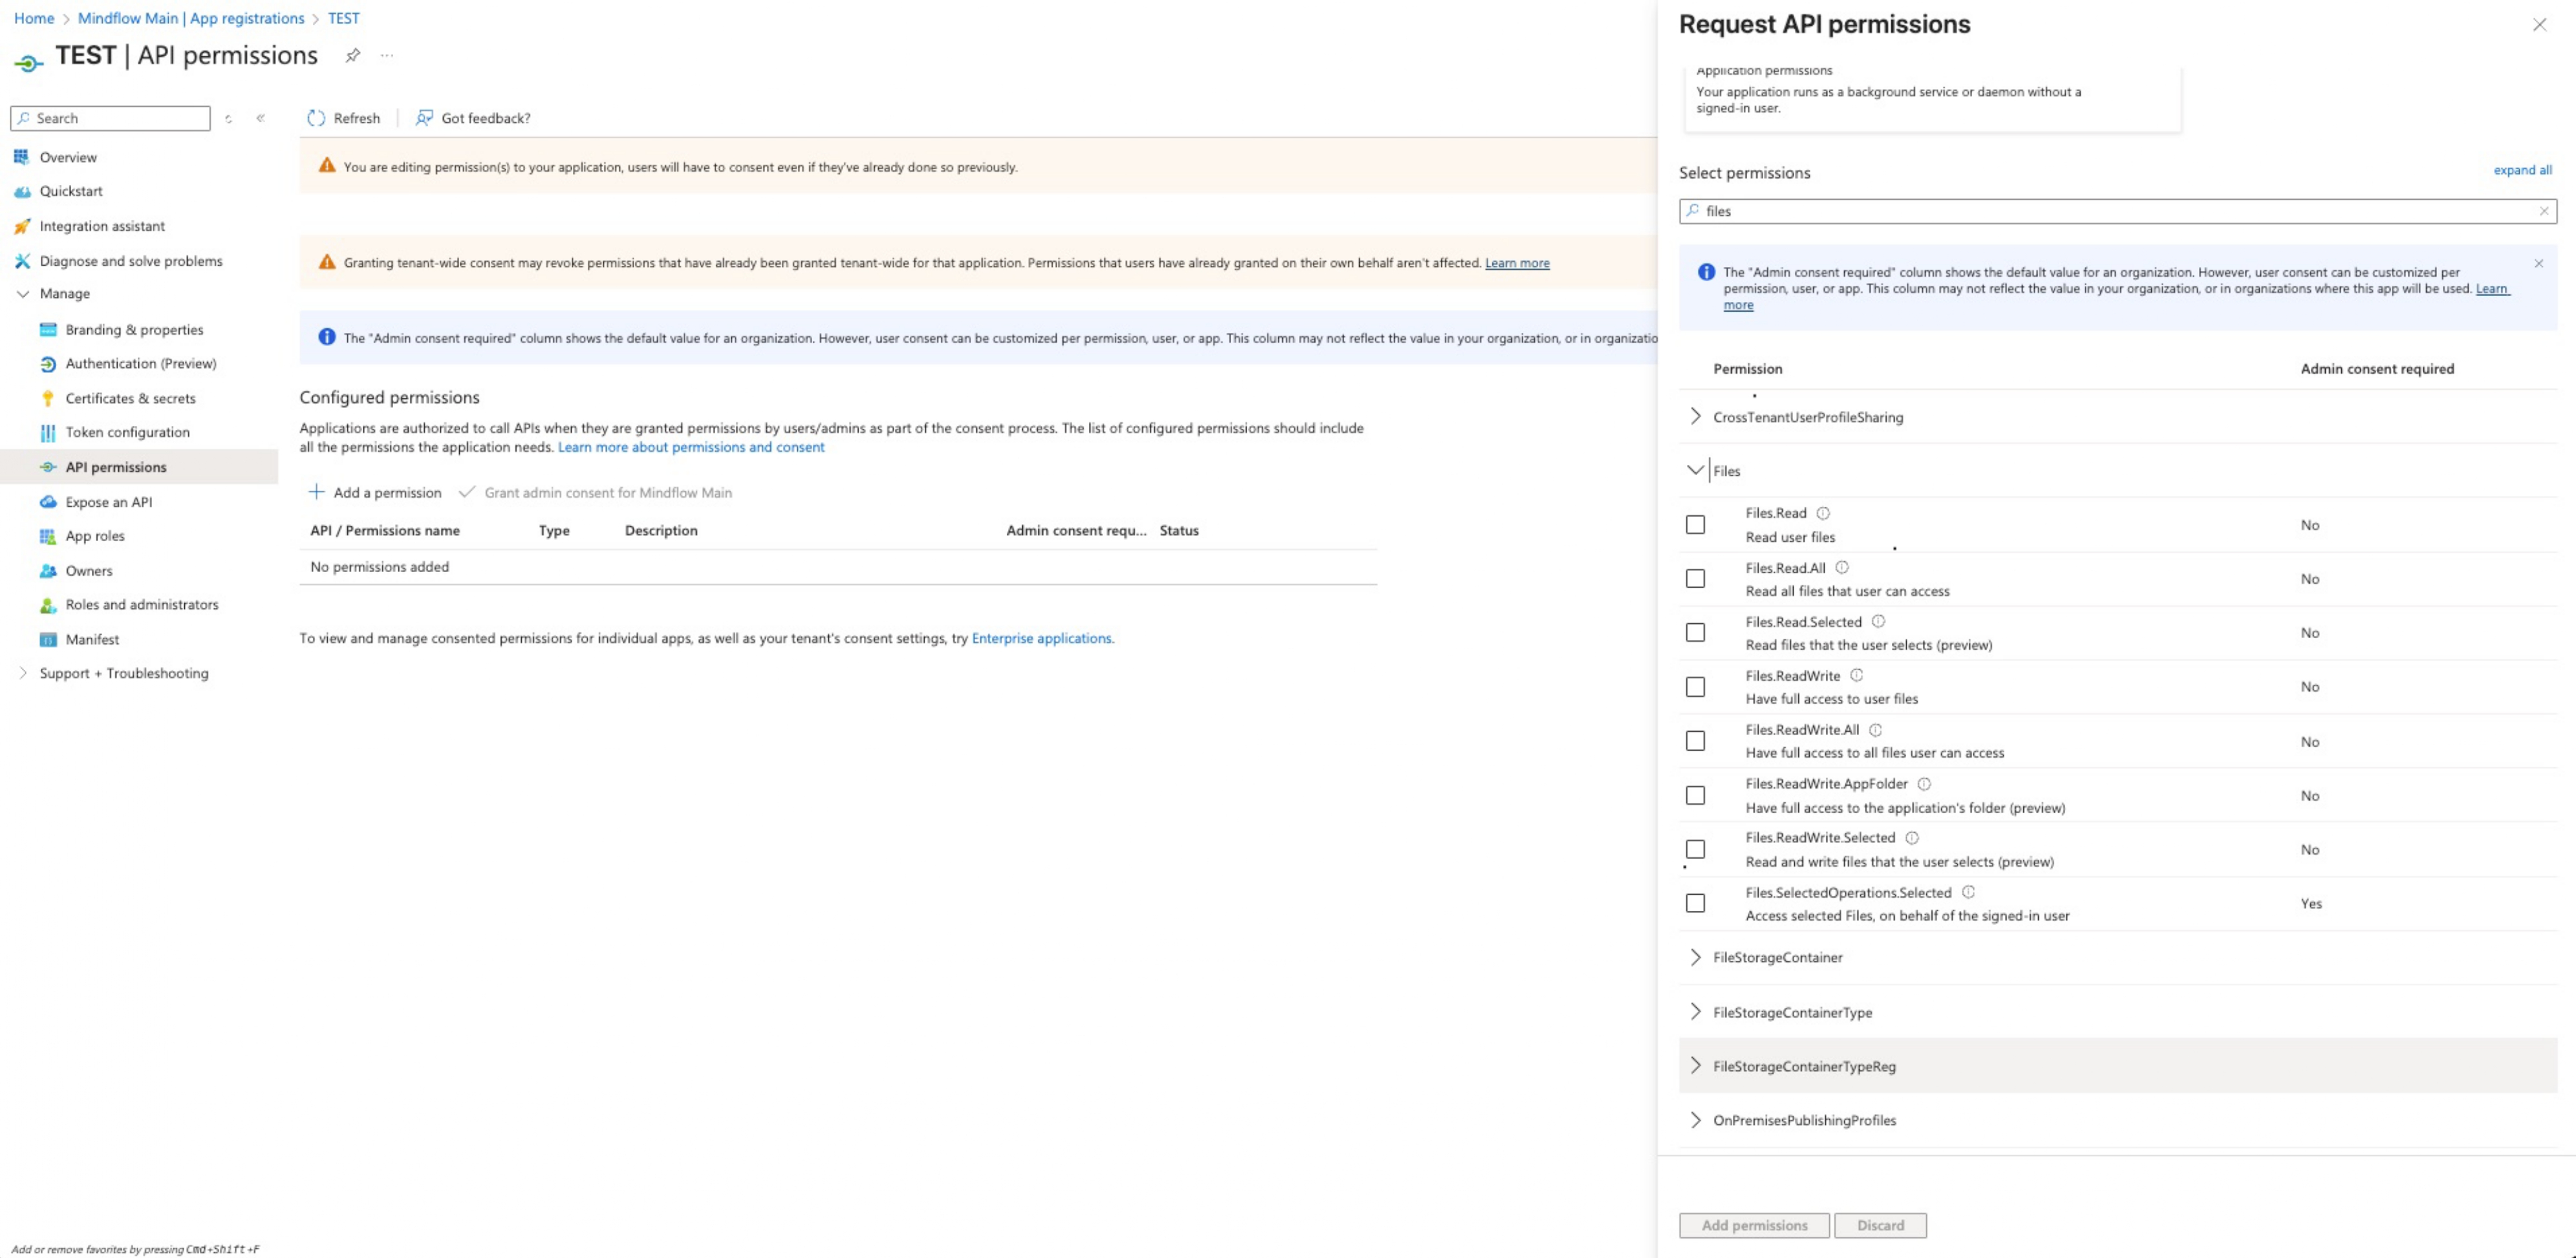
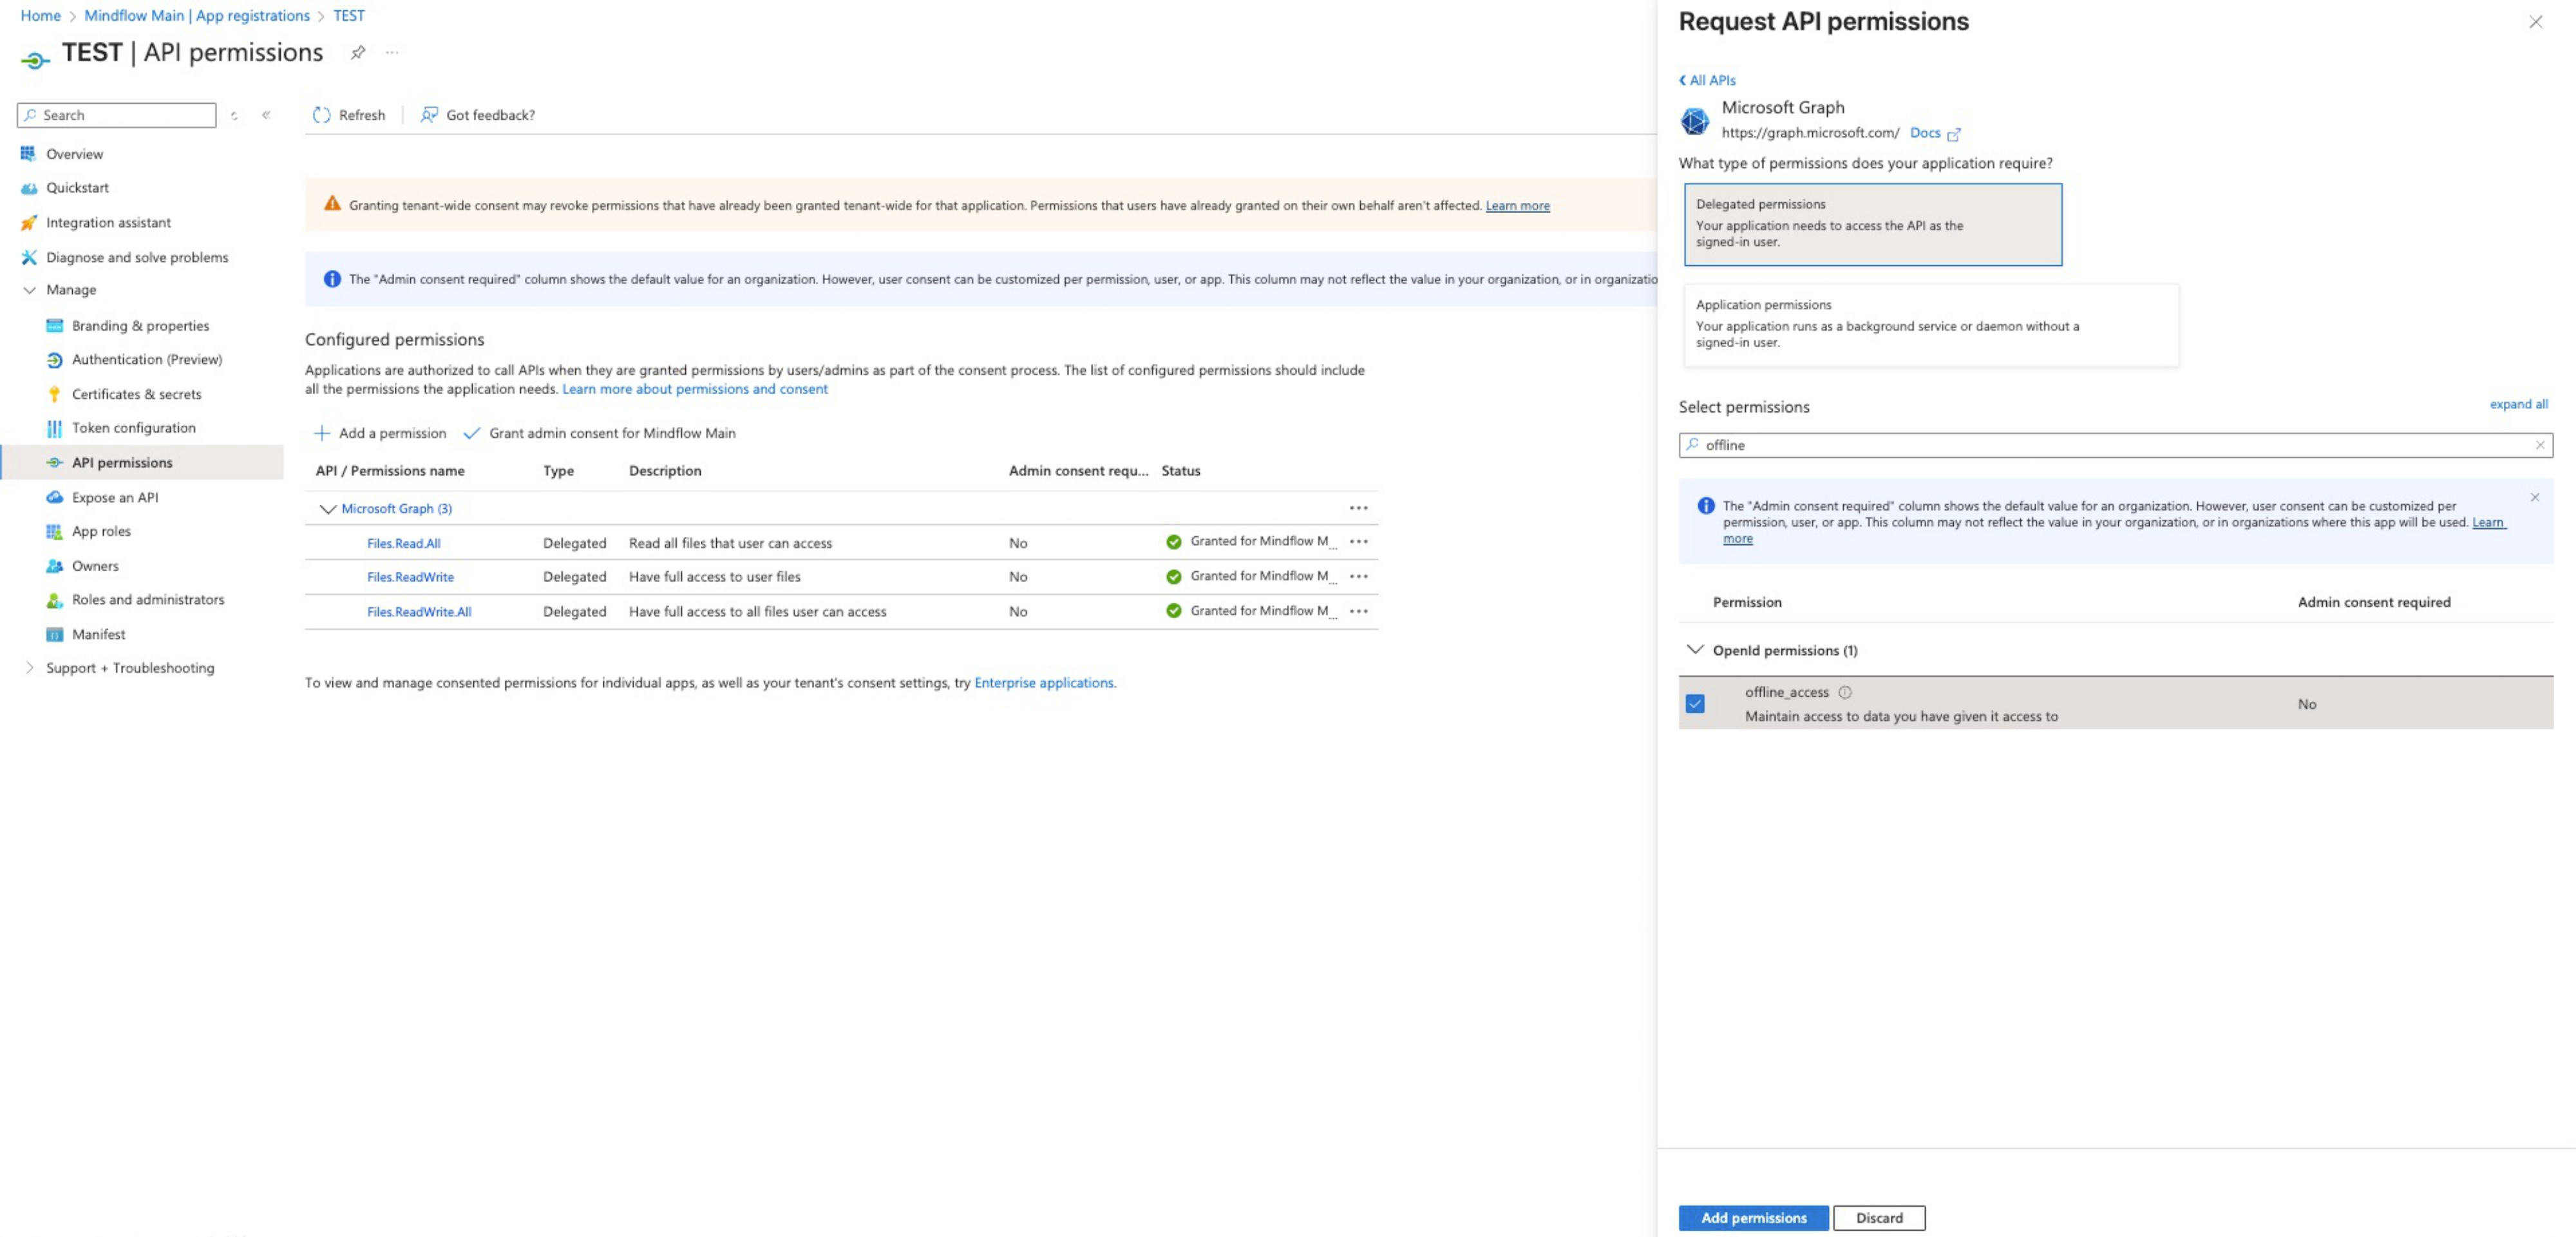
- Add offline_access to maintain access to data.
-
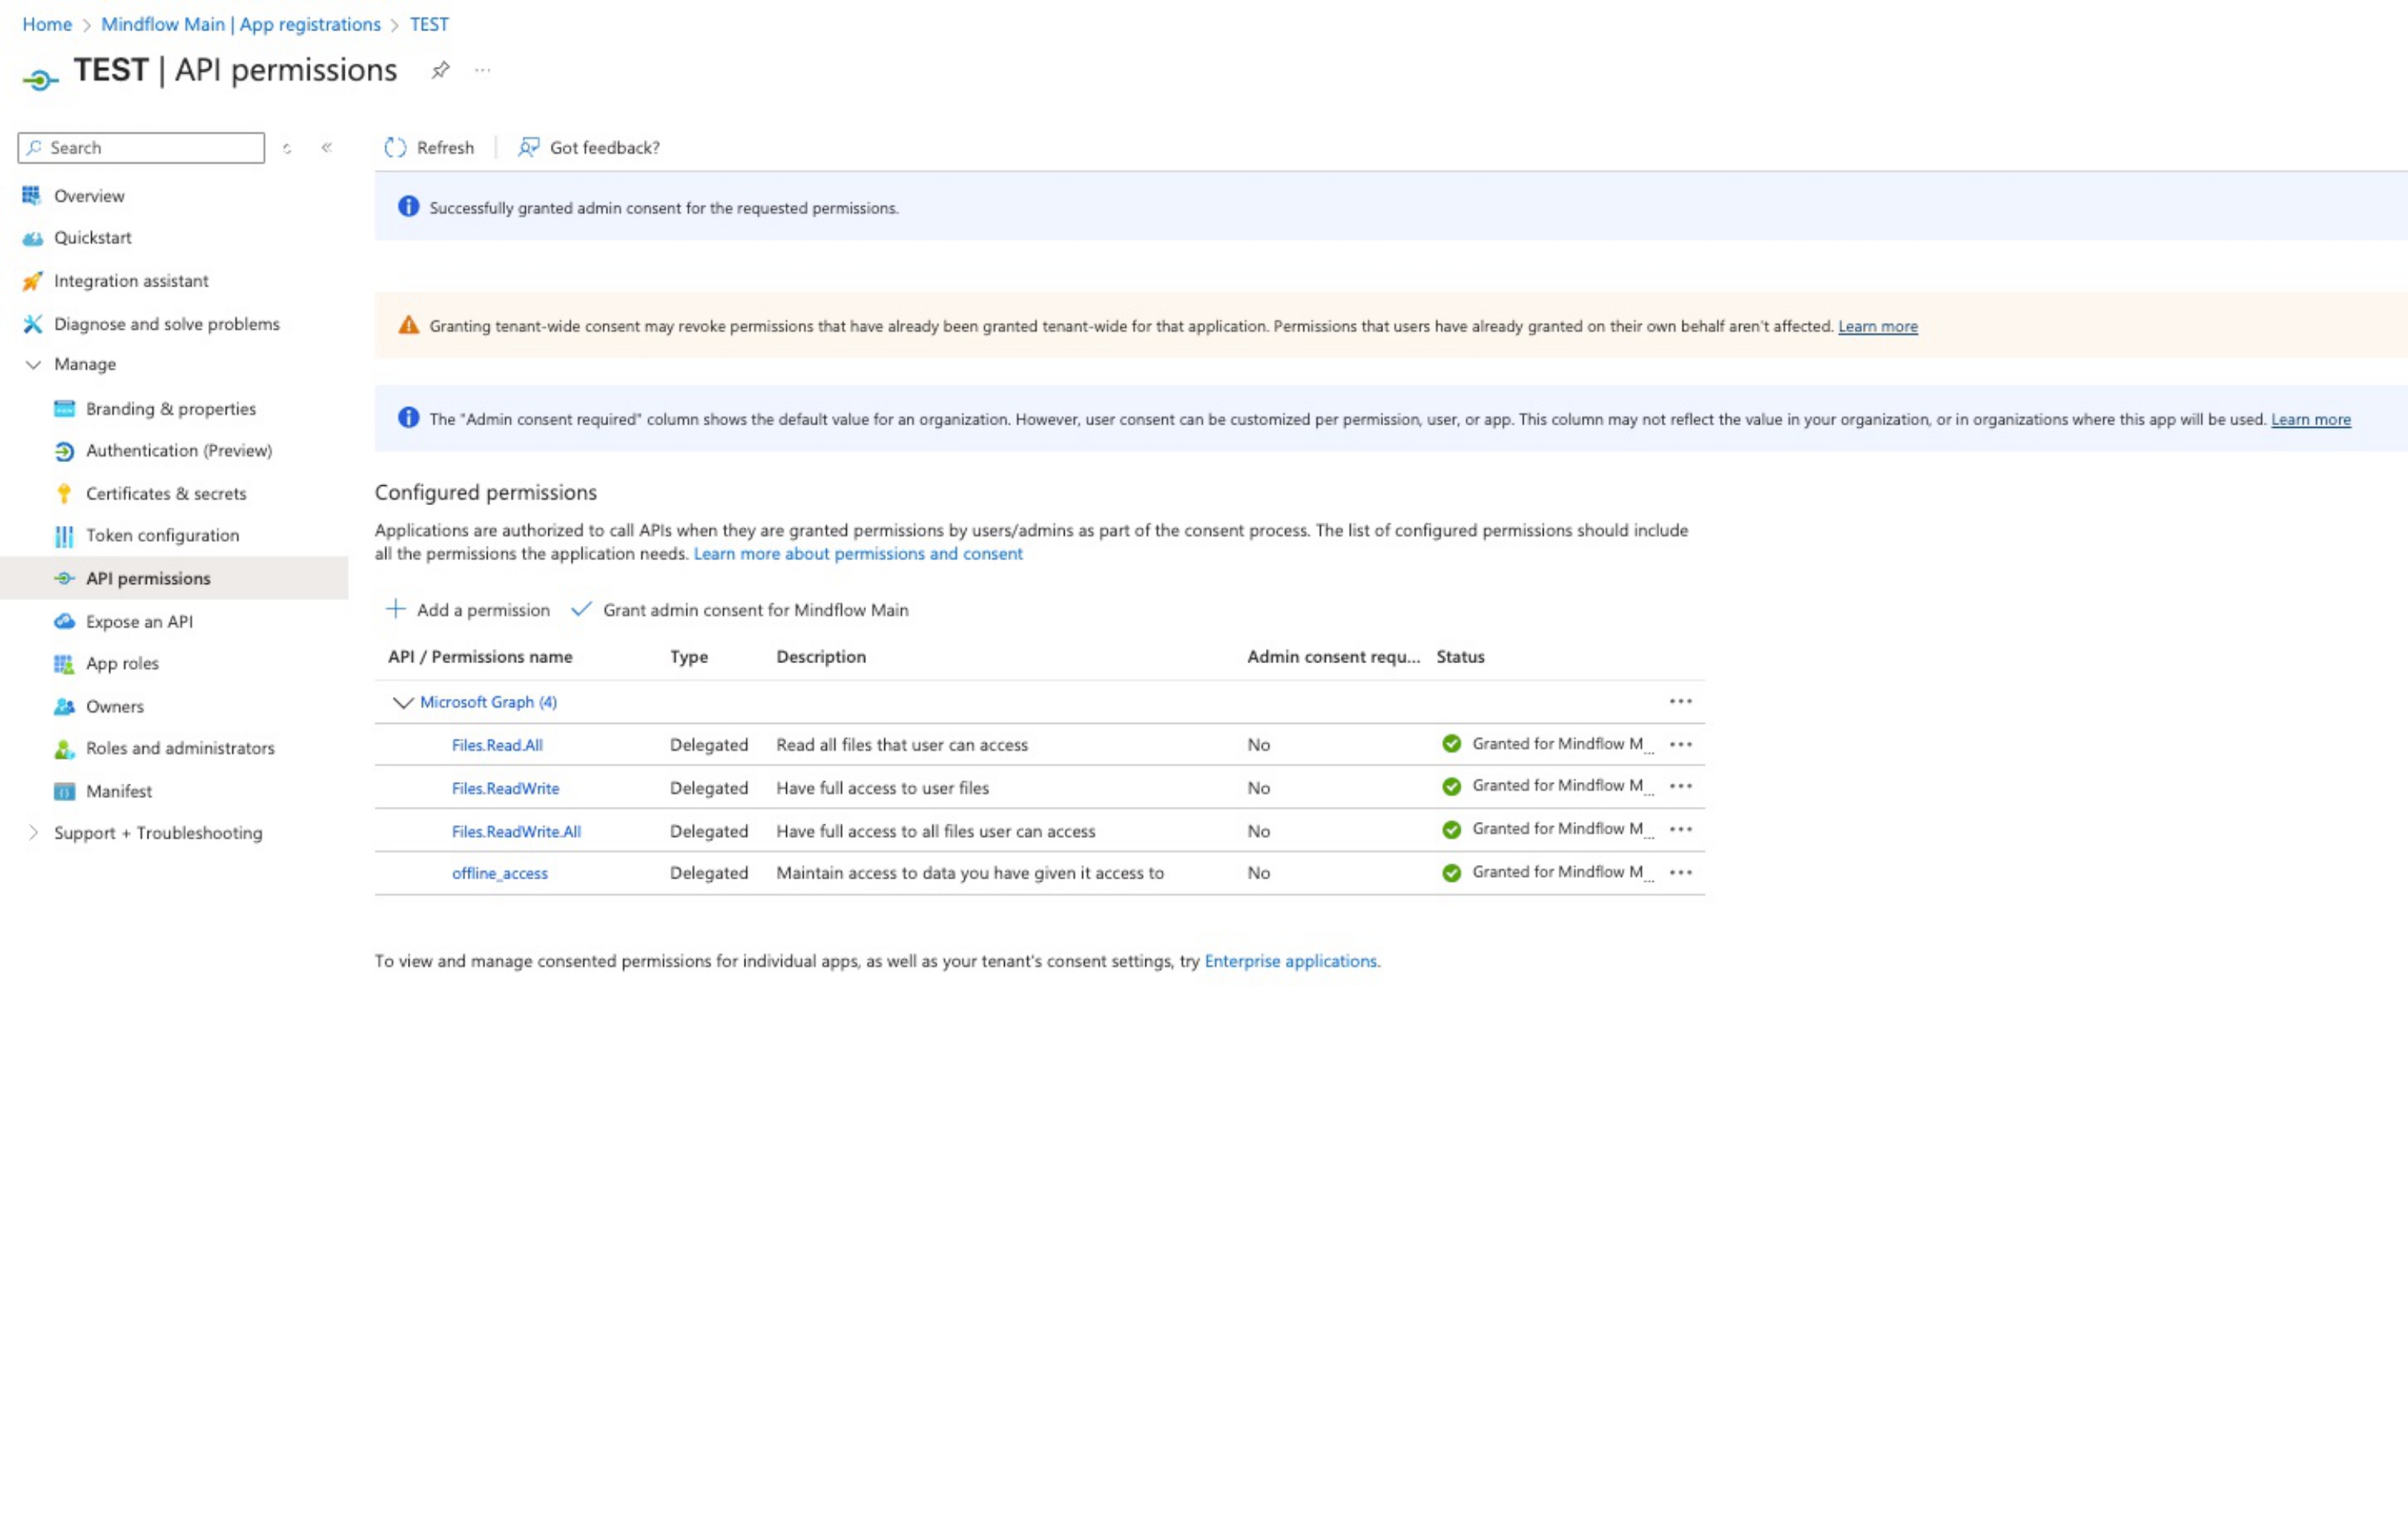
Grant Admin Consent: Initially, the status will show as not granted.
-
Click Grant admin consent and confirm to authorize these permissions for the entire tenant. A success message will appear once completed.
Generating Authentication Credentials
Section titled “Generating Authentication Credentials”-
Generate a client secret to allow Mindflow to authenticate as this application.
-
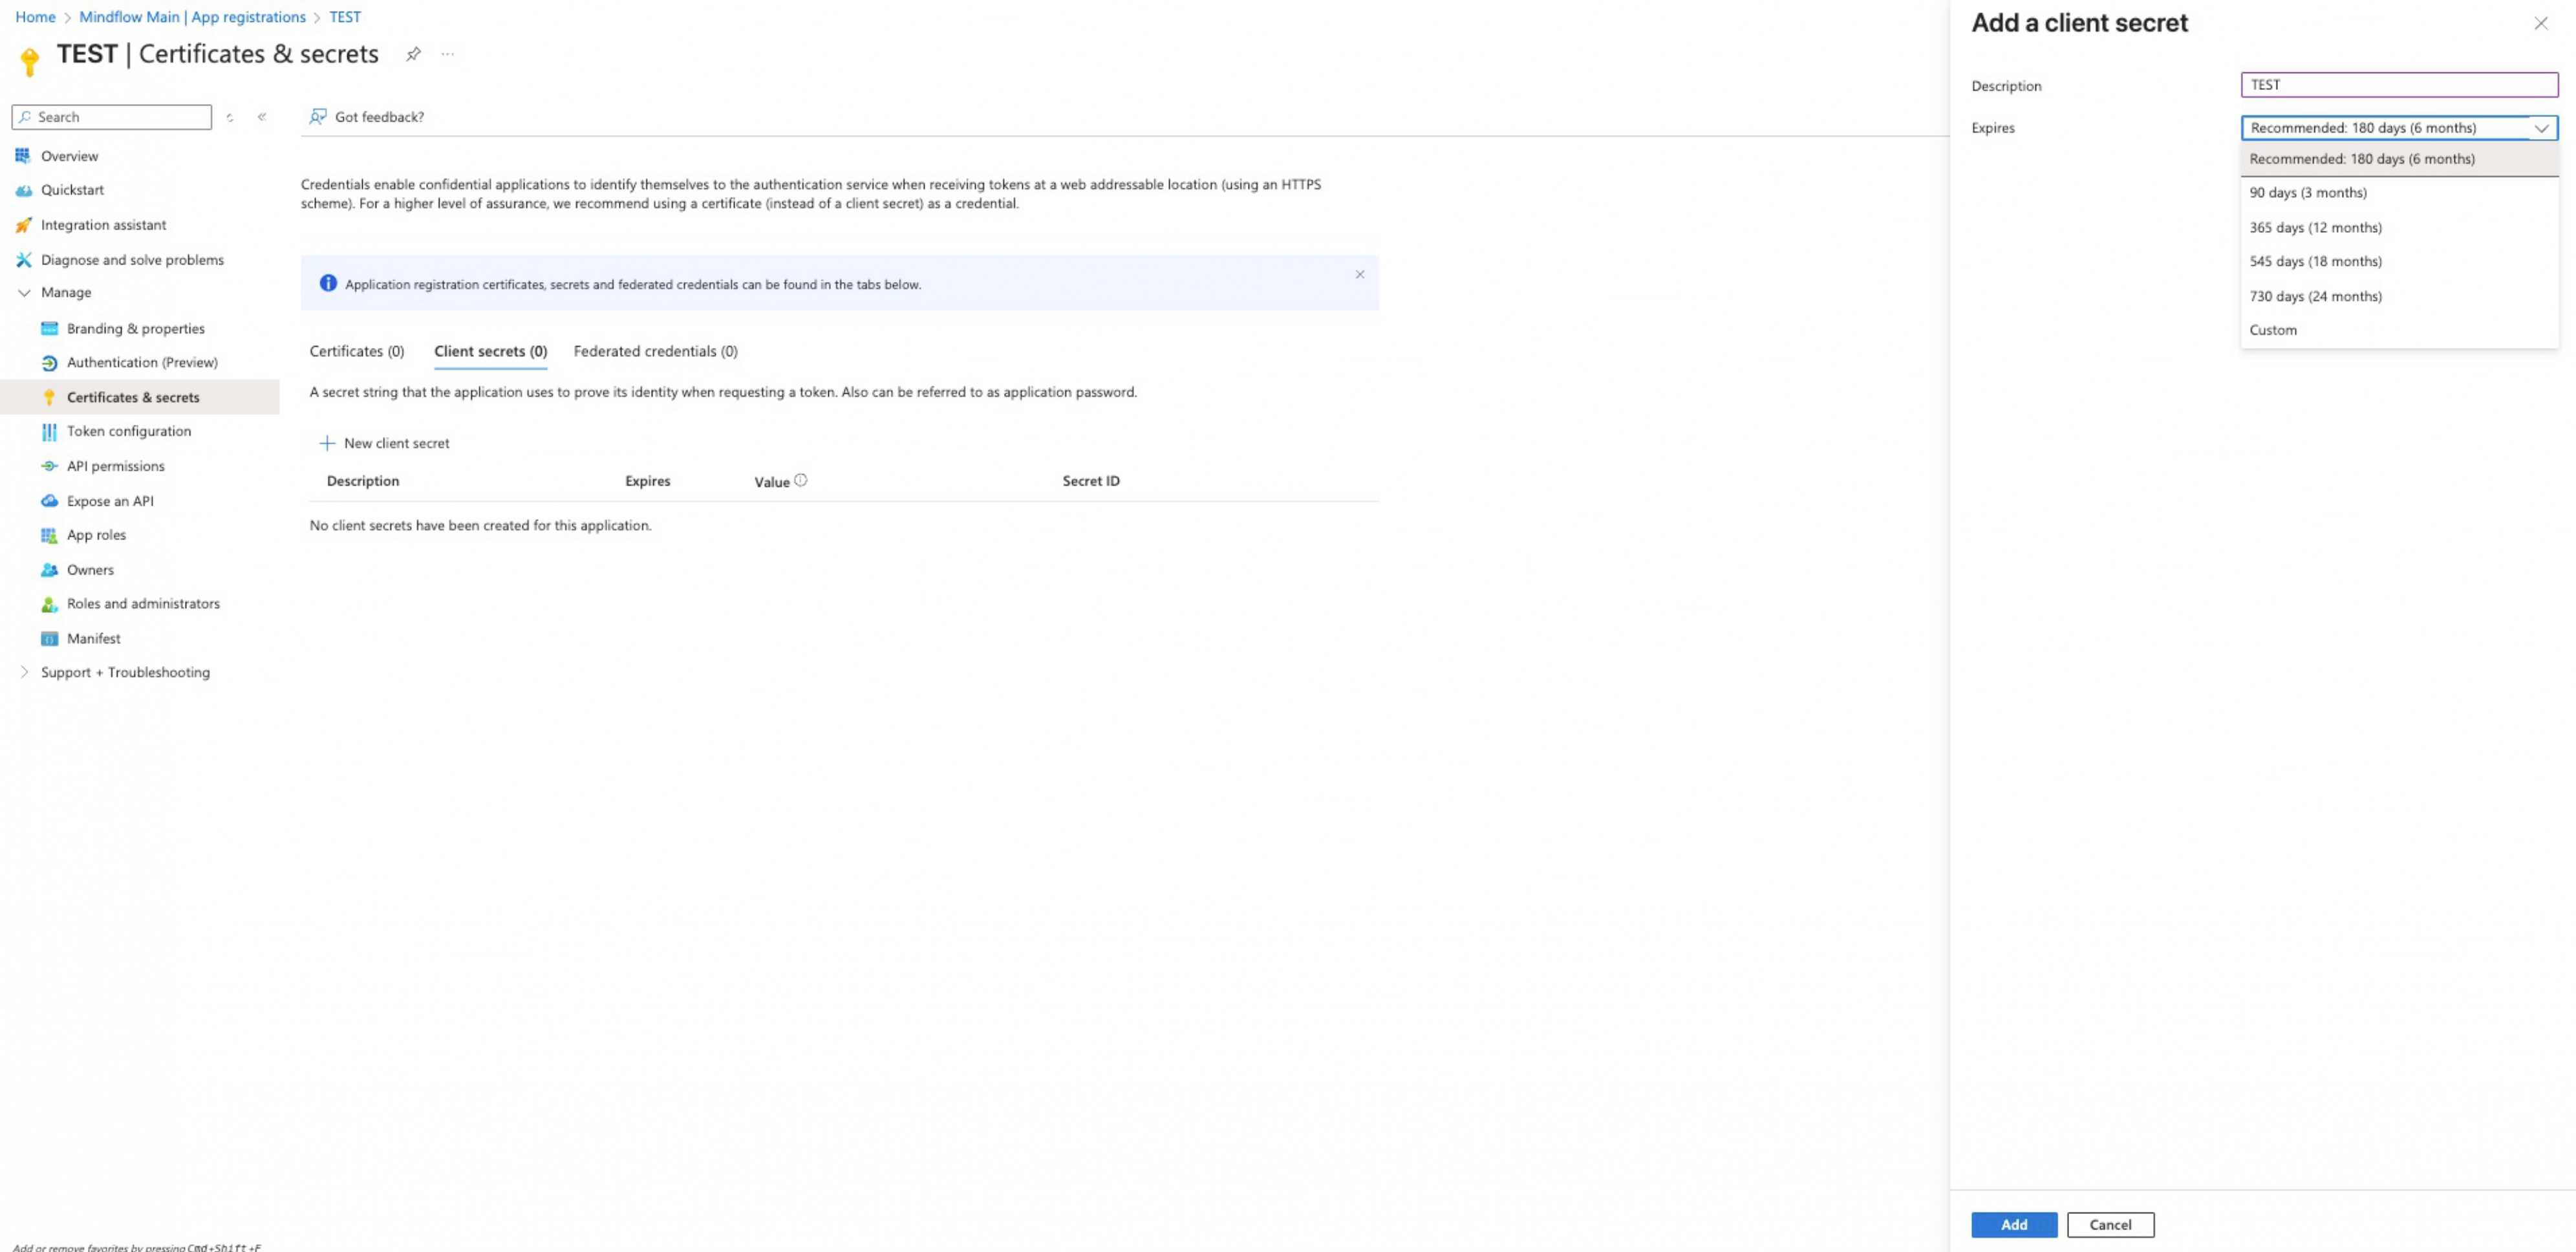
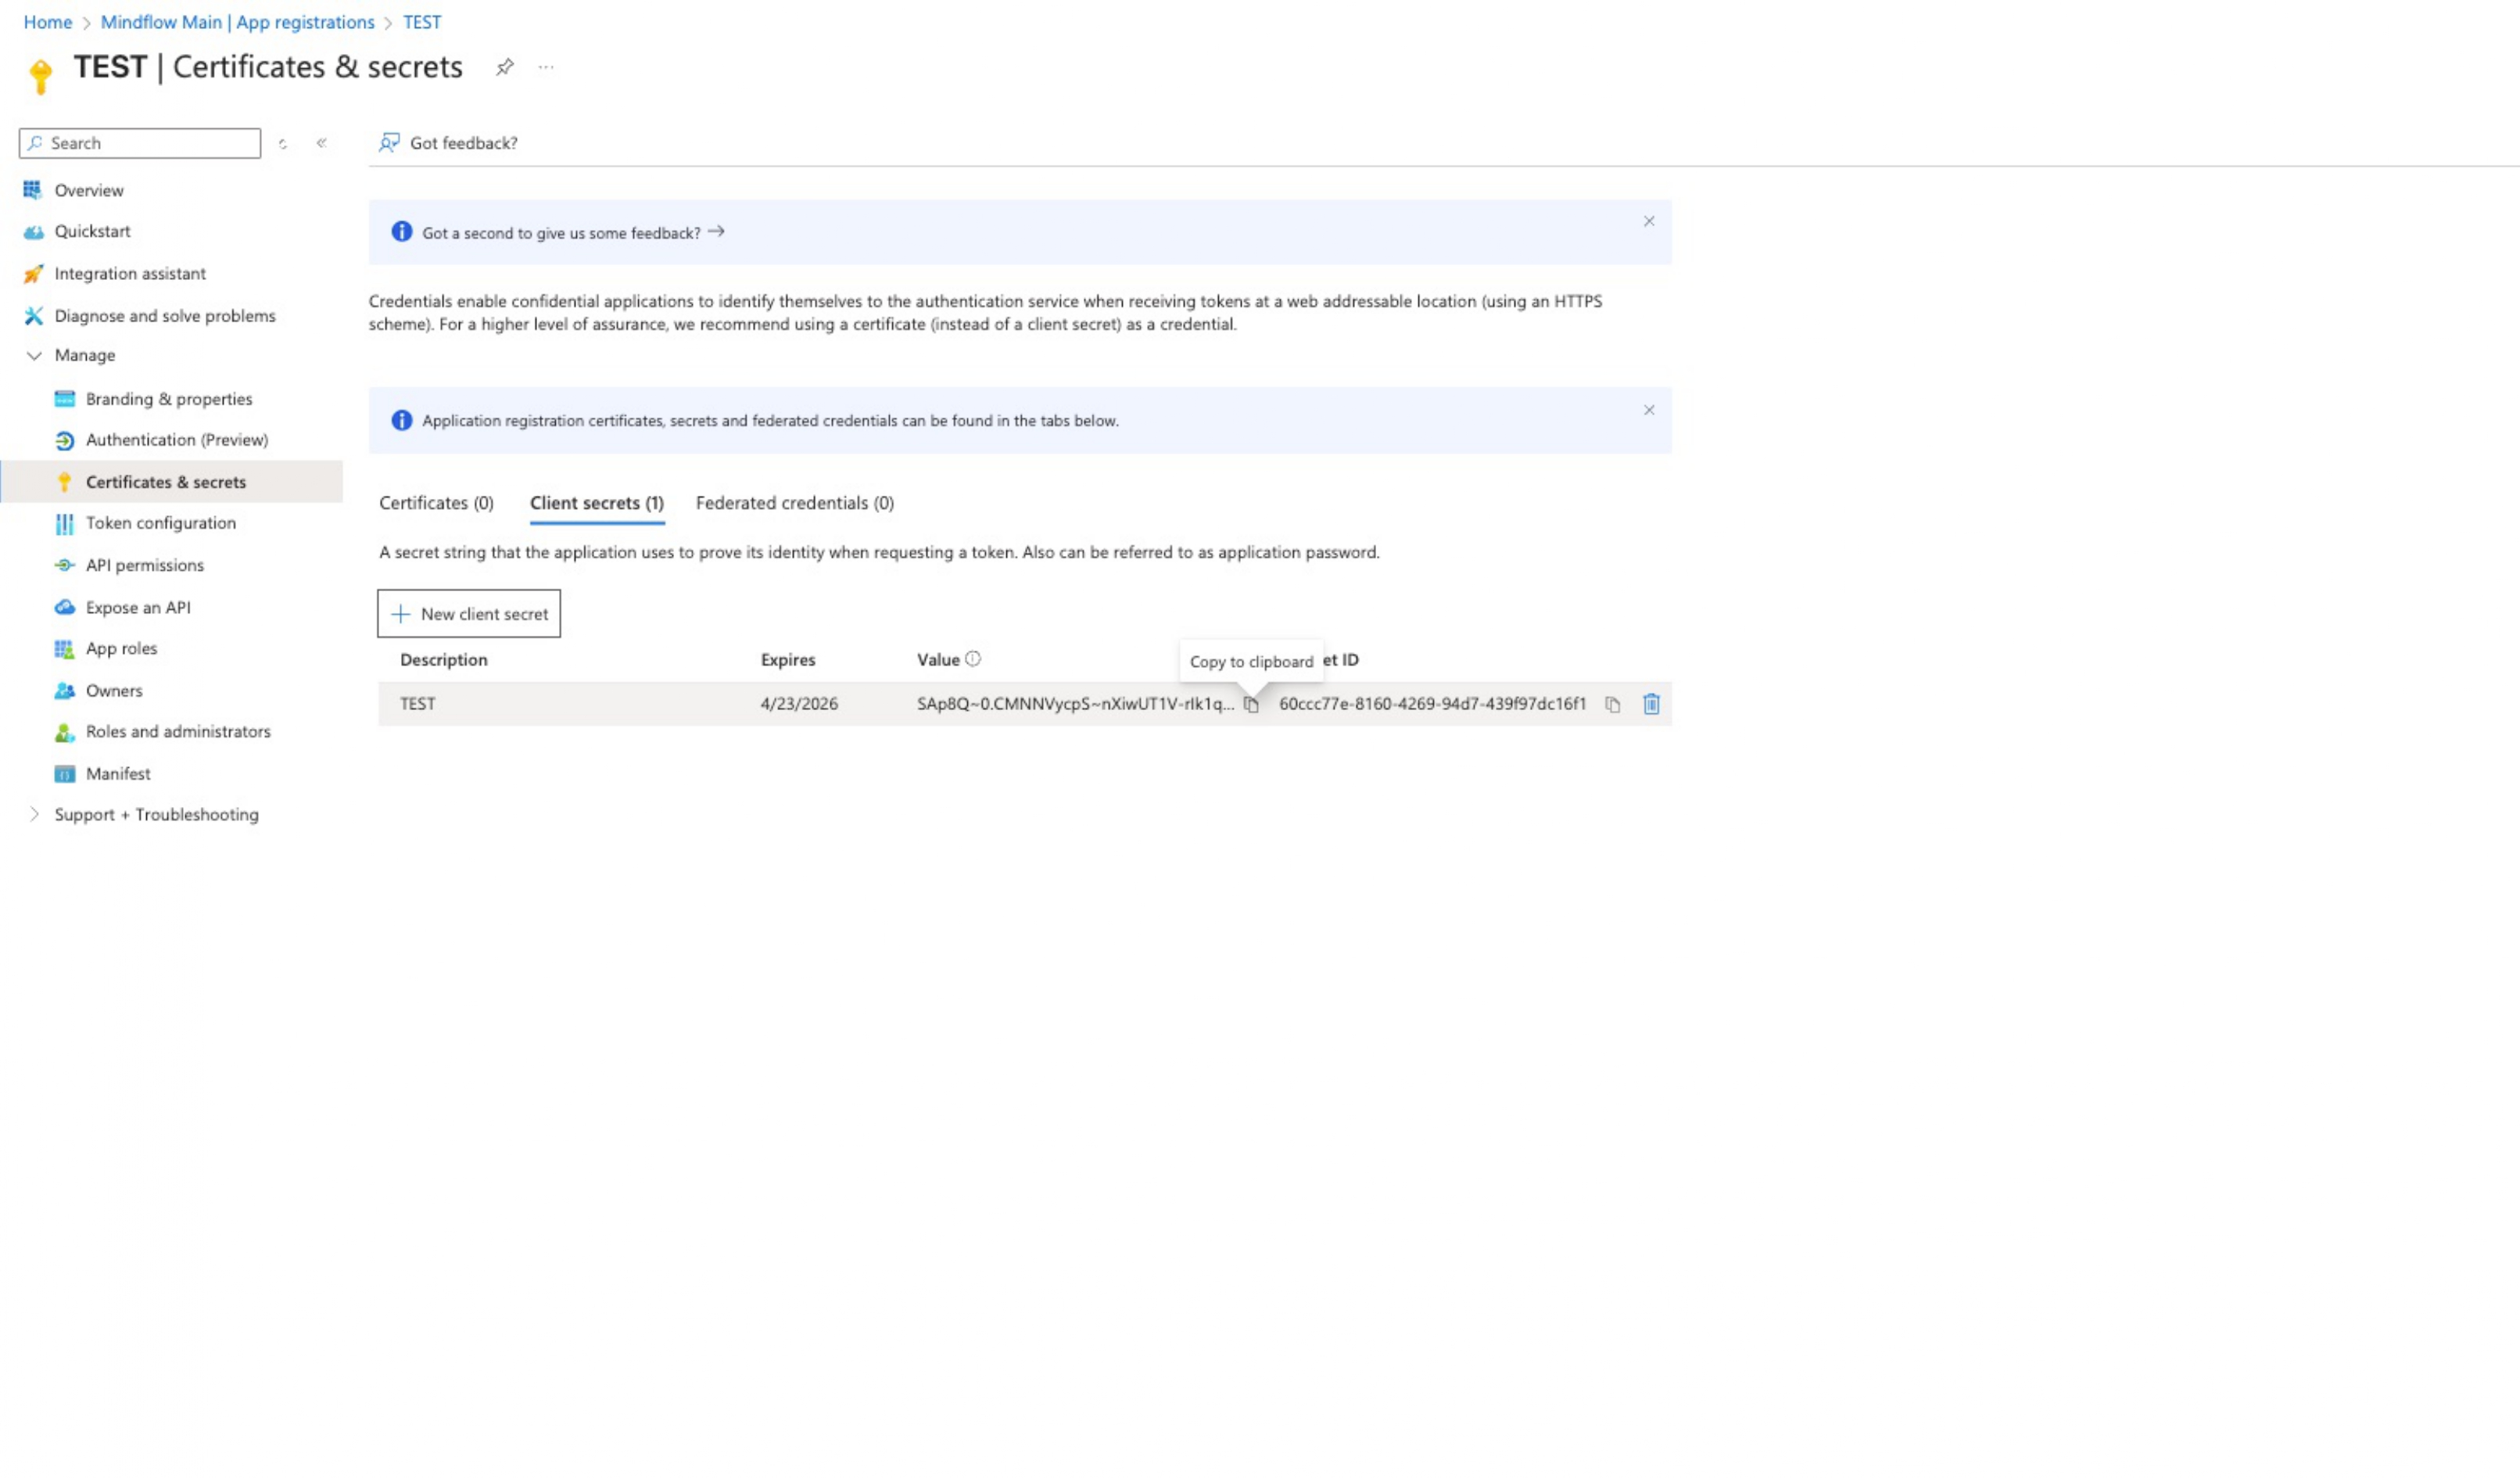
Create Secret: Navigate to Certificates & secrets and click + New client secret.
-
Set Expiration: Provide a description (e.g., “TEST”) and choose an expiration period, such as the recommended 180 days.
-
Secure the Value: Immediately copy the Secret Value.
Configuring redirect URL
Section titled “Configuring redirect URL”-
To allow the app to properly redirect to Mindflow to allows users to approve the delegation of permissions to the App navigate to Overview then click
Redirect URLs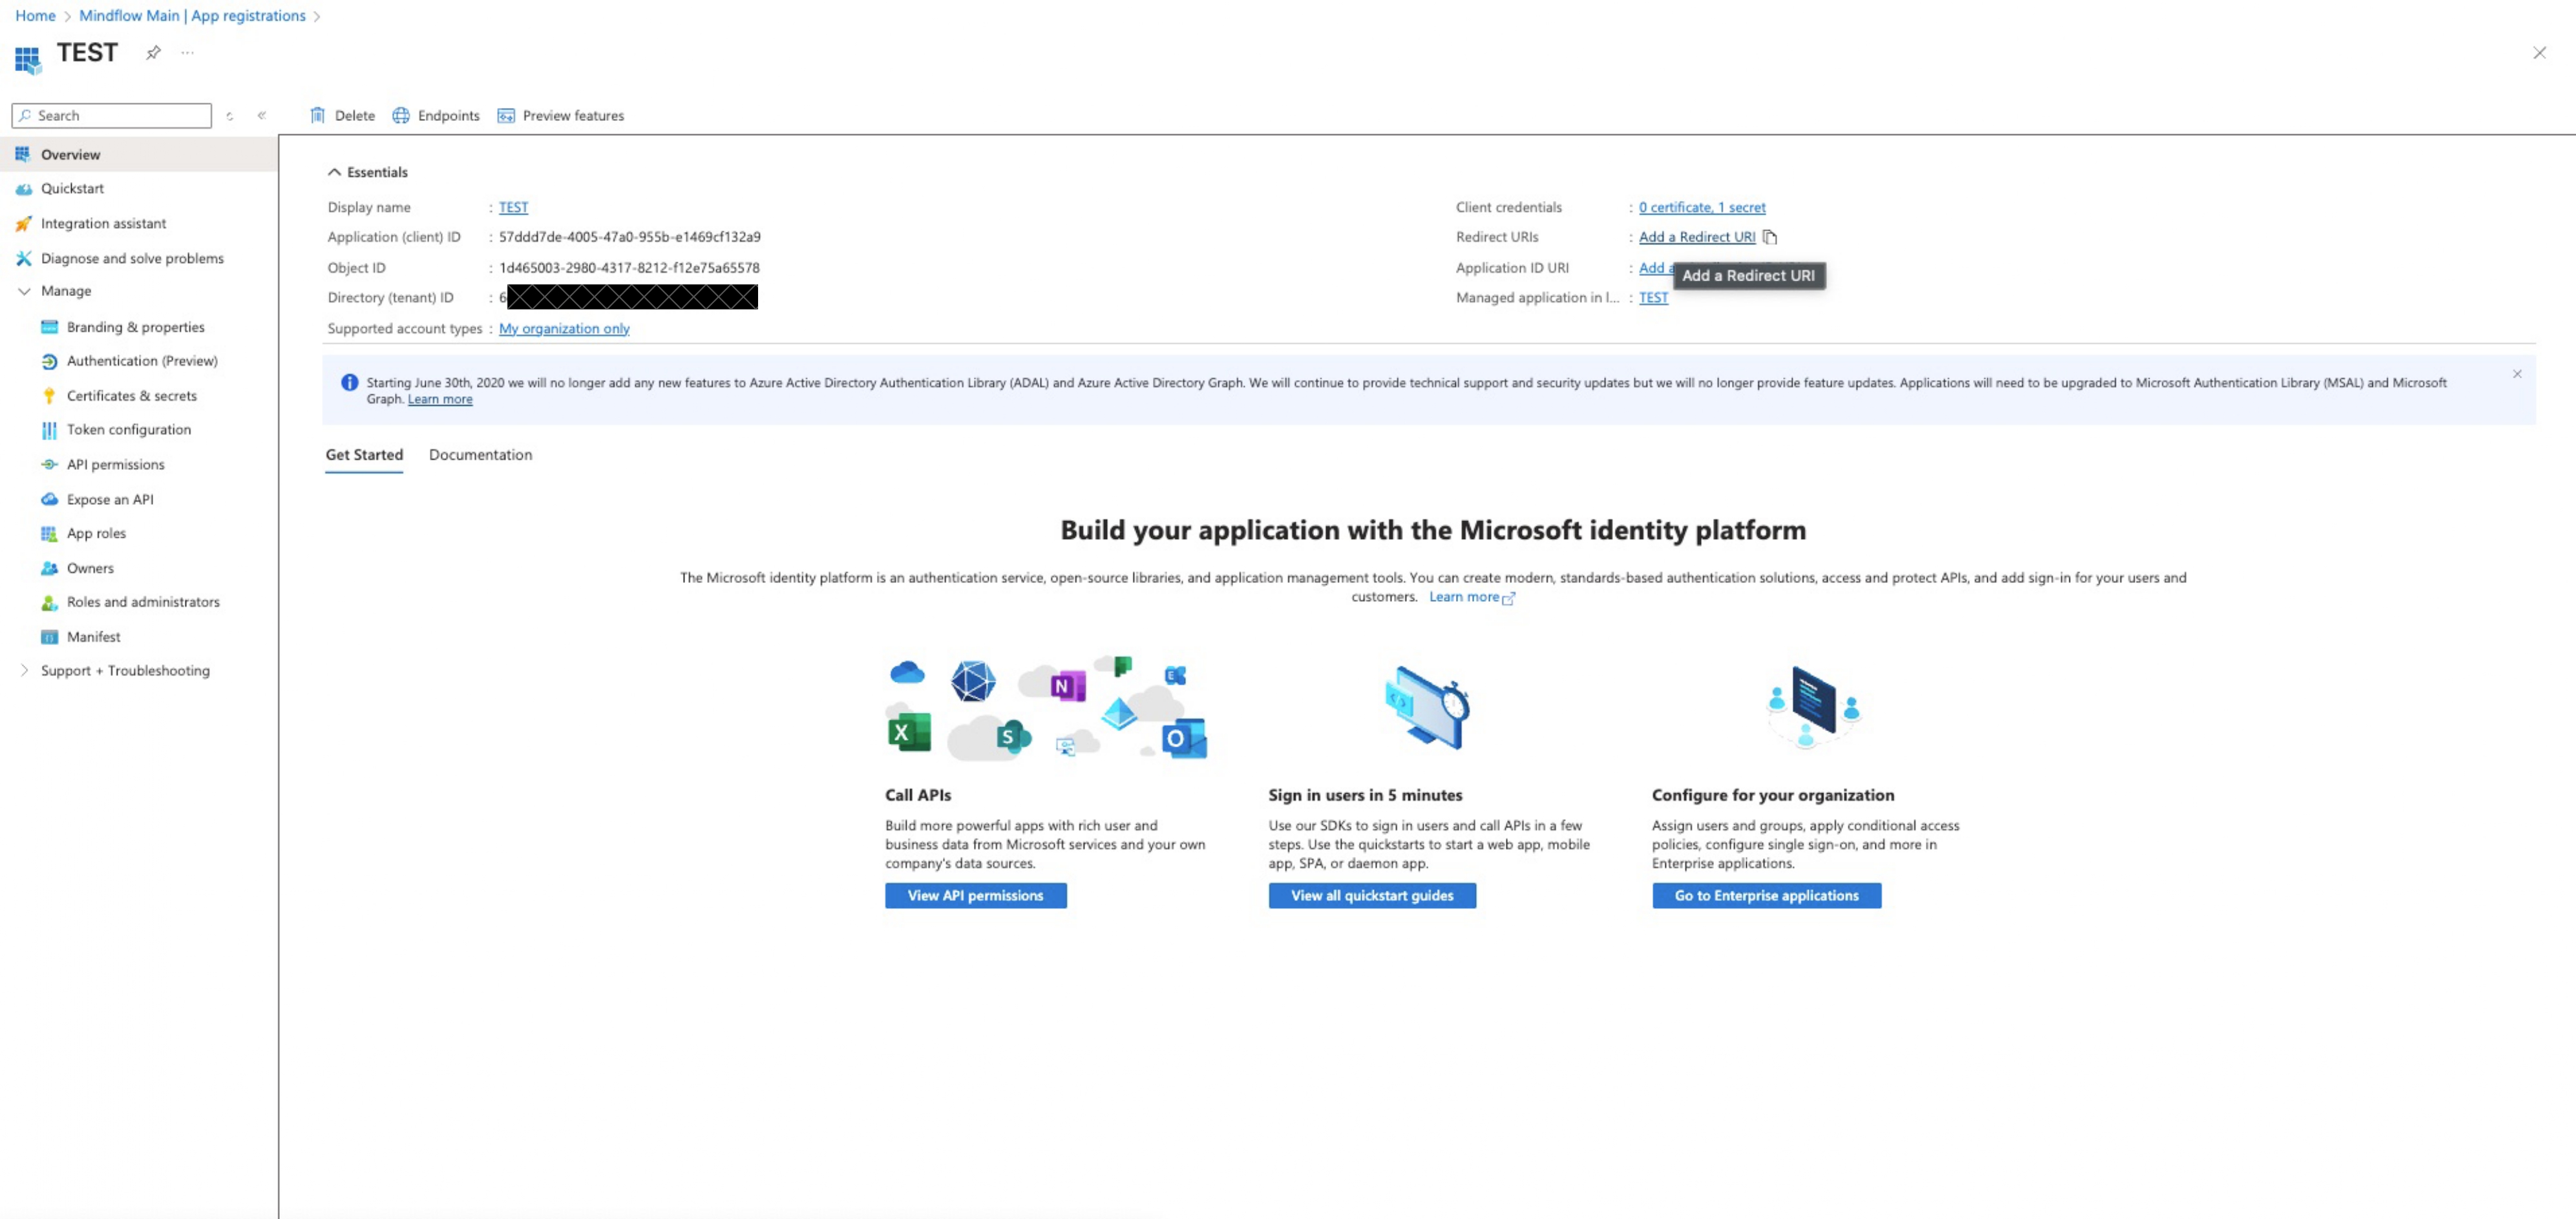
-
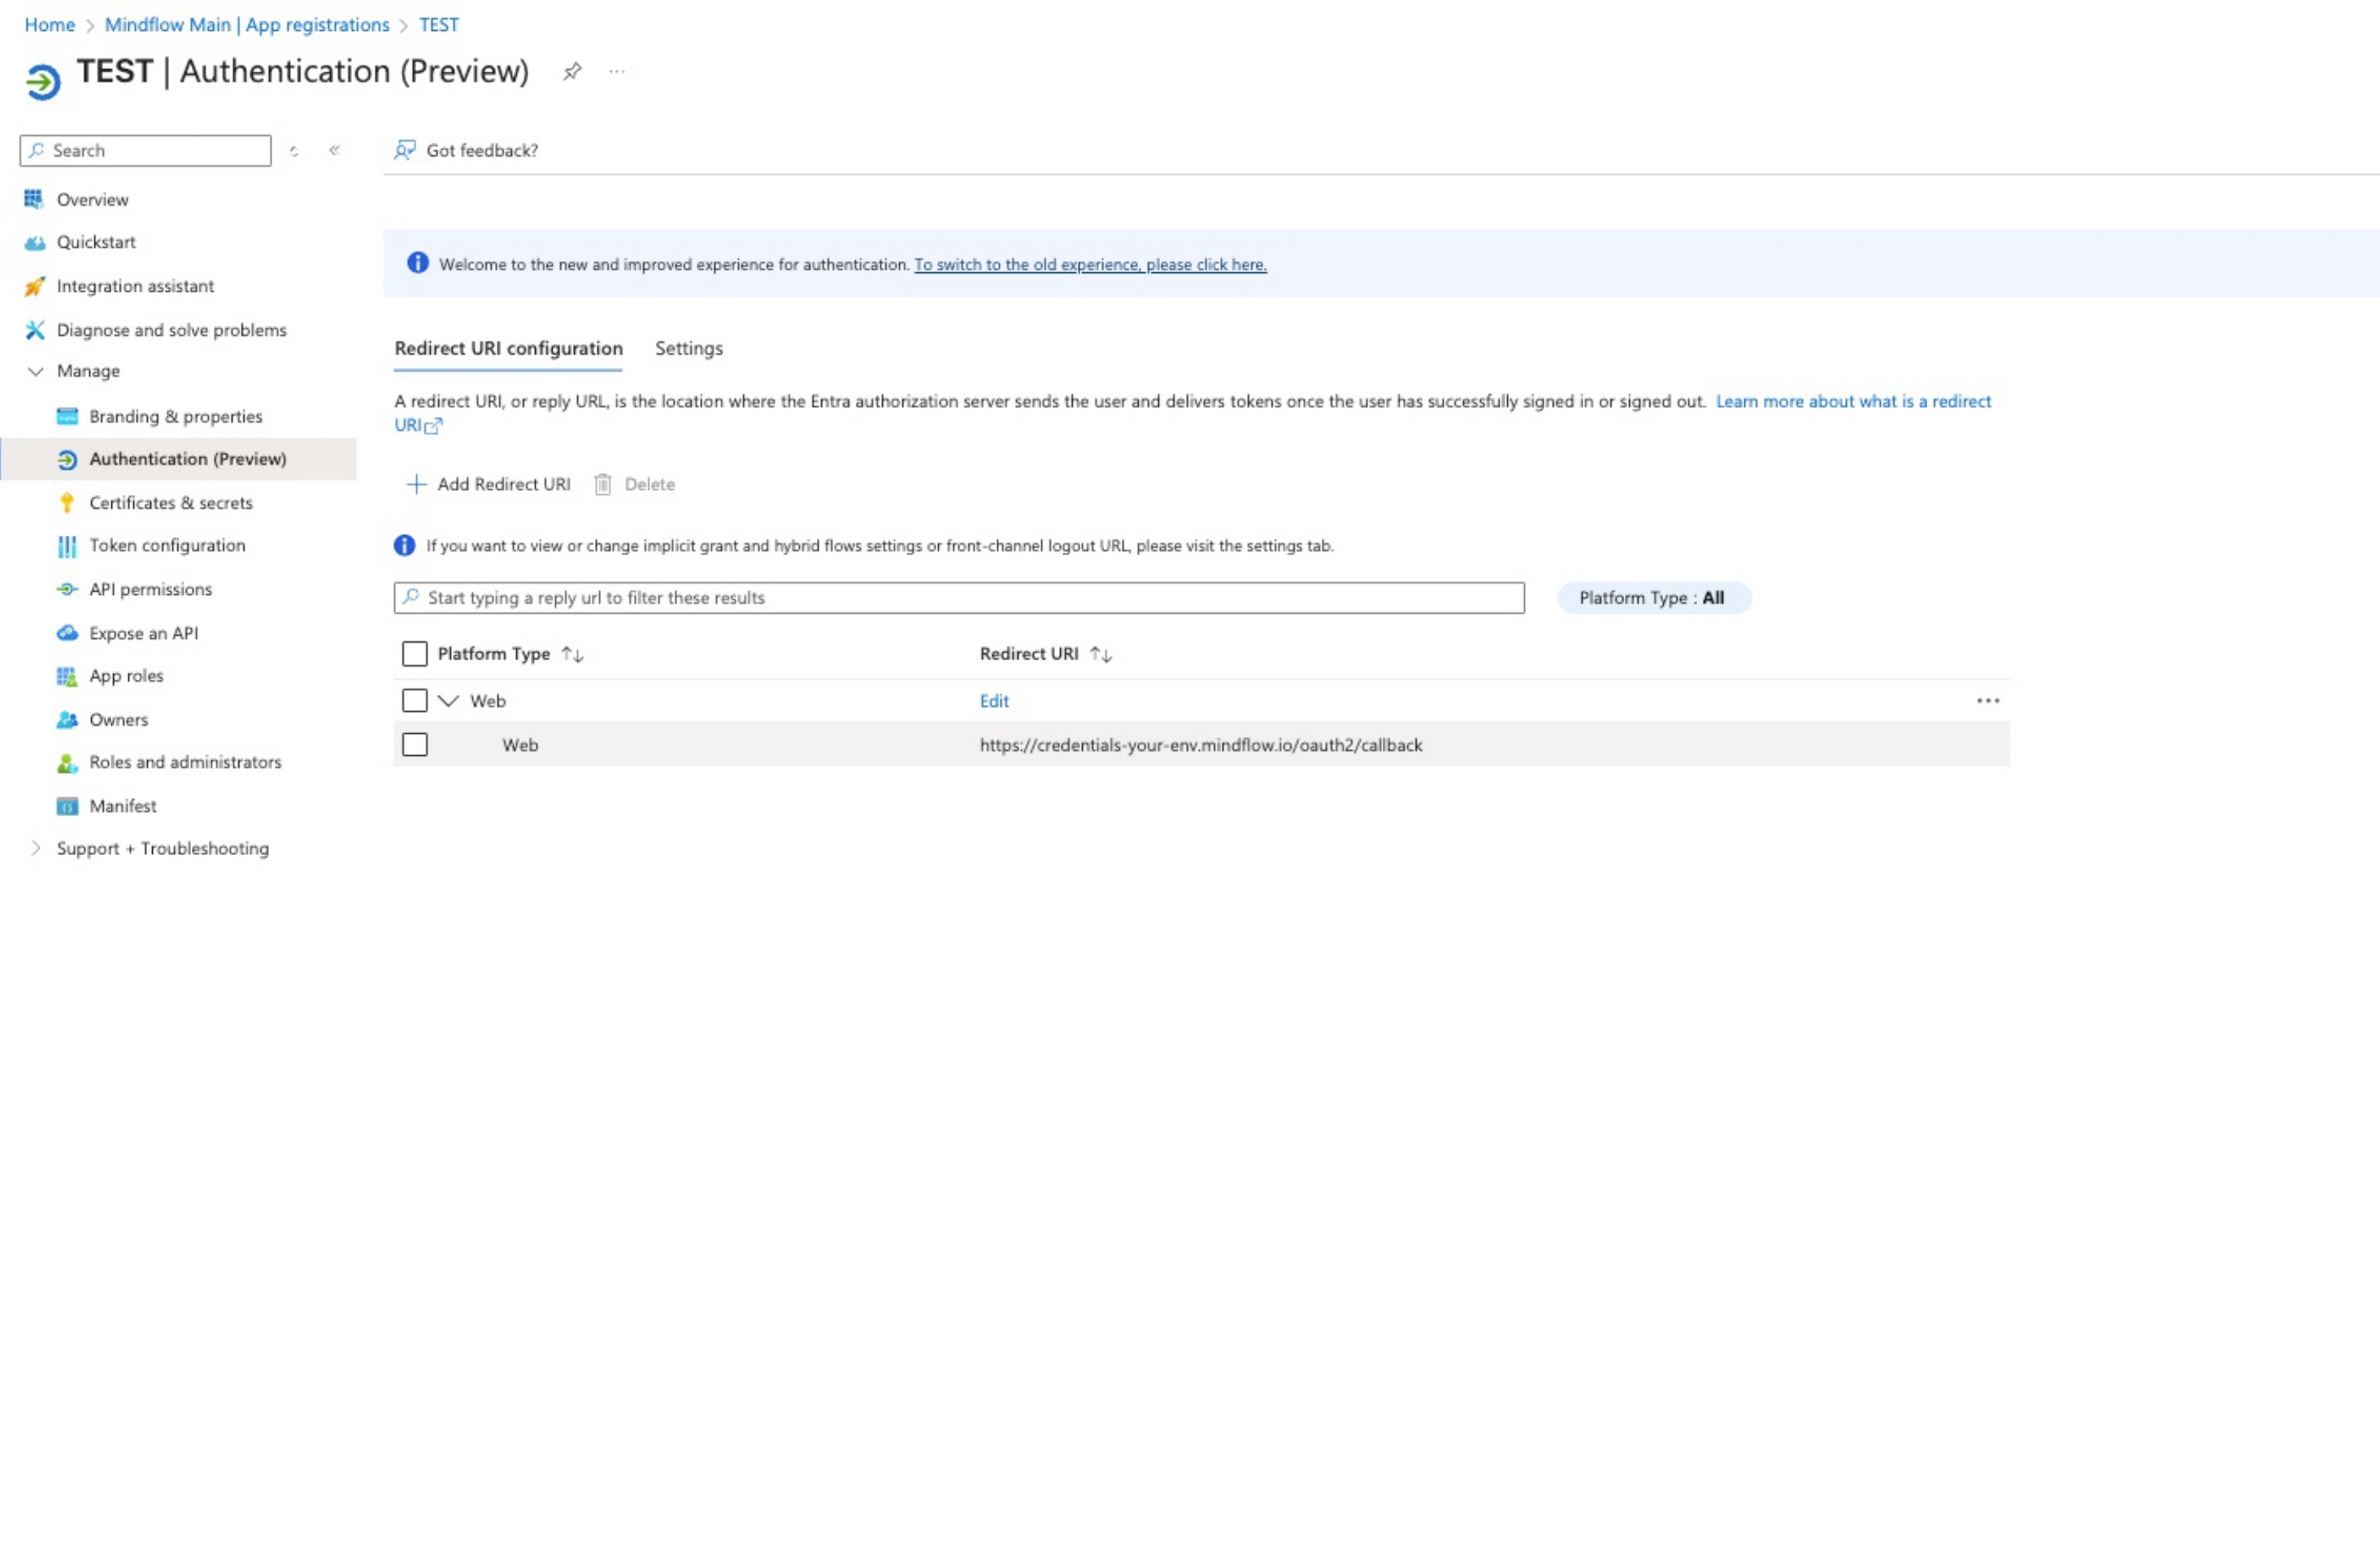
Click Add, select Web as platform and within the placeholder, write down
https://credentials-{your-mindflow-env}.mindflow.io/oauth2/callback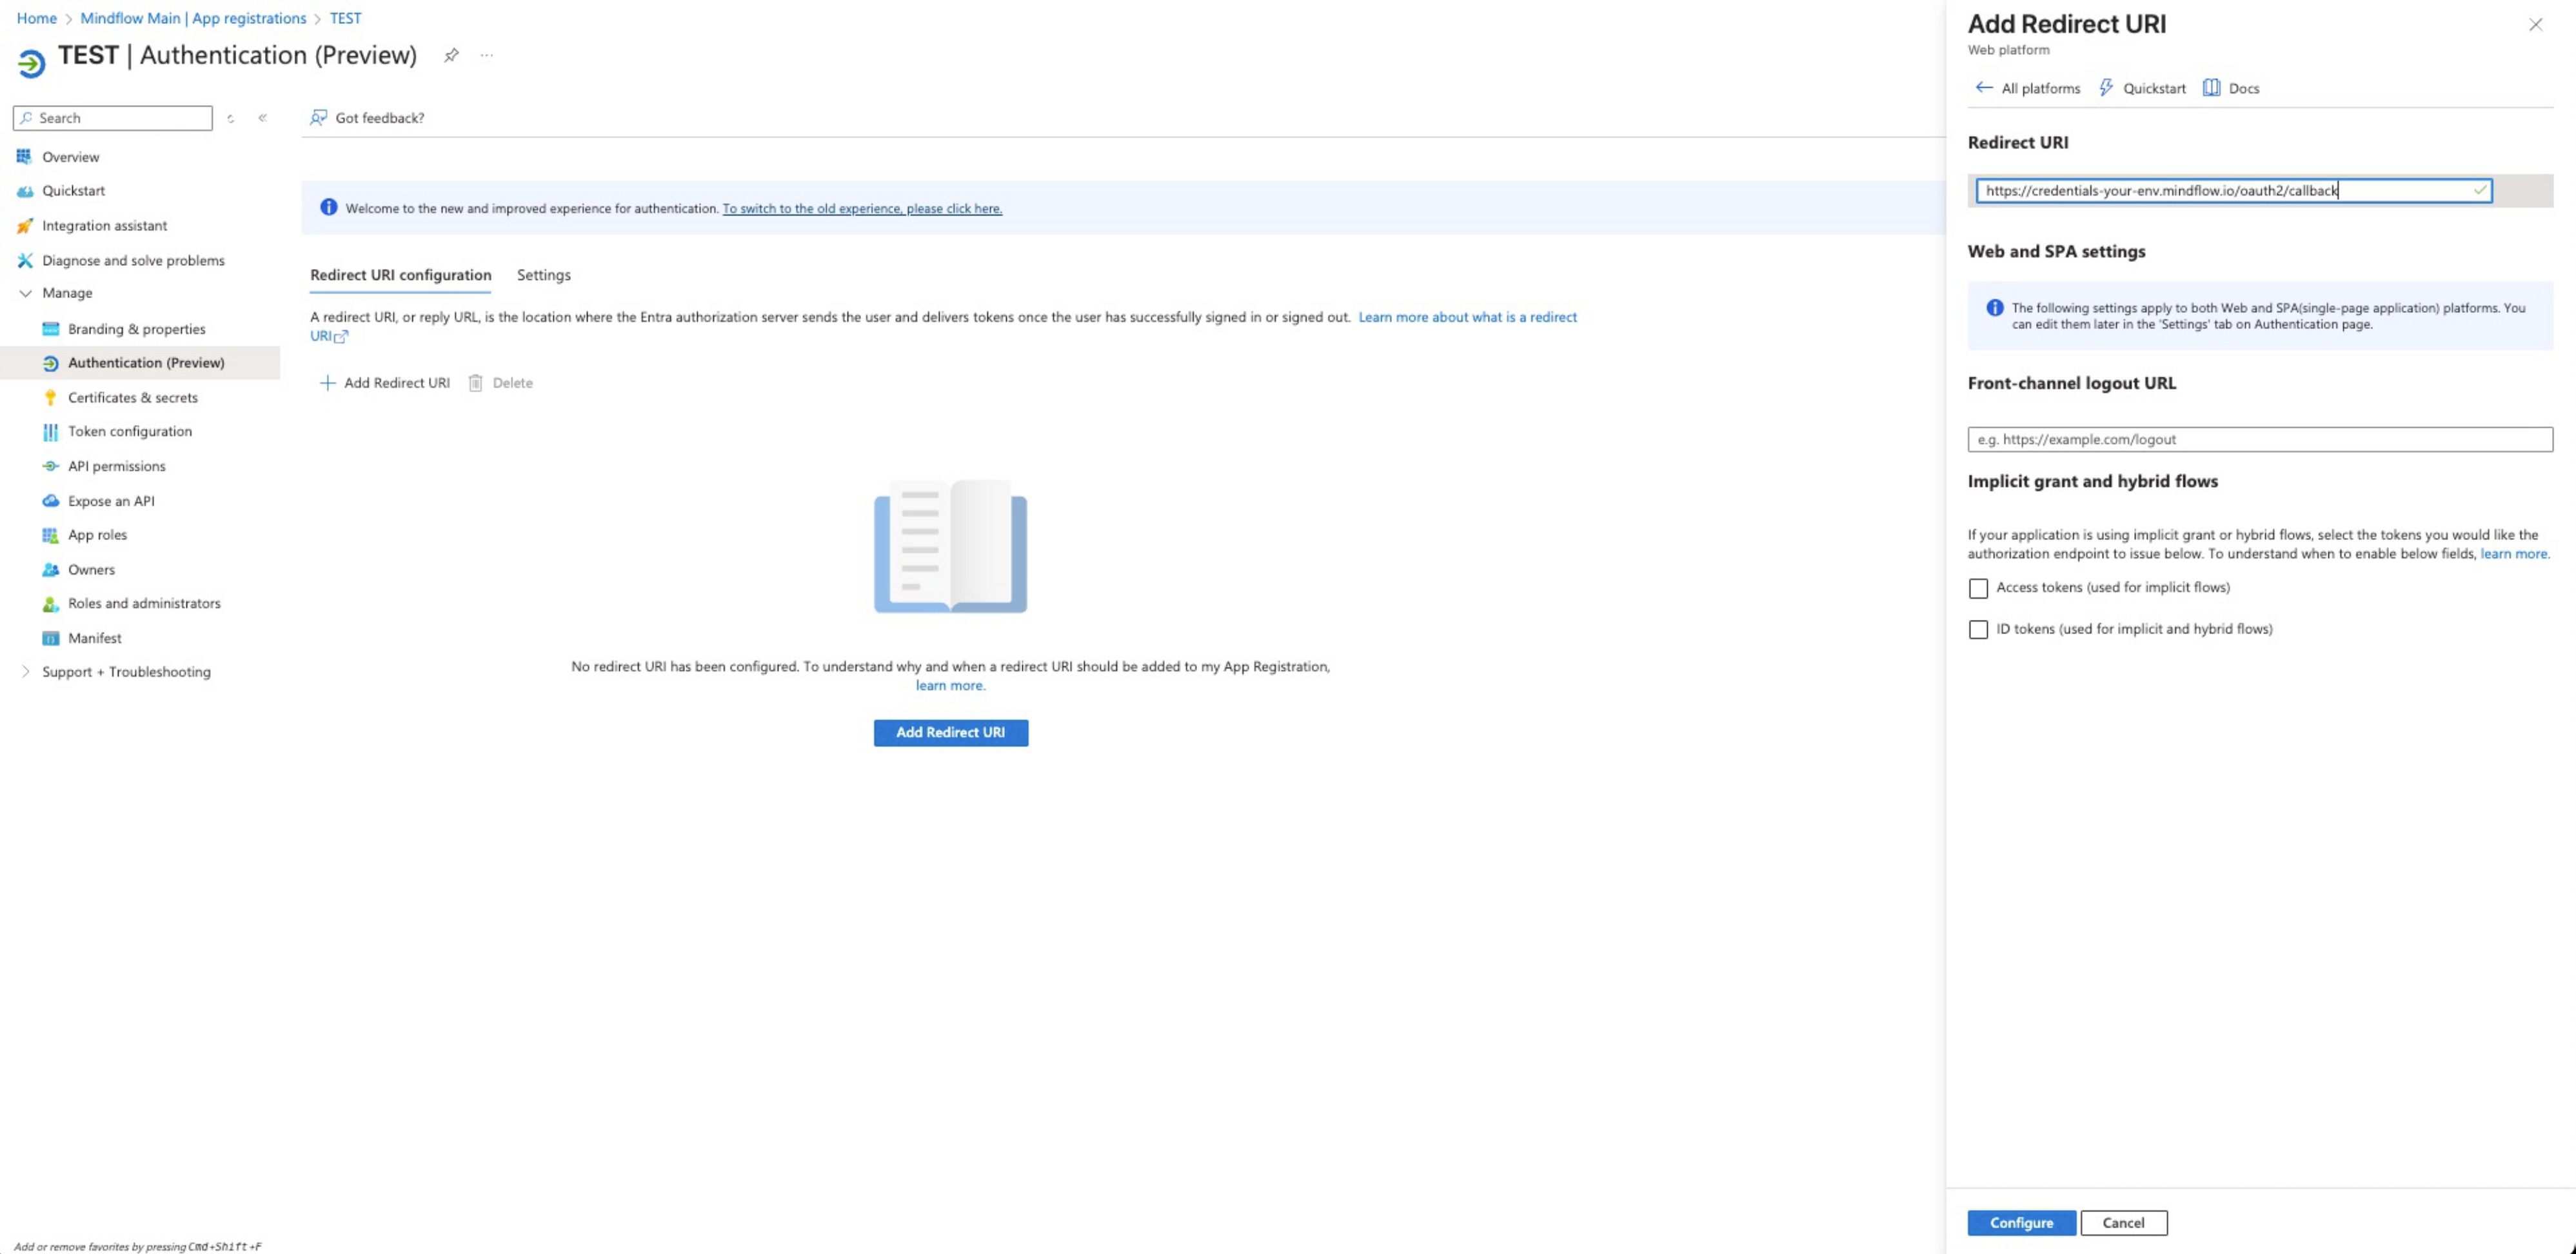
-
Click configure
Integrating with Mindflow
Section titled “Integrating with Mindflow”-
Use the gathered Azure details to create a functional credential within Mindflow.
-
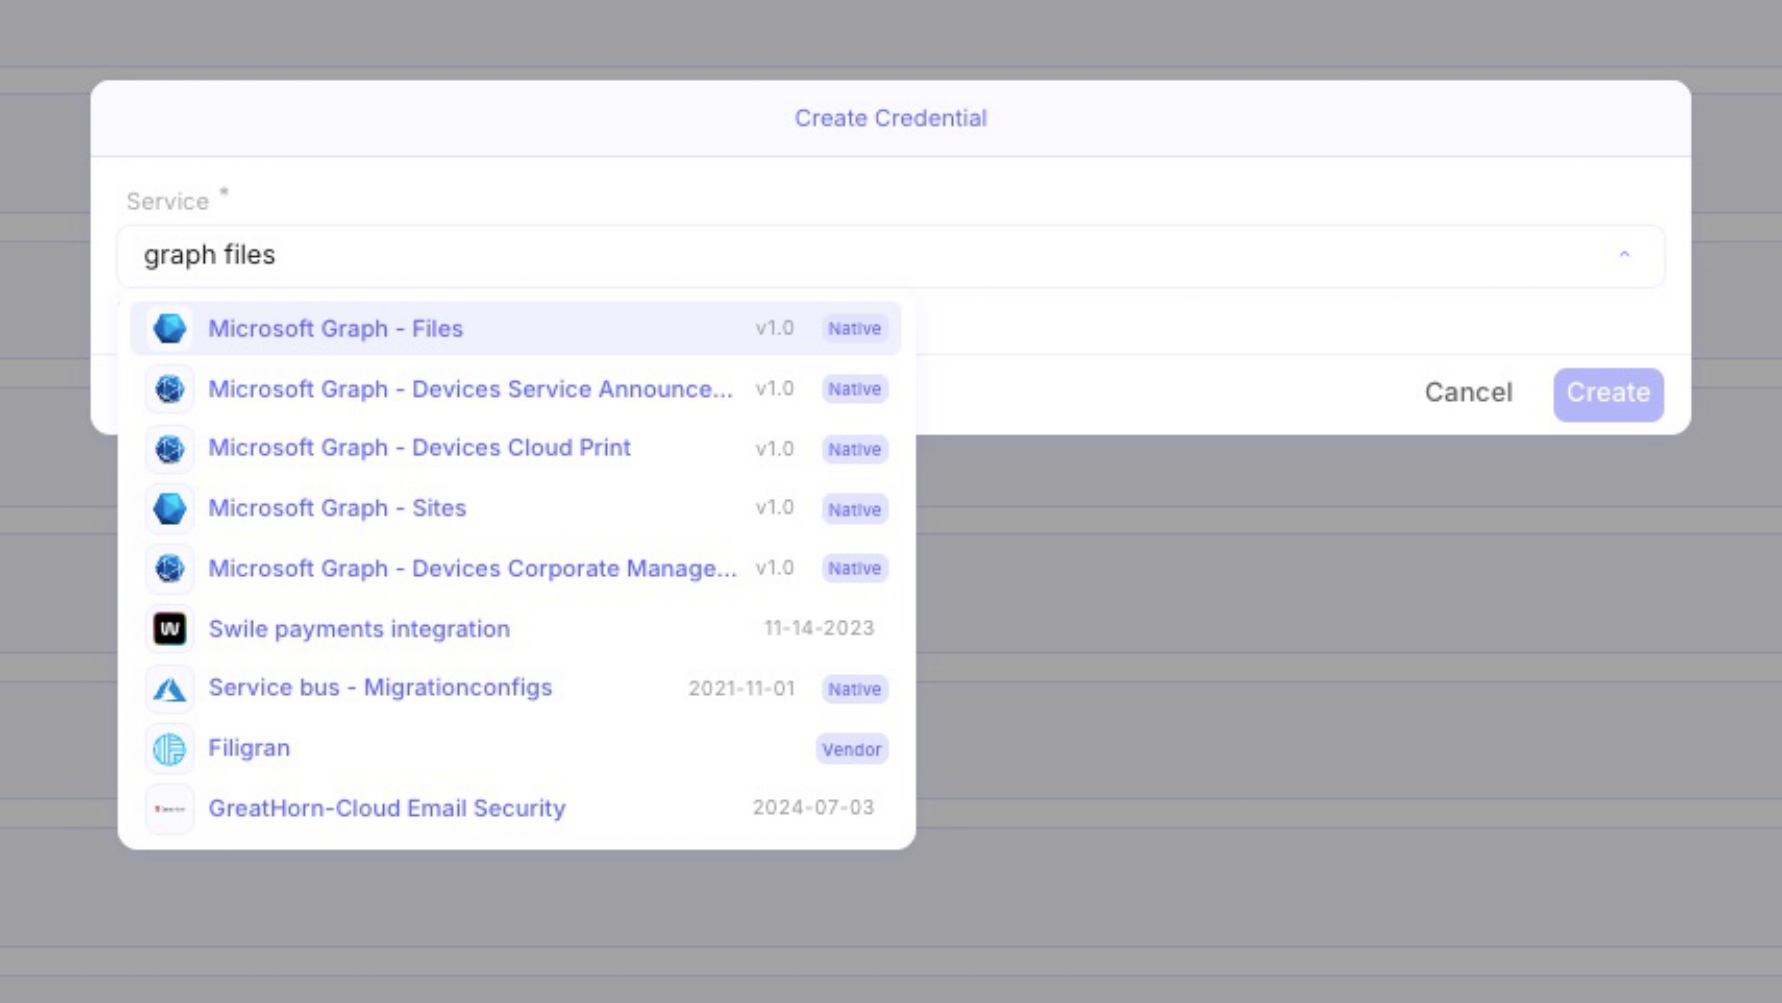
Start Credential Creation: In Mindflow, select the appropriate service, such as Microsoft Graph - Files.
-
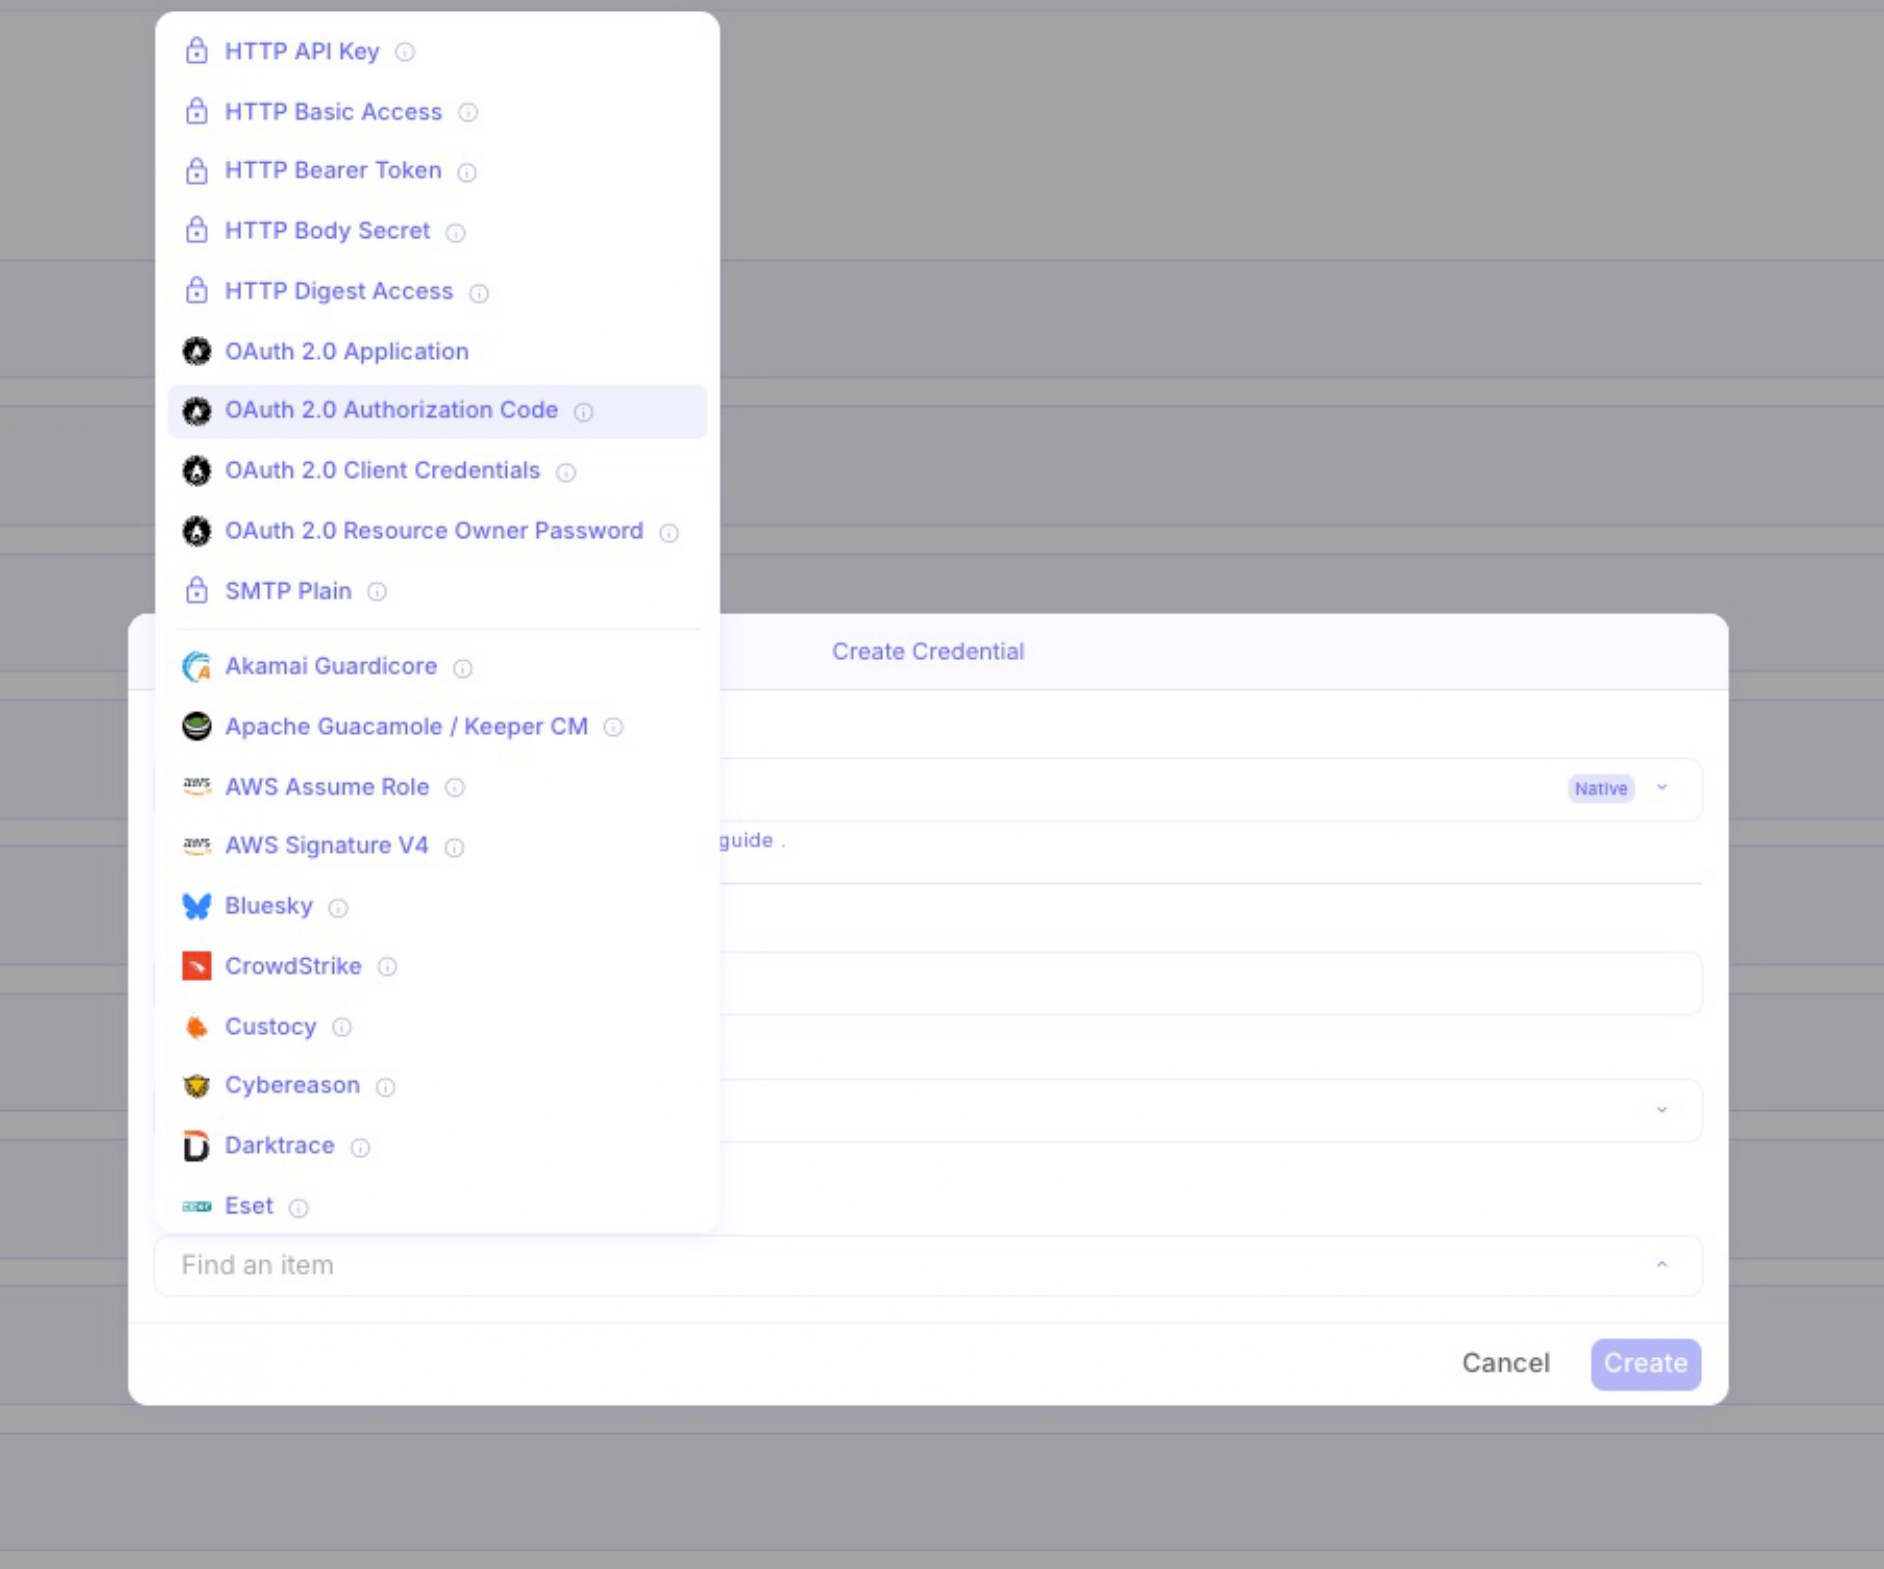
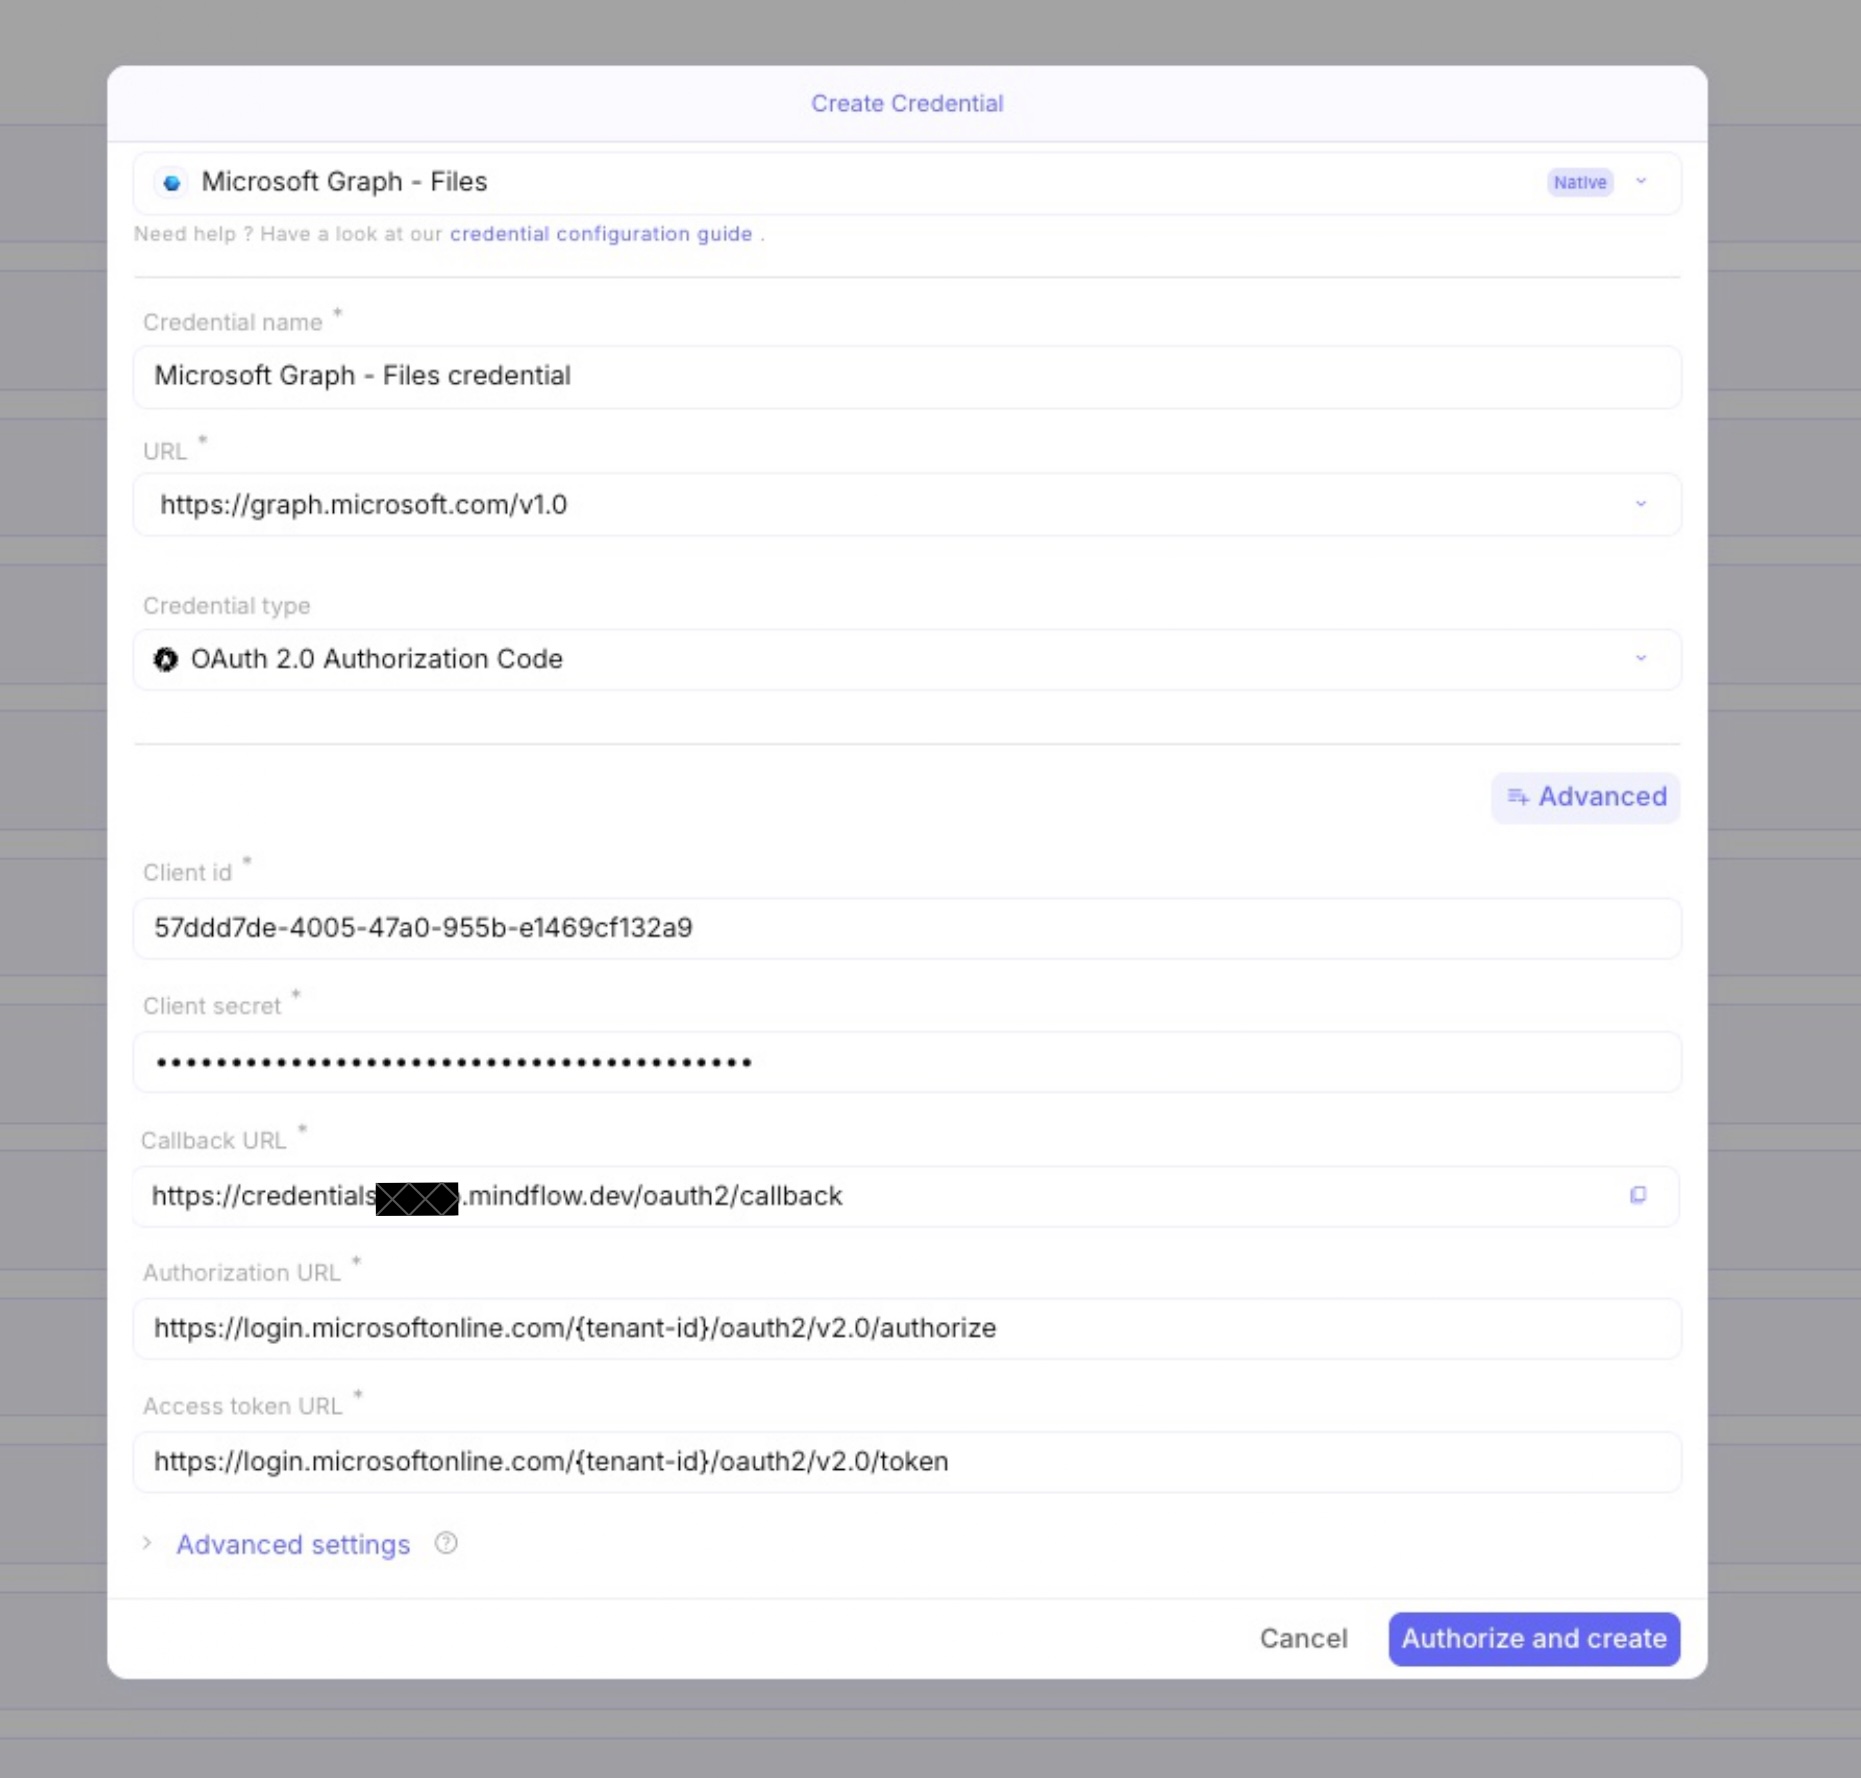
Configure Connection: Fill in the following details in Mindflow:
- Credential Name: e.g., “Microsoft Graph - Files credential”.
- Credential Type: Select OAuth 2.0 Authorization Code.
- Client ID: Paste the Application (client) ID from Phase 1.
- Client Secret: Paste the Secret Value generated in Phase 3.
- Callback URL: Ensure this matches the Redirect URI configured in Azure (e.g.,
https://credentials-{tenant}.mindflow.io/oauth2/callback). - Endpoints: Use the provided OAuth 2.0 authorization and token endpoints, replacing
{tenant-id}with your actual Directory ID.
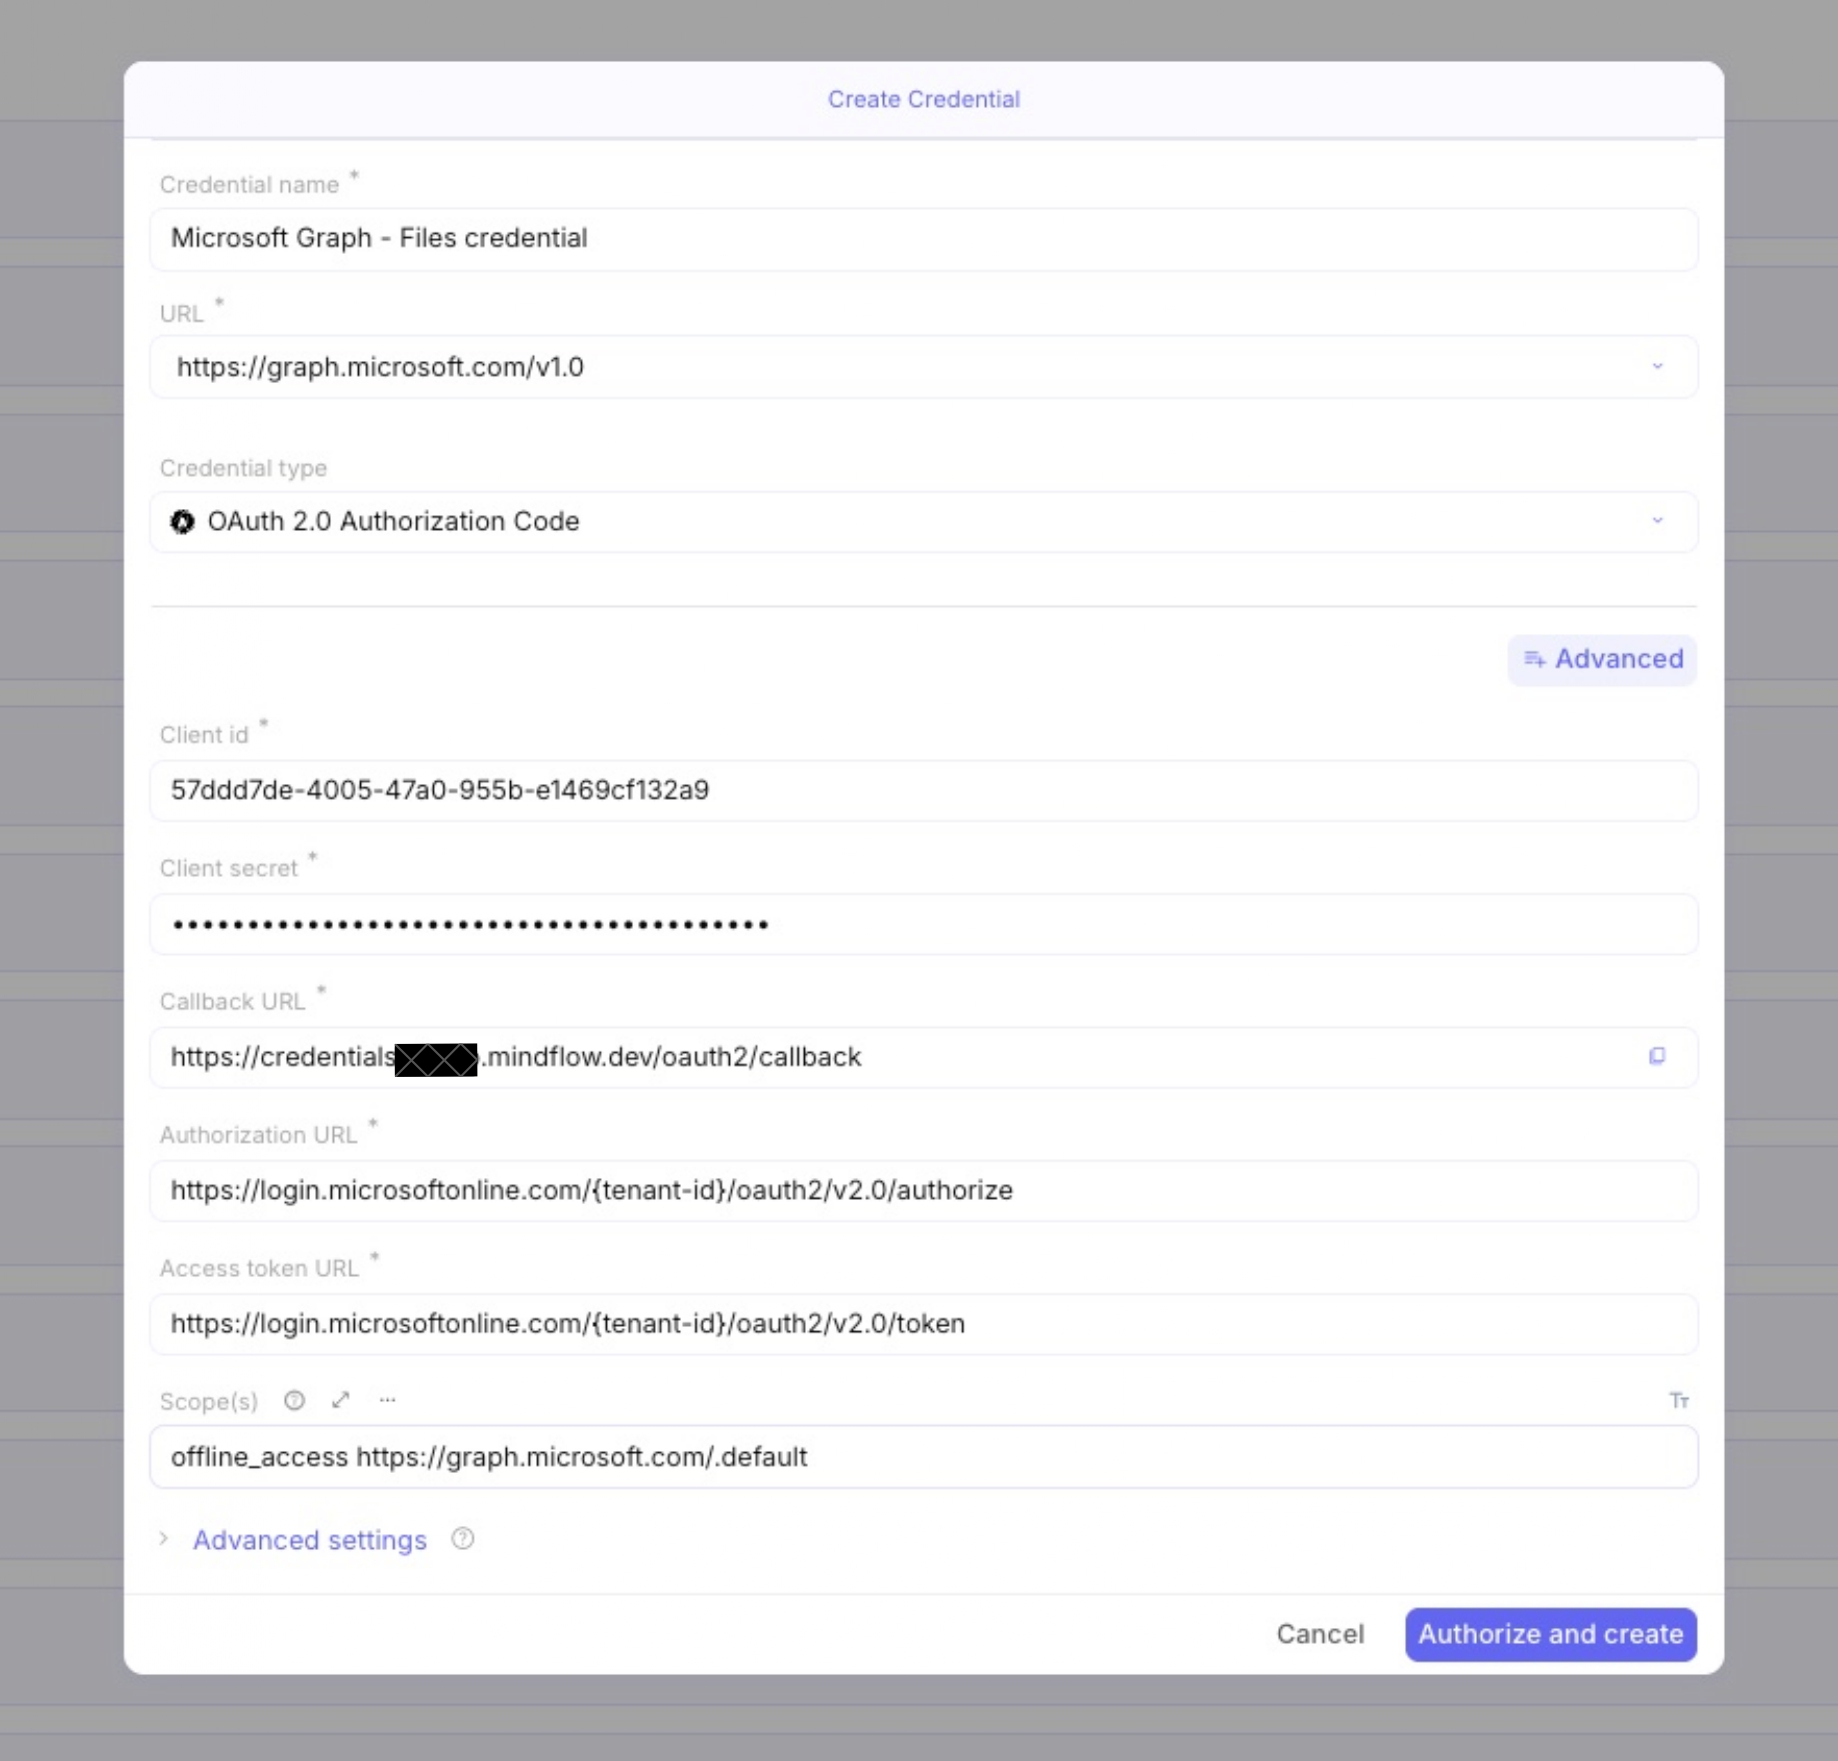
- Set Scopes: Under Advanced settings, enter the required scopes, such as
offline_access https://graph.microsoft.com/.default.
-
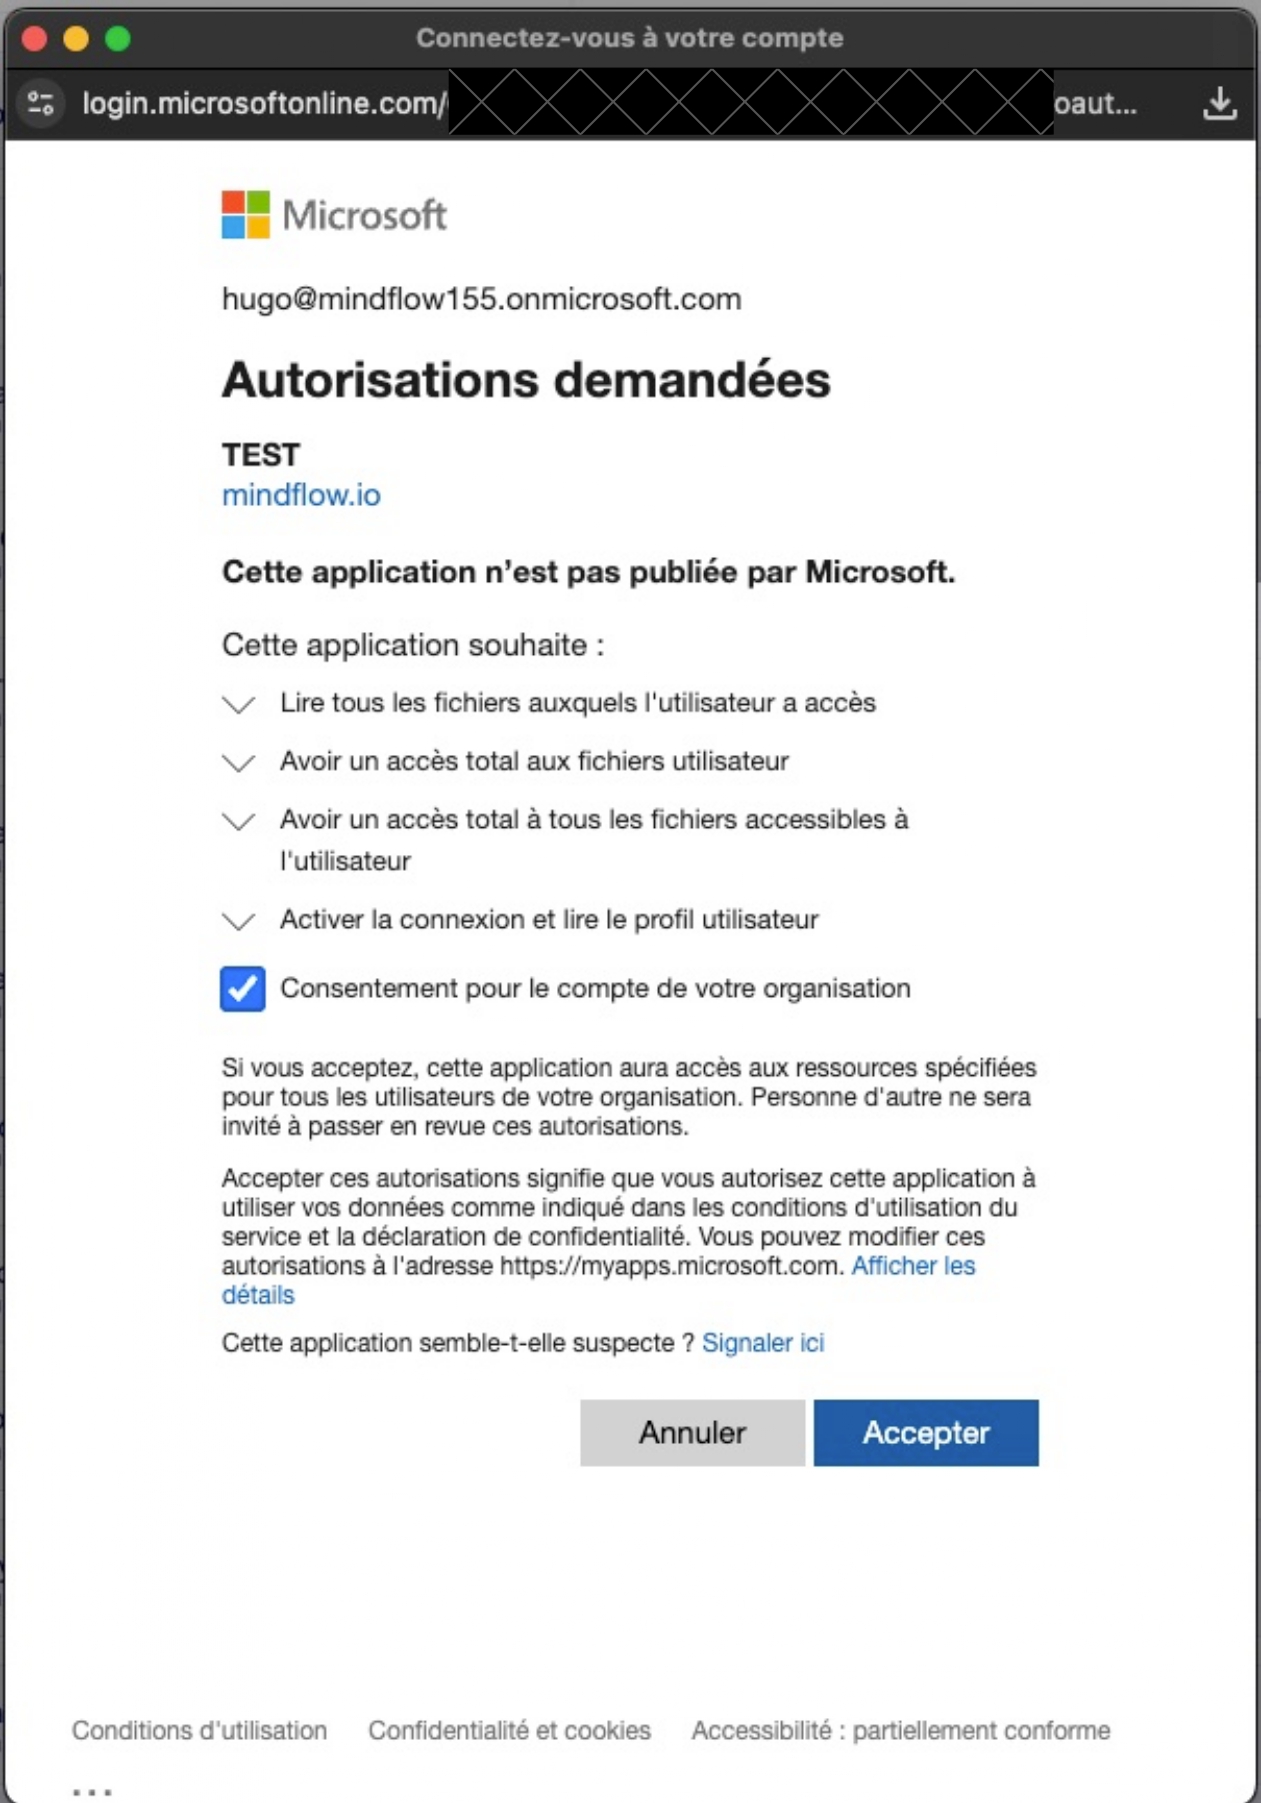
Authorize: Click Authorize and create. You will be prompted to sign in and accept the requested permissions for your organization.
-
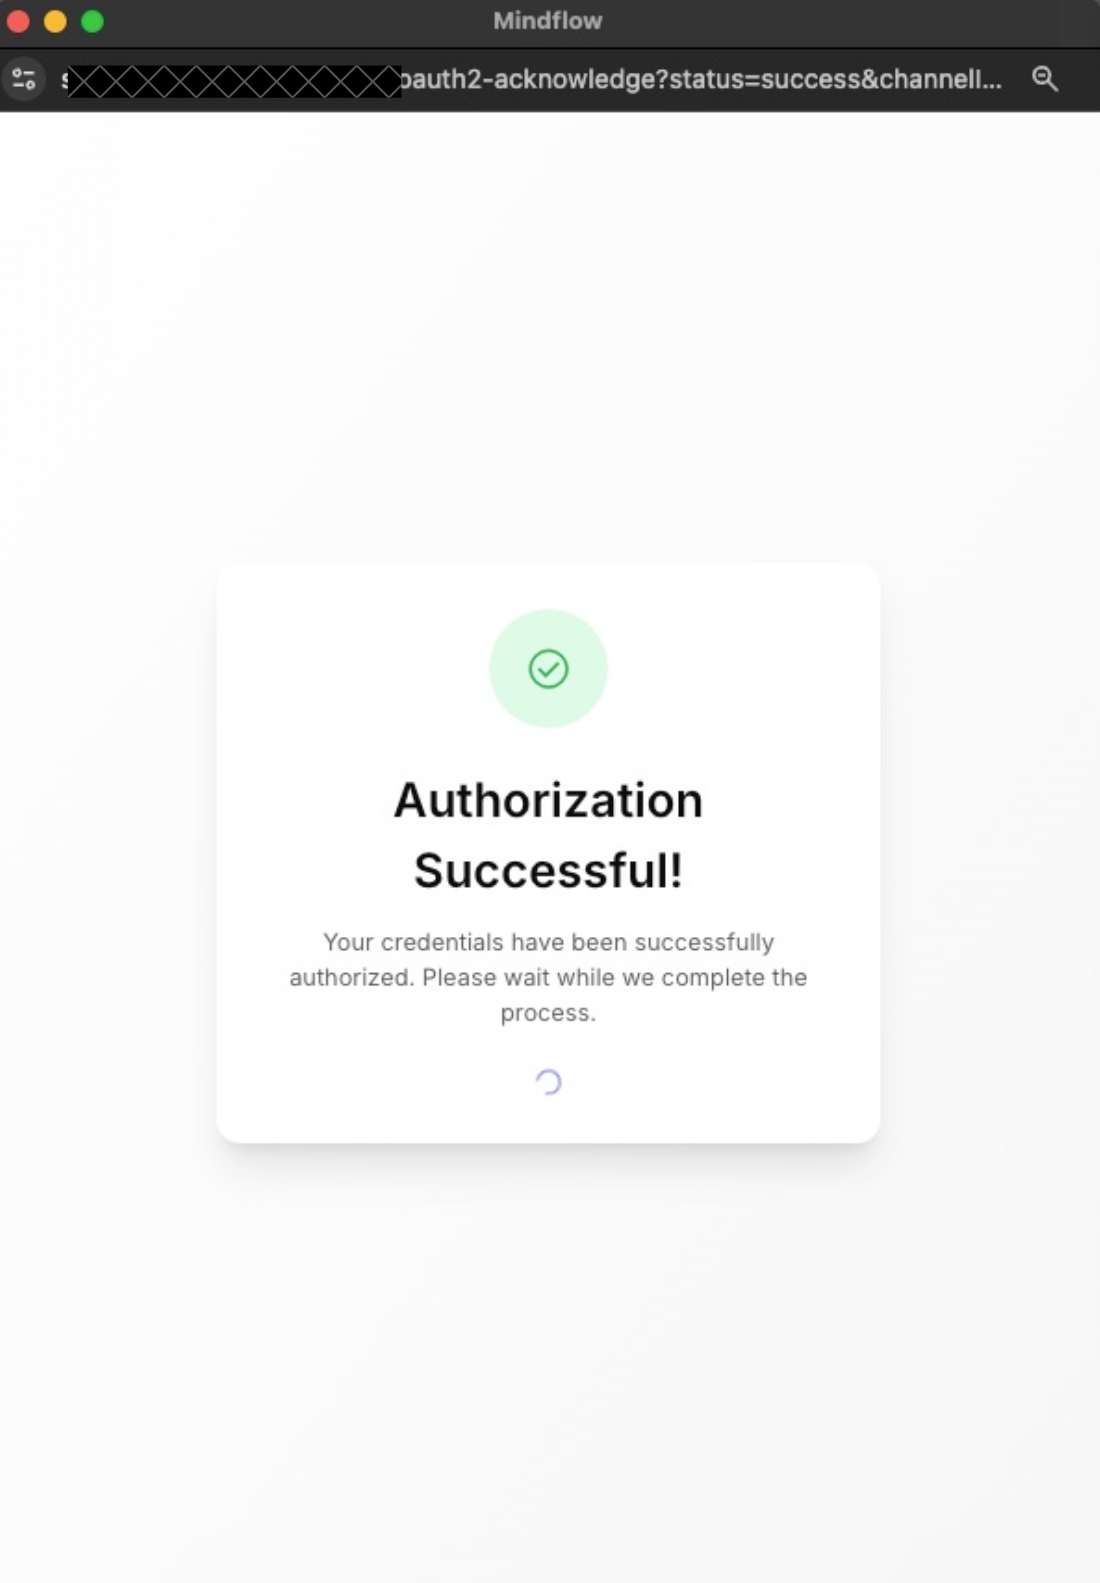
A successful integration will result in an “Authorization Successful!” message.