How to use Teams API as a User using Application Credentials
Phase 1: Register the Application in Microsoft Entra ID
Section titled “Phase 1: Register the Application in Microsoft Entra ID”-
Create the App Registration
- Navigate to App registrations in the Microsoft Entra admin center.
- Click New registration (or verify current details if editing an existing one).
- Enter a Name for your application.
- Under Supported account types, select “Accounts in this organizational directory only” (Single tenant).
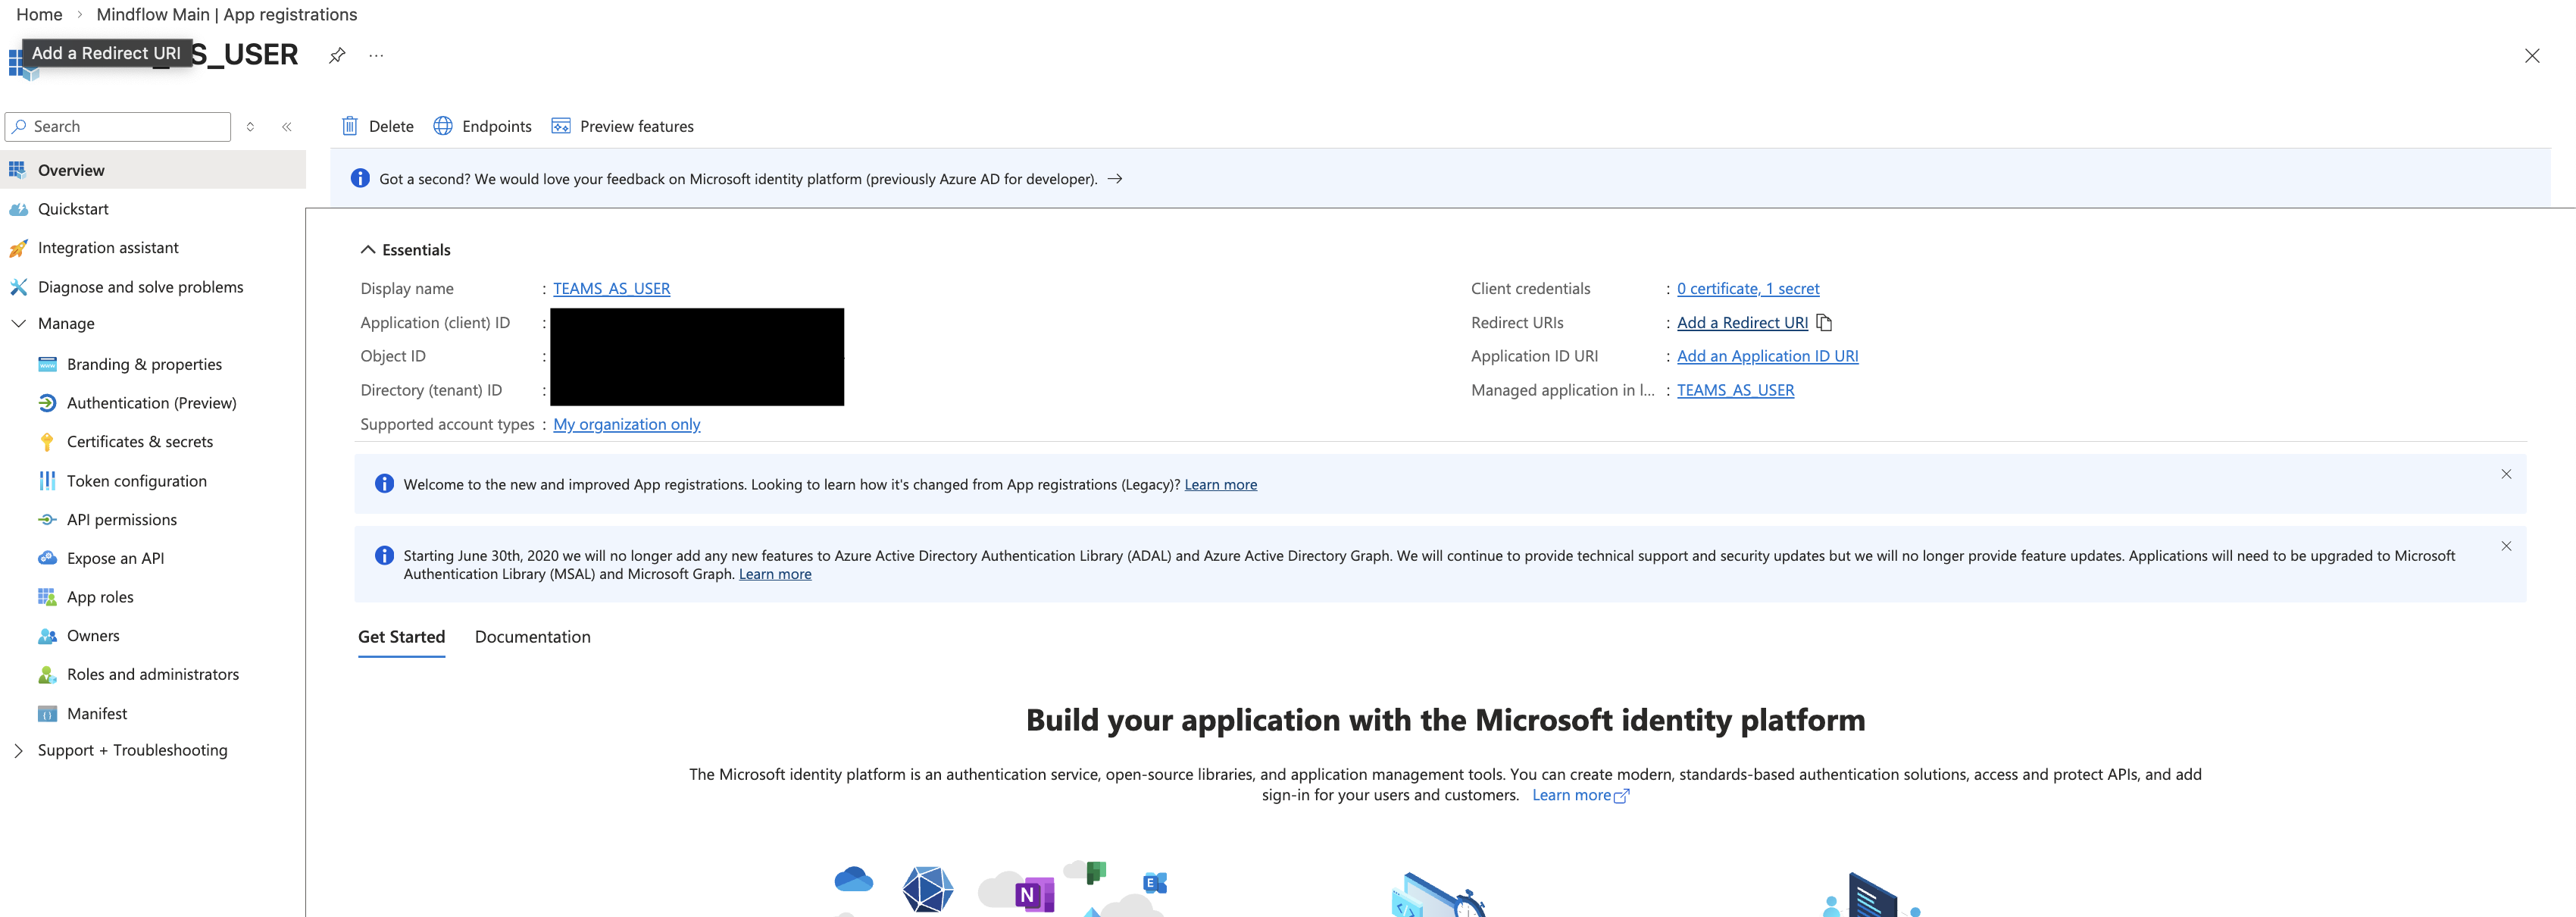
- Once created, go to the Overview page.
- Copy and save the Application (client) ID and Directory (tenant) ID. You will need these later.
-
Configure Authentication (Redirect URI)
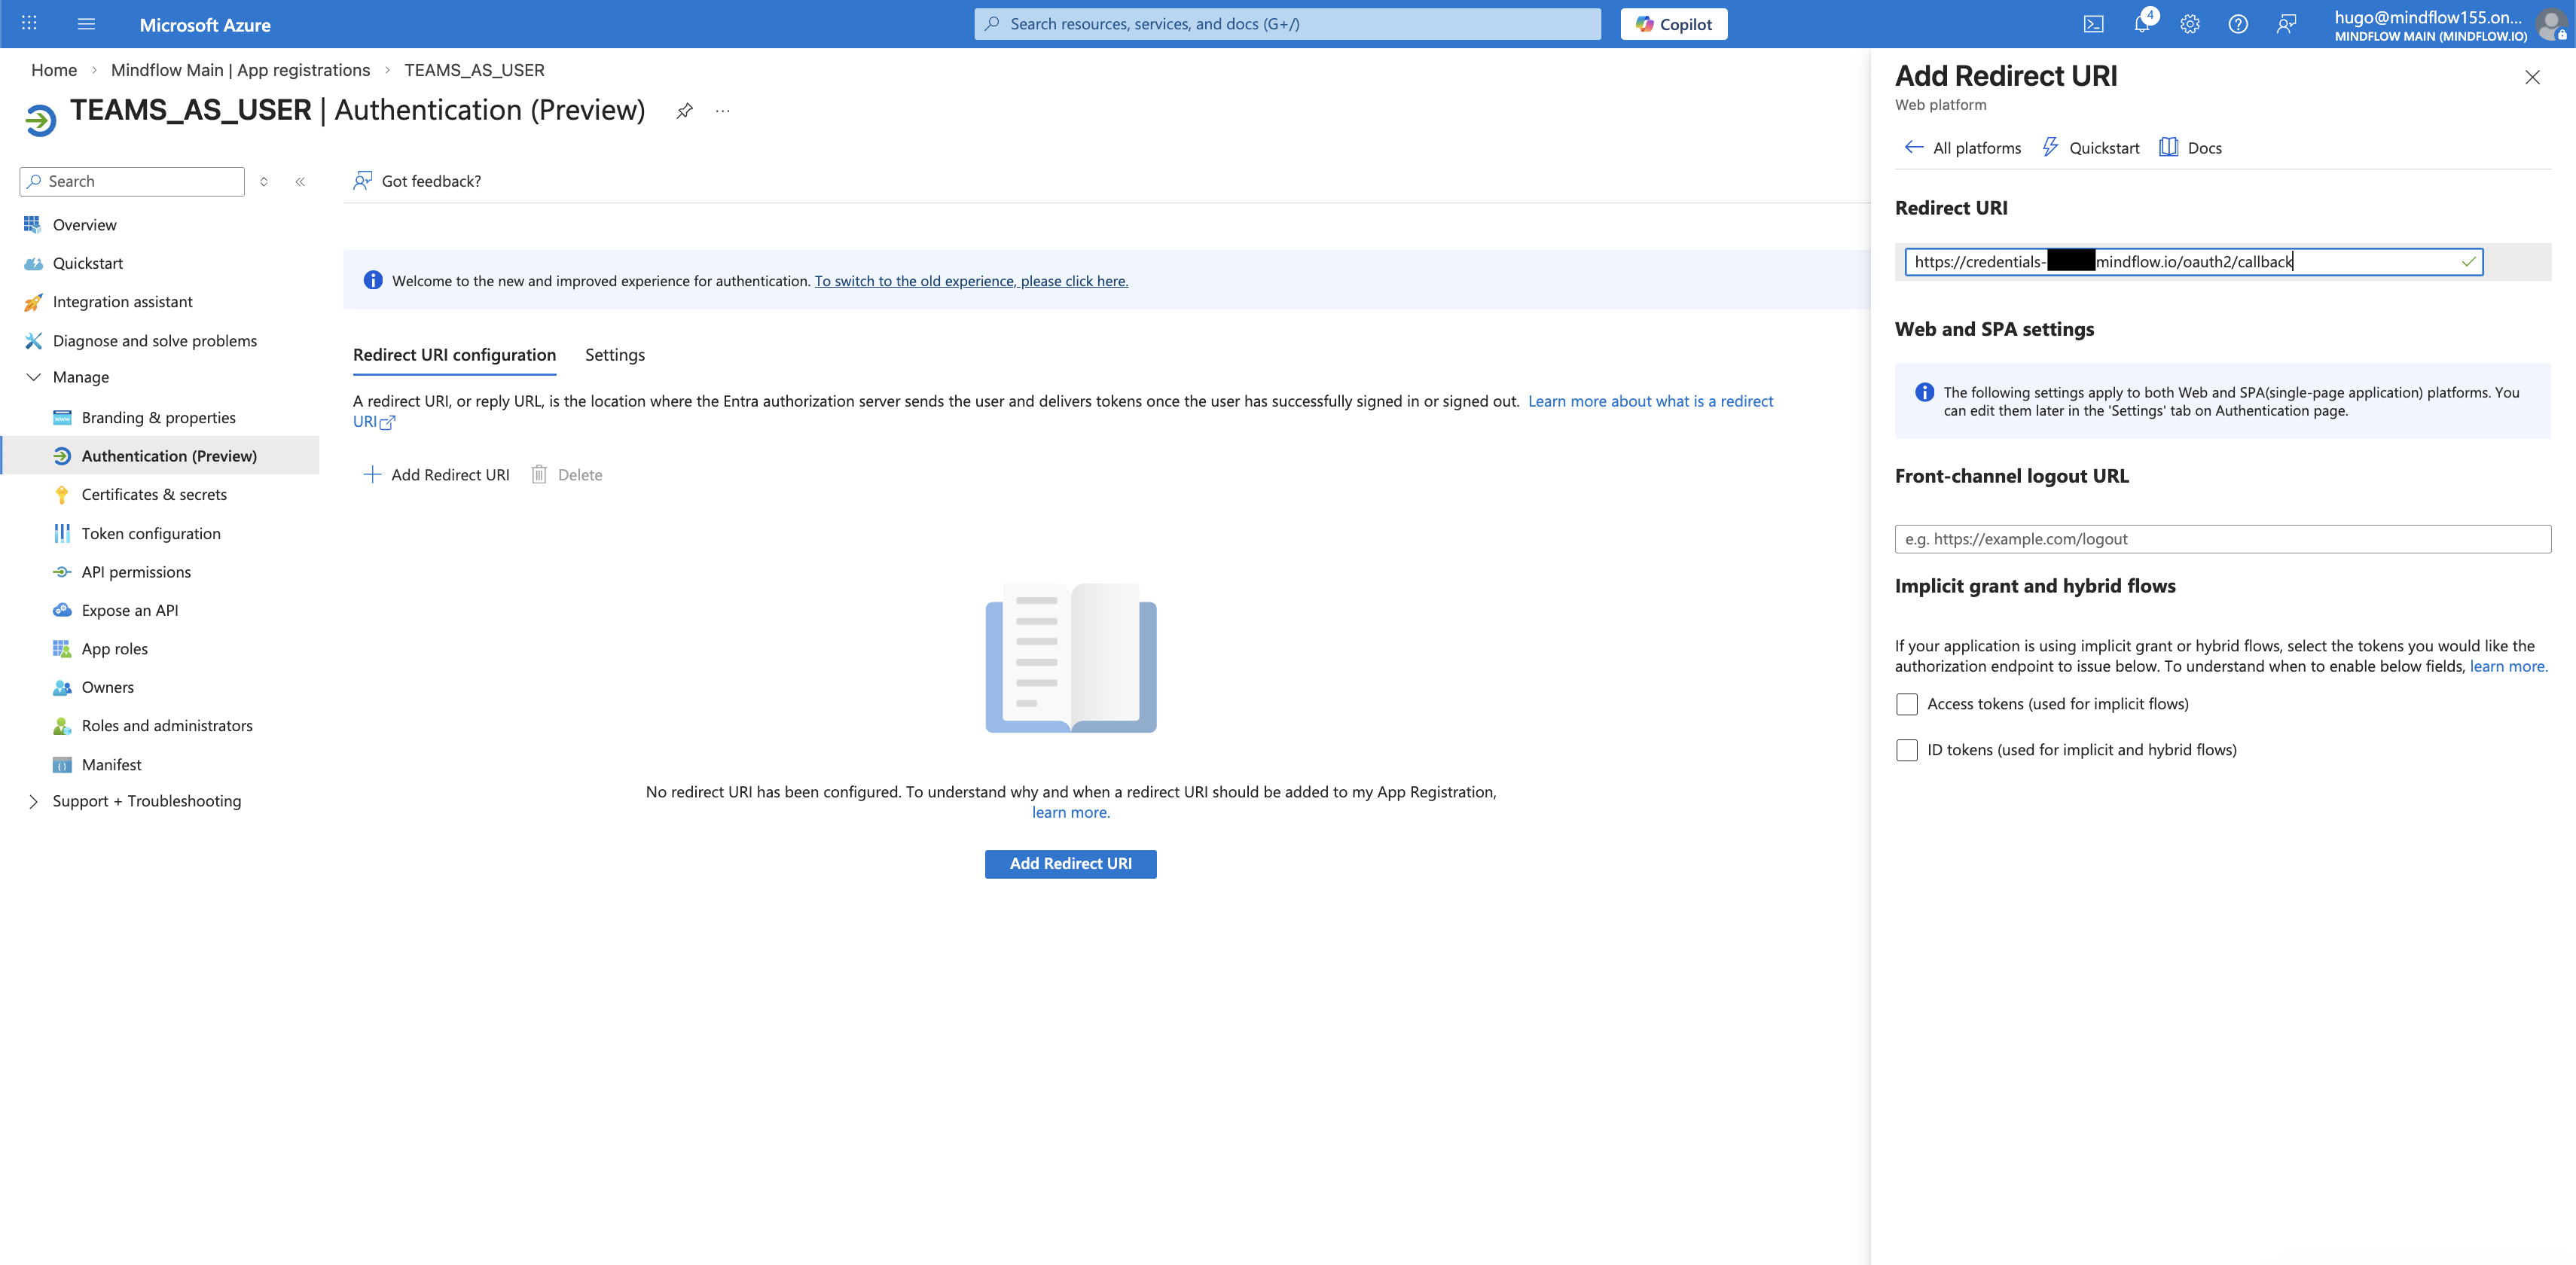
- Go to the Authentication blade in the left menu.
- Click Add a platform and select Web.
- In the Redirect URIs field, enter your application’s callback URL, it will follow this pattern:
https://credentials-{environment}.mindflow.io/oauth2/callback. - Ensure the URI matches exactly what your application expects for the OAuth handshake.
-
Generate a Client Secret
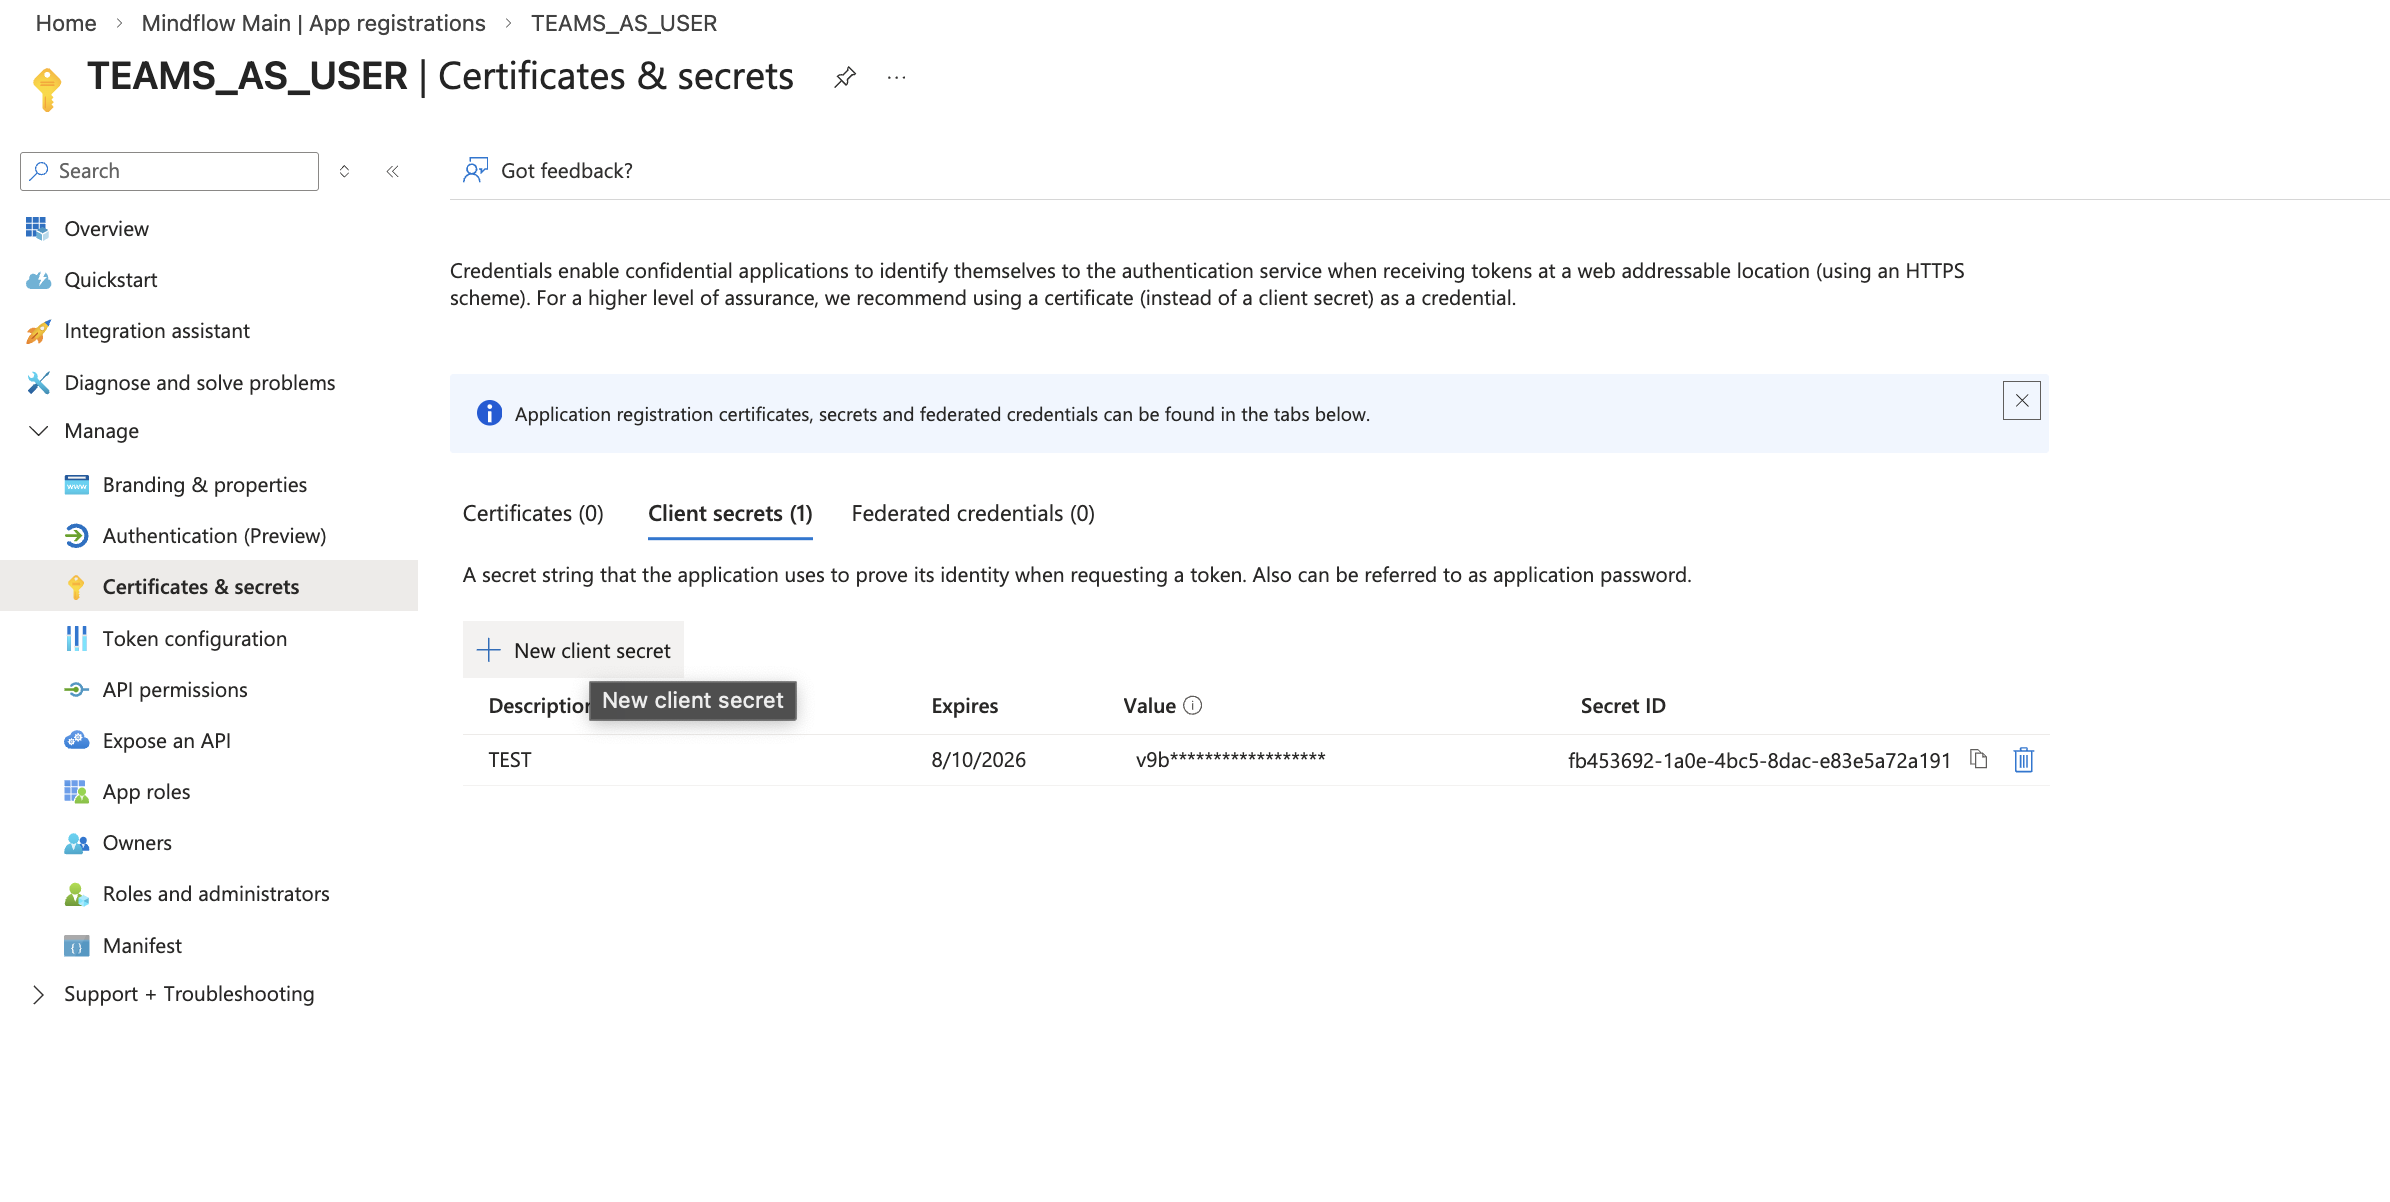
- Navigate to Certificates & secrets in the left menu.
- Click New client secret.
- Enter a Description (e.g., “New client secret”) and select an expiration period.
- Click Add.
- Important: Copy the Value of the secret immediately. It will be hidden after you leave this page.
Phase 2: Add API Permissions
Section titled “Phase 2: Add API Permissions”You must configure the app to have Delegated permissions so it can act on behalf of a signed-in user.
-
Add Permissions
- Navigate to API permissions in the left menu.
- Click + Add a permission.
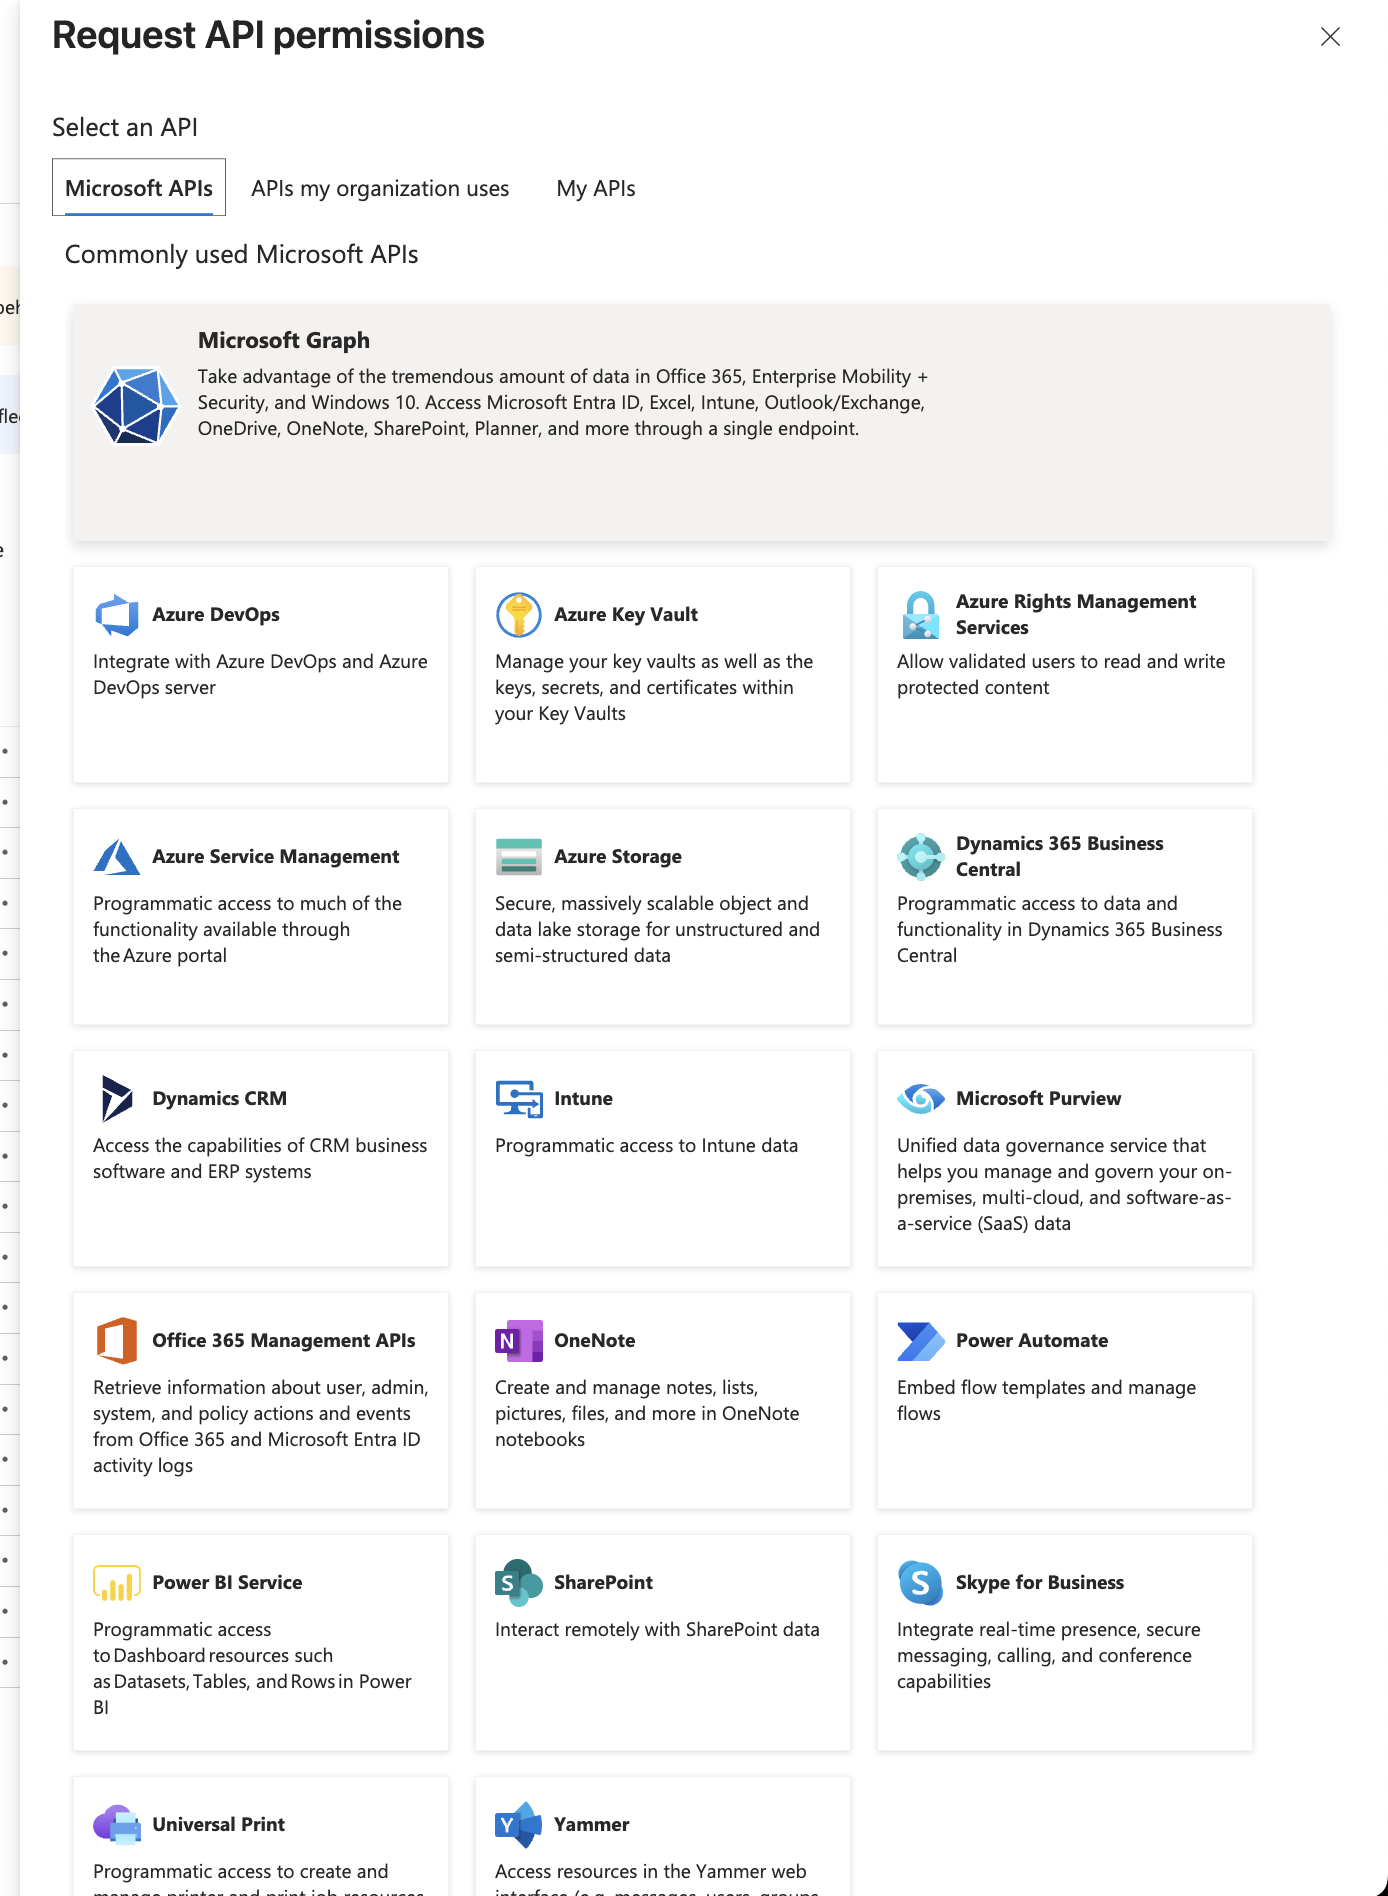
- Select Microsoft Graph.
- Choose Delegated permissions.
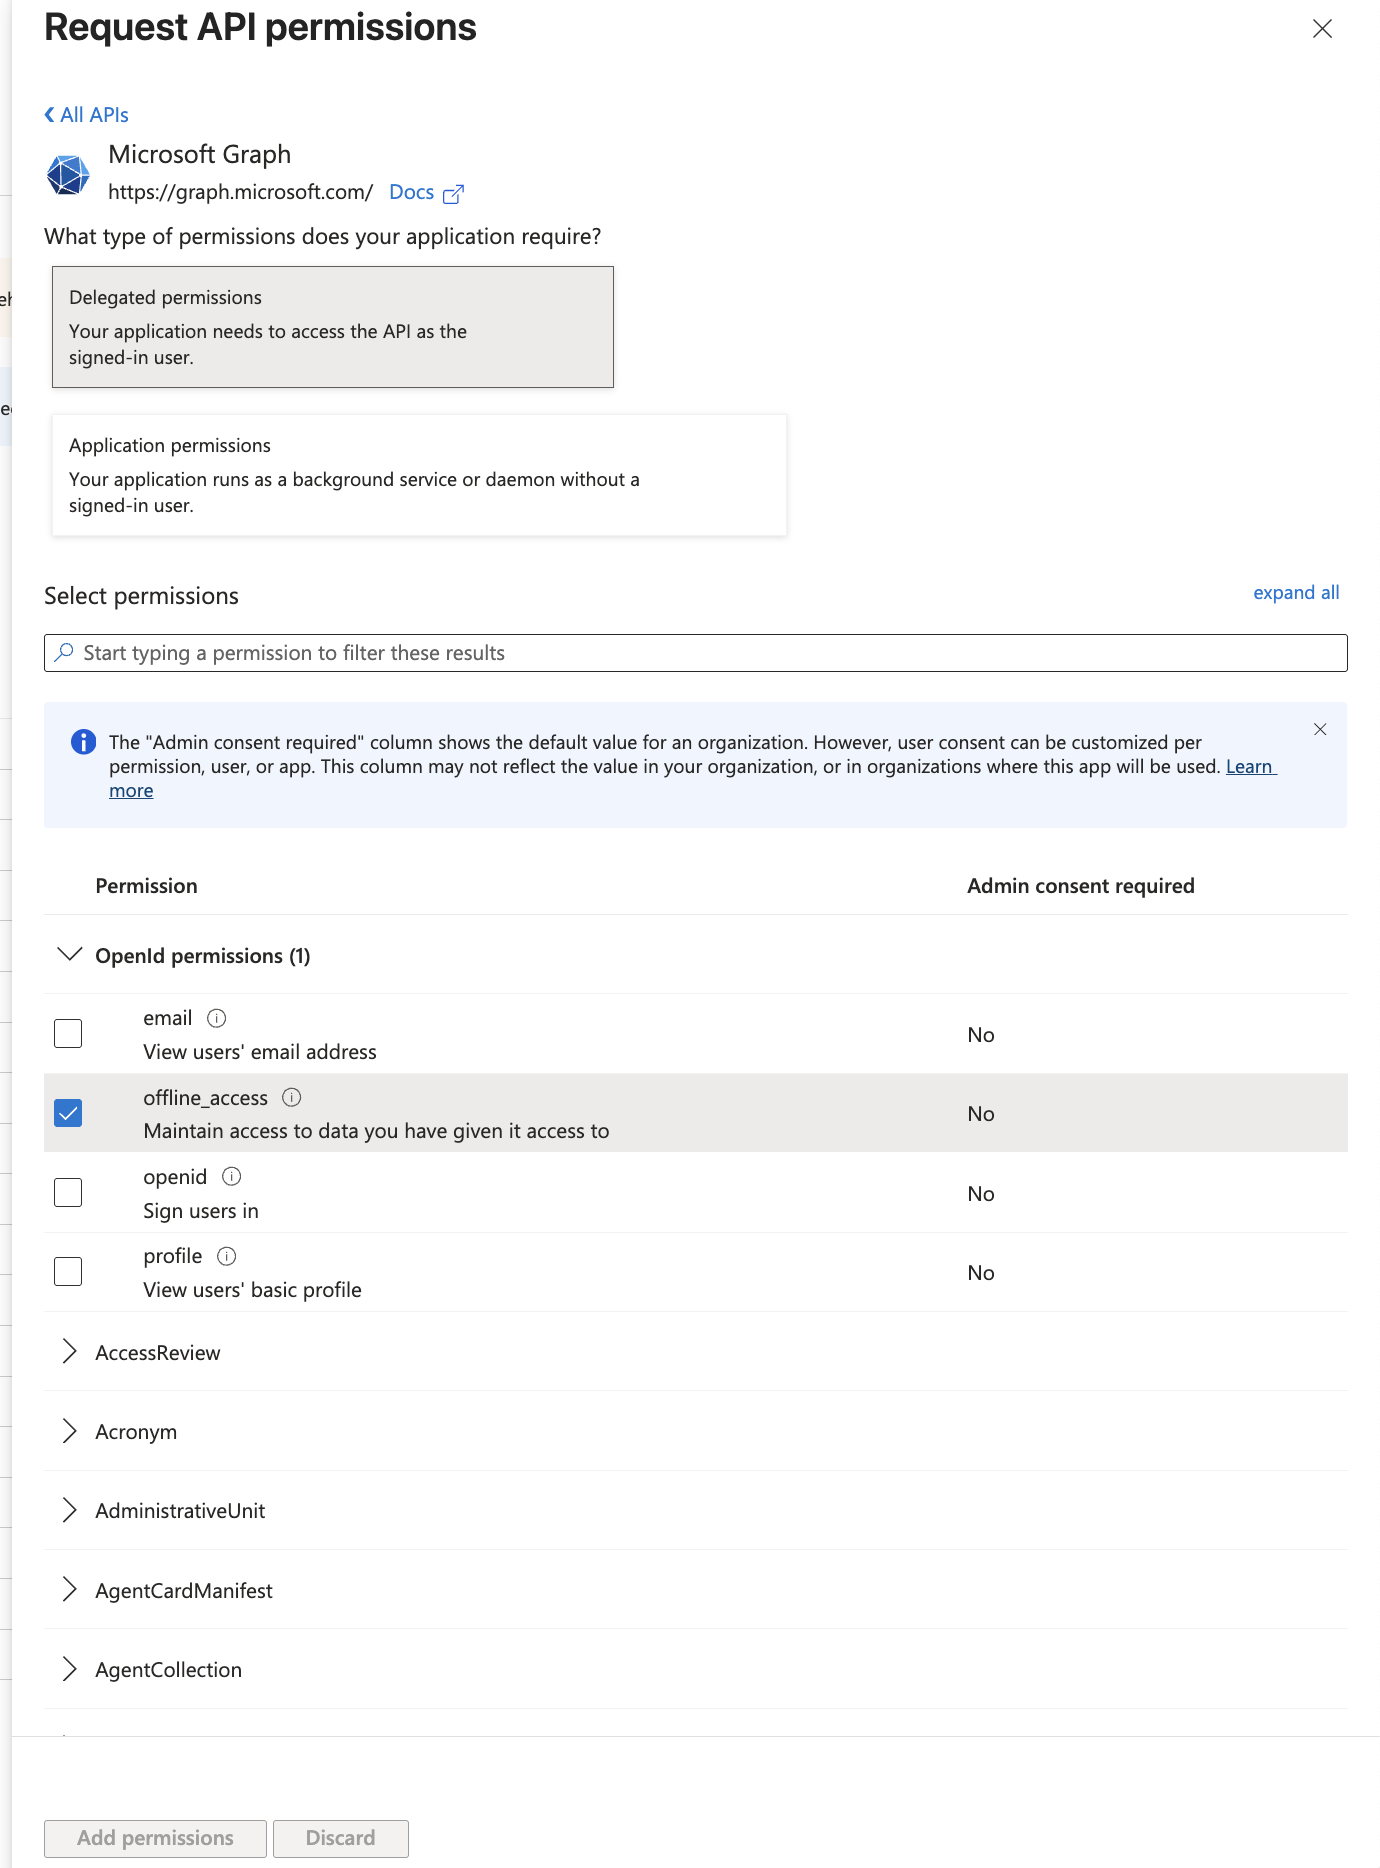
- Search for and select the following permissions:
-
Grant Admin Consent
- After adding the permissions, you will see a status warning “Not granted for [Your Org]” for permissions requiring admin consent.
- Click the Grant admin consent for [Your Organization] button to approve these permissions for the tenant.
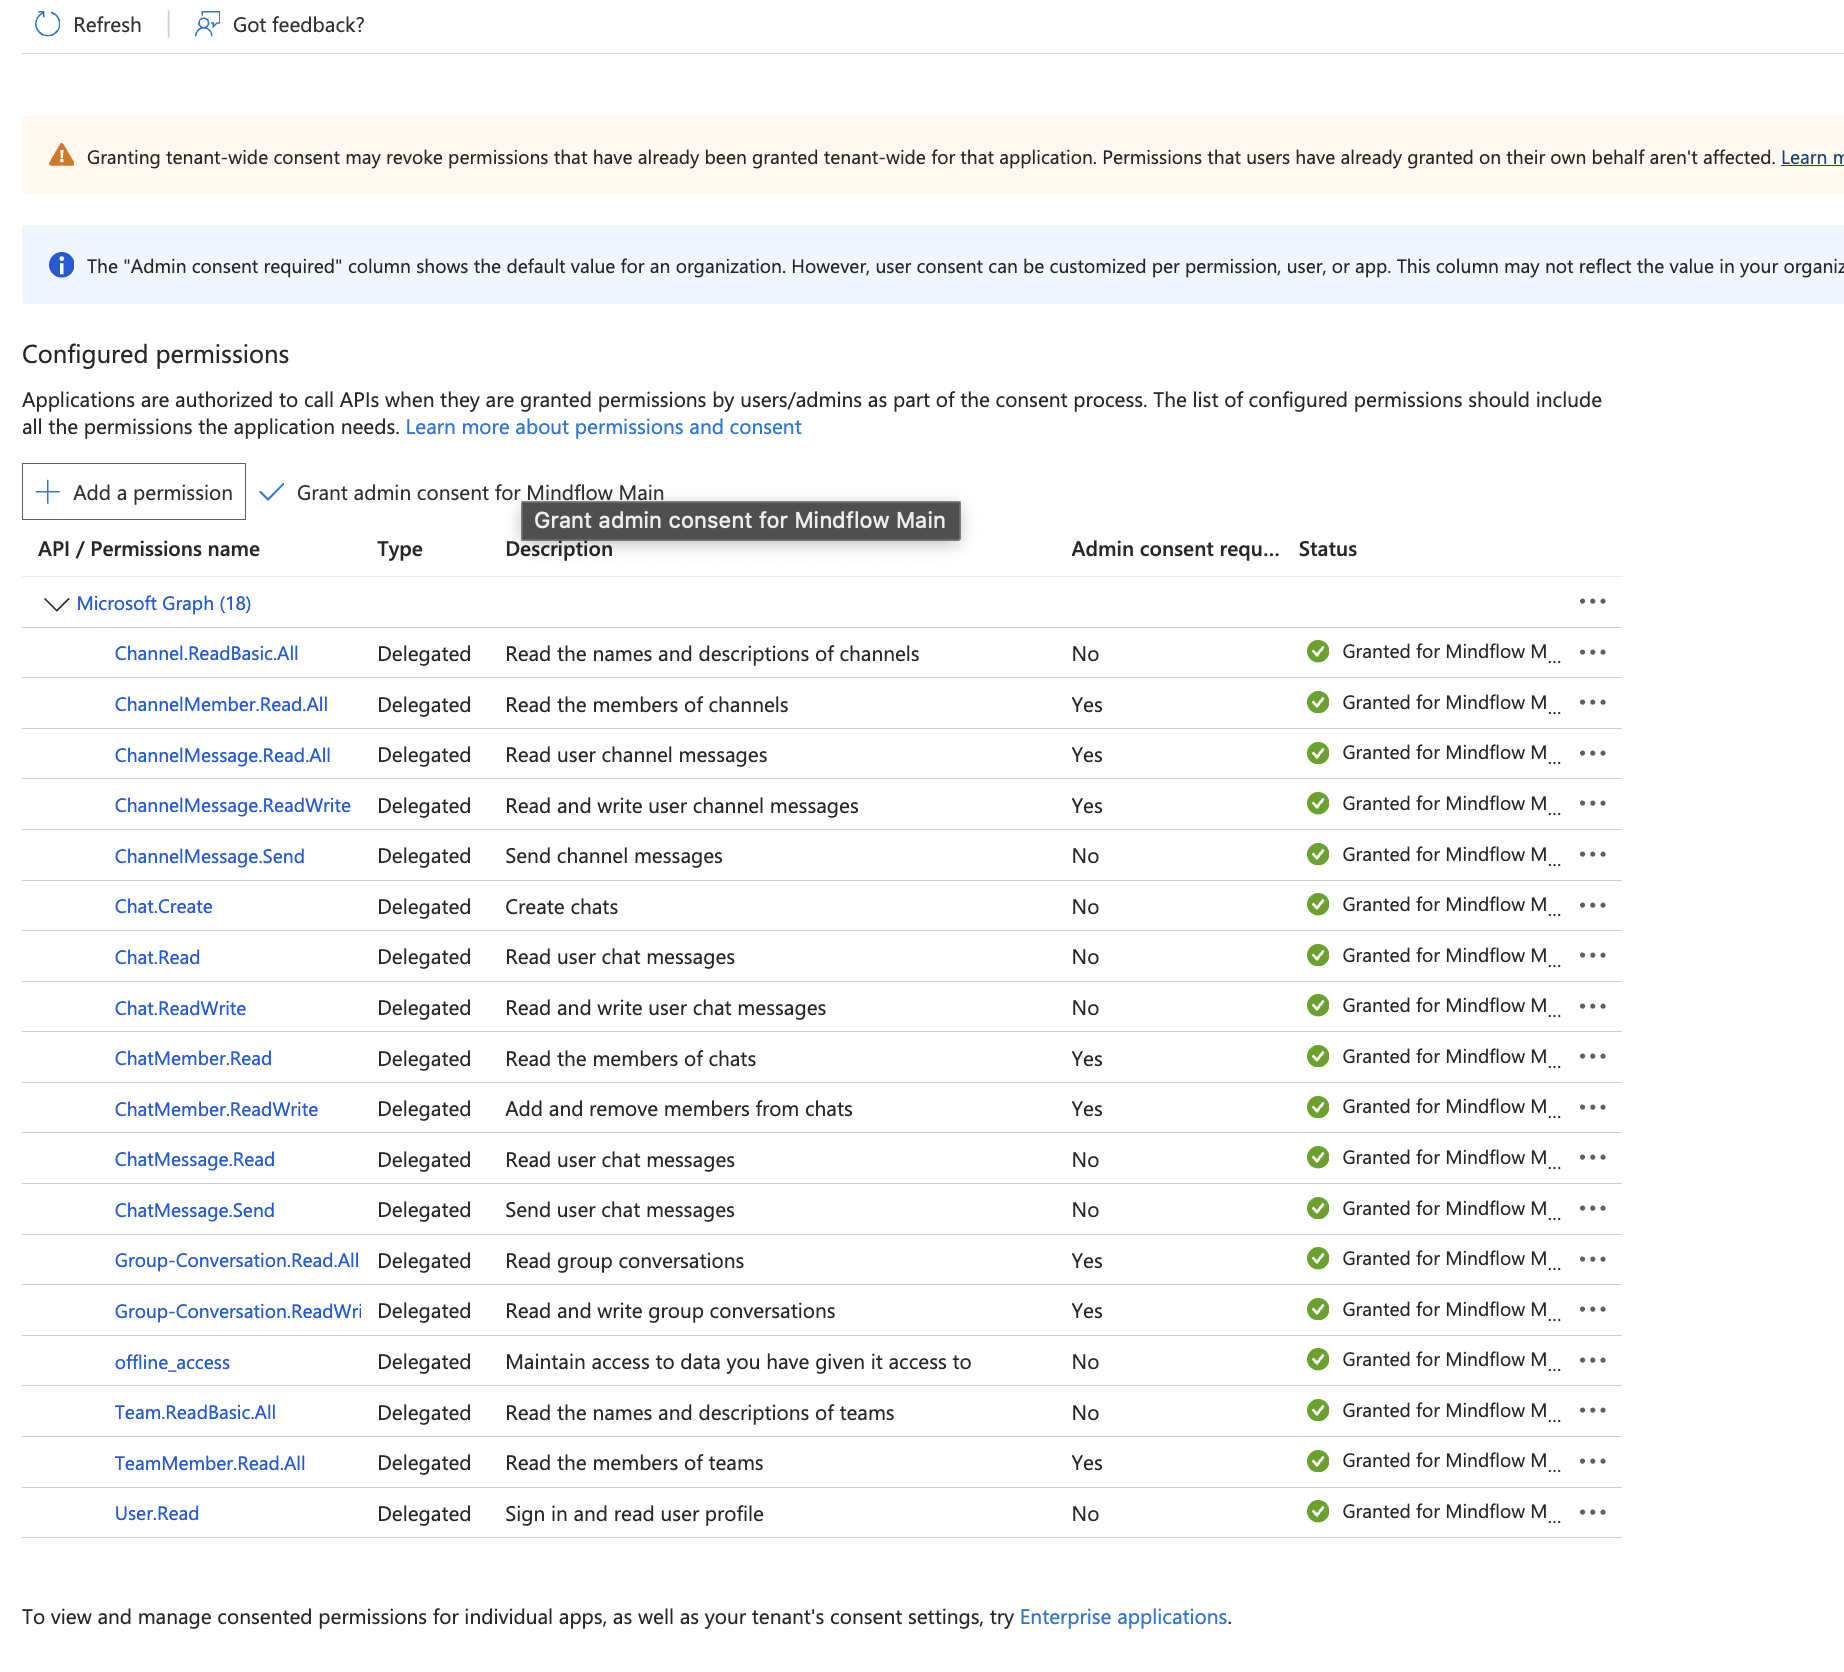
- The status should change to “Granted for [Your Organization]” with a green checkmark.
Phase 3: Configure Credentials in Application
Section titled “Phase 3: Configure Credentials in Application”Now, connect your external application (e.g., Mindflow) to the Azure app you just created.
-
Create New Credential
- In your application, navigate to the credential creation page.

- Service: Select
Microsoft Graph - Teams.
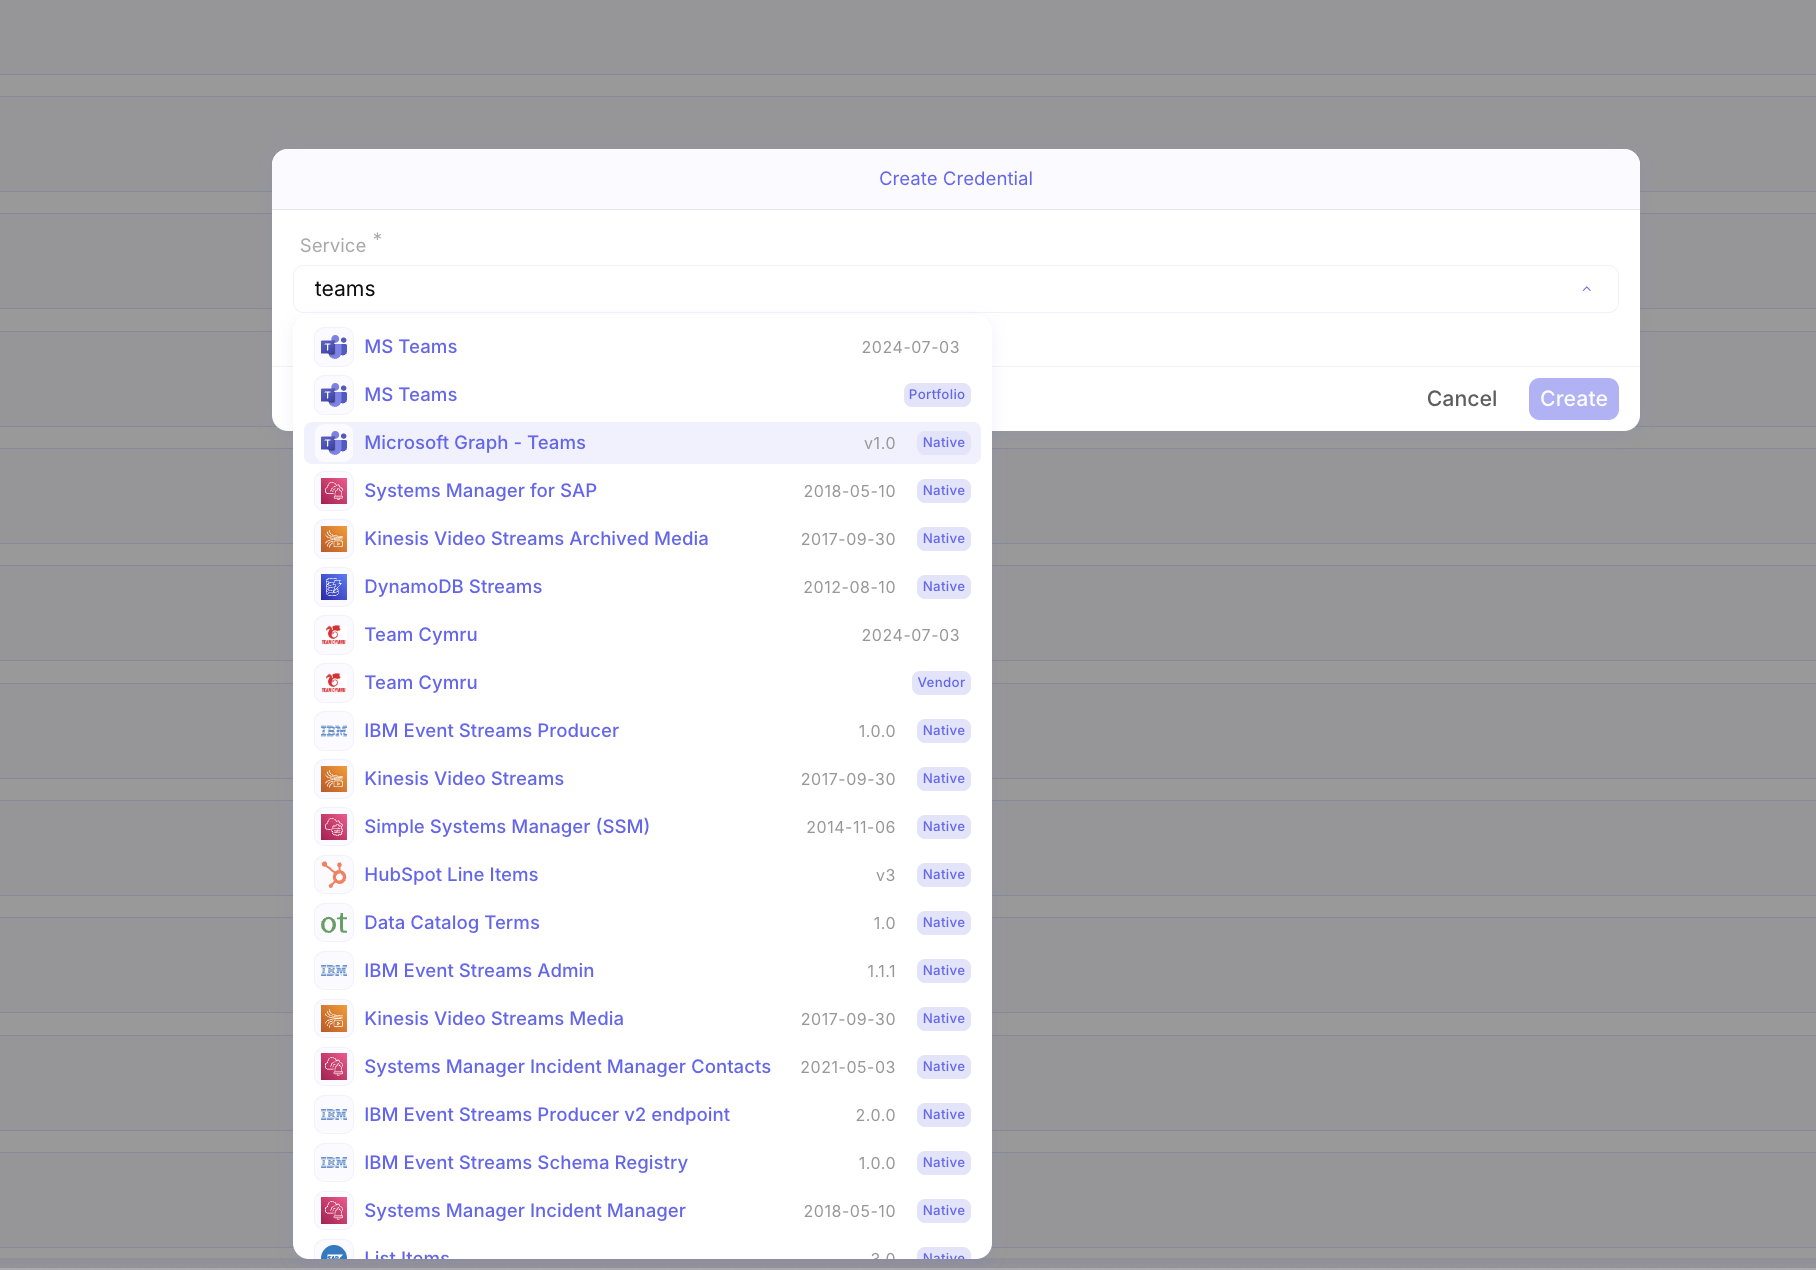
- Credential Name: Give it a recognizable name.
- URL:
https://graph.microsoft.com/v1.0.
-
Enter OAuth Details
- Client ID: Paste the Application (client) ID from Phase 1.
- Client Secret: Paste the Secret Value from Phase 1.
- Authorization URL:
https://login.microsoftonline.com/{tenant—id}/oauth2/v2.0/authorize. - Access Token URL:
https://login.microsoftonline.com/{tenant—id}/oauth2/v2.0/token. - Callback URL: Ensure this matches the Redirect URI set in Phase 1 (e.g.,
https://credentials-{environment}.mindflow.io/oauth2/callback).
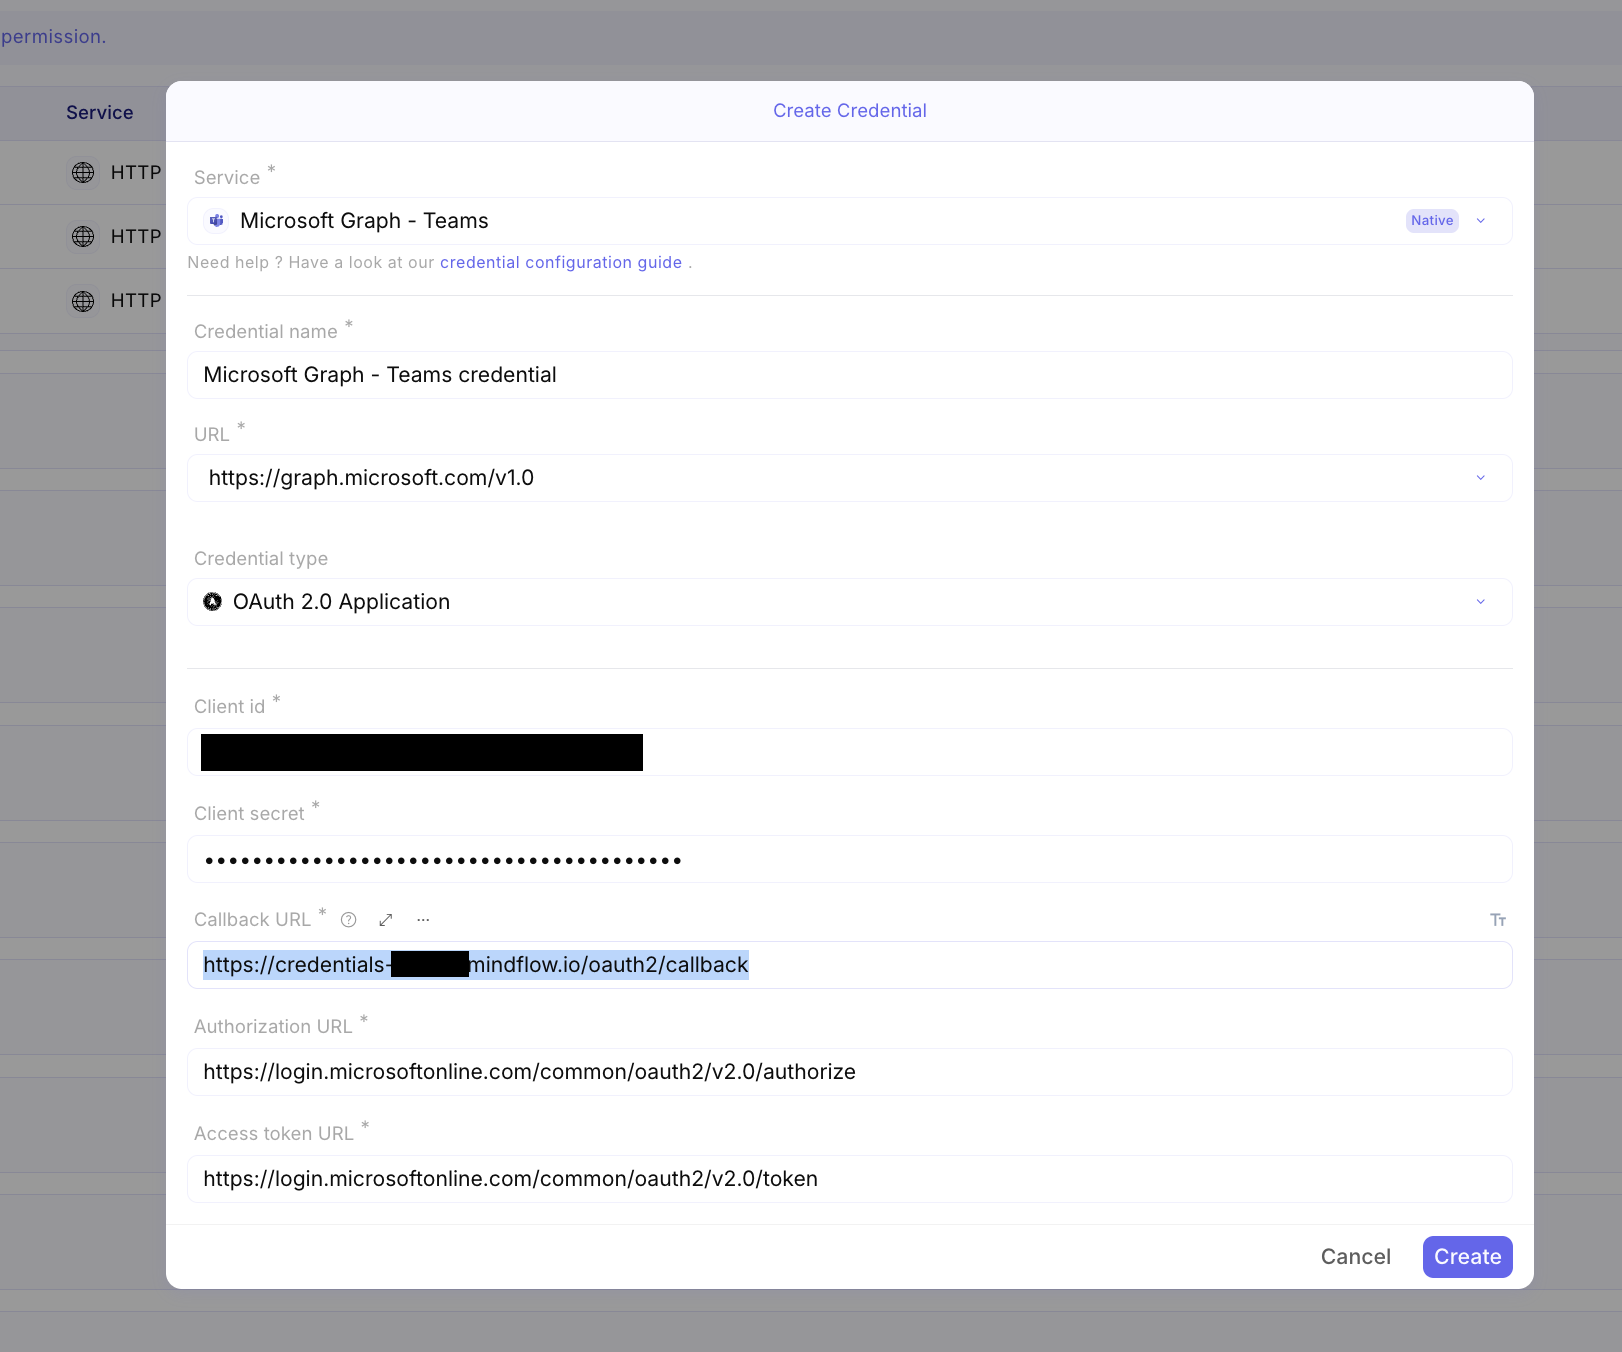
- Now, the Application is set. From now on, users from this Microsoft tenant will be able to create a credential more easily, by just sign in into that app. No need for multiple Entra App.
-
Sign in the App
- Now, as the user who wants to use Teams as themselves, create a new credential.
- Select Teams
- Here, you should see Sign in with Microsoft Graph - Teams.
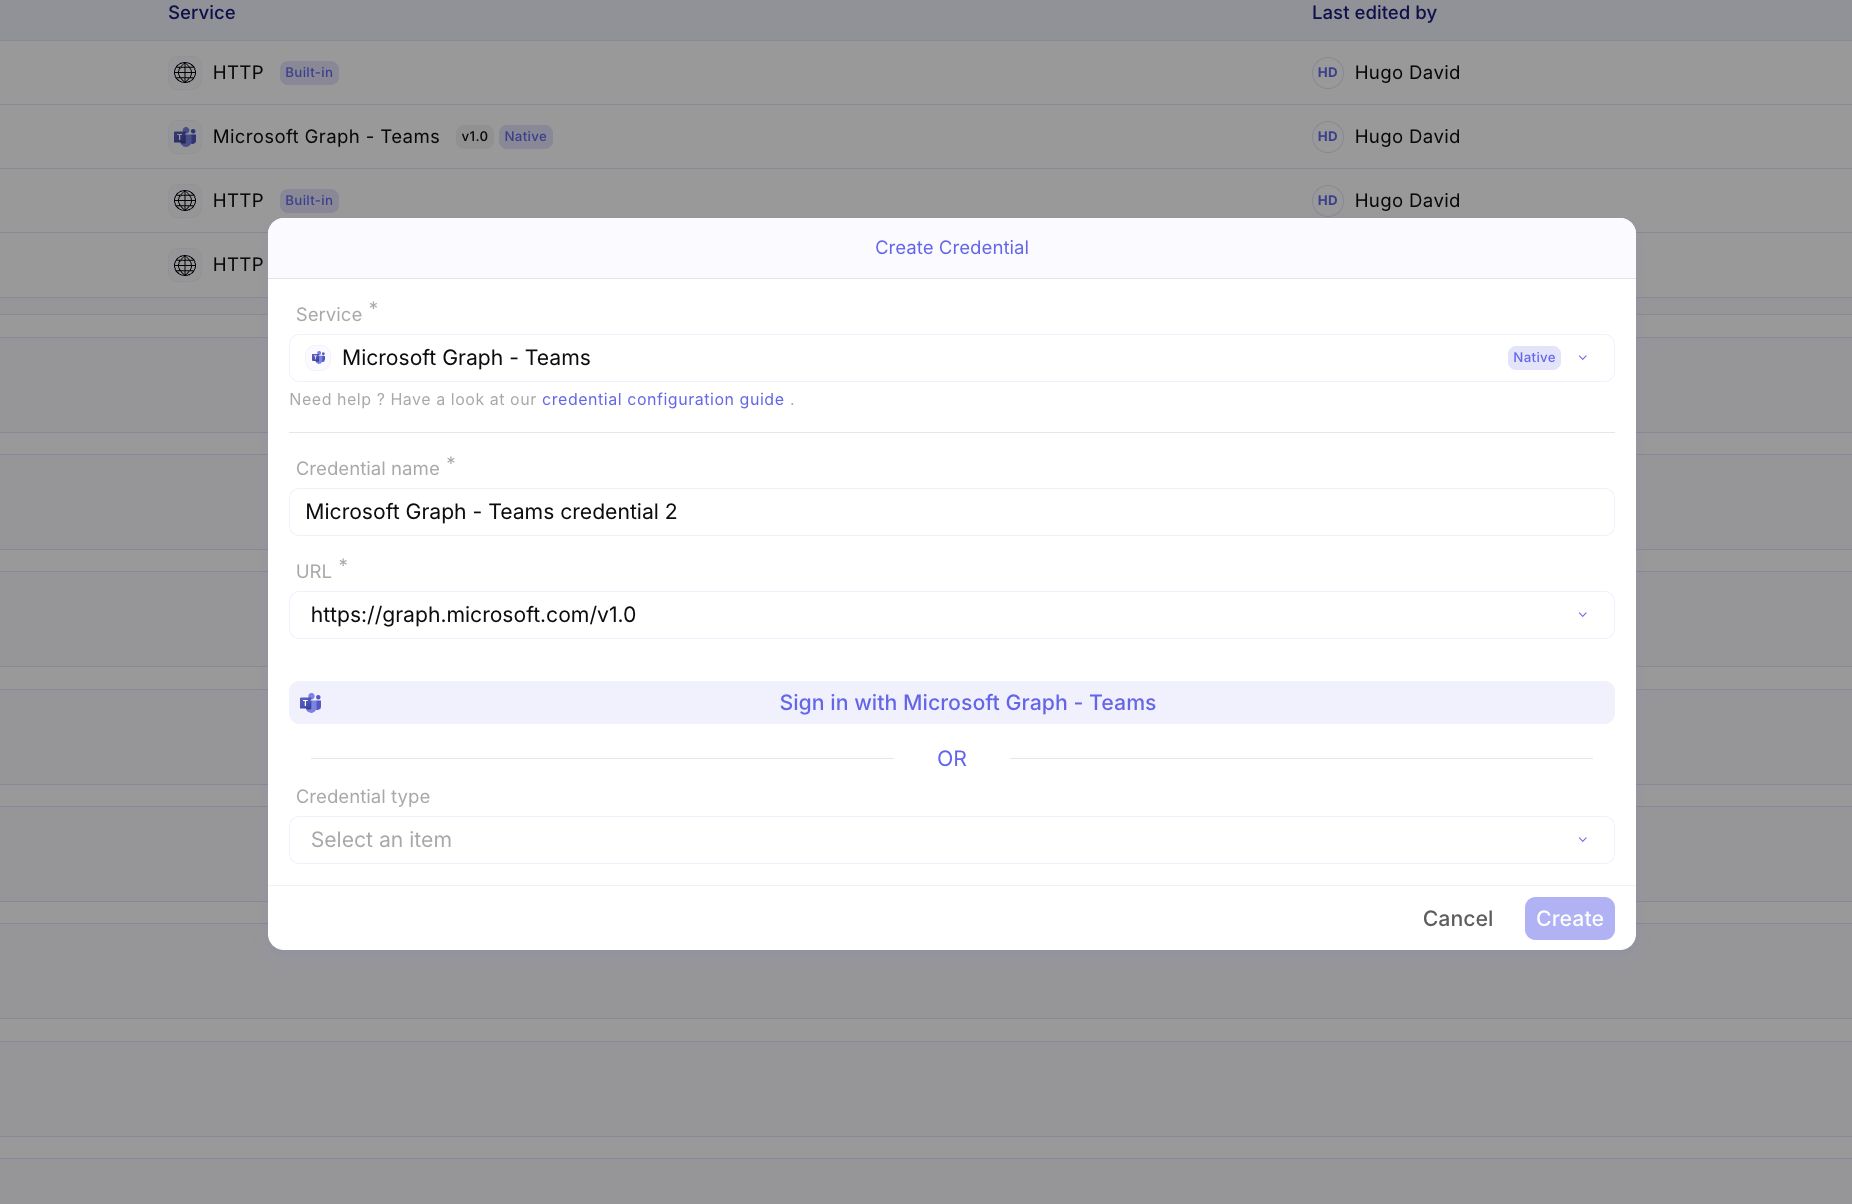
- Click on this and you will be redirected to a Microsoft login page. Log in with the appropriate user account.
- Upon success, you should see a message like “Authorization Successful!”.
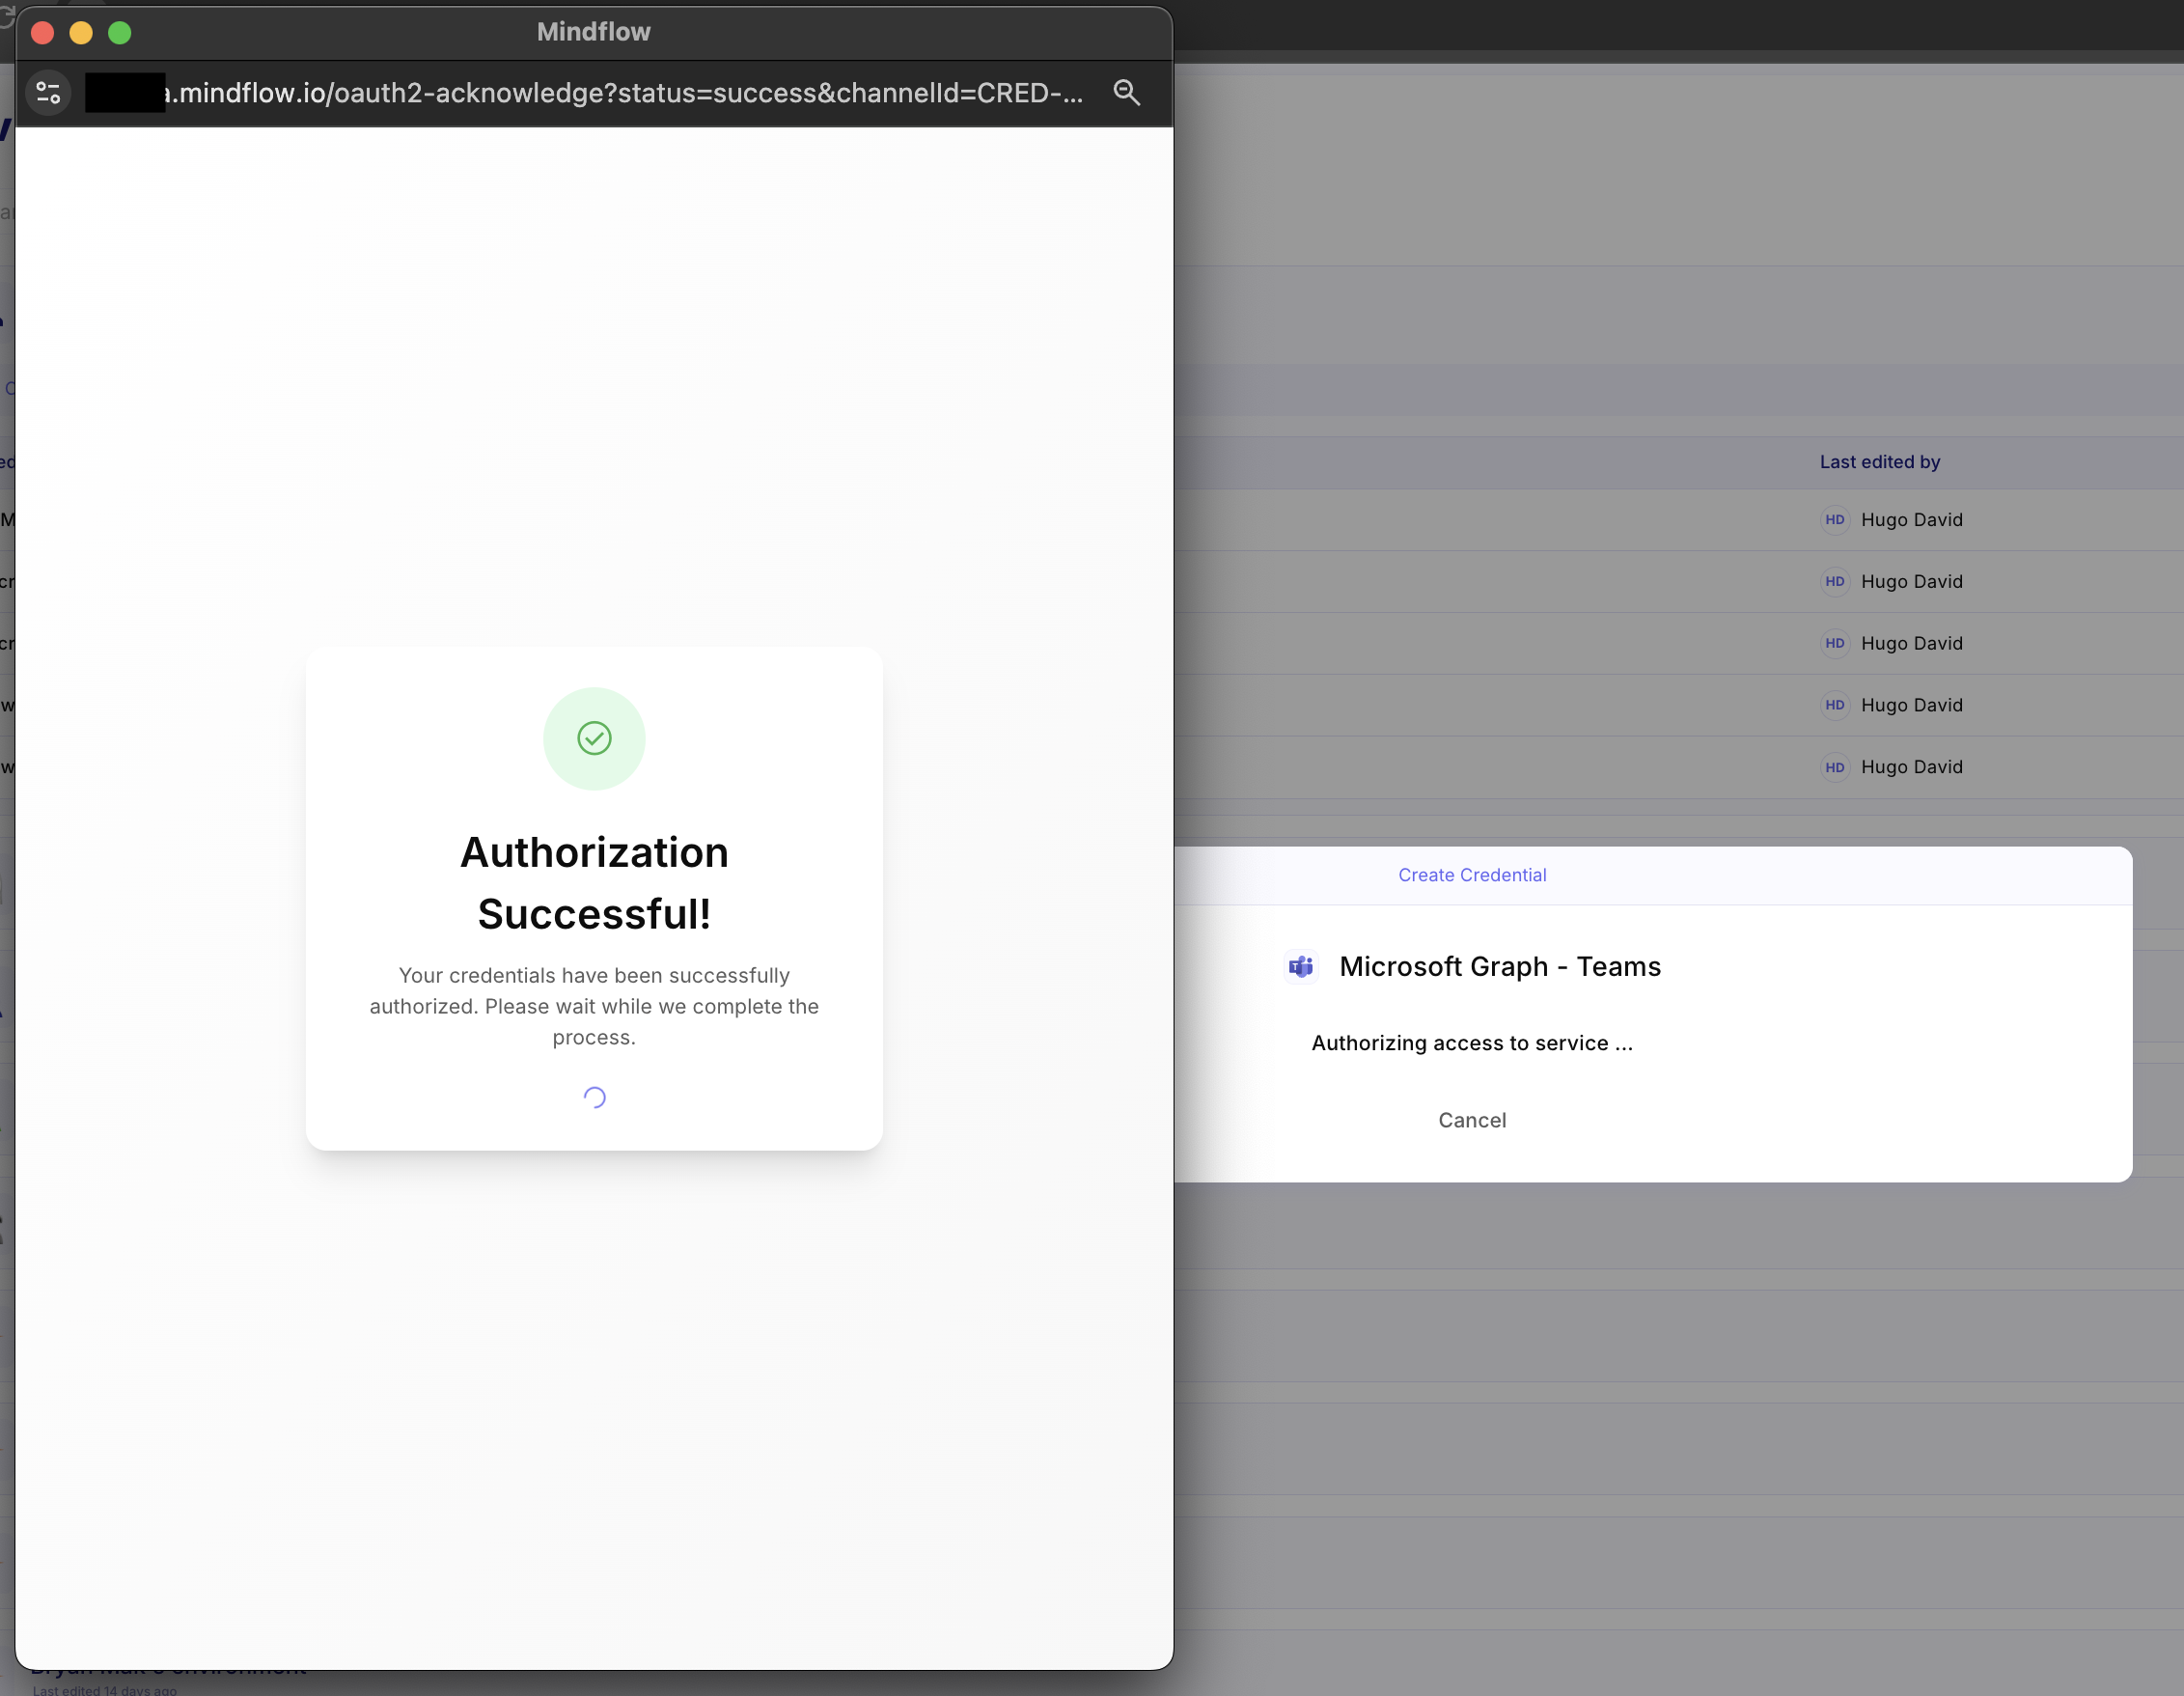
- Now, your user credential is set. Upon running, it will use your identity to perform actions on the target resources, in this instance Teams, with the scopes attributed in the first steps of this tutorial.
Phase 4: Verify Connection
Section titled “Phase 4: Verify Connection”-
To test that newly created credential, head on to Flows and create a Flow.
-
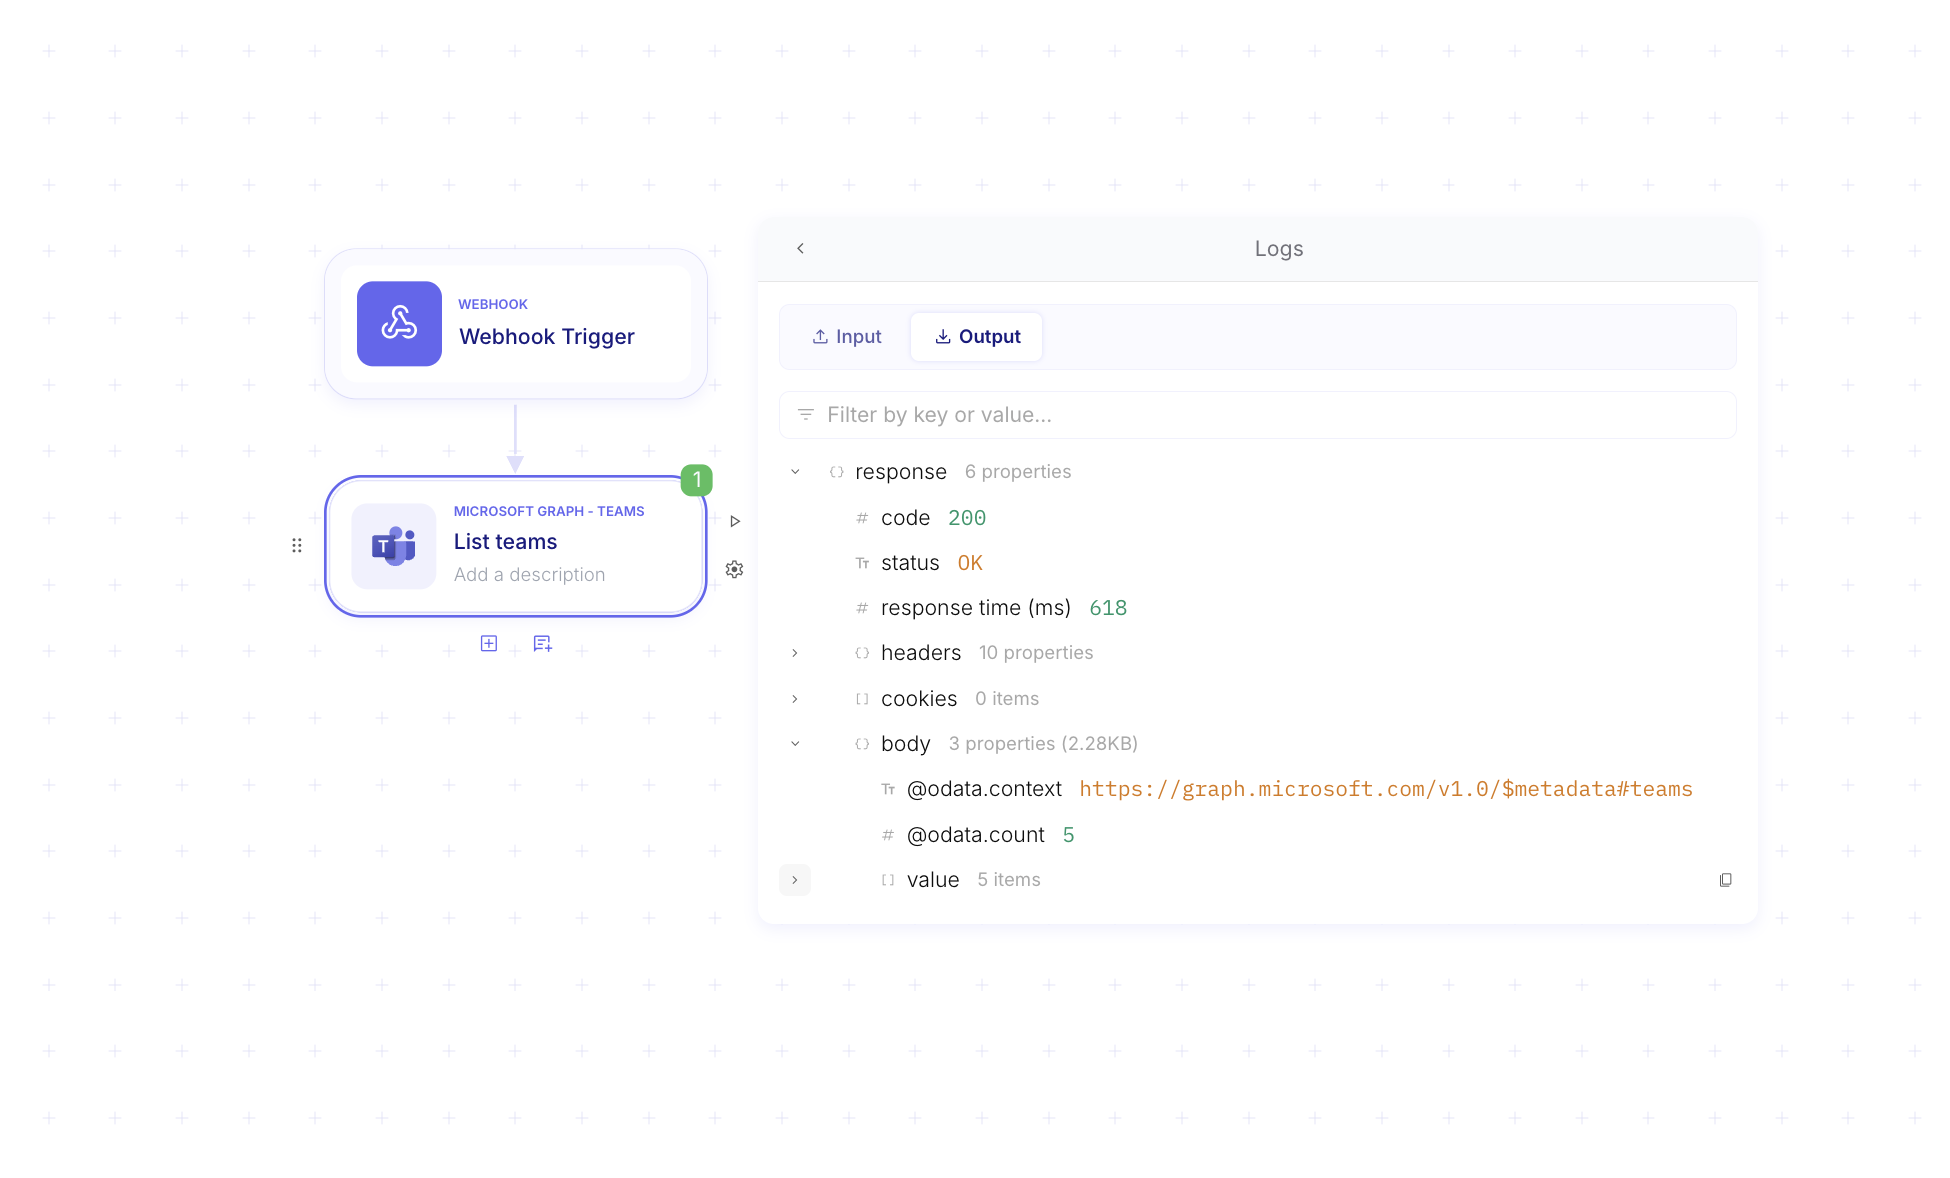
Create and run a test action, such as “List teams” from Teams API.
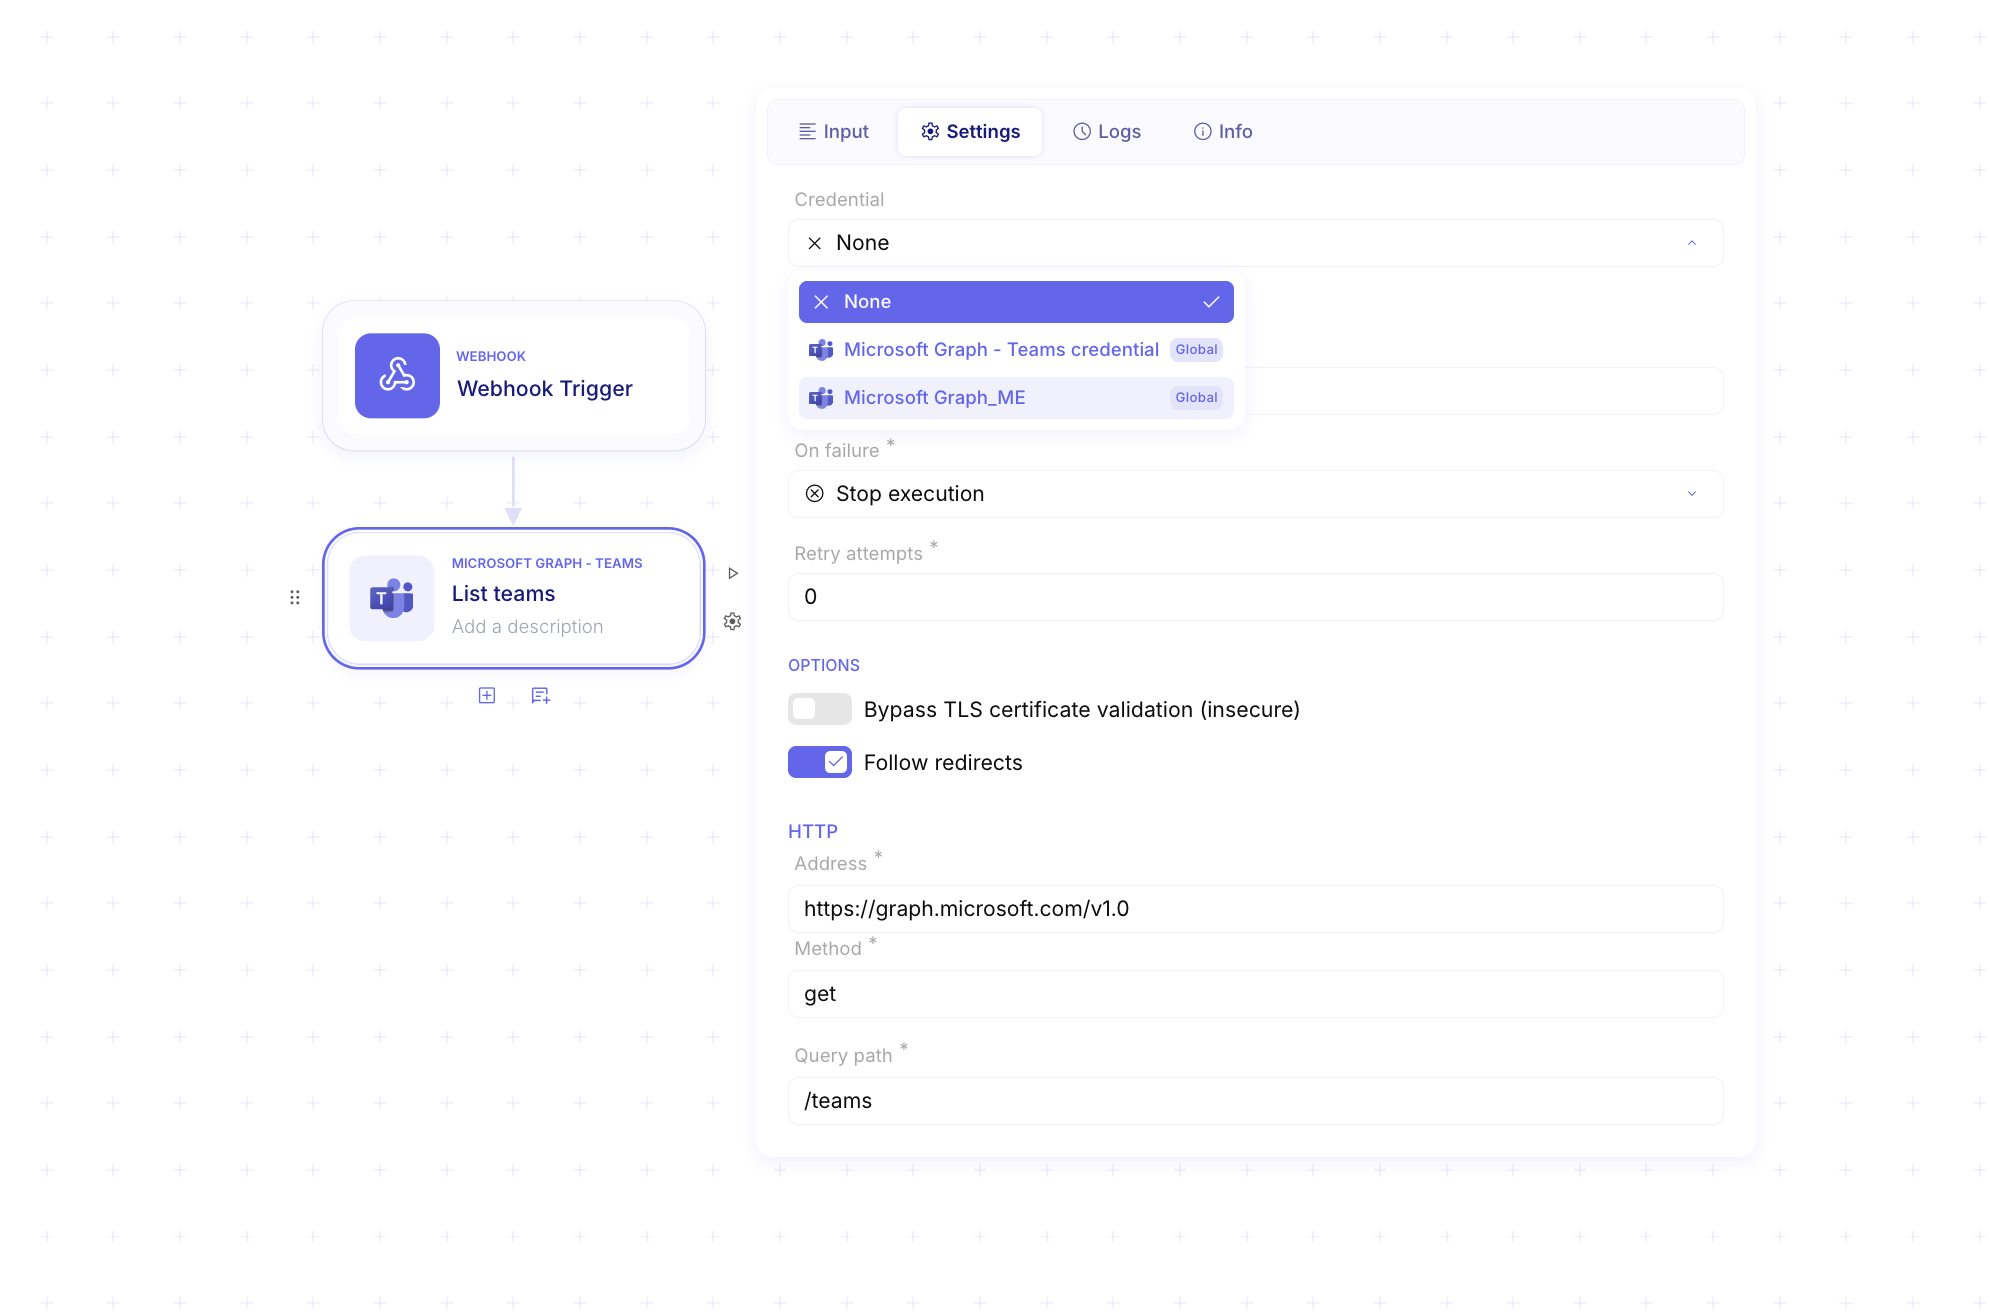
-
Check the logs for a 200 OK status code, confirming the permission setup is correct and the token is valid.