

Cisco Meraki Dashboard
Introduction
Section titled “Introduction”Connecting the Cisco Meraki Dashboard to Mindflow allows you to automate network management, security monitoring, and device orchestration. This setup relies on a Bearer Token (API Key), which provides full programmatic access to your Meraki organizations and networks.
1. Generate a Cisco Meraki API Key
Section titled “1. Generate a Cisco Meraki API Key”To interact with the Meraki API, you must first enable API access for your organization and generate a personal API key.
Step 1.1: Enable API Access
Section titled “Step 1.1: Enable API Access”- Log in to the Cisco Meraki Dashboard.
- Navigate to Organization > Configuration > Settings.
- Ensure that the Dashboard API access is set to “Enable access to the Cisco Meraki Dashboard API”.
- Click Save Changes.
Step 1.2: Generate Your Key
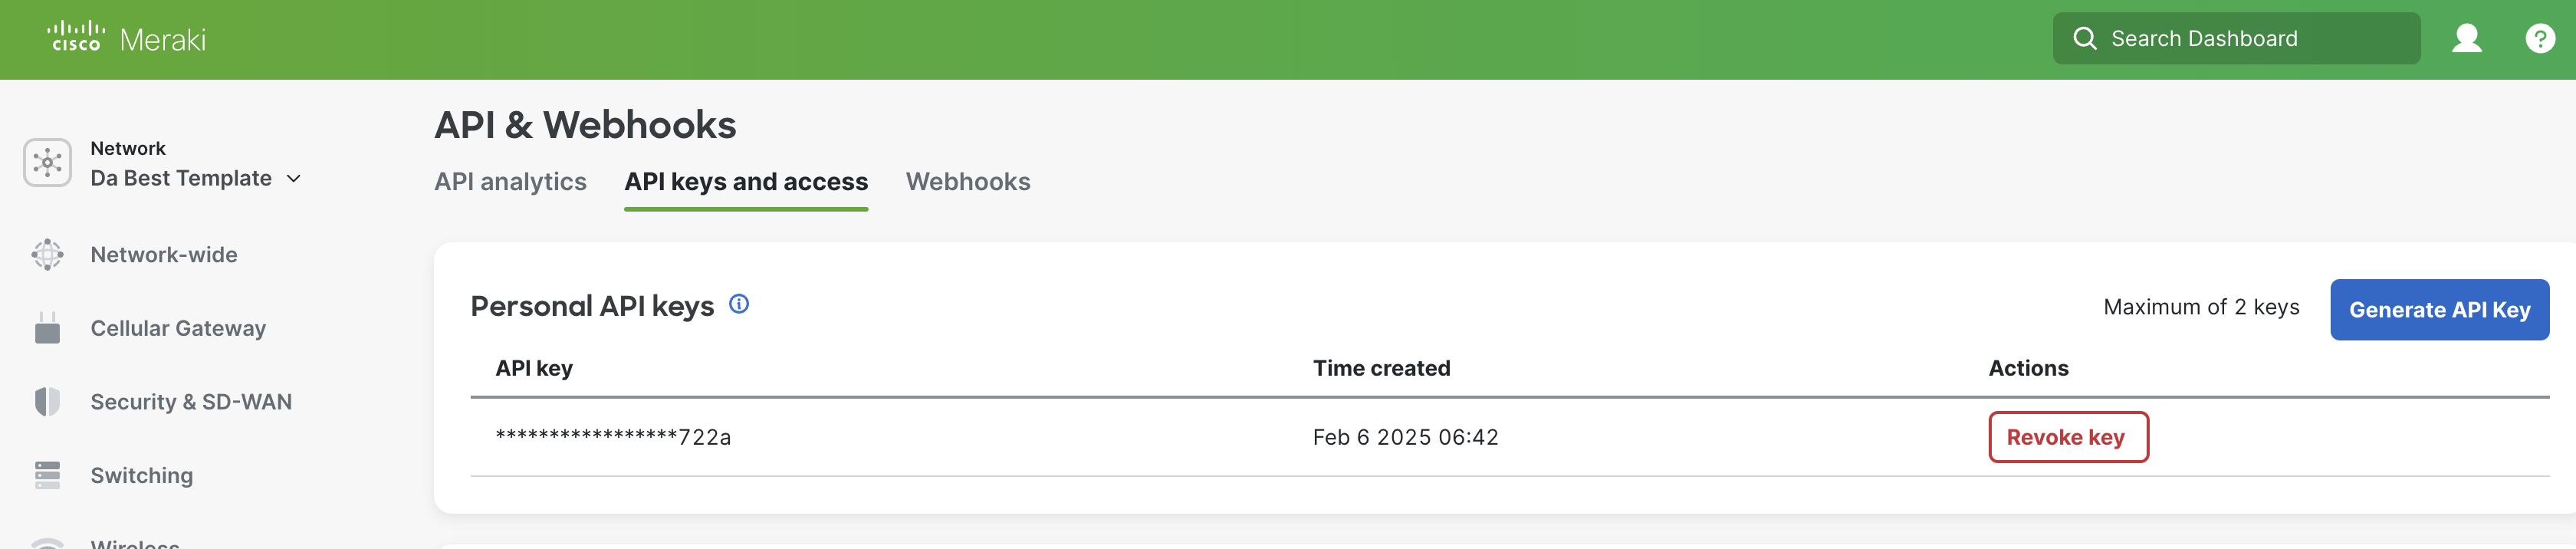
Section titled “Step 1.2: Generate Your Key”As shown in your Meraki screenshot:
-
Go to your profile (top right) and select My Profile.
-
Scroll down to the API & Webhooks section.
-
Under Personal API keys, click the Generate API Key button.
-
Copy your API key immediately. Meraki only shows this key once. If you lose it, you will have to revoke the old one and generate a new one.
2. Configure the Mindflow Credential
Section titled “2. Configure the Mindflow Credential”Now, you will take that API key and securely store it in Mindflow to enable your automated workflows.
Step 2.1: Select the Meraki Service
Section titled “Step 2.1: Select the Meraki Service”-
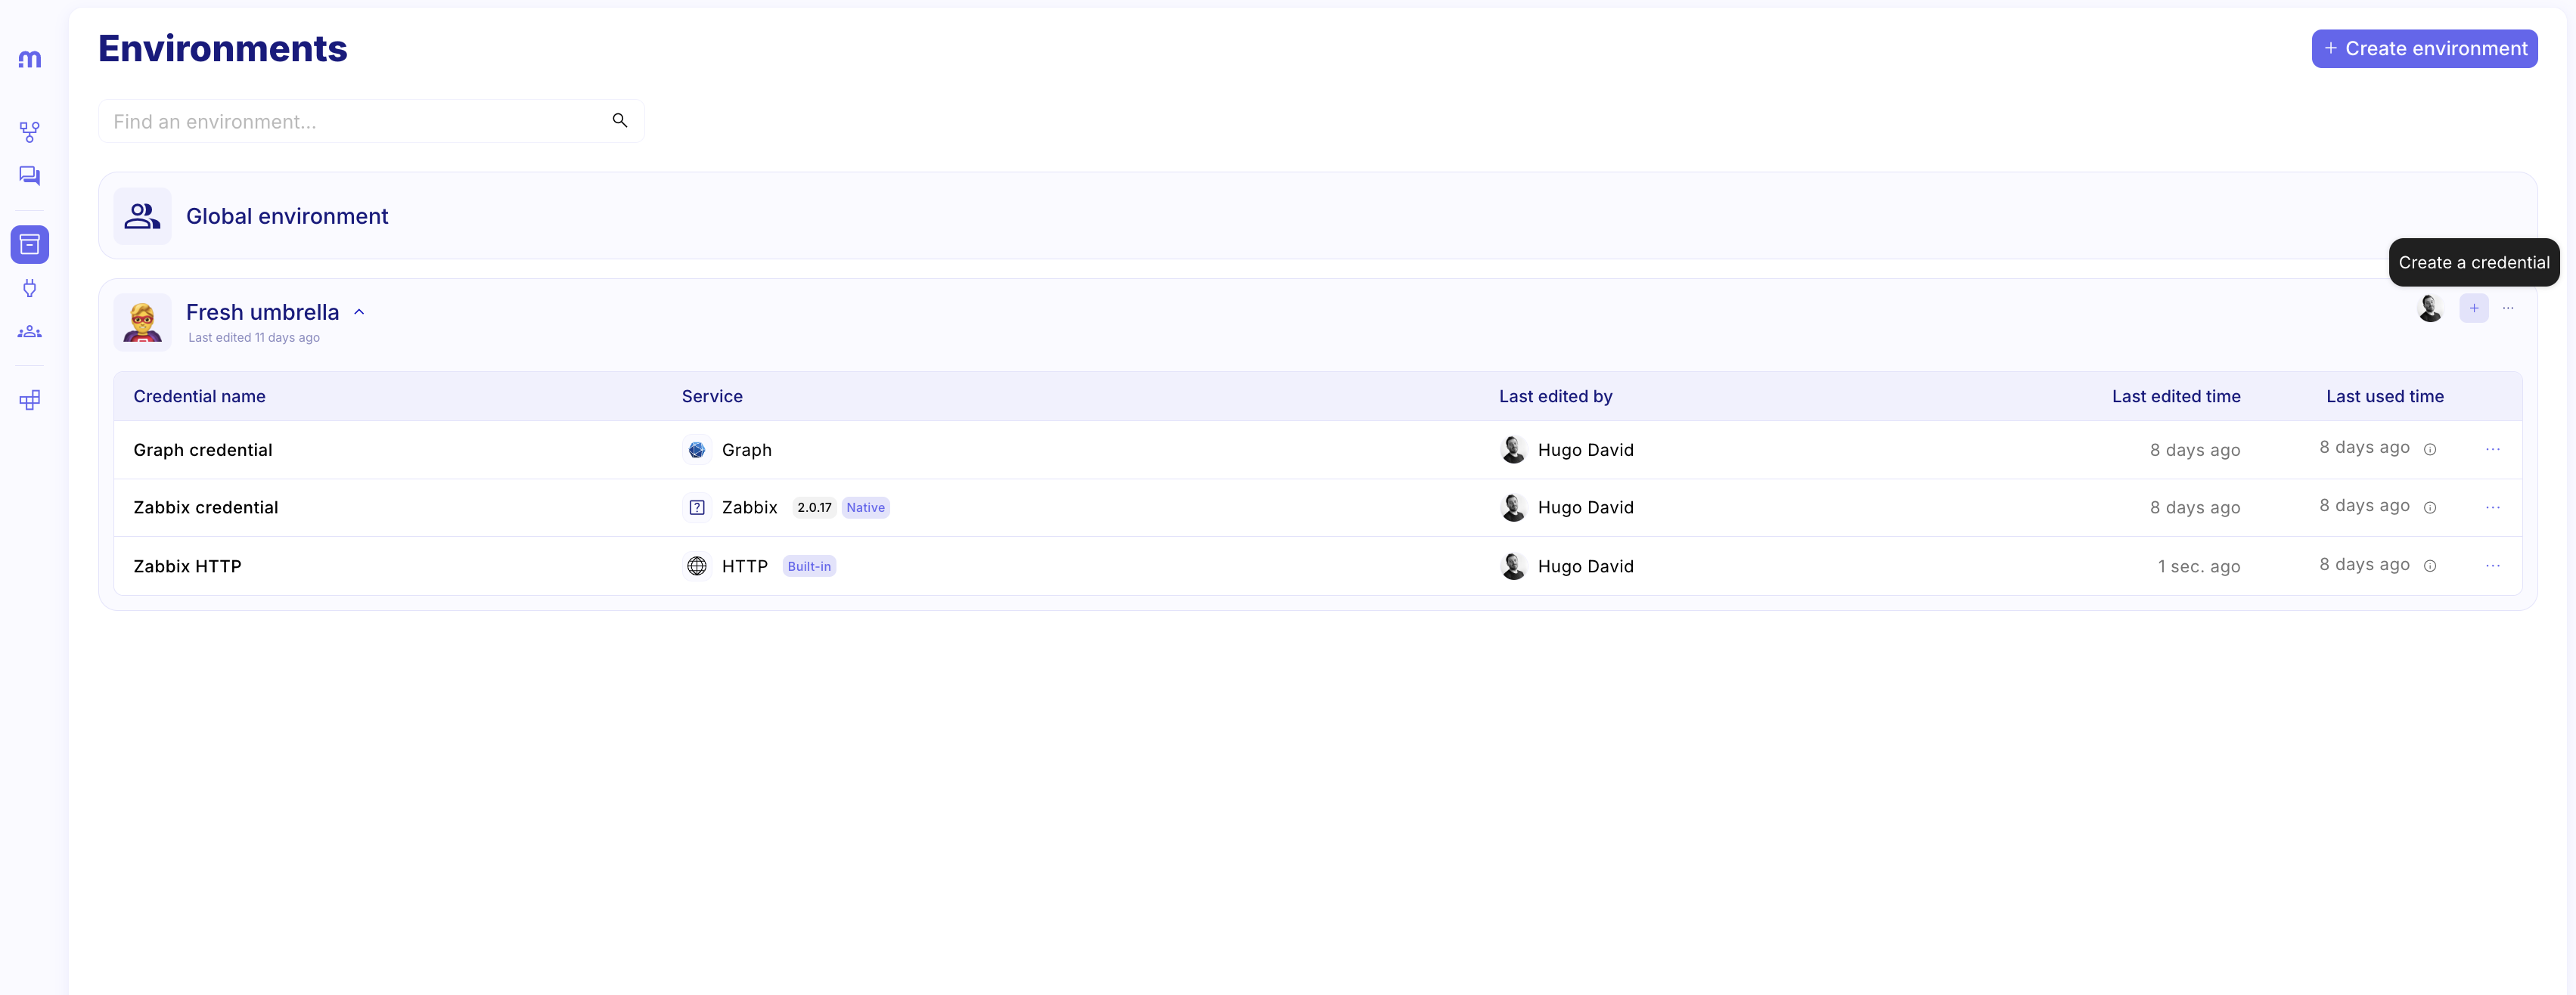
In the Mindflow platform, navigate to your Environments.
-
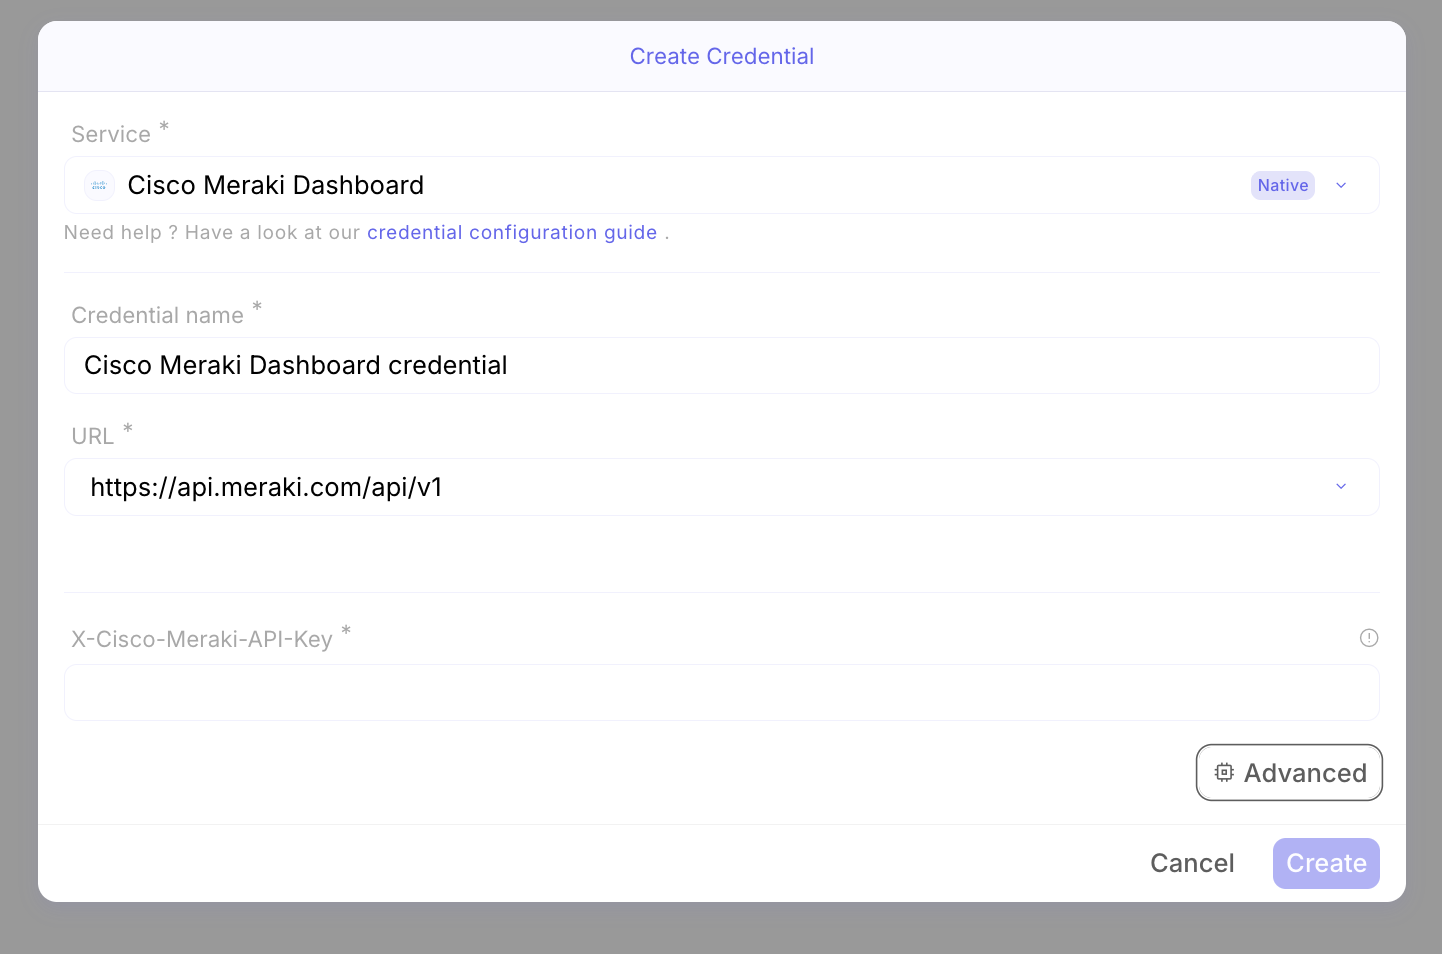
Click Create Credential and search for “Cisco Meraki Dashboard”.
Step 2.2: Basic Configuration
Section titled “Step 2.2: Basic Configuration”Mindflow provides a native form for Meraki. Fill out the following fields as shown in the screenshots below:
- Credential name *: Provide a descriptive name (e.g., “Meraki Production Key”).
- URL *: This is usually pre-filled as
https://api.meraki.com/api/v1. Keep this default unless you are using a specific regional shard. - X-Cisco-Meraki-API-Key *: Paste your API key here.
Step 2.3: Advanced Header Configuration (Optional/Alternative)
Section titled “Step 2.3: Advanced Header Configuration (Optional/Alternative)”If you prefer to use the Advanced settings or are working with a generic HTTP connector, you can configure the authentication via the Headers section:
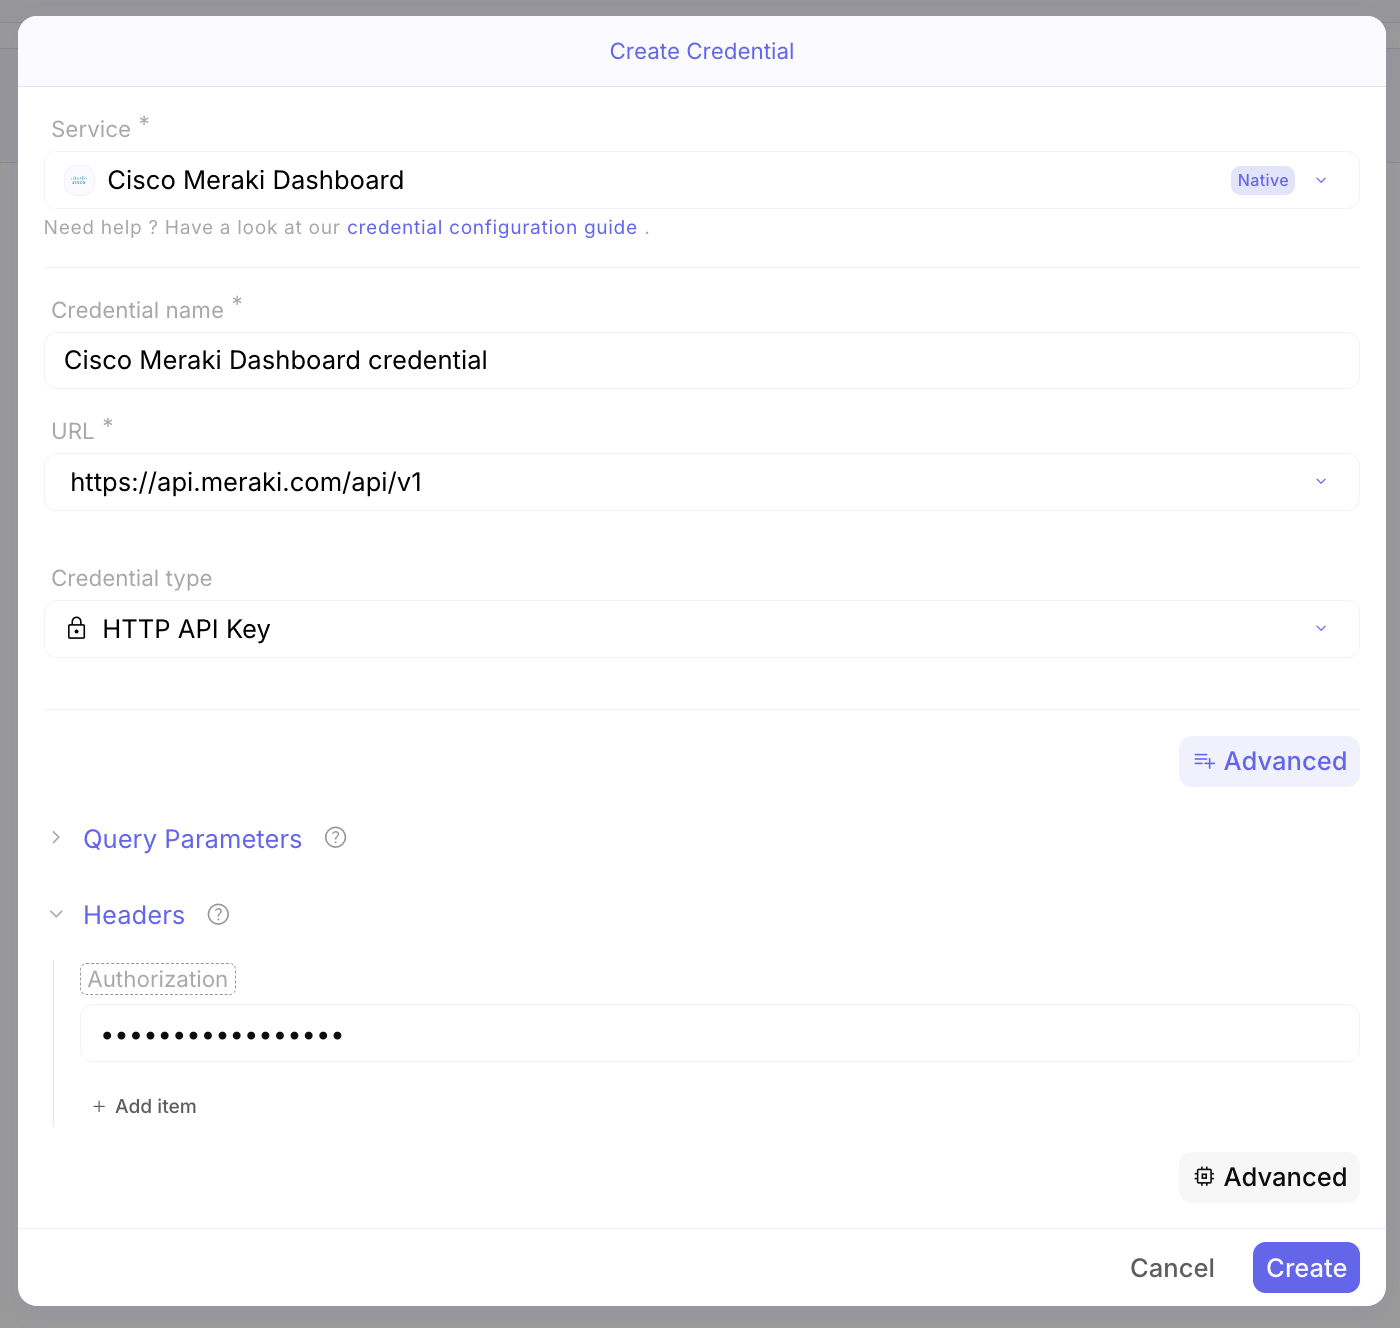
- Click on the Advanced toggle.
- Expand the Headers section.
- Add an item with the Key:
Authorization.
Step 2.4: Save and Test
Section titled “Step 2.4: Save and Test”Click Create. Your Cisco Meraki credential is now securely stored and ready to be pulled into any Mindflow action, allowing you to automate everything from SSID management to security group updates.