

Create and Set up a Google Chat App
Overview
Section titled “Overview”In this guide, we assist you in creating your first Google Chat bot, enabling you to harness quick-wins like helper bots.
This guide is separated into two main sections:
- The creation of the bot in itself
- Its’ registration as a private app and publication to your Workspace through an
Admin install.
Pre-requisites
Section titled “Pre-requisites”- An access to the Google Cloud Console
- An access to Google Workspace Admin console
Initial Setup
Section titled “Initial Setup”1. Create your project in GCP (Google Cloud Platform)
Section titled “1. Create your project in GCP (Google Cloud Platform)”-
Go to : https://console.cloud.google.com/projectcreate
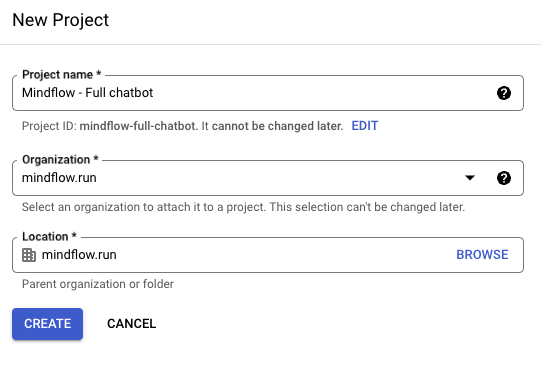
-
Wait for the project creation to complete, then copy the usefull informations for the next steps, the GCP Project number
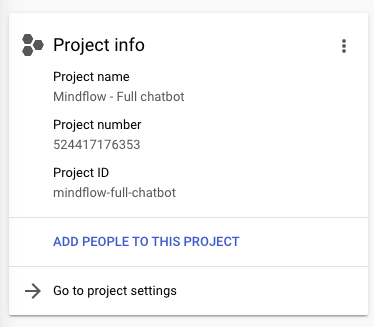
2. Enable Google Chat API in your project
Section titled “2. Enable Google Chat API in your project”-
Go to : https://console.cloud.google.com/apis/library/chat.googleapis.com
-
Then click the blue
ENABLEbutton.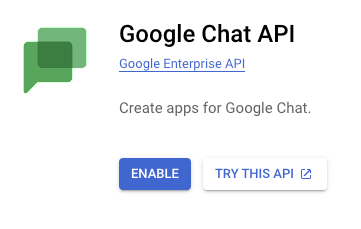
-
Once the API is enabled, you can access the Configuration tab by clicking on
Manage. Then, fill in the required fields in theCONFIGURATIONtab. -
Check the first box to allow the Chat application to join spaces and conversations within those spaces.
-
For more information about the Support App Home feature, this guide details the functionalities provided by this option: https://developers.google.com/workspace/chat/send-app-home-card-message
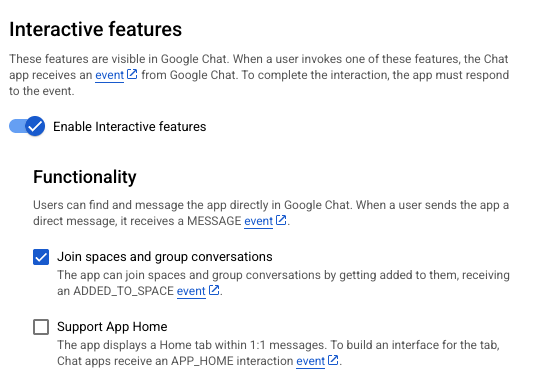
-
The most important part is configuring the connectivity between the Google Chat application and third-party services.
- In our case, to avoid managing additional resources on Google Cloud, we will detail the
HTTP endpoint URLconfiguration in the rest of this guide. - There are two options for configuring the trigger:
- Define a single URL for all event types
<div class="docs-screenshot-compact">

</div>
In our case, you need to select the synchronous URL to define the automatic response that will be sent upon receiving a message.-
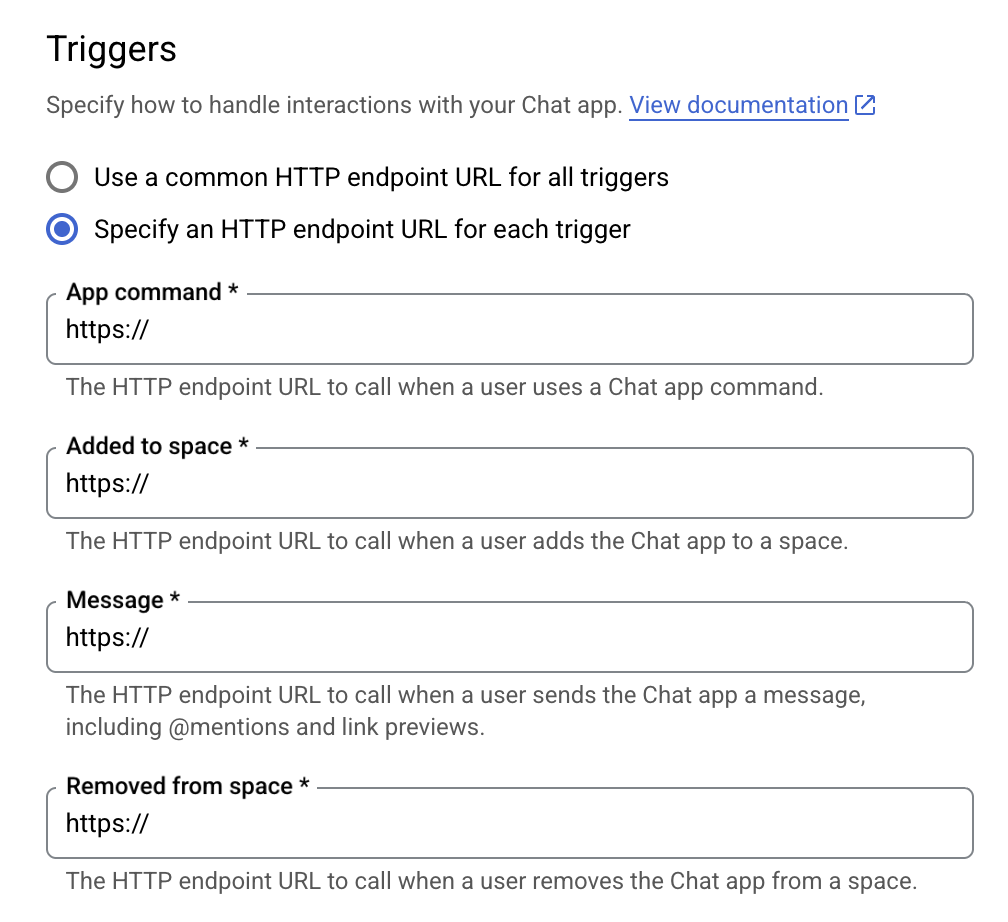
Or specify a different trigger URL for each event type:
- Available events:
APP_COMMAND,ADDED_TO_SPACE,MESSAGE,REMOVE_FROM_SPACE. Here, if you are going to perform an Admin install of the bot, beware that, if you choose Use a common HTTP endpoint URL for all triggers, your bot will be triggered for allADDED_TO_SPACEevents. Since the bot is going to install itself on all employees within the Organizational Unit you selected, you may encounter lots of events.
- Available events:
-
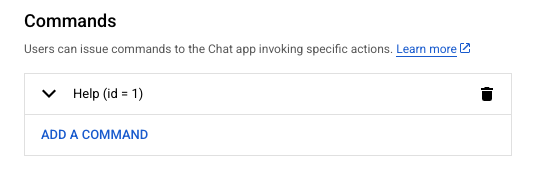
In this panel, you can also define a list of commands to trigger the application. Each command has a unique ID that will be visible in the event payload received by Mindflow, allowing you to dispatch to the appropriate sub-playbook using a condition or execute actions related to that command.
-
Before configuring the API part, you can already test your bot by sending a direct message to it or from a space. To start using a Chat app, Google Chat users can initiate a direct message with the Chat app or add it to a space. Users can also add the Chat app by @mentioning it.
3. Generate credentials to allow bot replying to users
Section titled “3. Generate credentials to allow bot replying to users”-
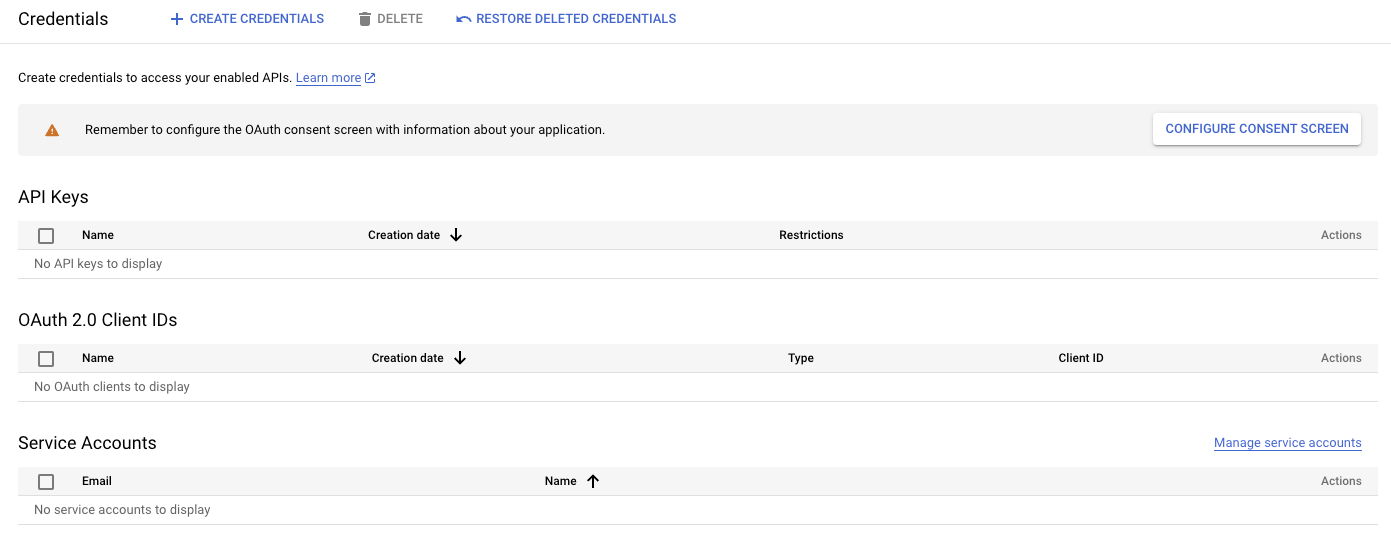
Go to : https://console.cloud.google.com/apis/credentials
-
Click on
Create Credentialsbutton, then selectService Account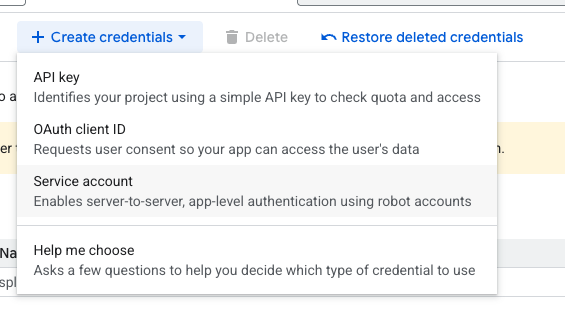
-
Fill in the mandatory fields, and click
Done.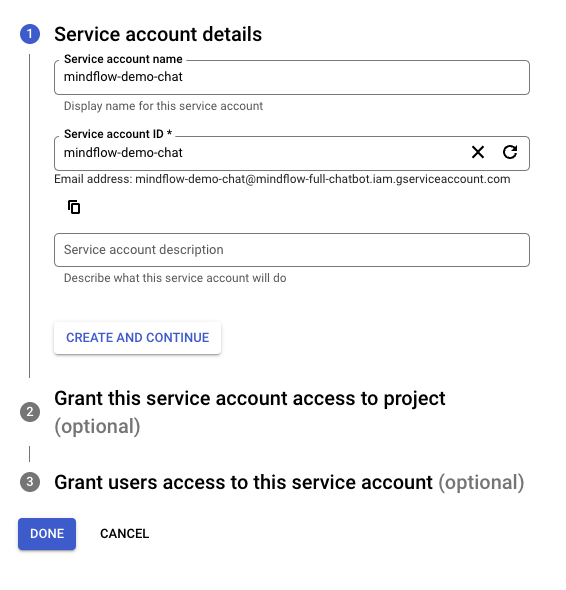
-
Then click on your service account in the credentials dashboard

-
Click on the
Keystab. Then on theAdd Keybutton.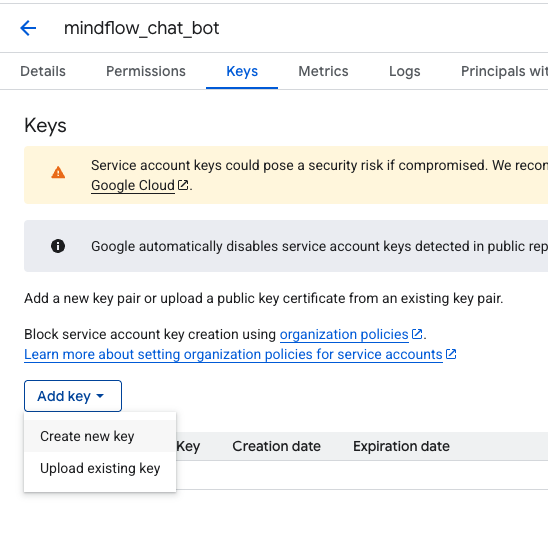
-
Choose JSON and click
Create.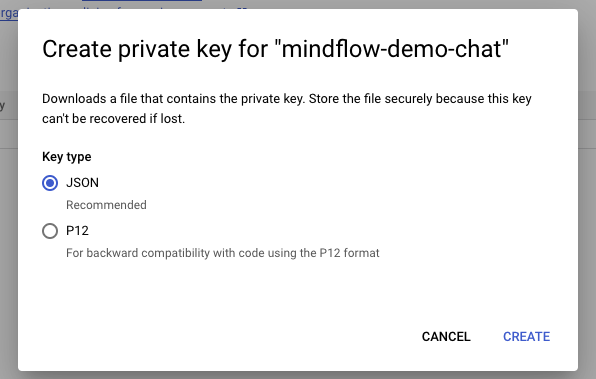
-
In some cases, depending on how permissions are managed in your Google Workspace environment, you may need to configure domain-wide delegation in the Admin Console. Follow these steps:
- Go to the Google Admin Console at https://admin.google.com/ac/owl/domainwidedelegation
- Navigate to Security > Access and data control > API controls
- In the Domain-wide delegation section, click Manage Domain Wide Delegation
- Add a new API client:
- Click Add new
- Enter the Client ID from your service account (you can find this in the JSON file you downloaded earlier or in the Google Cloud Console under your service account details)
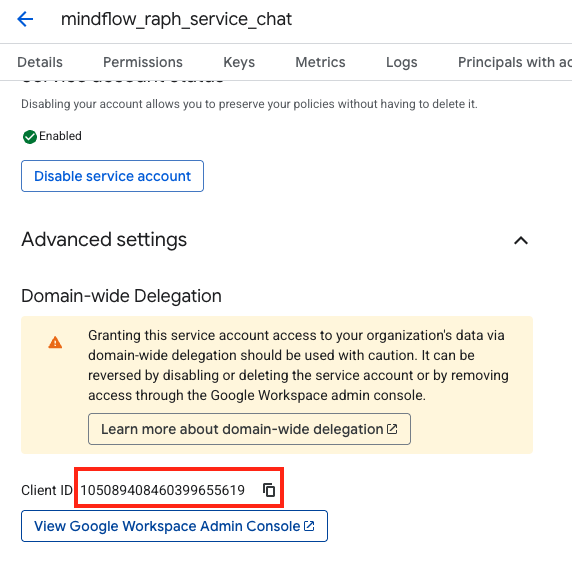
- In the OAuth Scopes field, add:
https://www.googleapis.com/auth/chat.bothttps://www.googleapis.com/auth/chat.spaceshttps://www.googleapis.com/auth/chat.messages.create
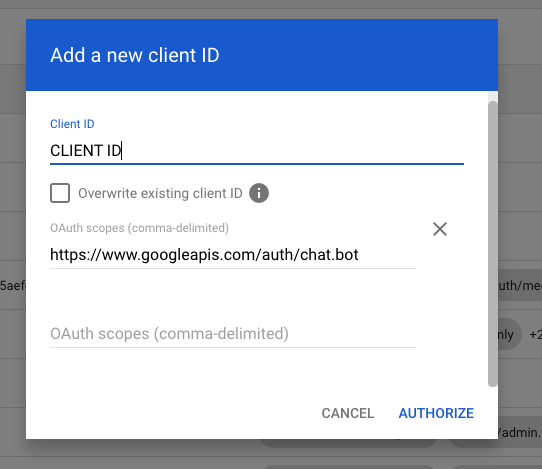
- Click
Authorize
- Go to the Google Admin Console at https://admin.google.com/ac/owl/domainwidedelegation
This configuration grants your service account the necessary permissions to interact with Google Chat on behalf of users in your domain.
4. Create credentials in Mindflow
Section titled “4. Create credentials in Mindflow”-
Go to : https://yourinstance.mindflow.io
-
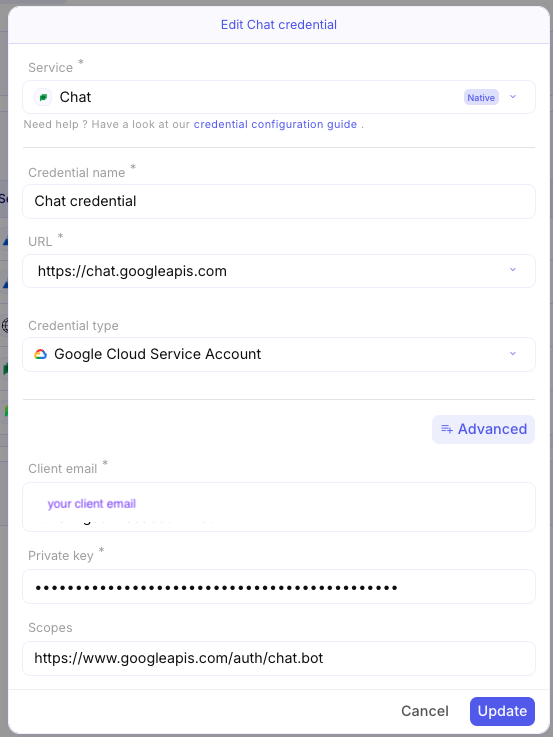
Create a new credential of type
Google Cloud Service Account. -
Copy all information from the previously downloaded JSON.
-
For the Scopes, you can start and set them to:
https://www.googleapis.com/auth/chat.bothttps://www.googleapis.com/auth/chat.spaceshttps://www.googleapis.com/auth/chat.messages.create
-
Click on
Createbutton.
Publication across the company
Section titled “Publication across the company”This section will take you from the final configurations in Google Cloud all the way through publishing, and includes the exact steps for an Admin to force-install the app or add it to an allowlist from the Google Admin Console.
Phase 1: Polish the Fundamentals (Google Cloud Console)
Section titled “Phase 1: Polish the Fundamentals (Google Cloud Console)”Before publishing, your app needs its internal permissions and outward appearance set correctly.
1. Verify the Chat API Configuration
Section titled “1. Verify the Chat API Configuration”-
Go to the Google Cloud Console > APIs & Services > Enabled APIs & services.
-
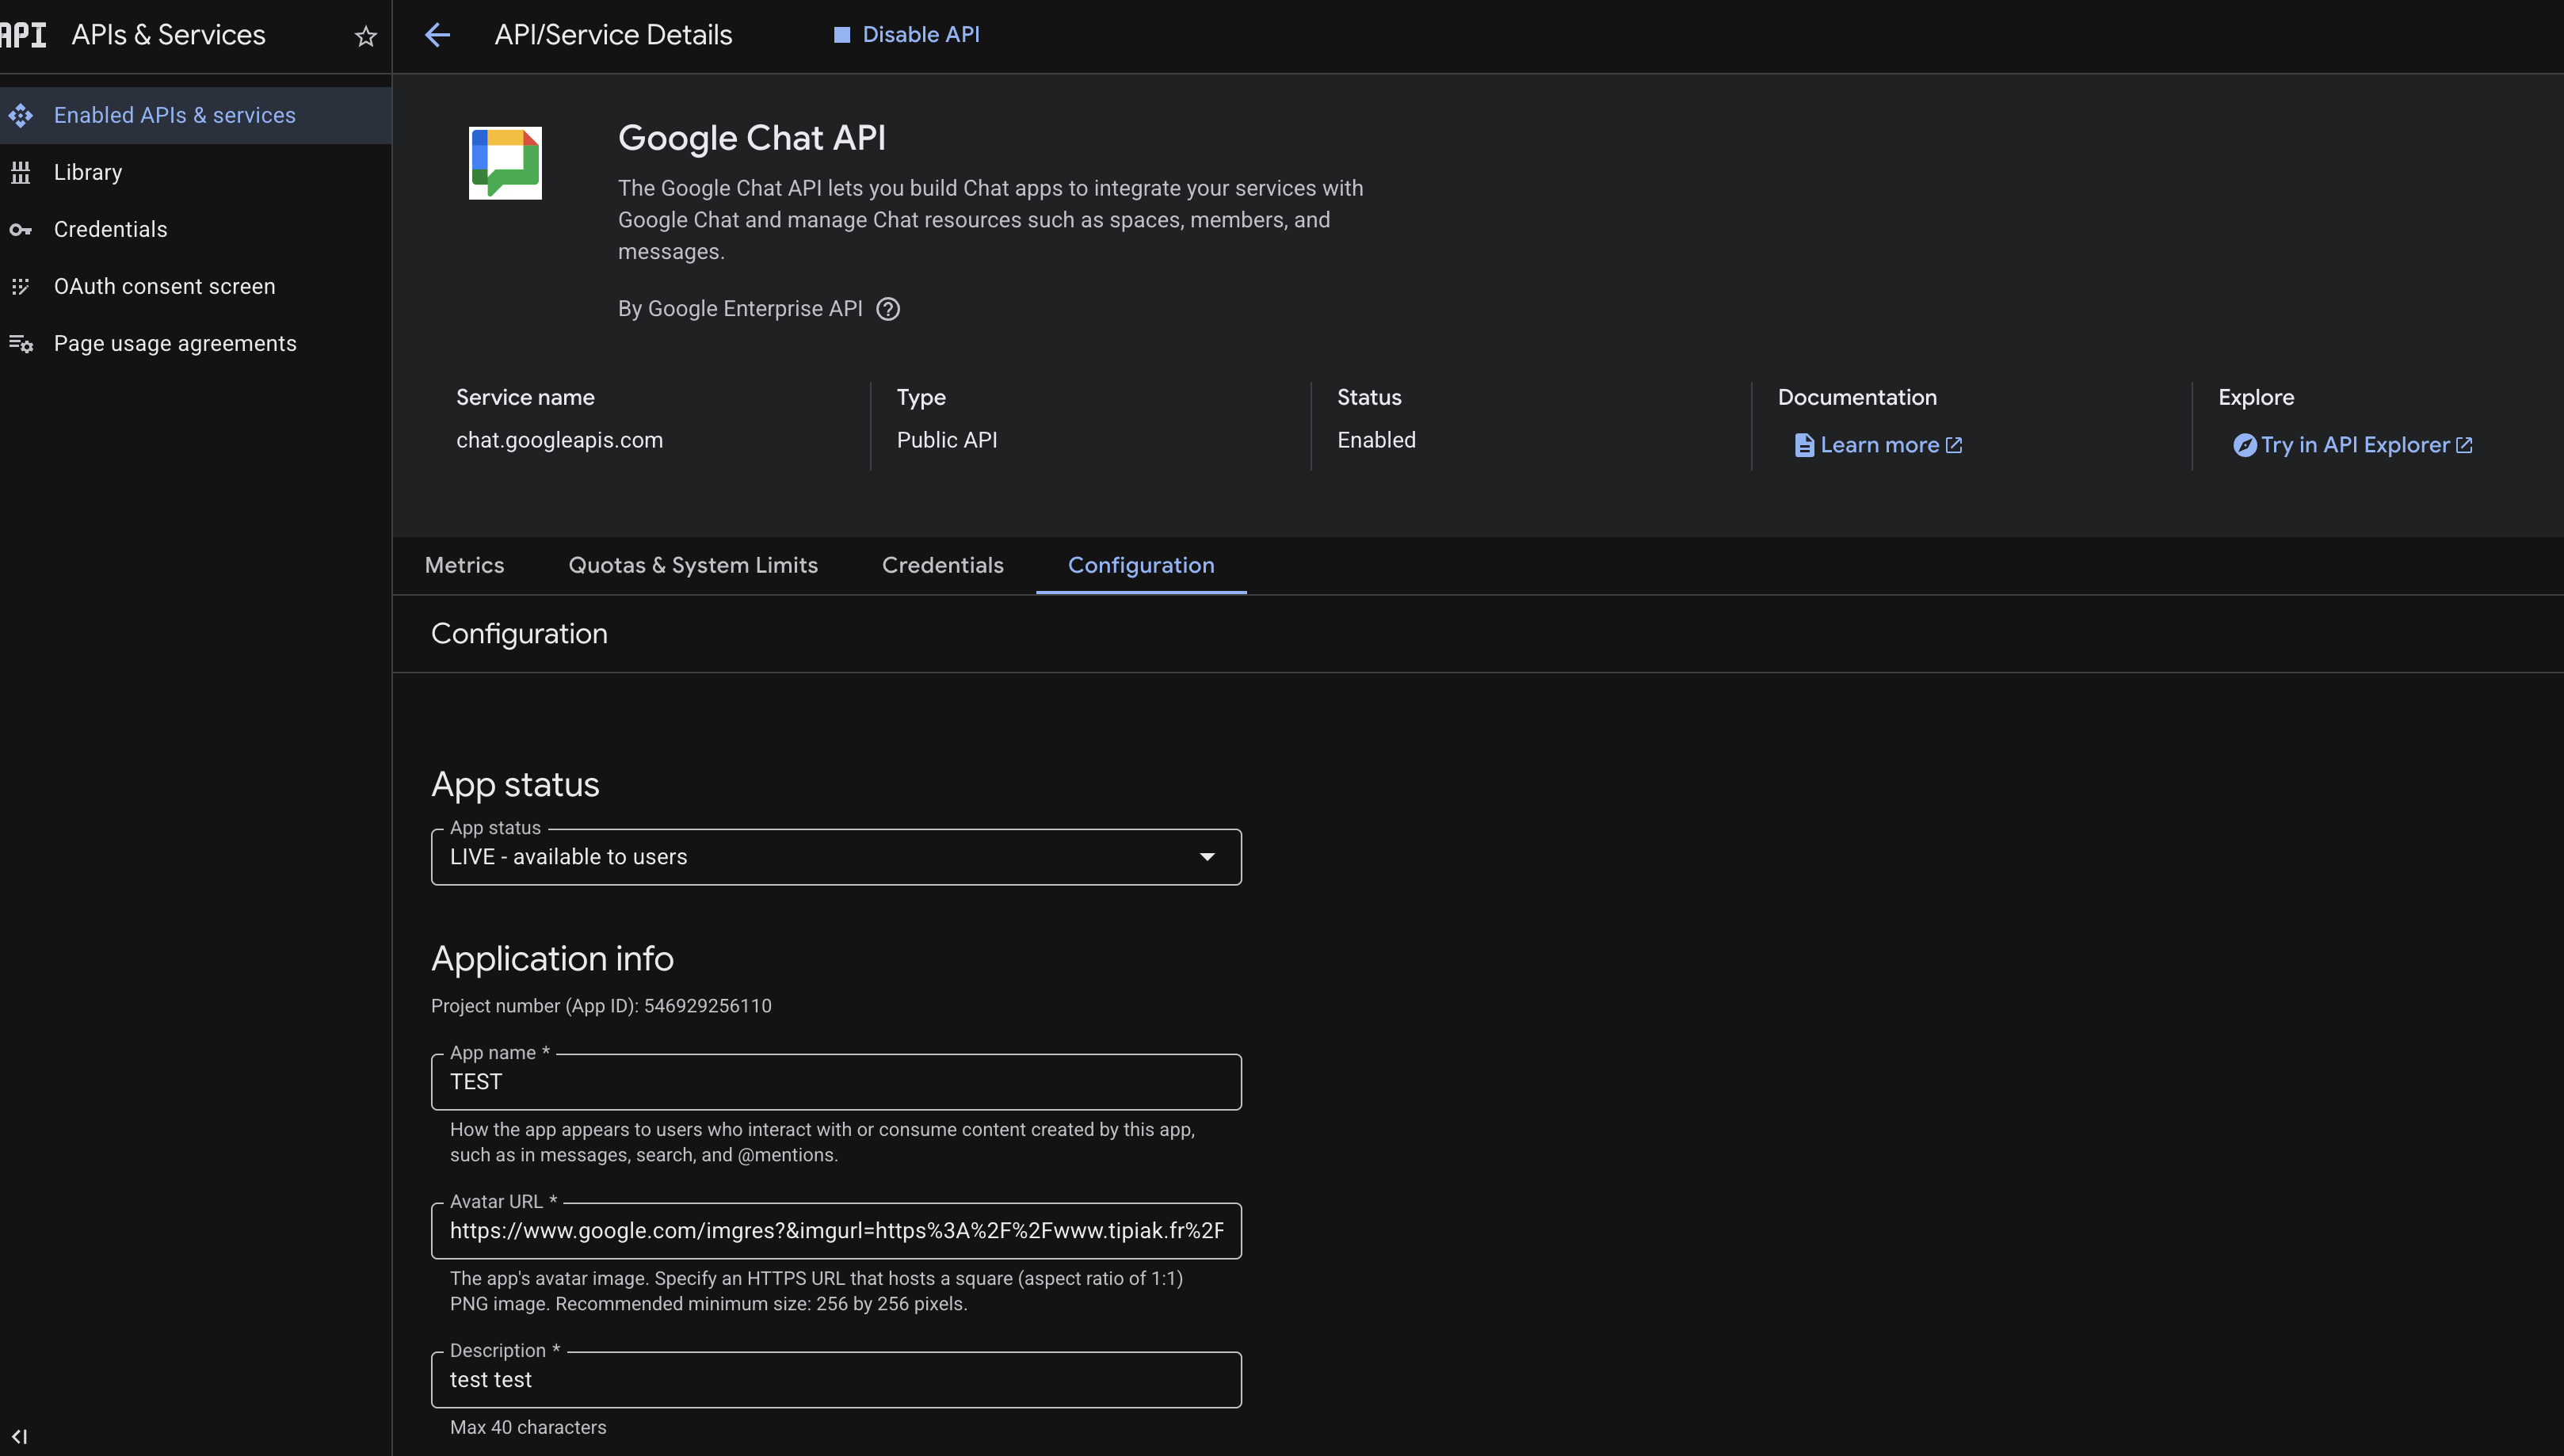
Click Google Chat API and go to the Configuration tab.
-
Ensure your App name, Avatar URL, and Description are exactly how you want them to appear in the chat interface.
-
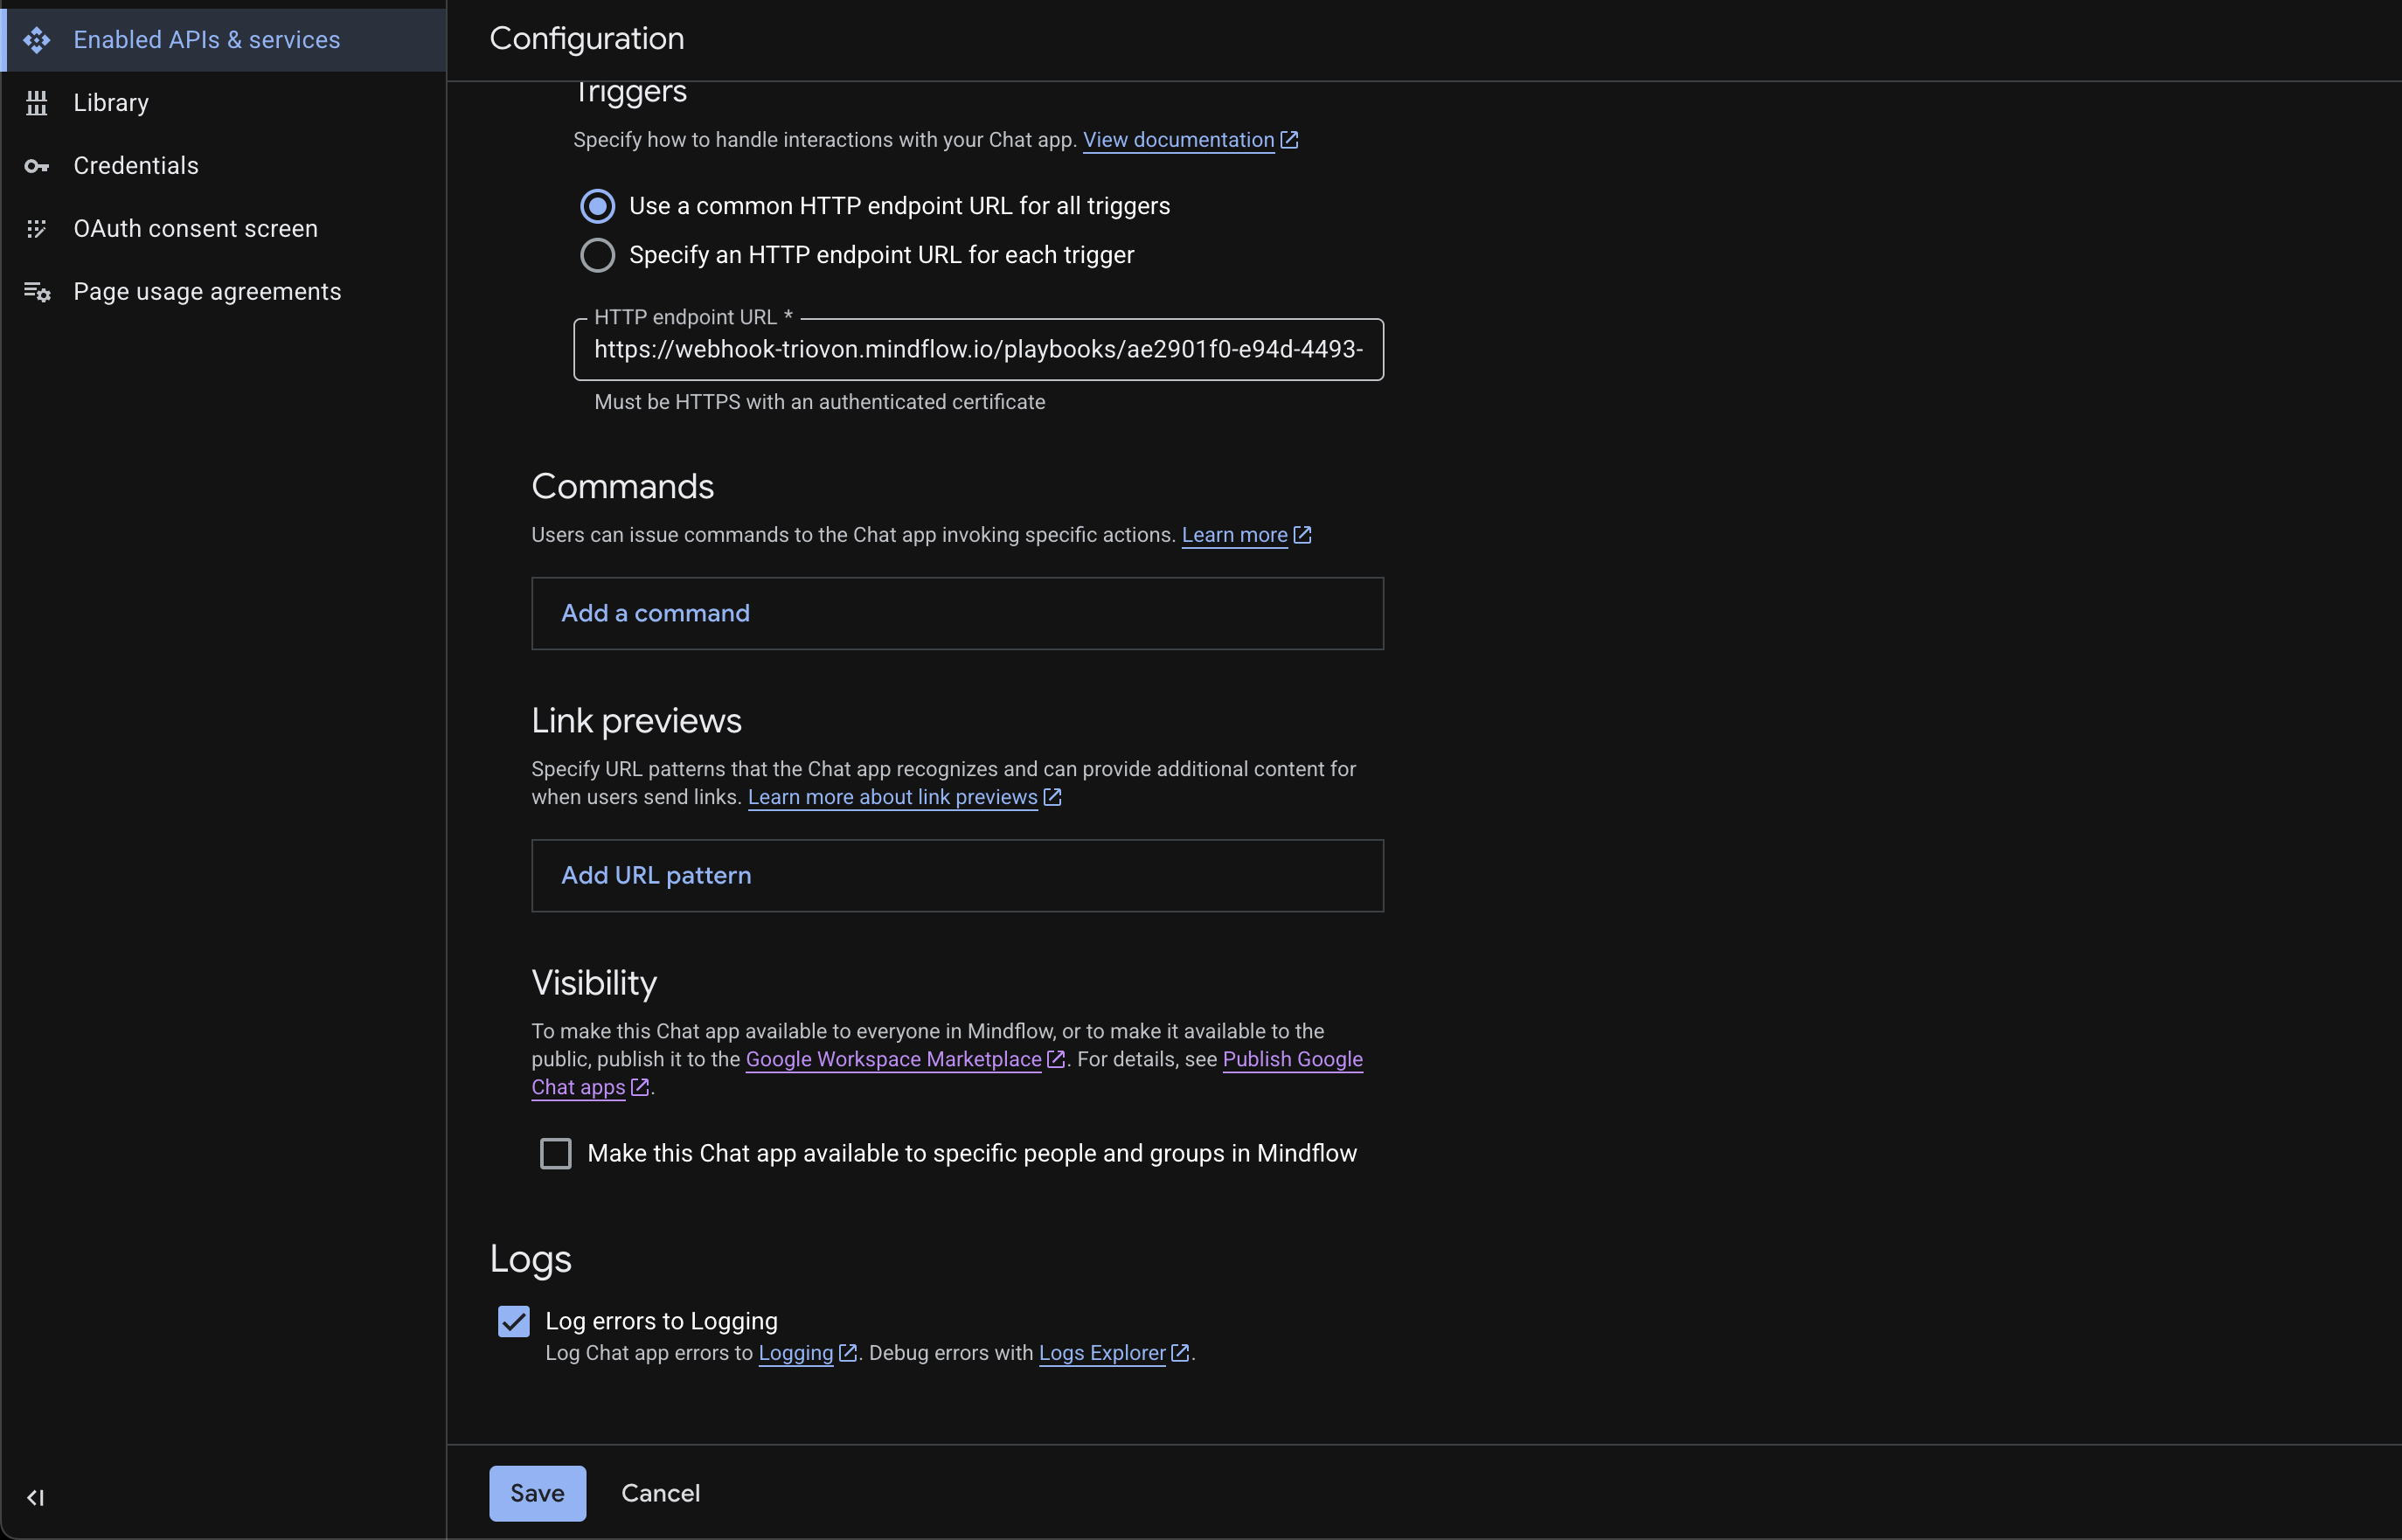
Double-check that your connection settings (Webhook, Apps Script, or HTTP Endpoint) are correct and saved.
2. Configure the OAuth Consent Screen
Section titled “2. Configure the OAuth Consent Screen”Even for a private bot, Google requires this to understand who owns the application.
- Go to APIs & Services > OAuth consent screen.
- Select Internal as the User Type. (This locks the app to your
@company.comdomain). - Fill in the mandatory fields: App name, User support email, and Developer contact information.
- Click Save and Continue through the Scopes and Summary screens.
Phase 2: The Workspace Marketplace SDK (The Publishing Engine)
Section titled “Phase 2: The Workspace Marketplace SDK (The Publishing Engine)”To make the app discoverable internally, you package it through the Marketplace SDK.
1. Enable the SDK
Section titled “1. Enable the SDK”-
In the Cloud Console search bar, type Google Workspace Marketplace SDK and click Enable.
2. App Configuration Setup
Section titled “2. App Configuration Setup”-
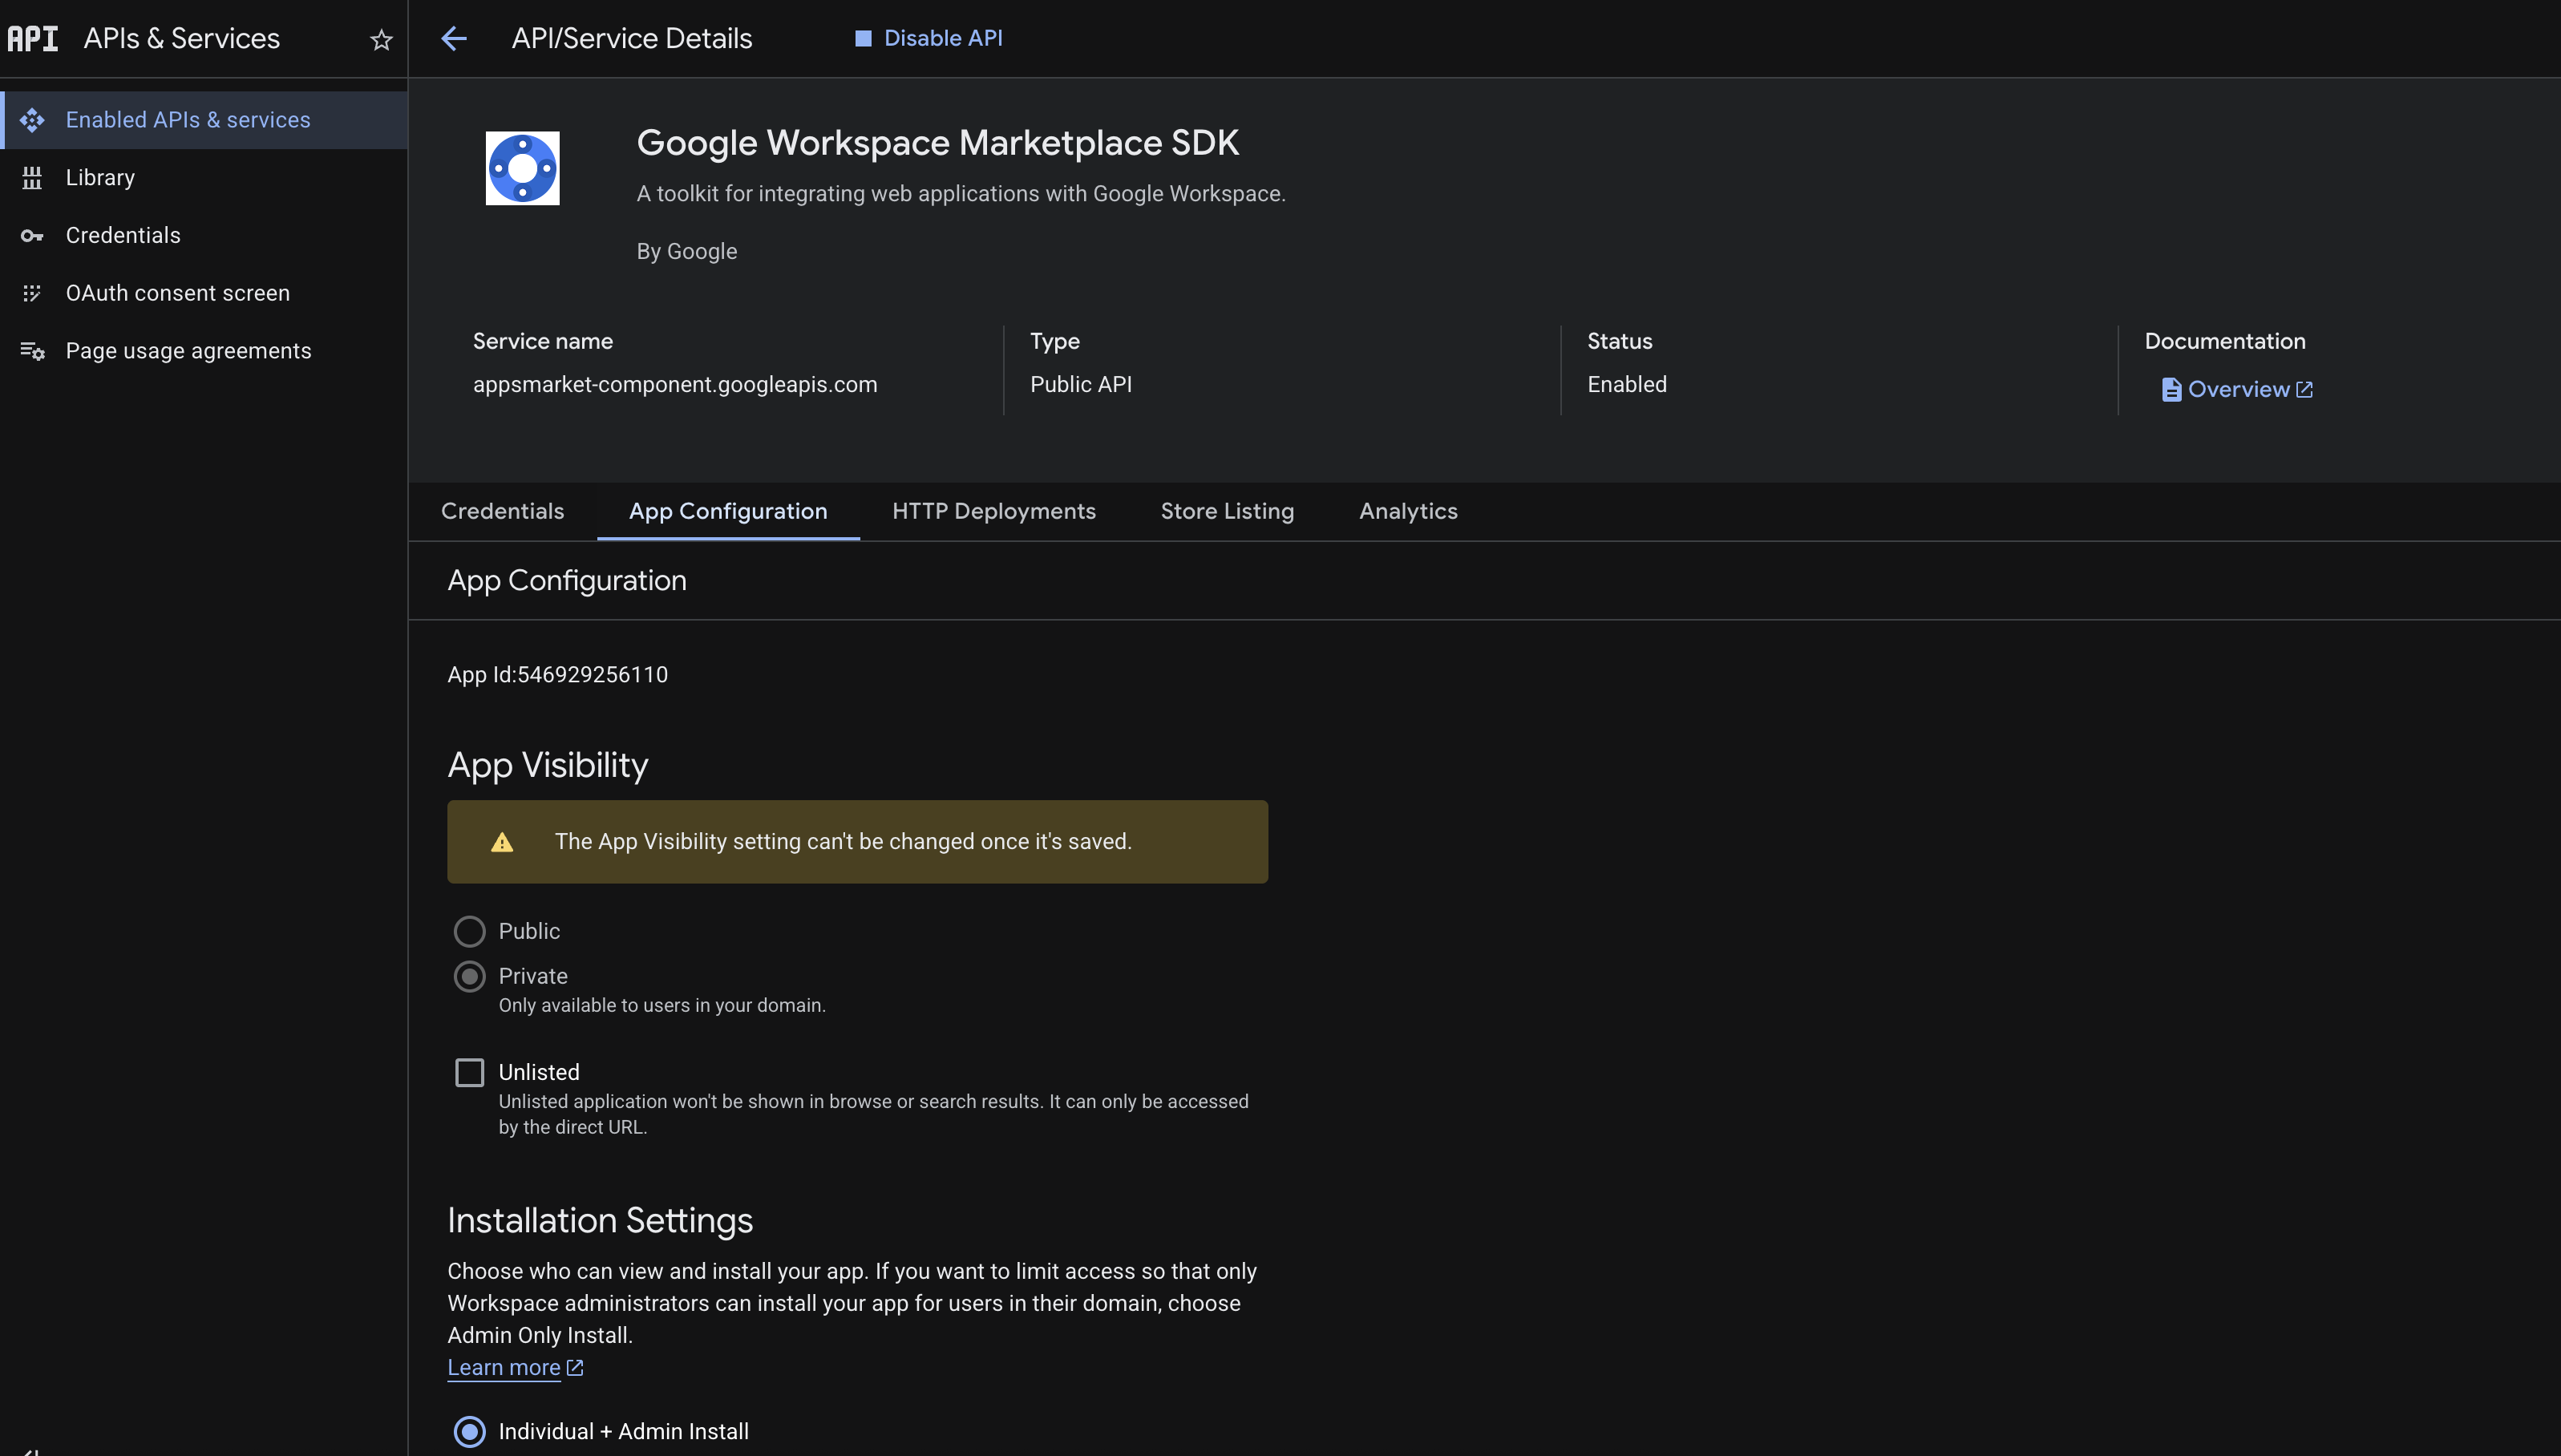
Open the SDK and click on the App Configuration tab on the left.
-
App Visibility: Select Private. This restricts the app strictly to your organization.
-
Installation Settings: Choose whether you want Individual install (users can install it themselves) or Admin install only (only IT can deploy it). You can select both.
-
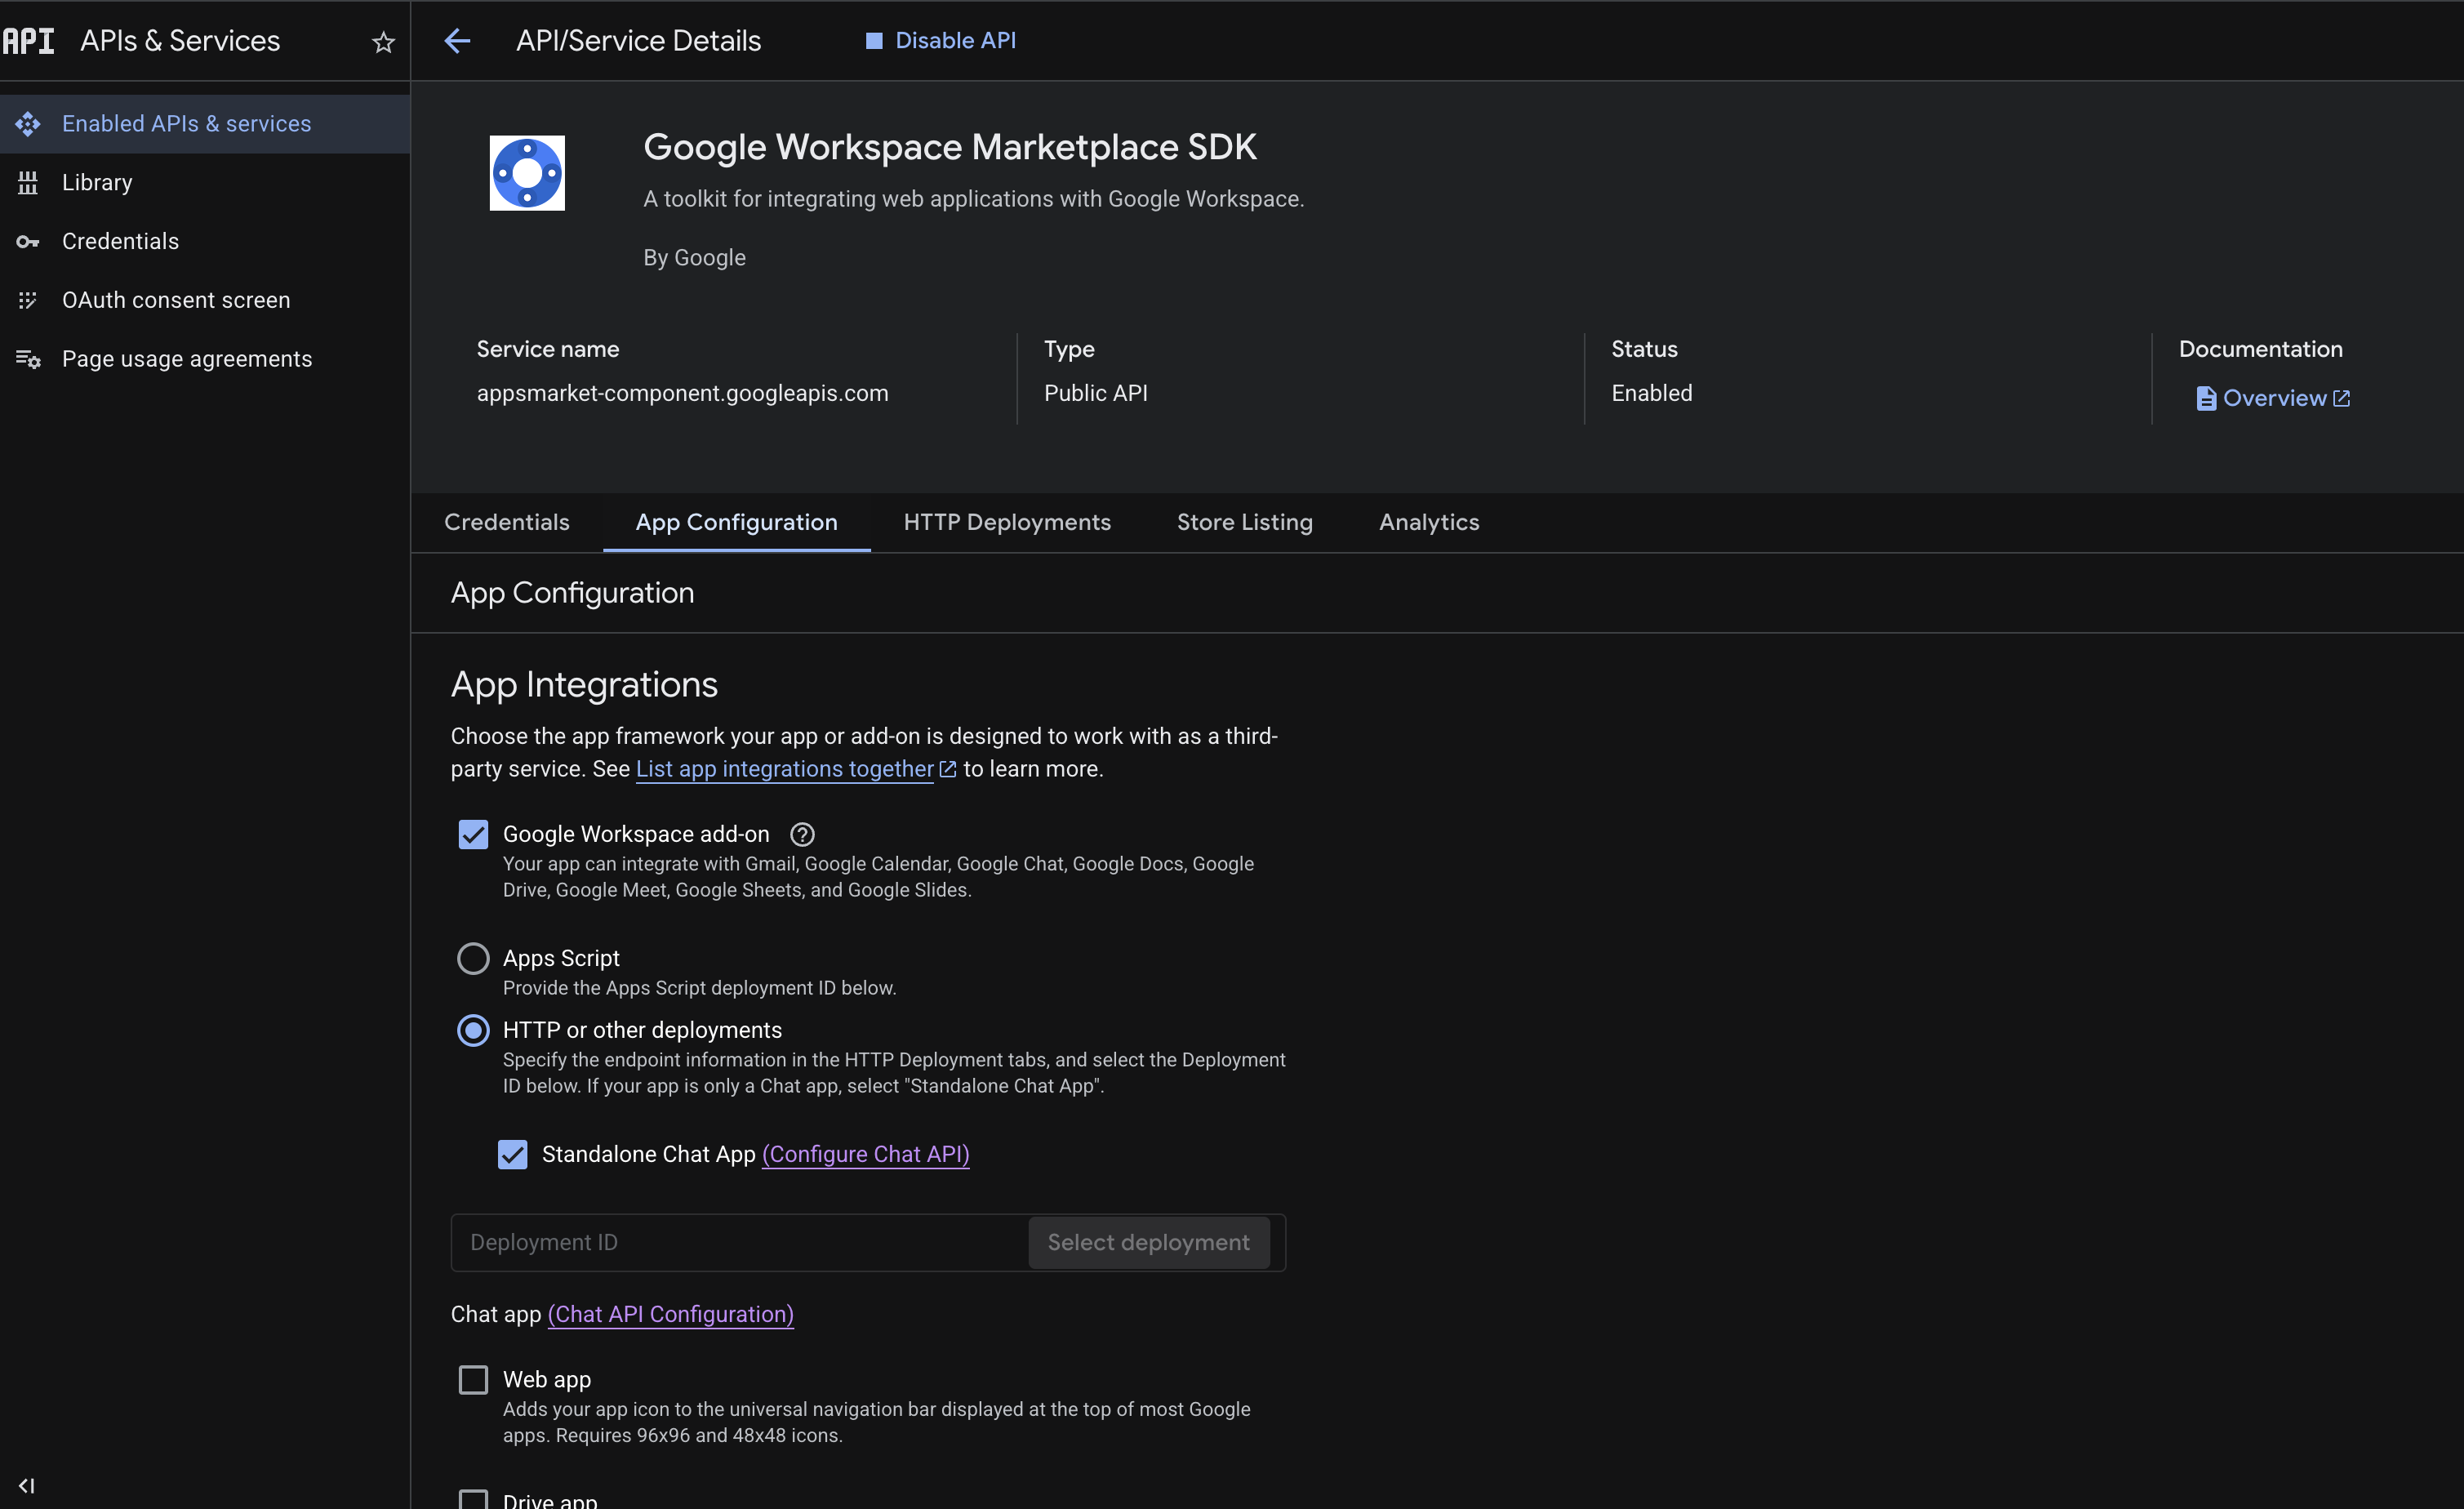
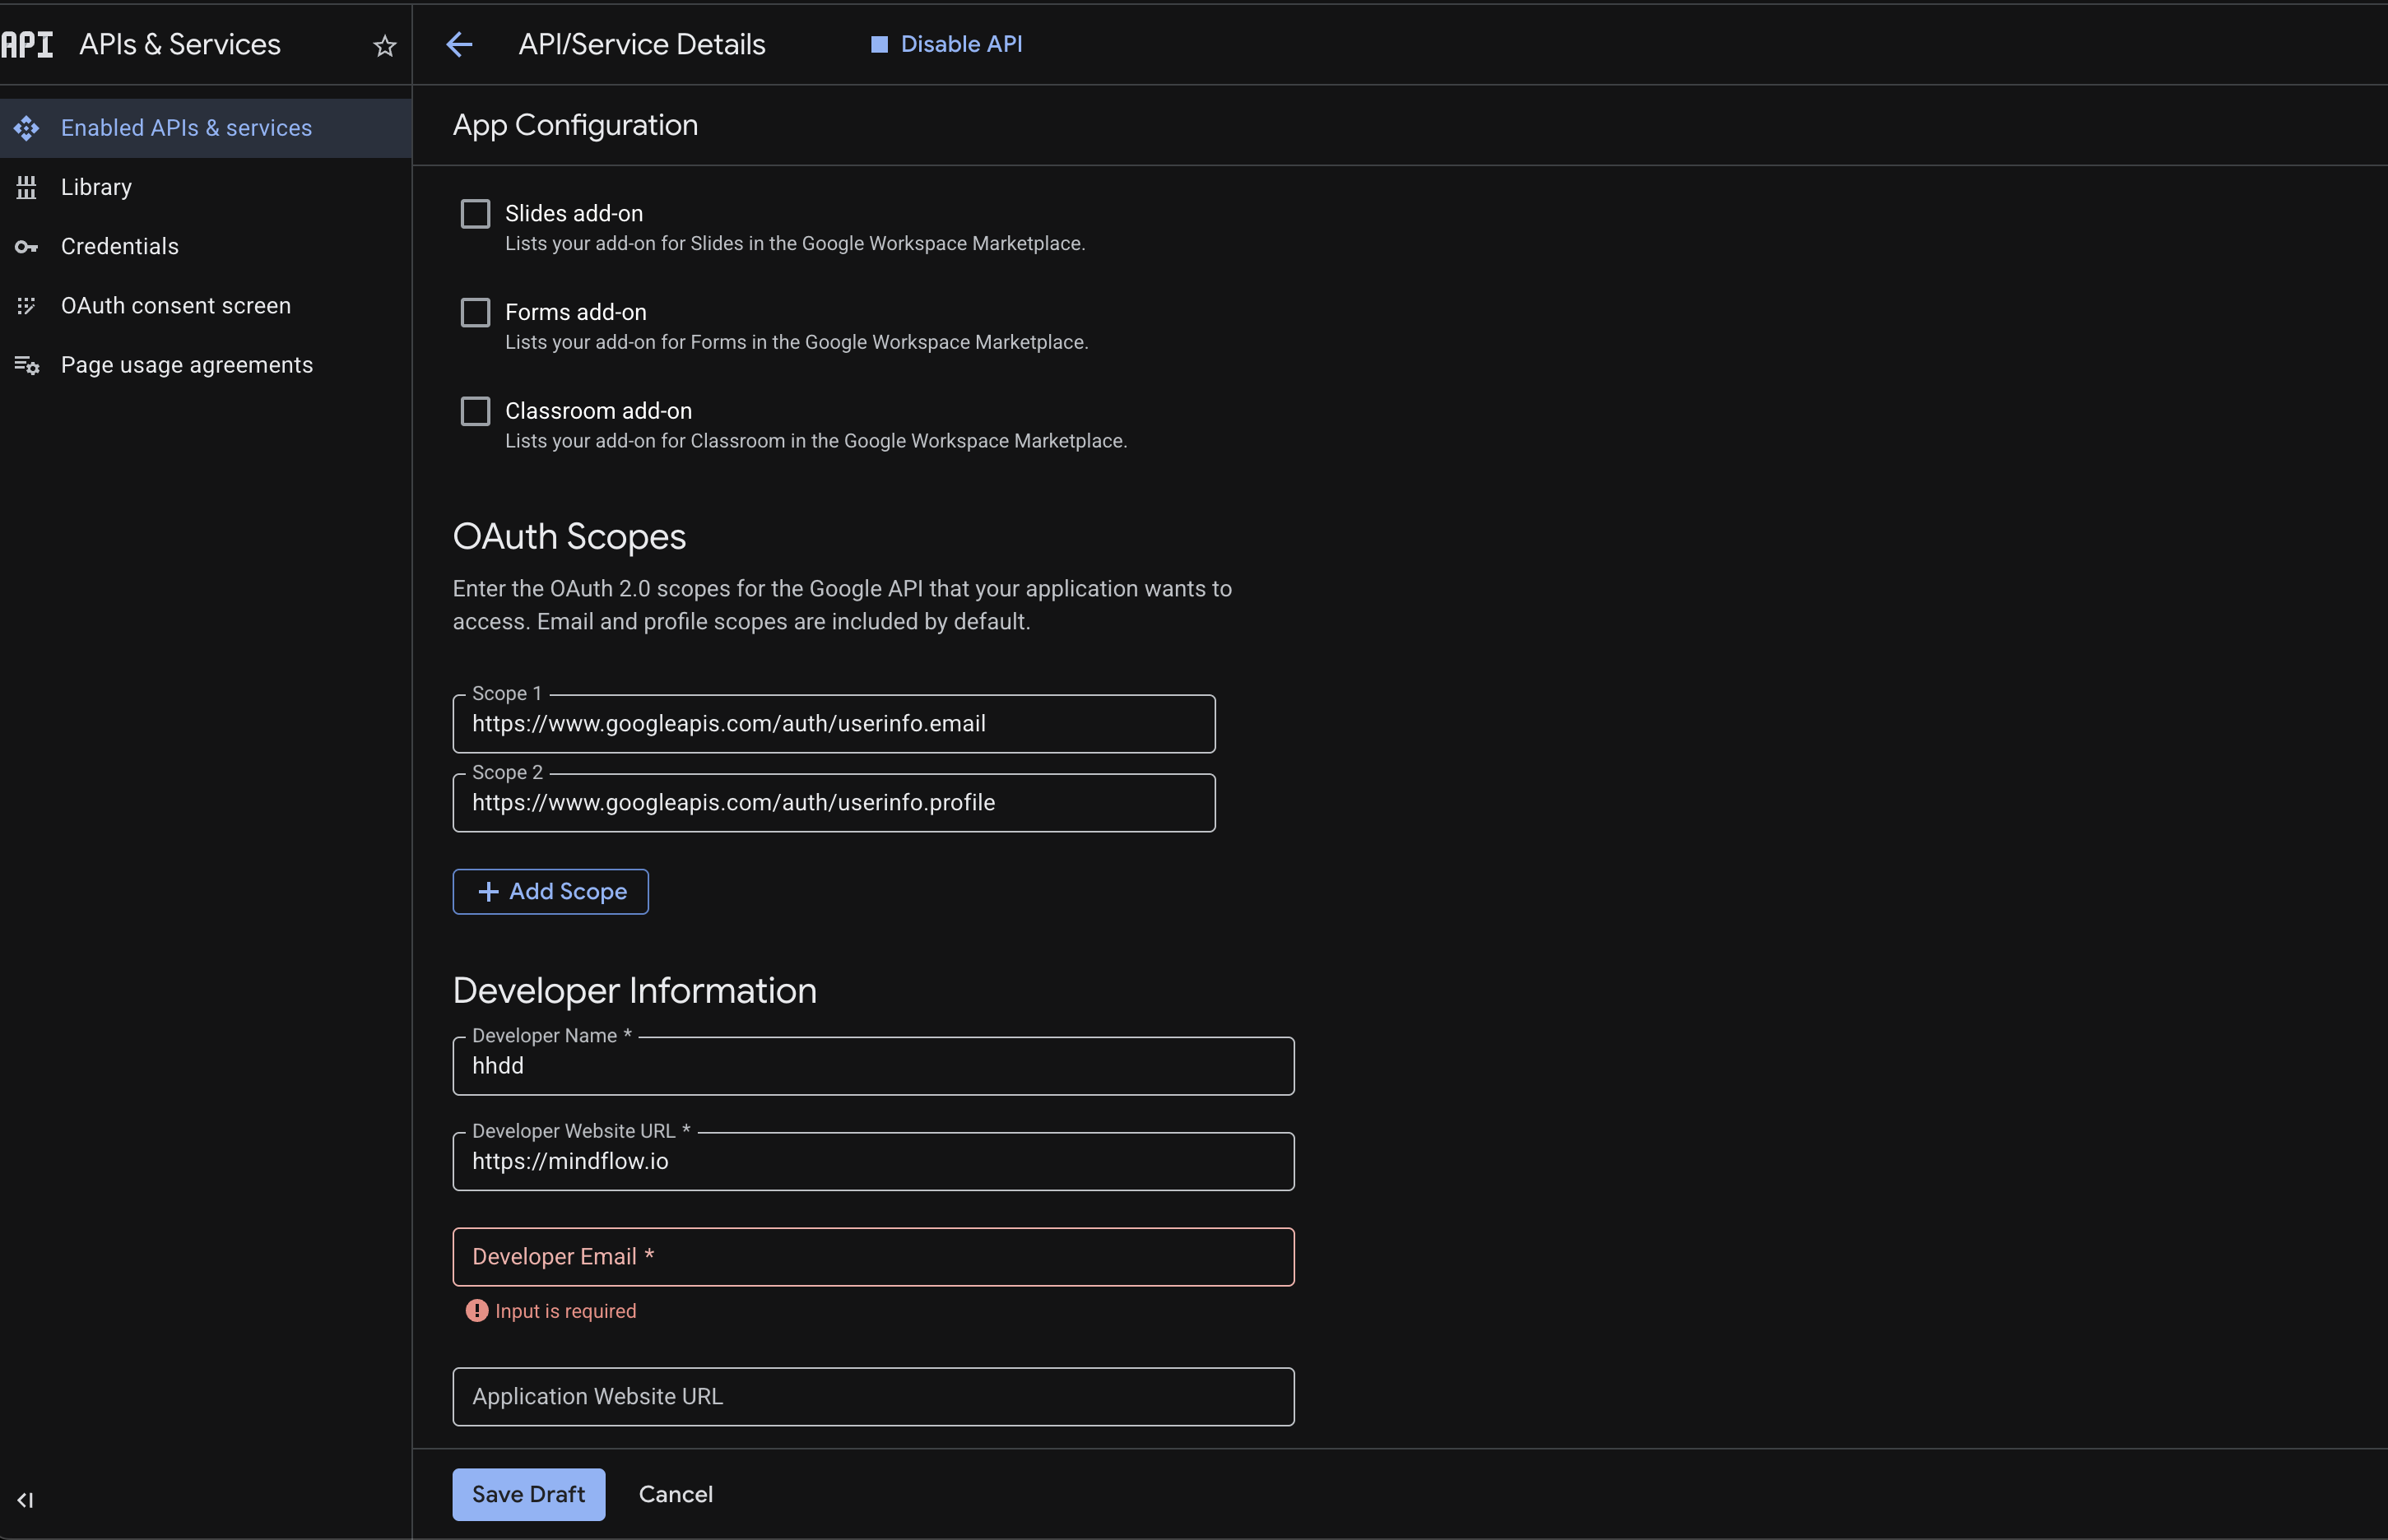
App Integrations: Scroll down and check the box for Google Chat App.
Phase 3: The “Store” Listing
Section titled “Phase 3: The “Store” Listing”Private apps still need a listing so your coworkers know what the bot does.
-
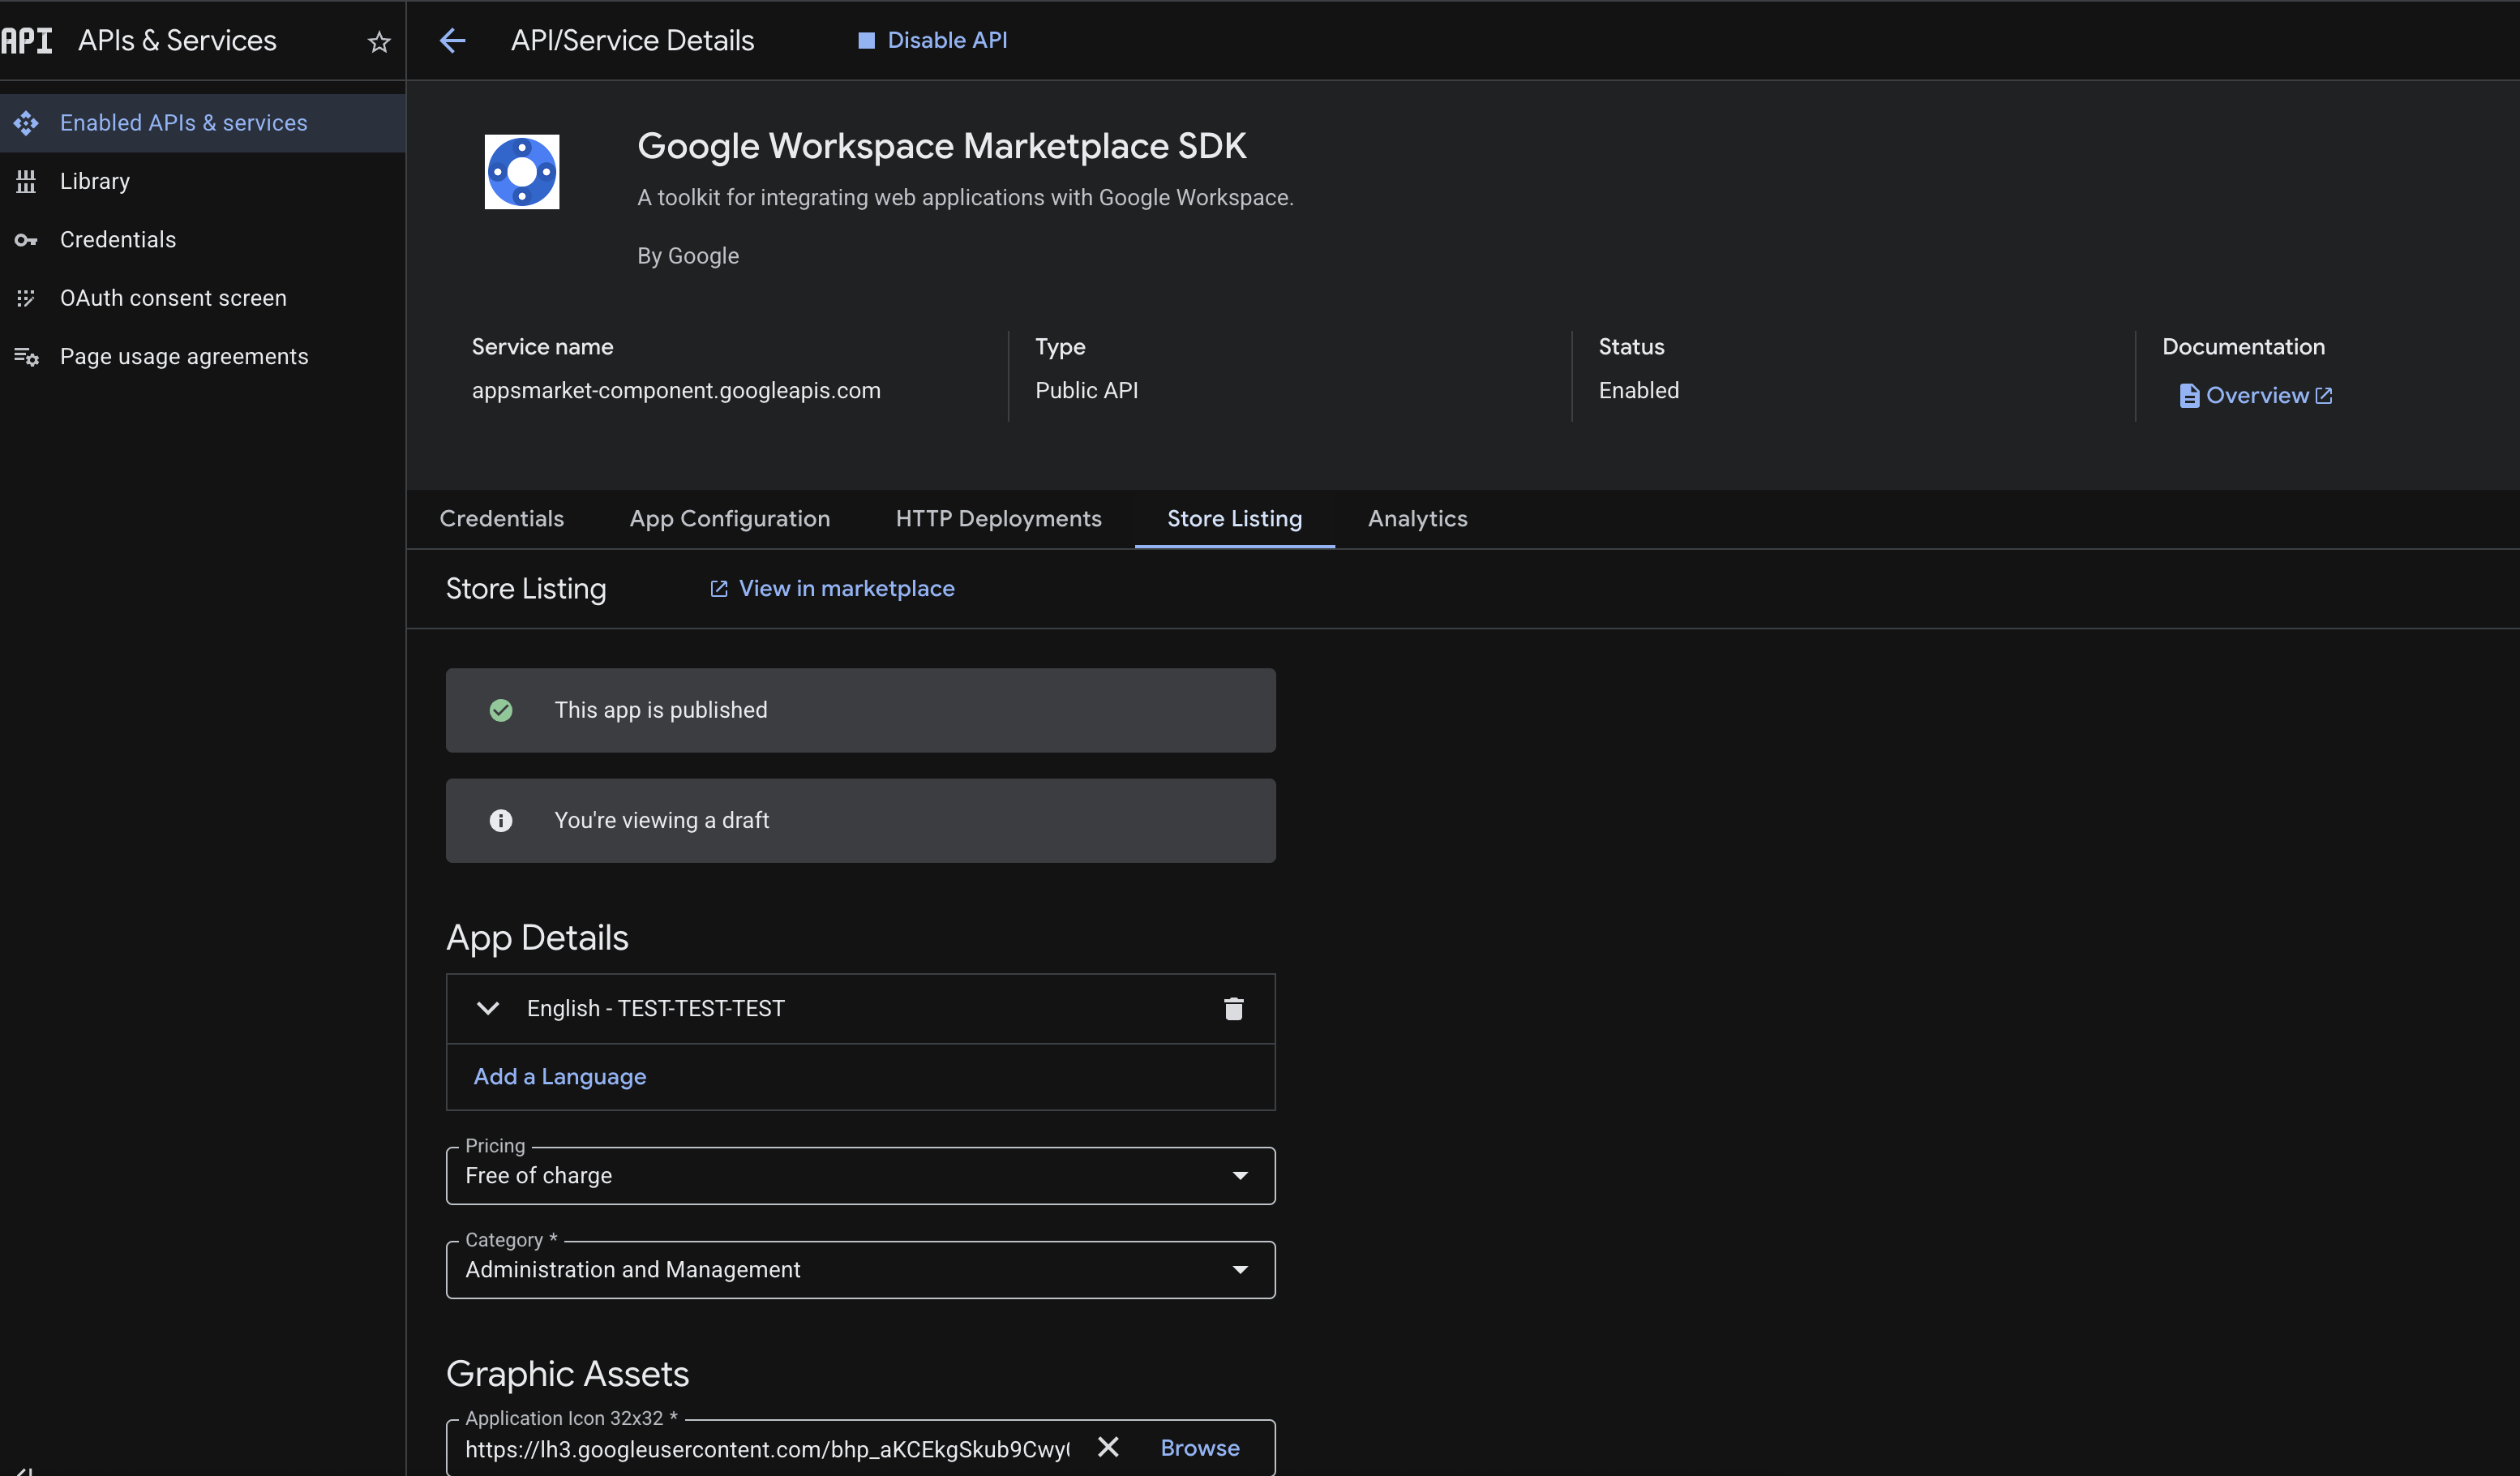
Click on the Store Listing tab.
-
App Details: Provide a short and detailed description of your bot.
-
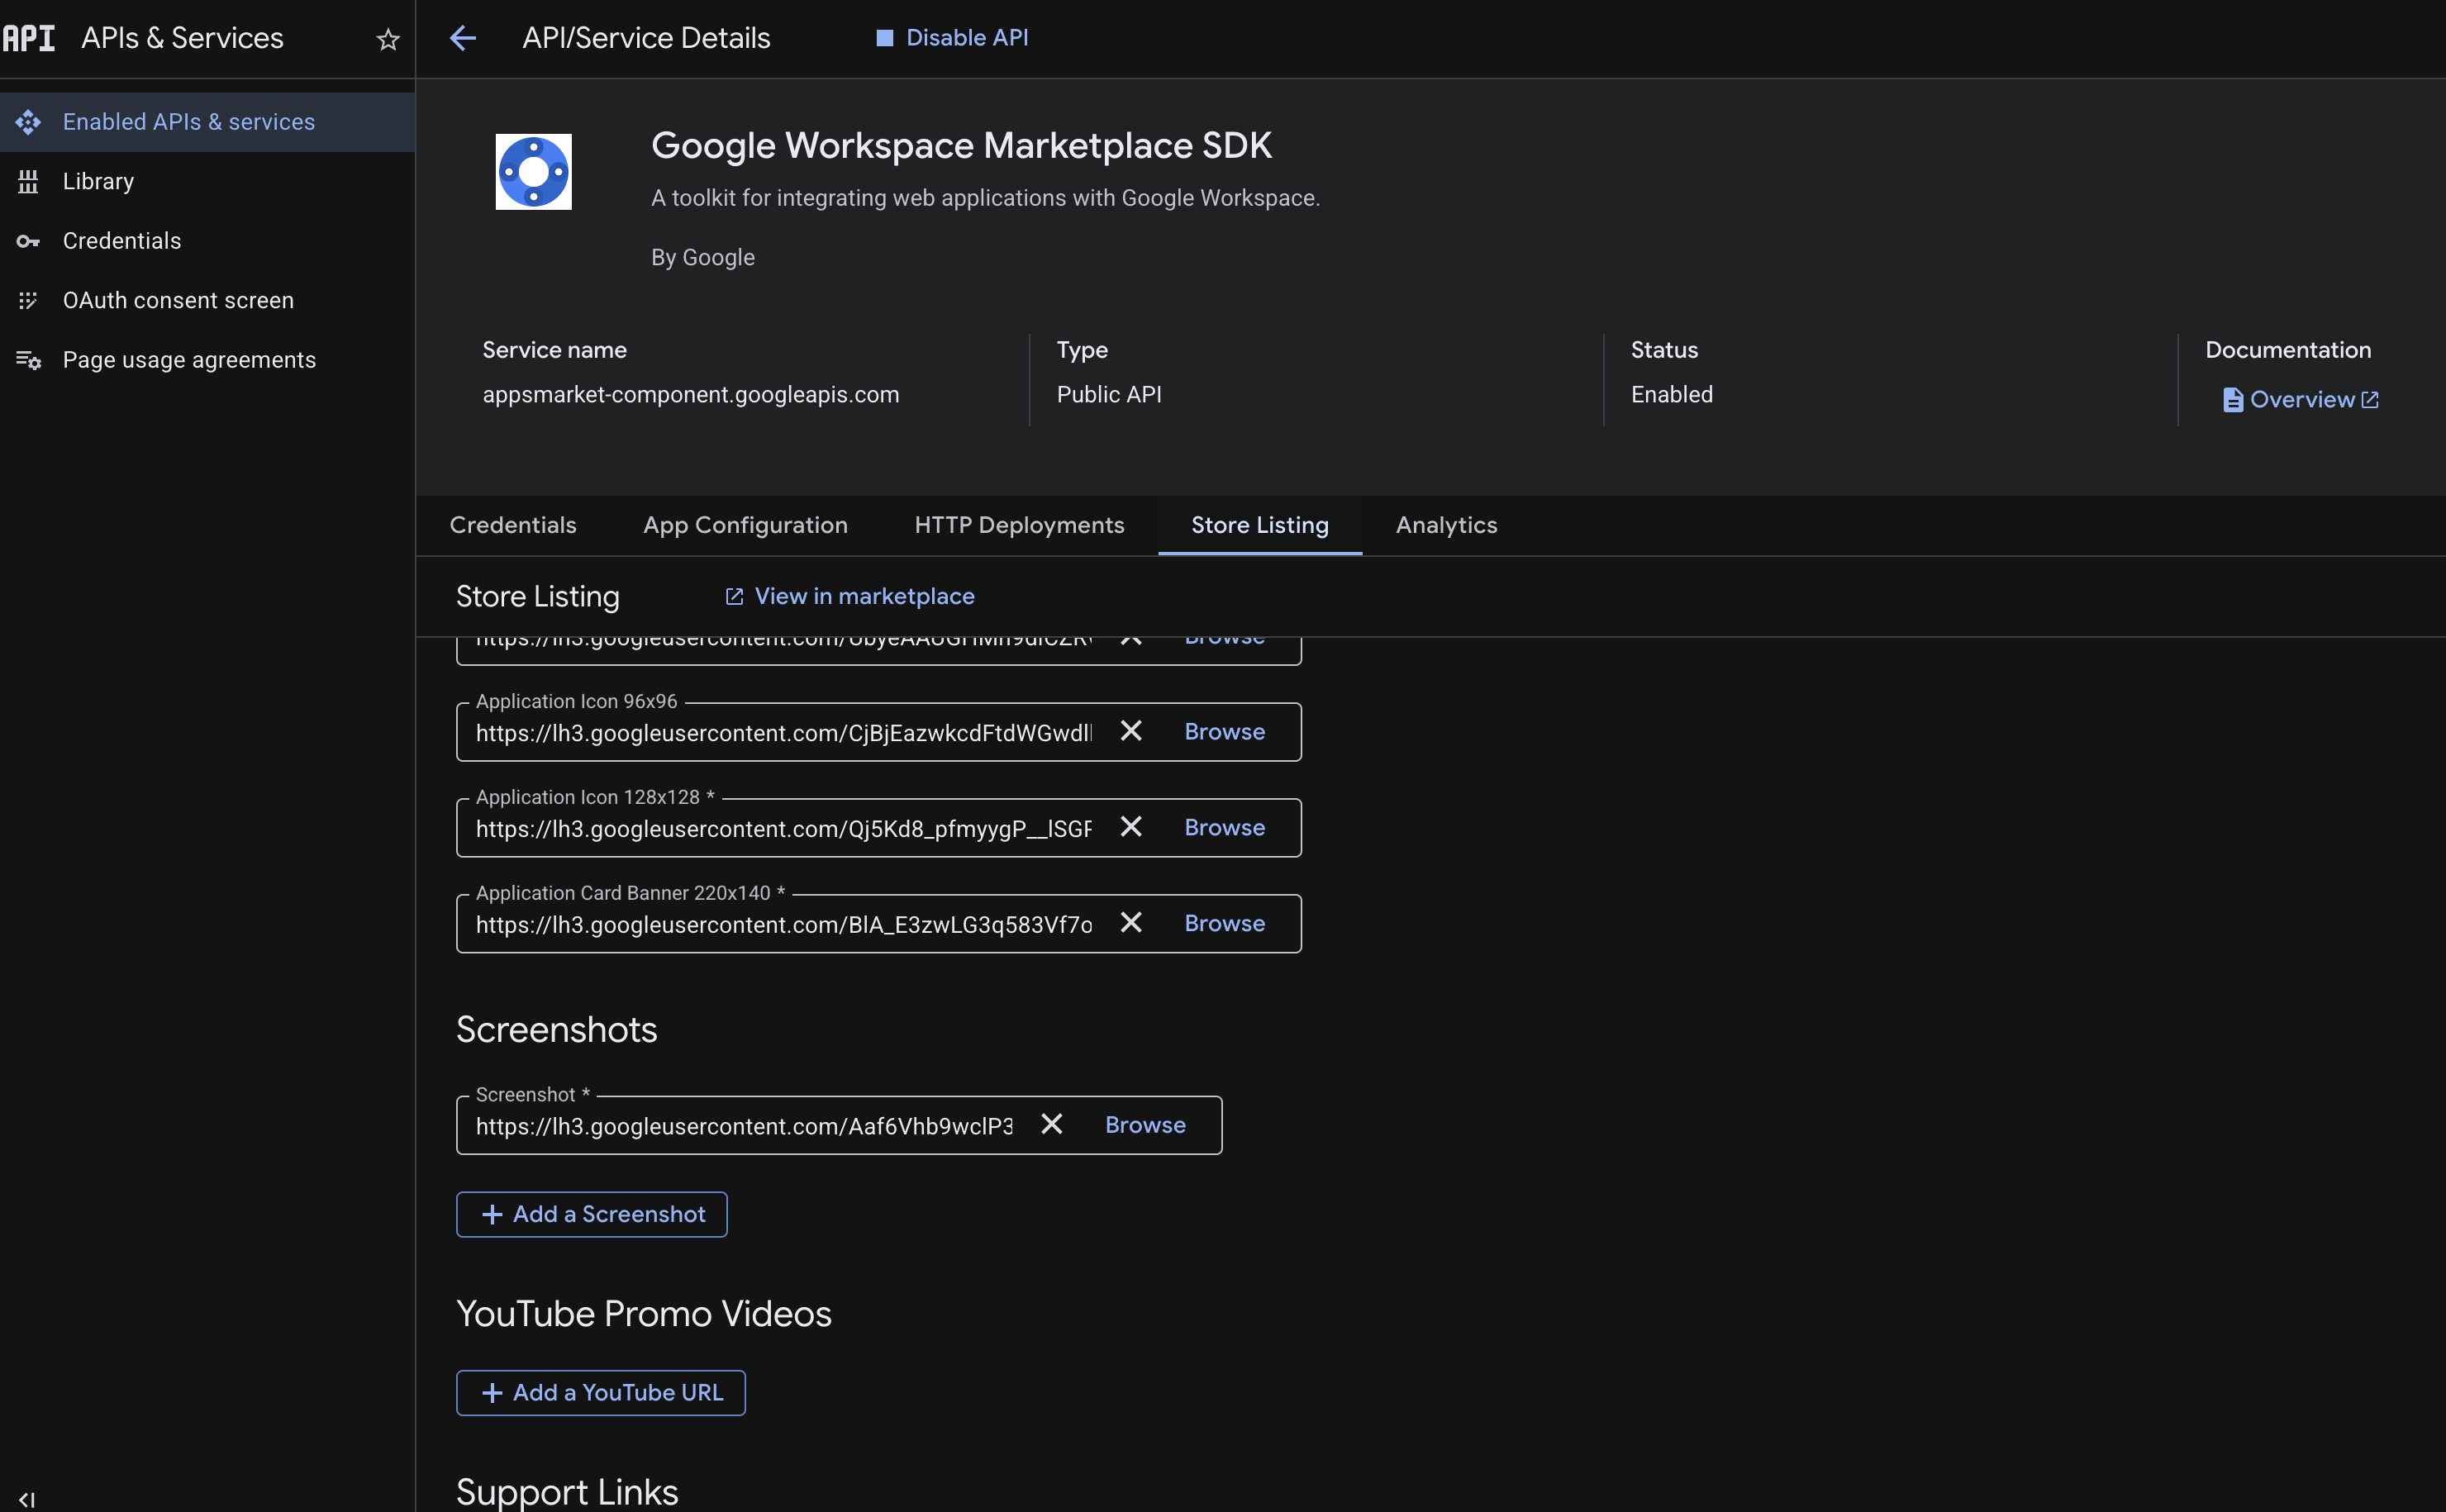
Graphics: Upload the required images (App Icon 32x32, Card Icon 96x96, and at least one Screenshot).
-
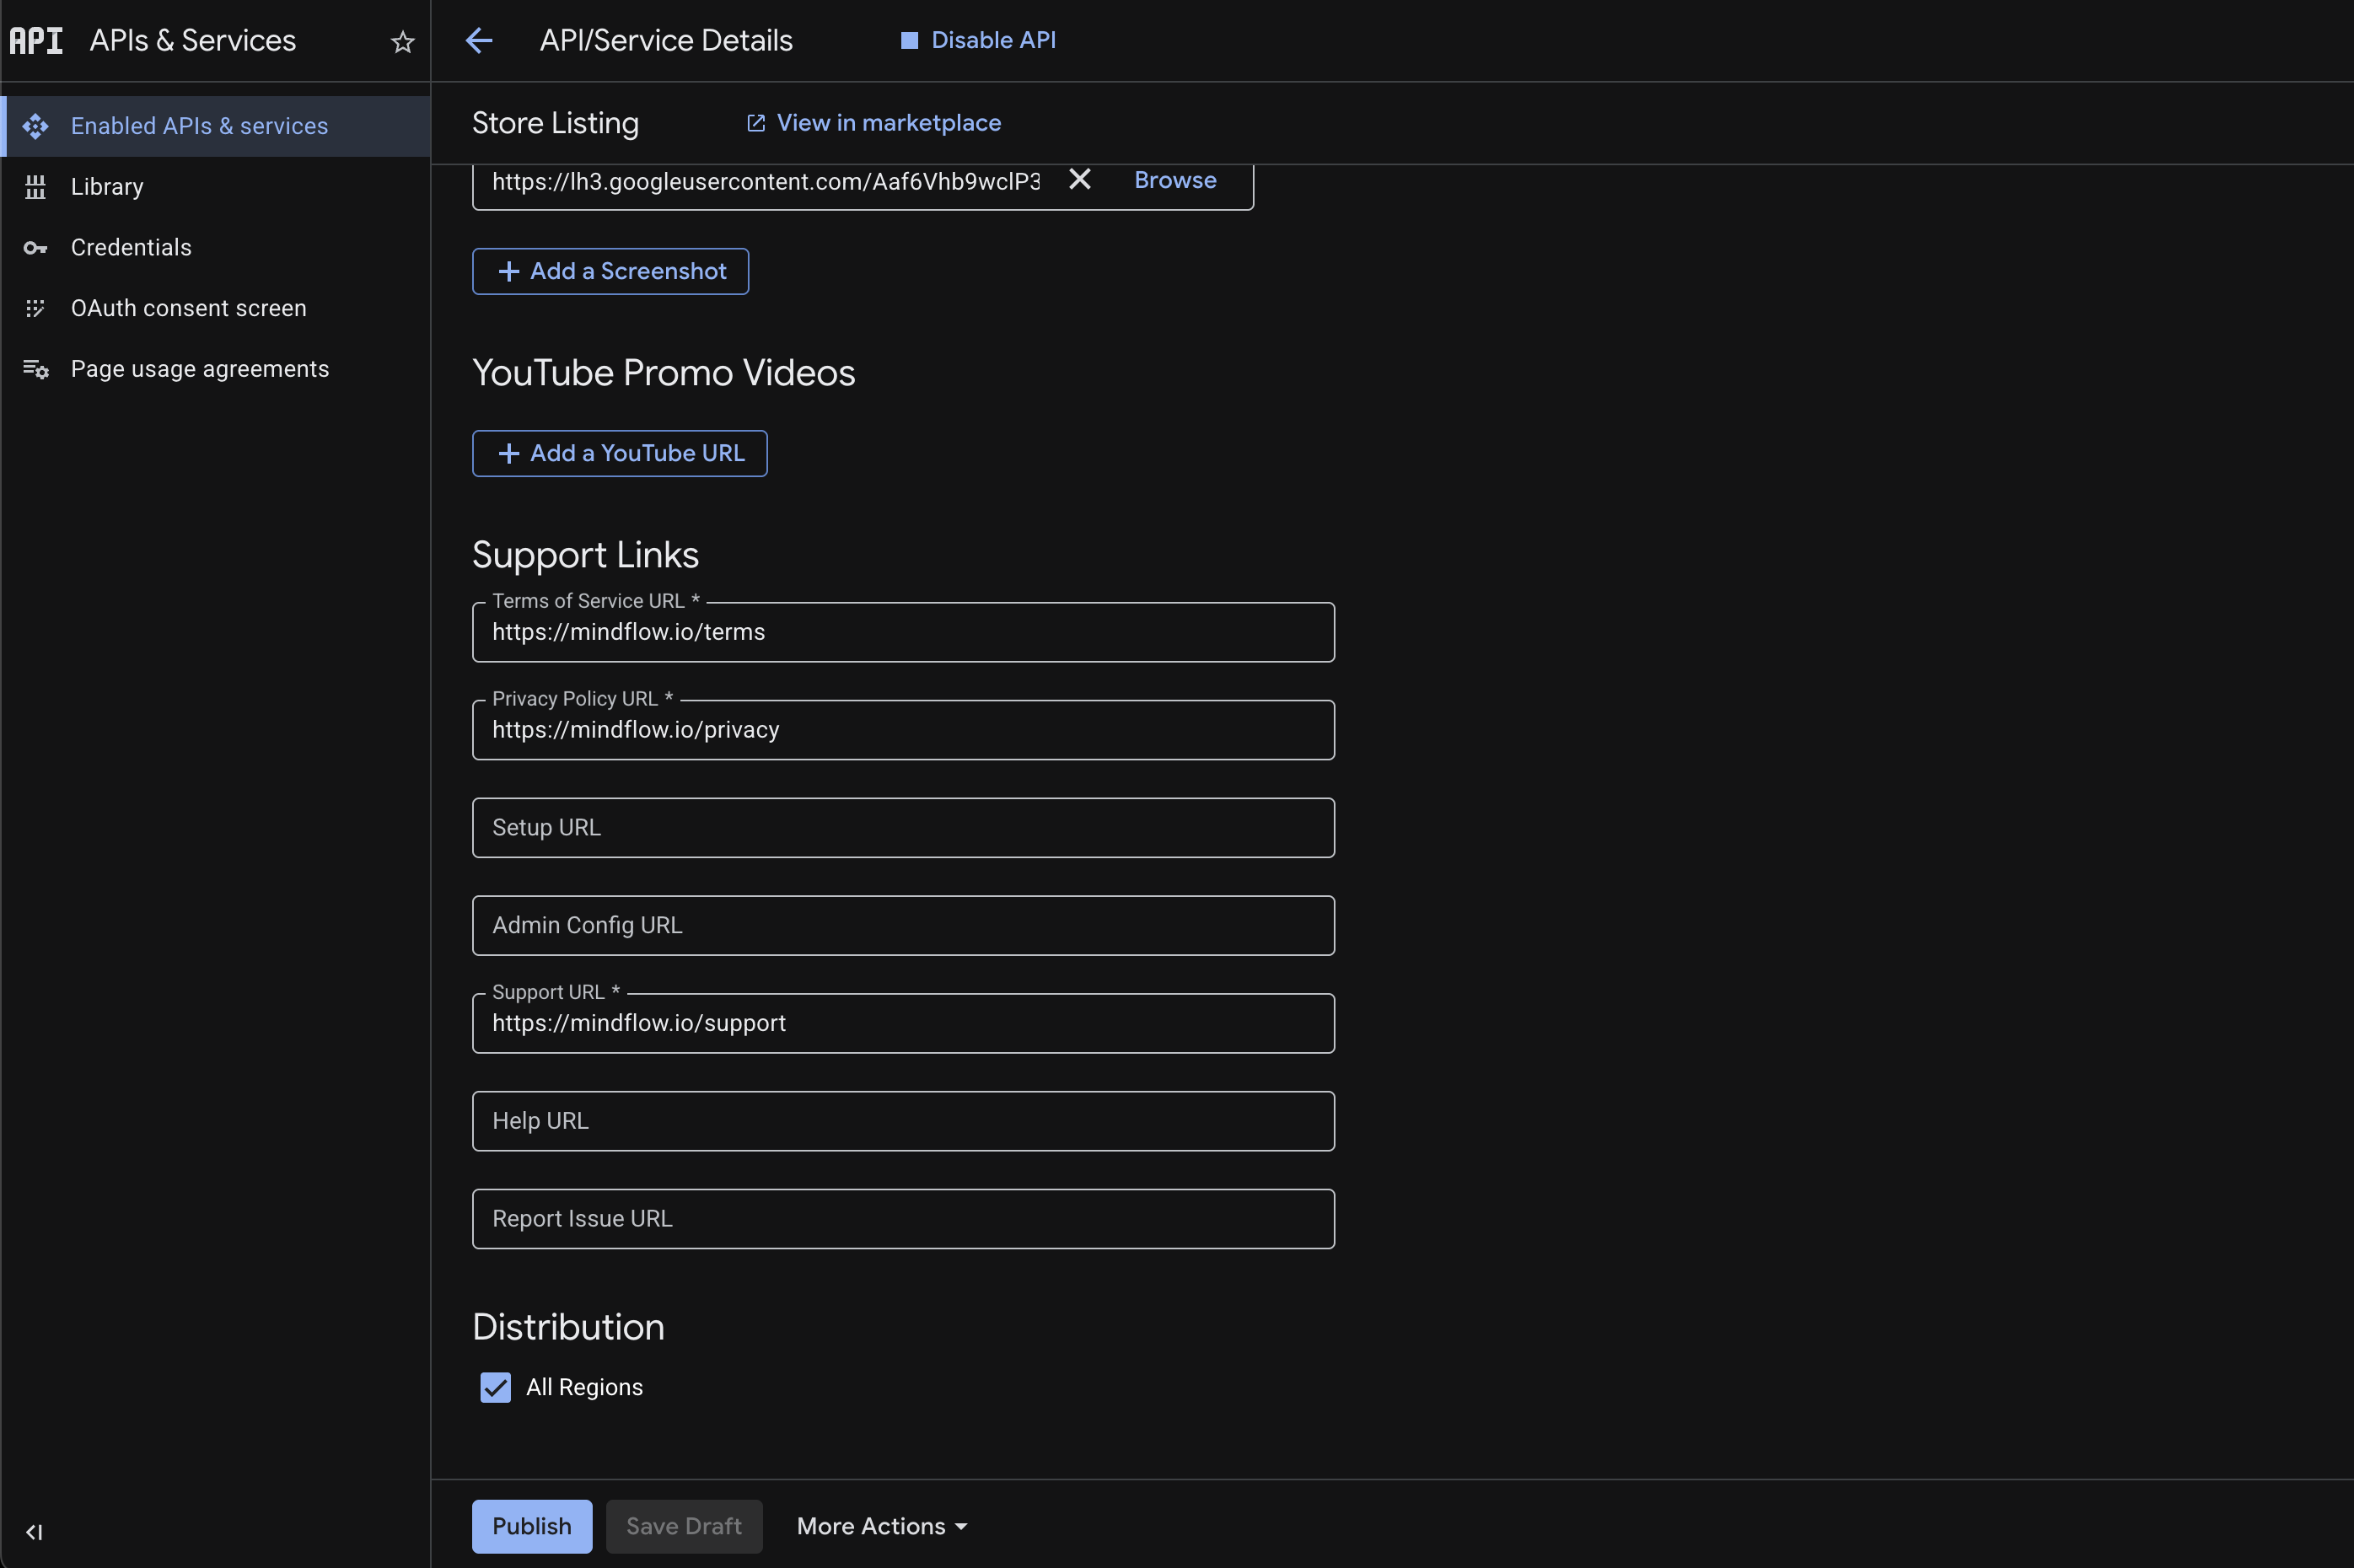
Support Links: Paste a link to an internal company Wiki, Notion page, or IT support portal for your Terms of Service and Privacy Policy.
Phase 4: Publish
Section titled “Phase 4: Publish”- Once all required fields are saved, click the Publish button.
- Because you set the visibility to “Private” and OAuth to “Internal,” Google skips the manual review process. It is now published to your private organizational directory.
Phase 5: Distribution (Google Admin Console)
Section titled “Phase 5: Distribution (Google Admin Console)”Now that the app is published privately, you need to manage how users get it. This is done by a Workspace Admin in the Google Admin Console.
1. Locate Your Private App
Section titled “1. Locate Your Private App”-
Go to admin.google.com.
-
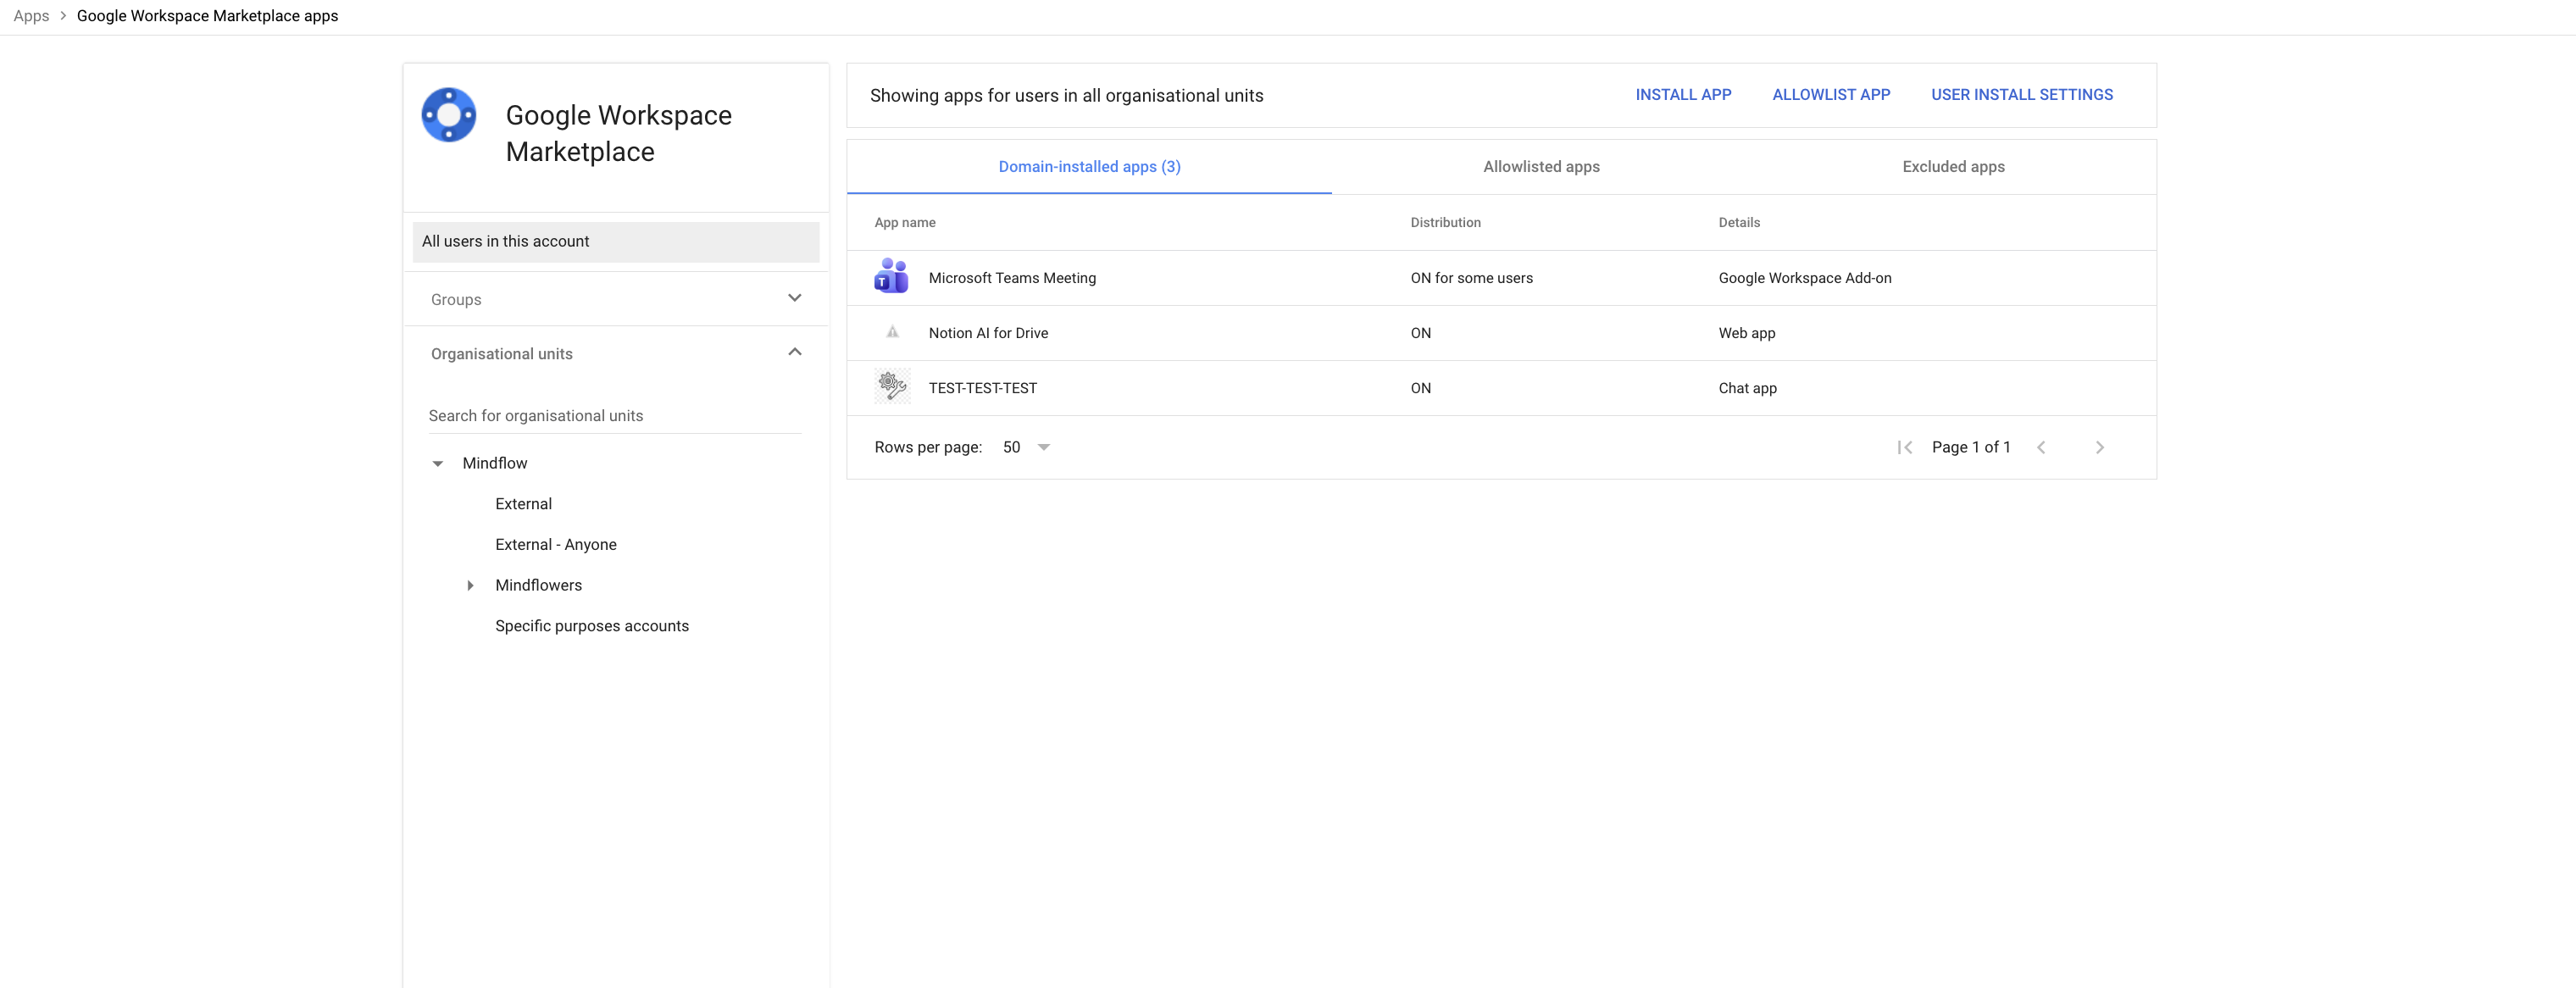
On the left-hand sidebar, navigate to Apps > Google Workspace Marketplace apps > Apps list.
-
Click Install app.
-
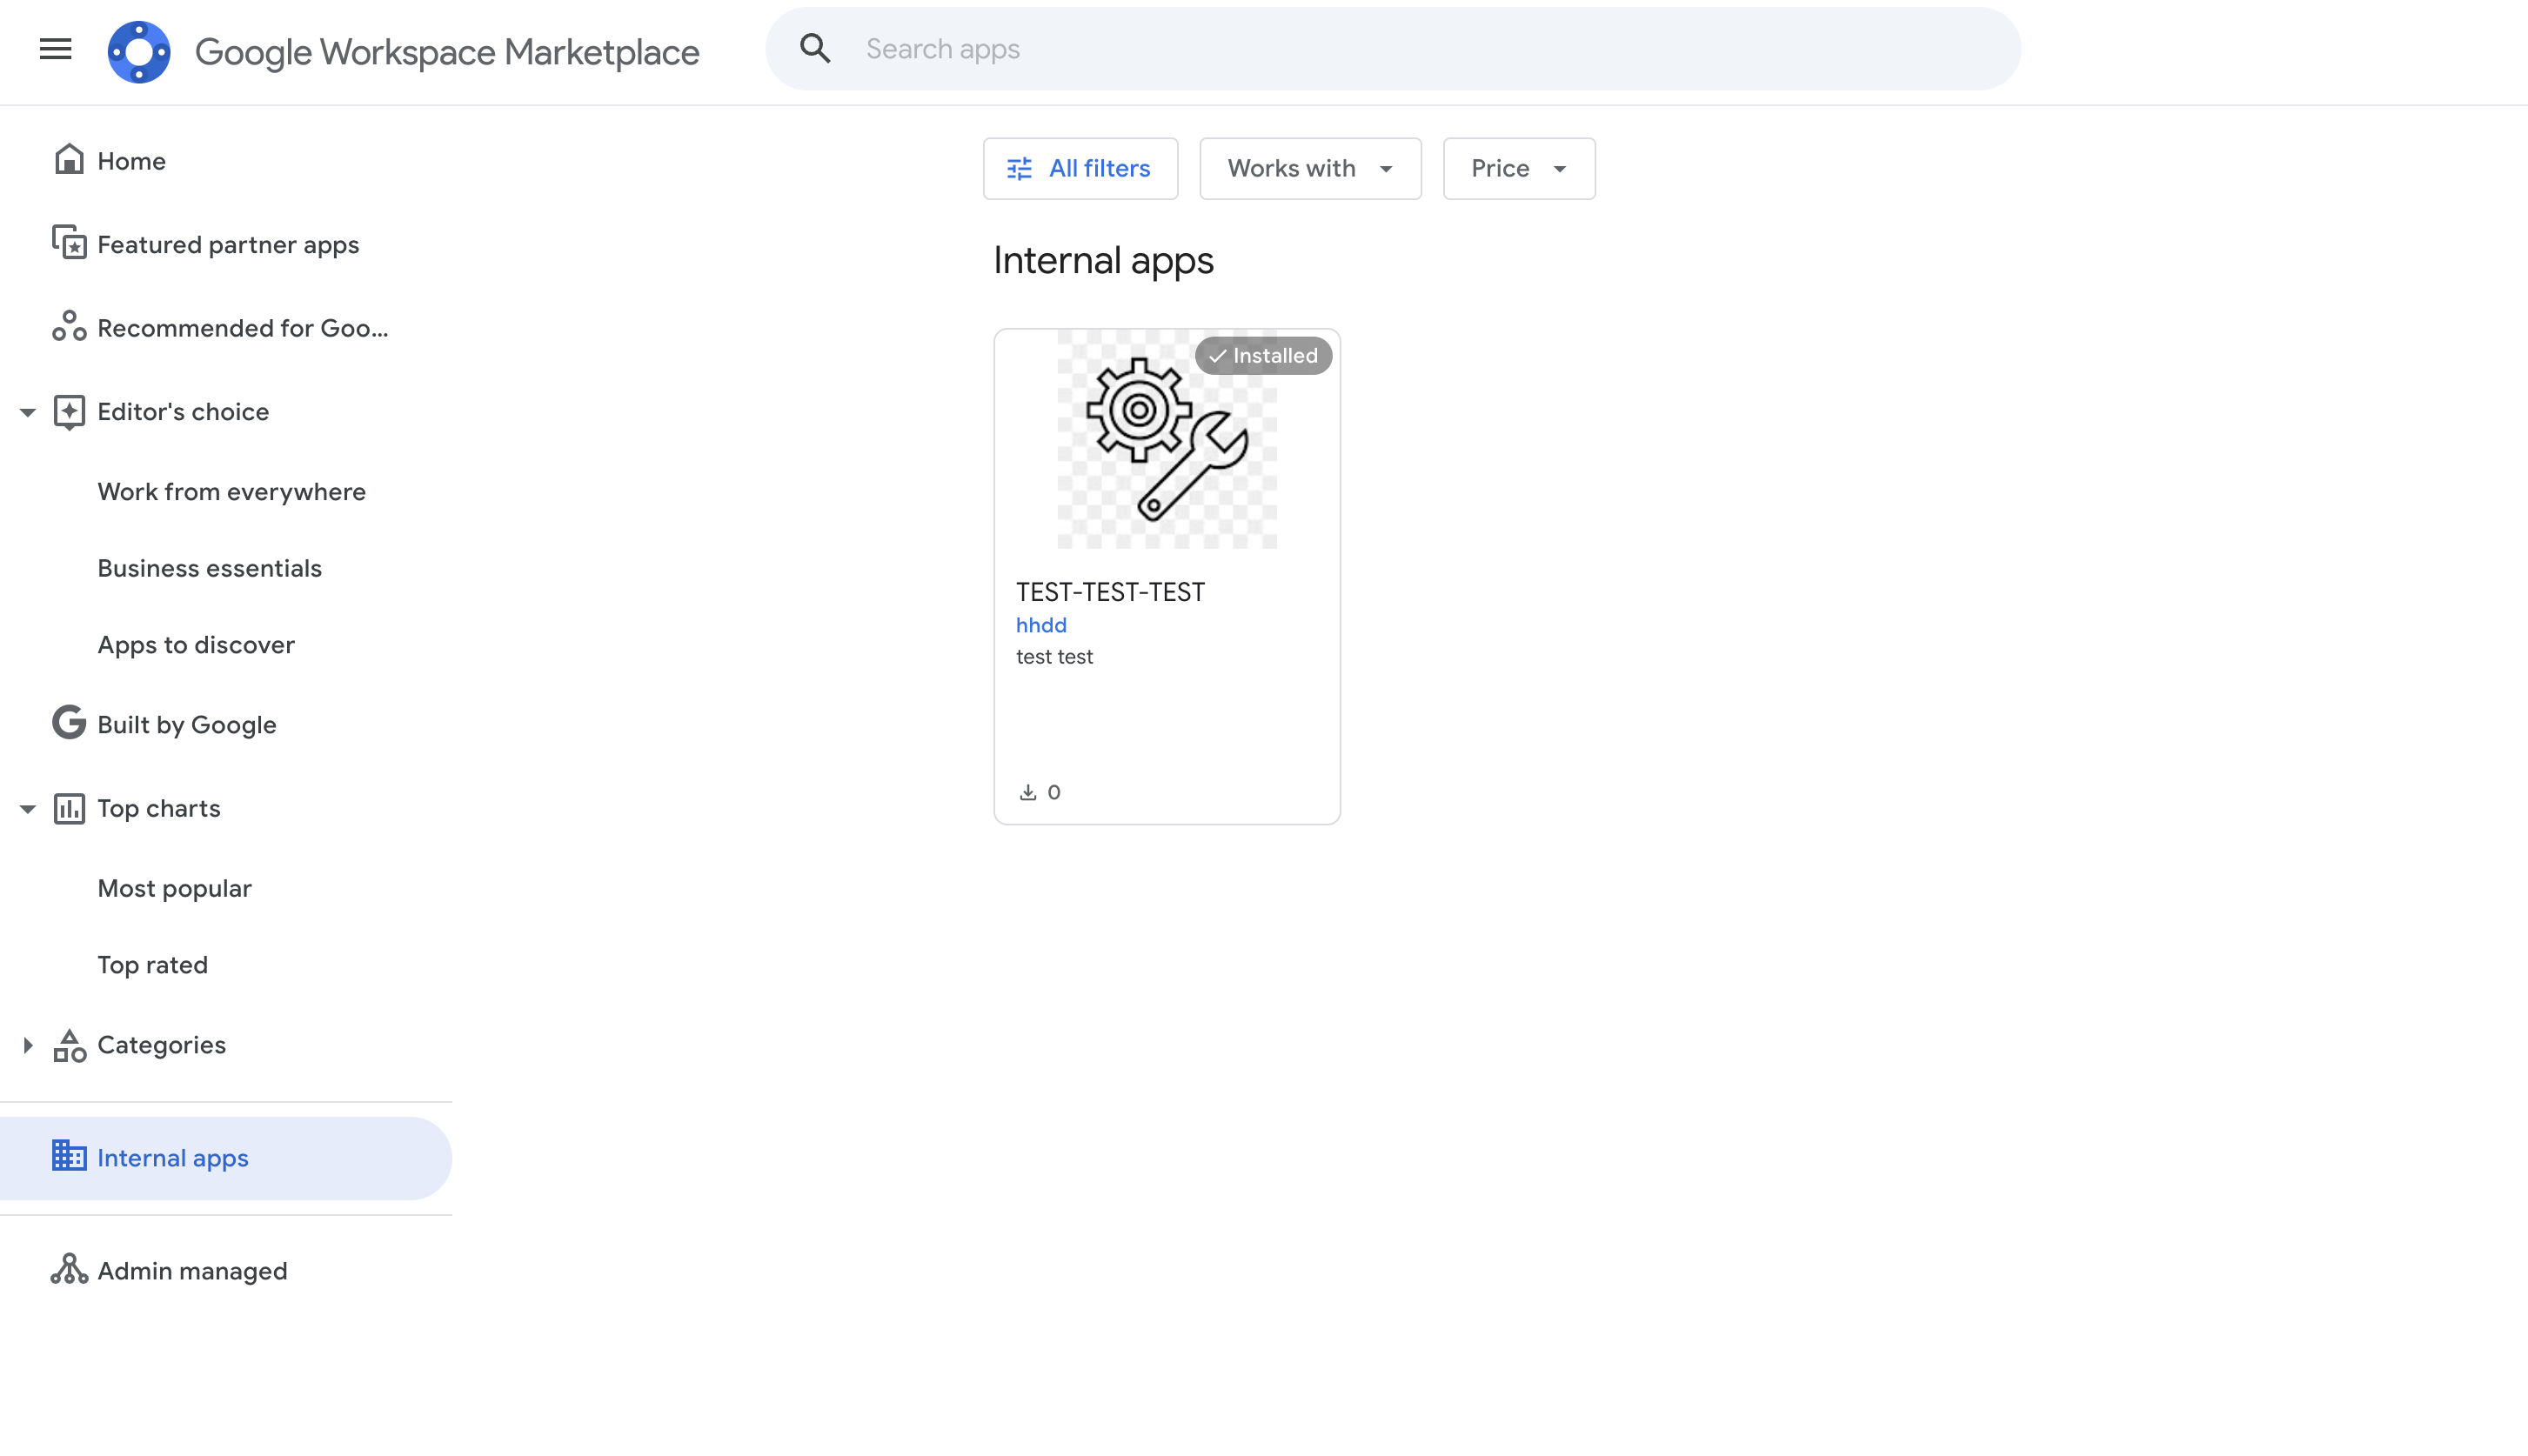
In the search window, look for the Internal Apps tab/filter (or search your bot’s exact name). Click on your bot.
2. Choose Your Deployment Method
Section titled “2. Choose Your Deployment Method”From the app’s listing page, you have two distinct ways to roll this out:
Option A: The “Force-Install” (Admin Install)
Section titled “Option A: The “Force-Install” (Admin Install)”This pushes the bot directly into the users’ Chat sidebars without them doing anything. It is highly recommended for company-wide tools or specific department workflows.
-
Click the Admin Install button.
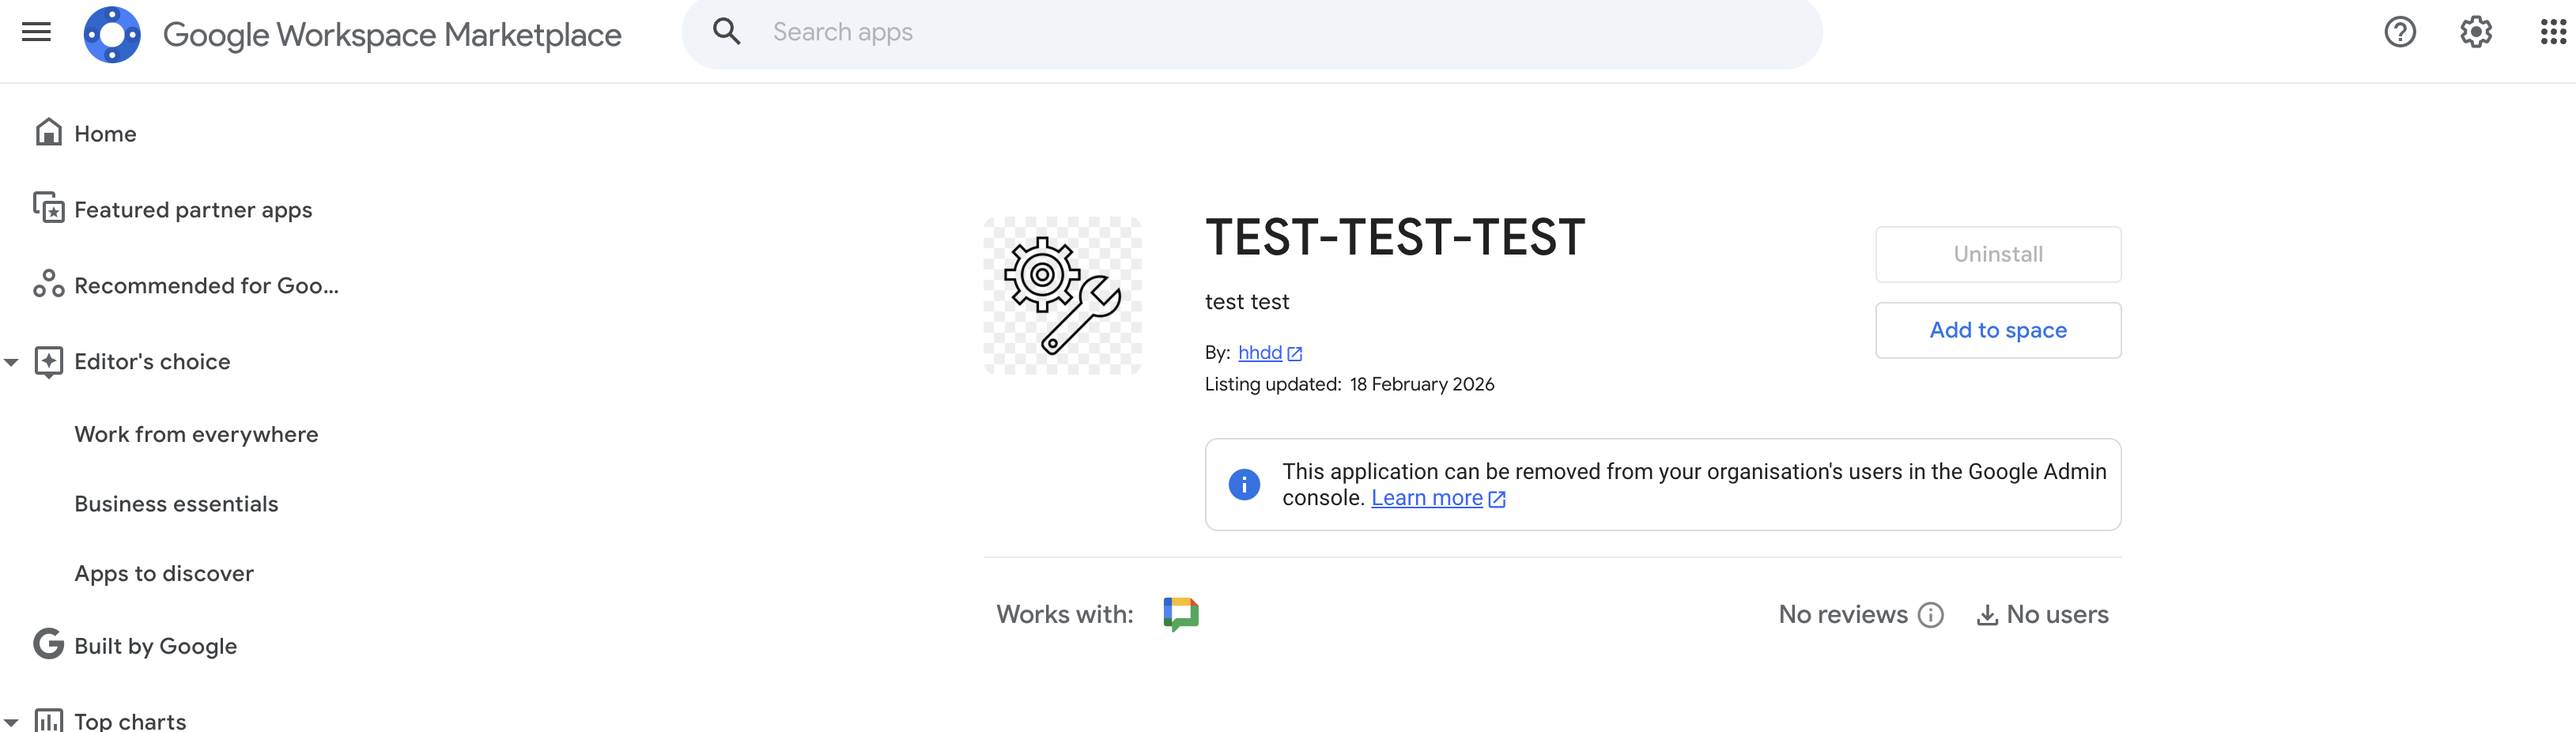
Here, the bot is already installed. When not, Uninstall is
Admin install. -
Permissions: A prompt will ask you to grant the bot permission to access data. Click Continue.
-
Target Audience: Choose who gets the app:
- Everyone in your organization: Pushes it to the entire company.
- Specific Groups or Organizational Units (OUs): Select specific departments (e.g., only the “Engineering” OU).
-
Click Finish.
Note: It can take up to 24 hours for a force-installed app to appear in every user’s Chat interface, though it usually happens much faster.
Option B: The Allowlist (Individual Install)
Section titled “Option B: The Allowlist (Individual Install)”If you don’t want to force the bot onto everyone’s screen, but want employees to be able to find and install it themselves, you use the allowlist method.
- Ensure you selected Individual install back in Phase 2.
- In the Admin Console (Apps > Google Workspace Marketplace apps > Apps list), ensure the app’s status is set to Allowed for users to install. (You can adjust this by clicking on the app in your list and managing data access/distribution).
- The User Experience: Users will now go to Google Chat > click New Chat (or the + icon) > Find Apps > check the Internal Apps section, and click Add on your bot.