

Create flows and agents
A flow is a deterministic sequence of steps you design on the canvas. An agent starts from a prompt and lets AI choose how to reach a goal within your environment’s credentials and permissions. Both open in the same designer, where you add steps, configure settings, and prepare a version to deploy.
When to use
Section titled “When to use”- You finished planning and credentials and are ready to create the automation in Studio.
- You need repeatable, step-by-step control—prefer a flow.
- You need flexible triage, classification, or unstructured input—prefer an agent (or add an AI··Task inside a flow later).
- Prefer Plan before you build when the scenario and credentials are not ready yet.
- Prefer Use AI··Agent when you attach a Flowhook-based agent on an AI··Task Agents tab.
- Prefer Manage versions and deployments when the design is ready to run in an environment.
Before you begin, confirm you can open Flows and that you are an Owner or Operator on the environment where the flow or agent will run. Create that environment and its credentials first—see Create and manage environments and Create and manage credentials.
Create a flow or an agent
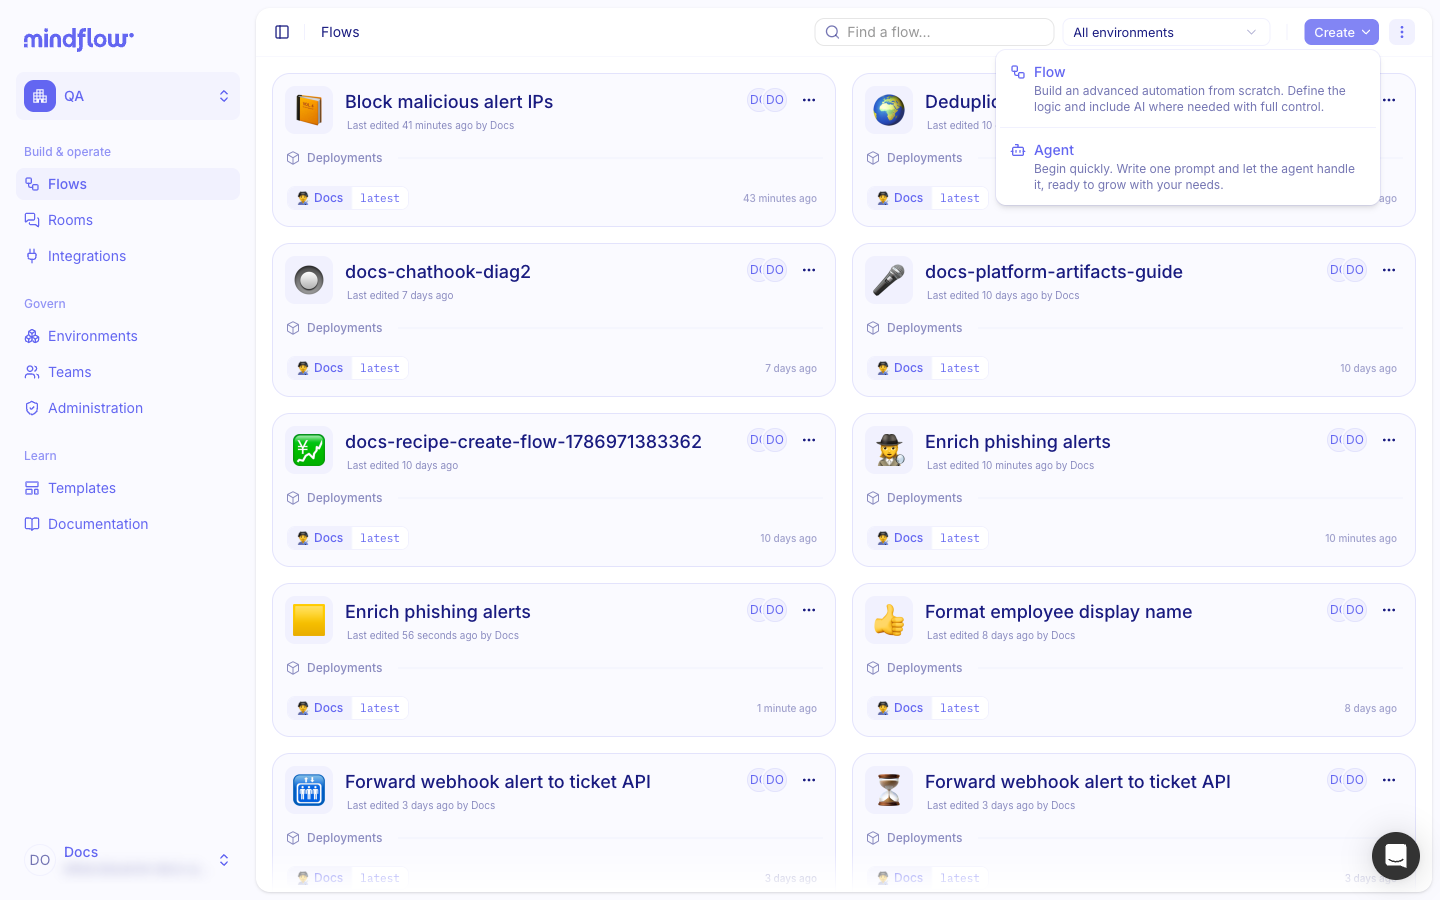
Section titled “Create a flow or an agent”On Flows, Create offers two starters that match Studio’s menu copy. Flow builds an advanced automation from scratch with full control (you can still add AI later). Agent starts from one prompt and seeds a graph you can grow (webhook plus an AI··Task). Pick the starter that matches how much of the path you already know.
-
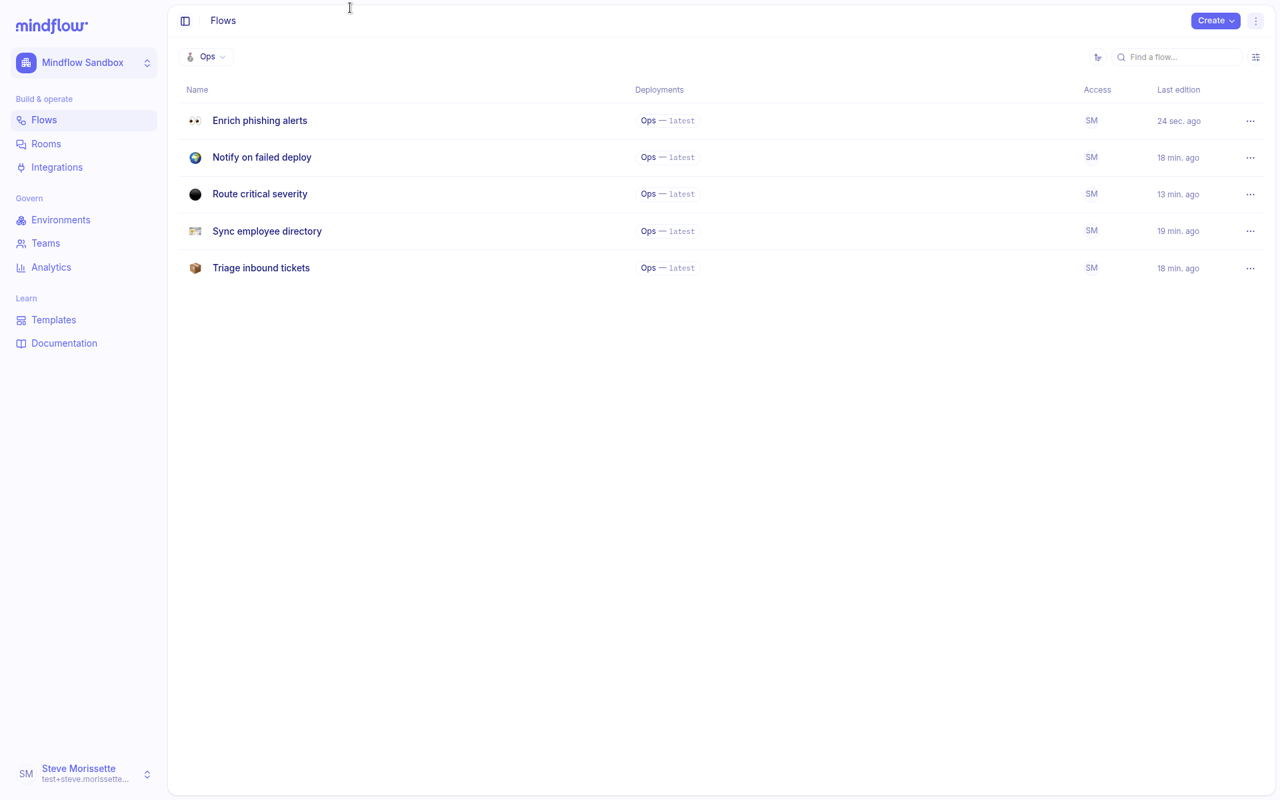
Open Flows. In the Studio sidebar, choose Flows. Use the table or cards layout when you want a denser list or a board-style scan.
-
Open Create. In the page header, click Create.
-
Choose Flow or Agent. Select Flow to define the logic yourself, or Agent to begin from a prompt.
-
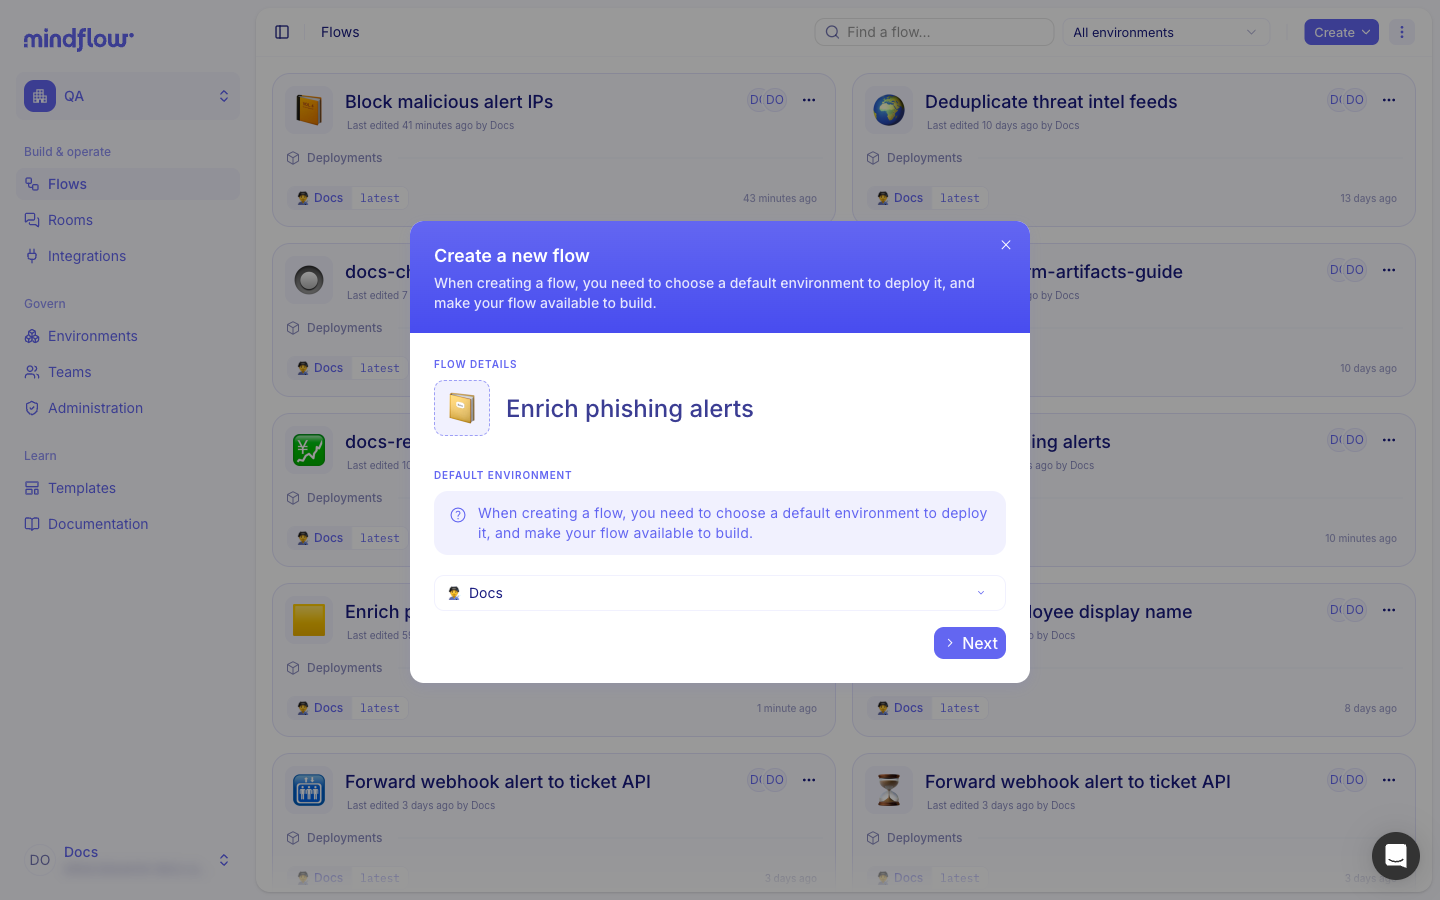
Name the flow. Enter a title that states the outcome—for example
Enrich phishing alerts. -
Choose the environment. Select the environment that holds the credentials this flow will use—for example Docs.
-
Create. Click Next, confirm access if prompted, then click Create. Studio opens the designer.
-
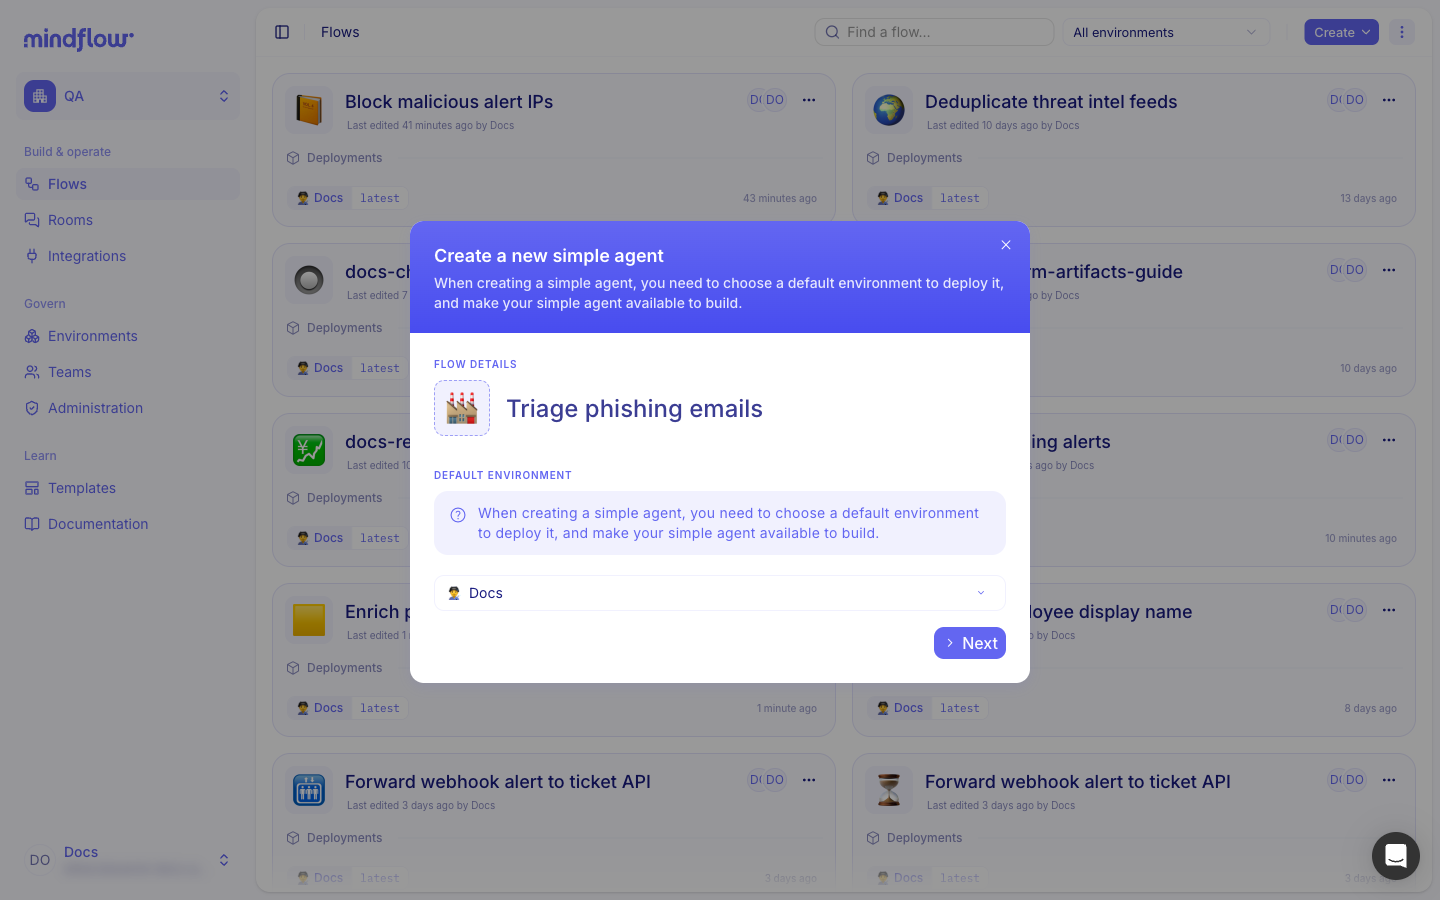
Name the agent. Enter a title that states the job—for example
Triage phishing emails. -
Choose the environment. Select the environment whose credentials the agent may use—for example Docs.
-
Create. Click Next, confirm access if prompted, then click Create. Studio opens the designer with a webhook trigger and an AI··Task prompt step ready to edit.
Work in the designer
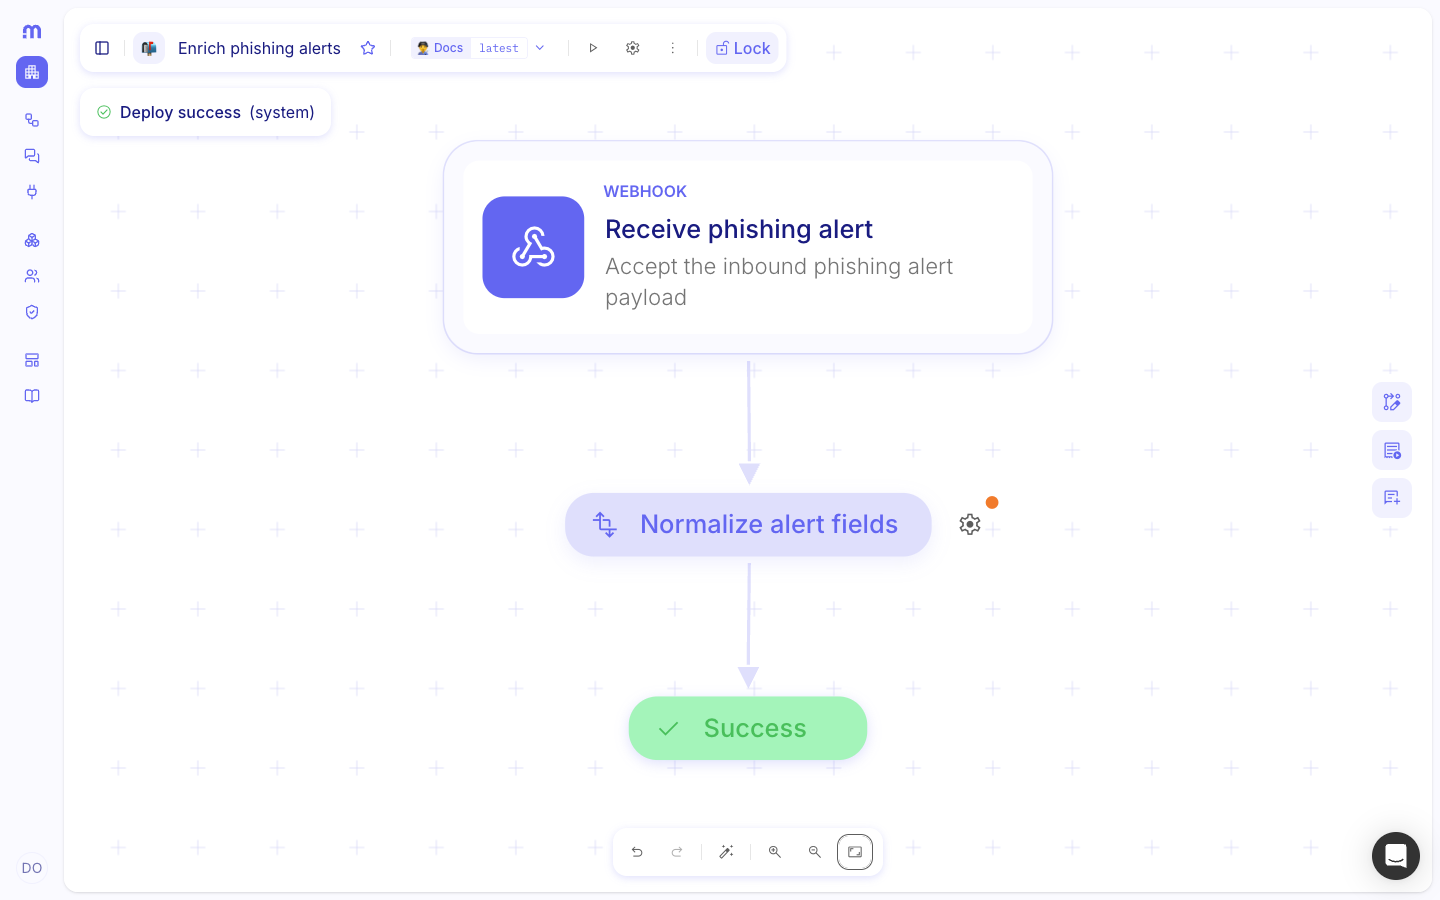
Section titled “Work in the designer”The designer is the visual canvas where you add steps, connect them, and configure behavior. Rename steps and fill descriptions so the graph matches your scenario.
- Open the flow. From Flows, select the flow or agent you created—or stay on the designer after Create.
- Add and rename steps. Build the path your scenario needs. Give each step a clear title and description.
Top toolbar
Section titled “Top toolbar”The floating bar at the top of the designer names the flow, shows which environment and version you are editing, and exposes run, settings, more actions, and lock. Changelog, run logs, and AI··Build are on the right rail—not in this bar.
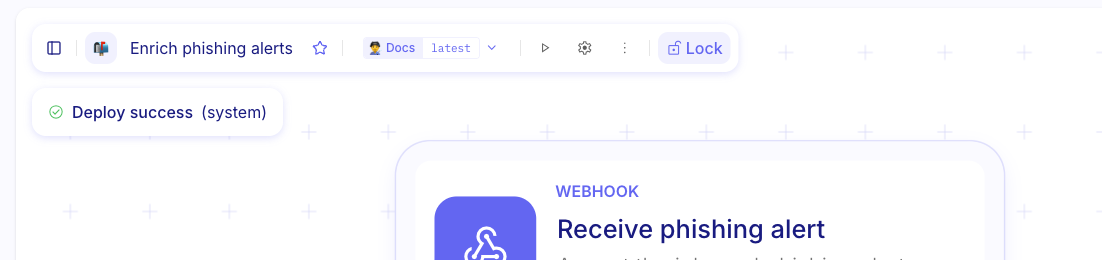
- Name: current flow name—click to rename (and change the icon). Use the star to favorite the flow.
- Environment and version: which environment and version are open (for example Docs / latest)—switch from the dropdown.
- Run: run this playbook from the designer.
- Settings: opens flow settings (Timeout (seconds), email notifications, Run logs)—see Configure flow settings.
- More actions: copy the flow and related actions.
- Lock / Unlock: prevent accidental edits (useful for production designs).
Right rail (history and AI··Build)
Section titled “Right rail (history and AI··Build)”The vertical rail on the right opens side panels without leaving the canvas.
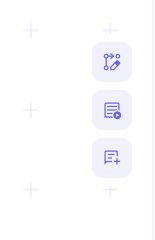
- Browse updates: open the Updates changelog for this flow.
- Open logs side panel: open Logs for recent runs—see also Manage versions and deployments.
- AI··Build: open AI Build to draft or extend the flow with AI—see AI··Build: Faster flow creation.
Bottom toolbar
Section titled “Bottom toolbar”The floating bar at the bottom of the canvas helps you rearrange and frame the graph while you edit.
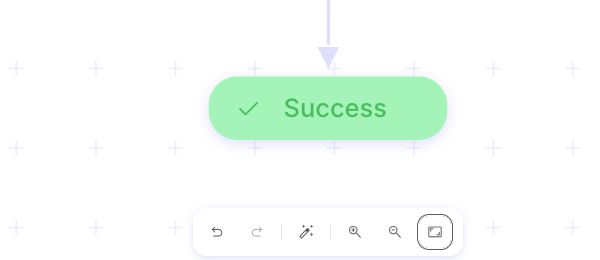
- Undo / Redo: move through edit history.
- Auto-layout: rearrange steps into a readable layout.
- Zoom in / Zoom out: adjust canvas zoom.
- Zoom to fit: show the entire flow in view.
Configure flow settings
Section titled “Configure flow settings”Flow settings control how long a run may take, who gets email about outcomes, and how long Mindflow keeps run log data. Open them from the designer gear before you rely on a deployment in production.
-
Open Settings. In the designer top toolbar, click the gear (Settings).
-
Set Timeout (seconds). Enter the maximum run duration (placeholder 300). Mindflow stops the run when the limit is reached (status Timed out). The allowed range is 0–604800 seconds (one week).
-
Choose email notifications. Pick No notifications, or notify on failure, success, or both. Changes can take up to about 15 minutes to apply on runs.
-
Set Retention period. Under Run logs, set the duration and unit (for example 1 / weeks), click Save, then optionally turn on Redact run log data when you need new runs to show
[Redacted]in Studio.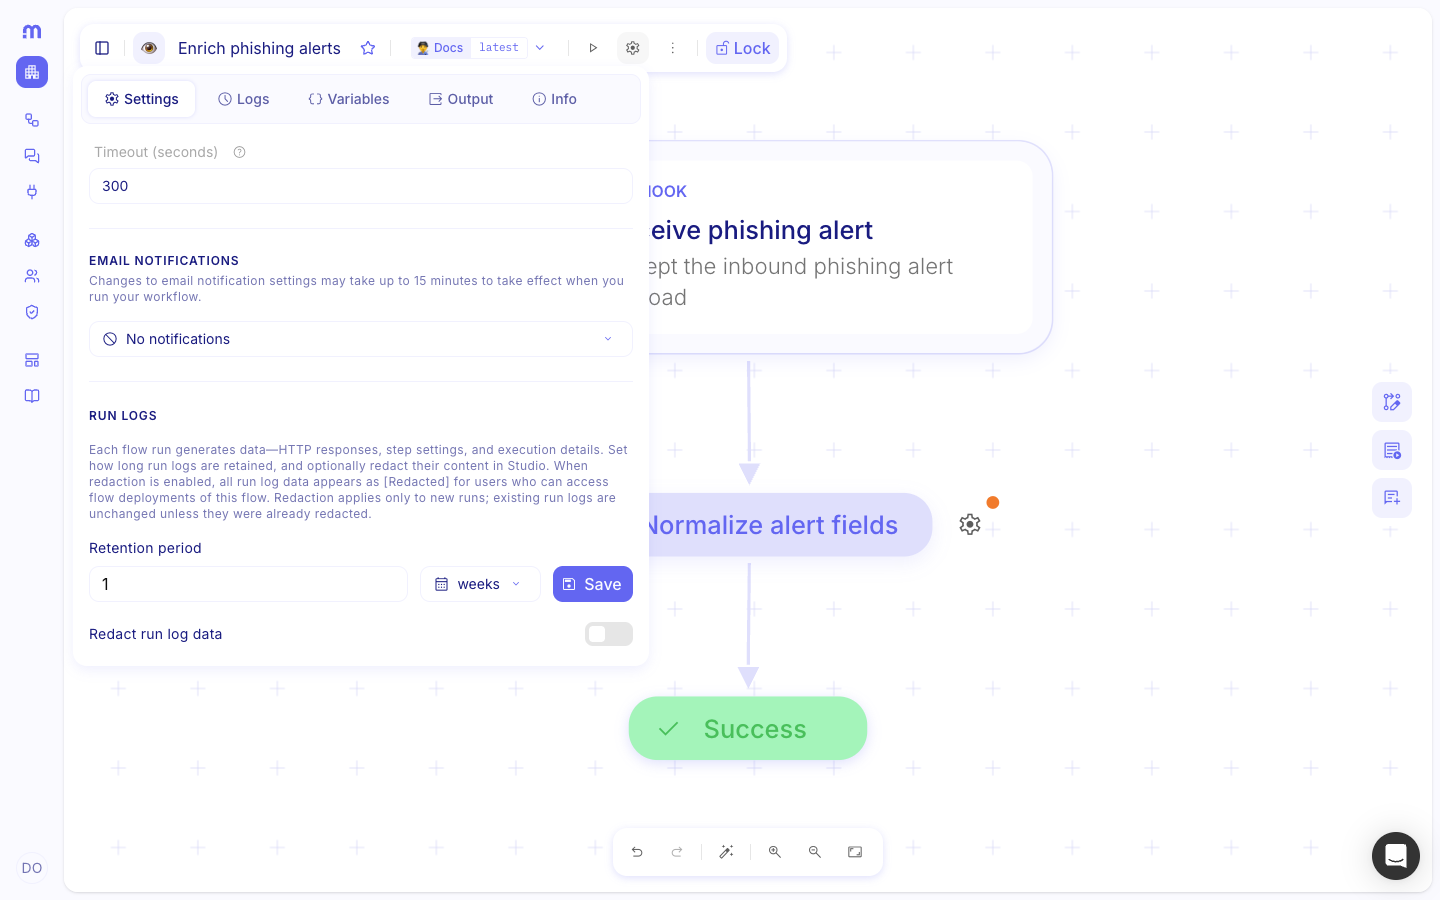
-
Use the other tabs when needed. Logs shows execution logs, Variables holds flow-scoped values, Output defines the value the flow returns, and Info holds description and time-saved metadata.
Connect design to environments and deployments
Section titled “Connect design to environments and deployments”A flow or agent is a versioned design. It becomes runnable when you deploy a version into an environment. That deployment uses only the integrations and credentials available there. Design once, then deploy to as many environments as you need—each with its own secrets and access.
Example
Section titled “Example”A SOC analyst creates Enrich phishing alerts in the Docs environment: a webhook receives the alert, a transform normalizes fields, and Success ends the run. The same team later creates Triage phishing emails as an Agent when they want a prompt-first path for unstructured mail.
- Create the flow. On Flows, choose Create → Flow, name it
Enrich phishing alerts, pick Docs, and create. - Build the path. Add a webhook (Receive phishing alert), a transform (Normalize alert fields), and a Success terminal. Fill descriptions on steps that support them so the canvas reads like the scenario.
- Tune settings. Set Timeout (seconds) to 300, leave No notifications while testing, set Retention period to 1 / weeks, and leave Redact run log data off unless you need it.
- Deploy when ready. Deploy the version to Docs for tests, then to production with that environment’s credentials—see Manage versions and deployments.
Keep in mind
Section titled “Keep in mind”- Flow vs agent: Use a flow when every branch should be explicit. Use an agent (or an AI··Task in a flow) when the path depends on interpretation.
- Lock: Lock production designs so accidental edits do not land on the wrong version.
- Retention and privacy: Shorter Retention period reduces stored run data; turn on Redact run log data when logs may contain secrets (applies to new runs).
- Environment scope: Credentials and integrations stay on the environment of the deployment—not on the design alone.
Related
Section titled “Related”- Plan before you build — outline the scenario and credentials first.
- Visual Mindflow language — transforms, loops, conditions, and waits.
- AI··Task: A simple guide — add AI inside a flow.
- Manage versions and deployments — deploy a version into an environment.