

Lesson #1: Build your first flow
By the end of this lesson, you will have configured your first integration and built a fully automated weekly newsletter about airport lounges — from data fetching to your inbox.
Prerequisites
Section titled “Prerequisites”Step 1: Configure your NewsAPI Credential
Section titled “Step 1: Configure your NewsAPI Credential”Connect Mindflow to NewsAPI — the service we will use to programmatically collect news articles from around the world.
First, retrieve your API key:
-
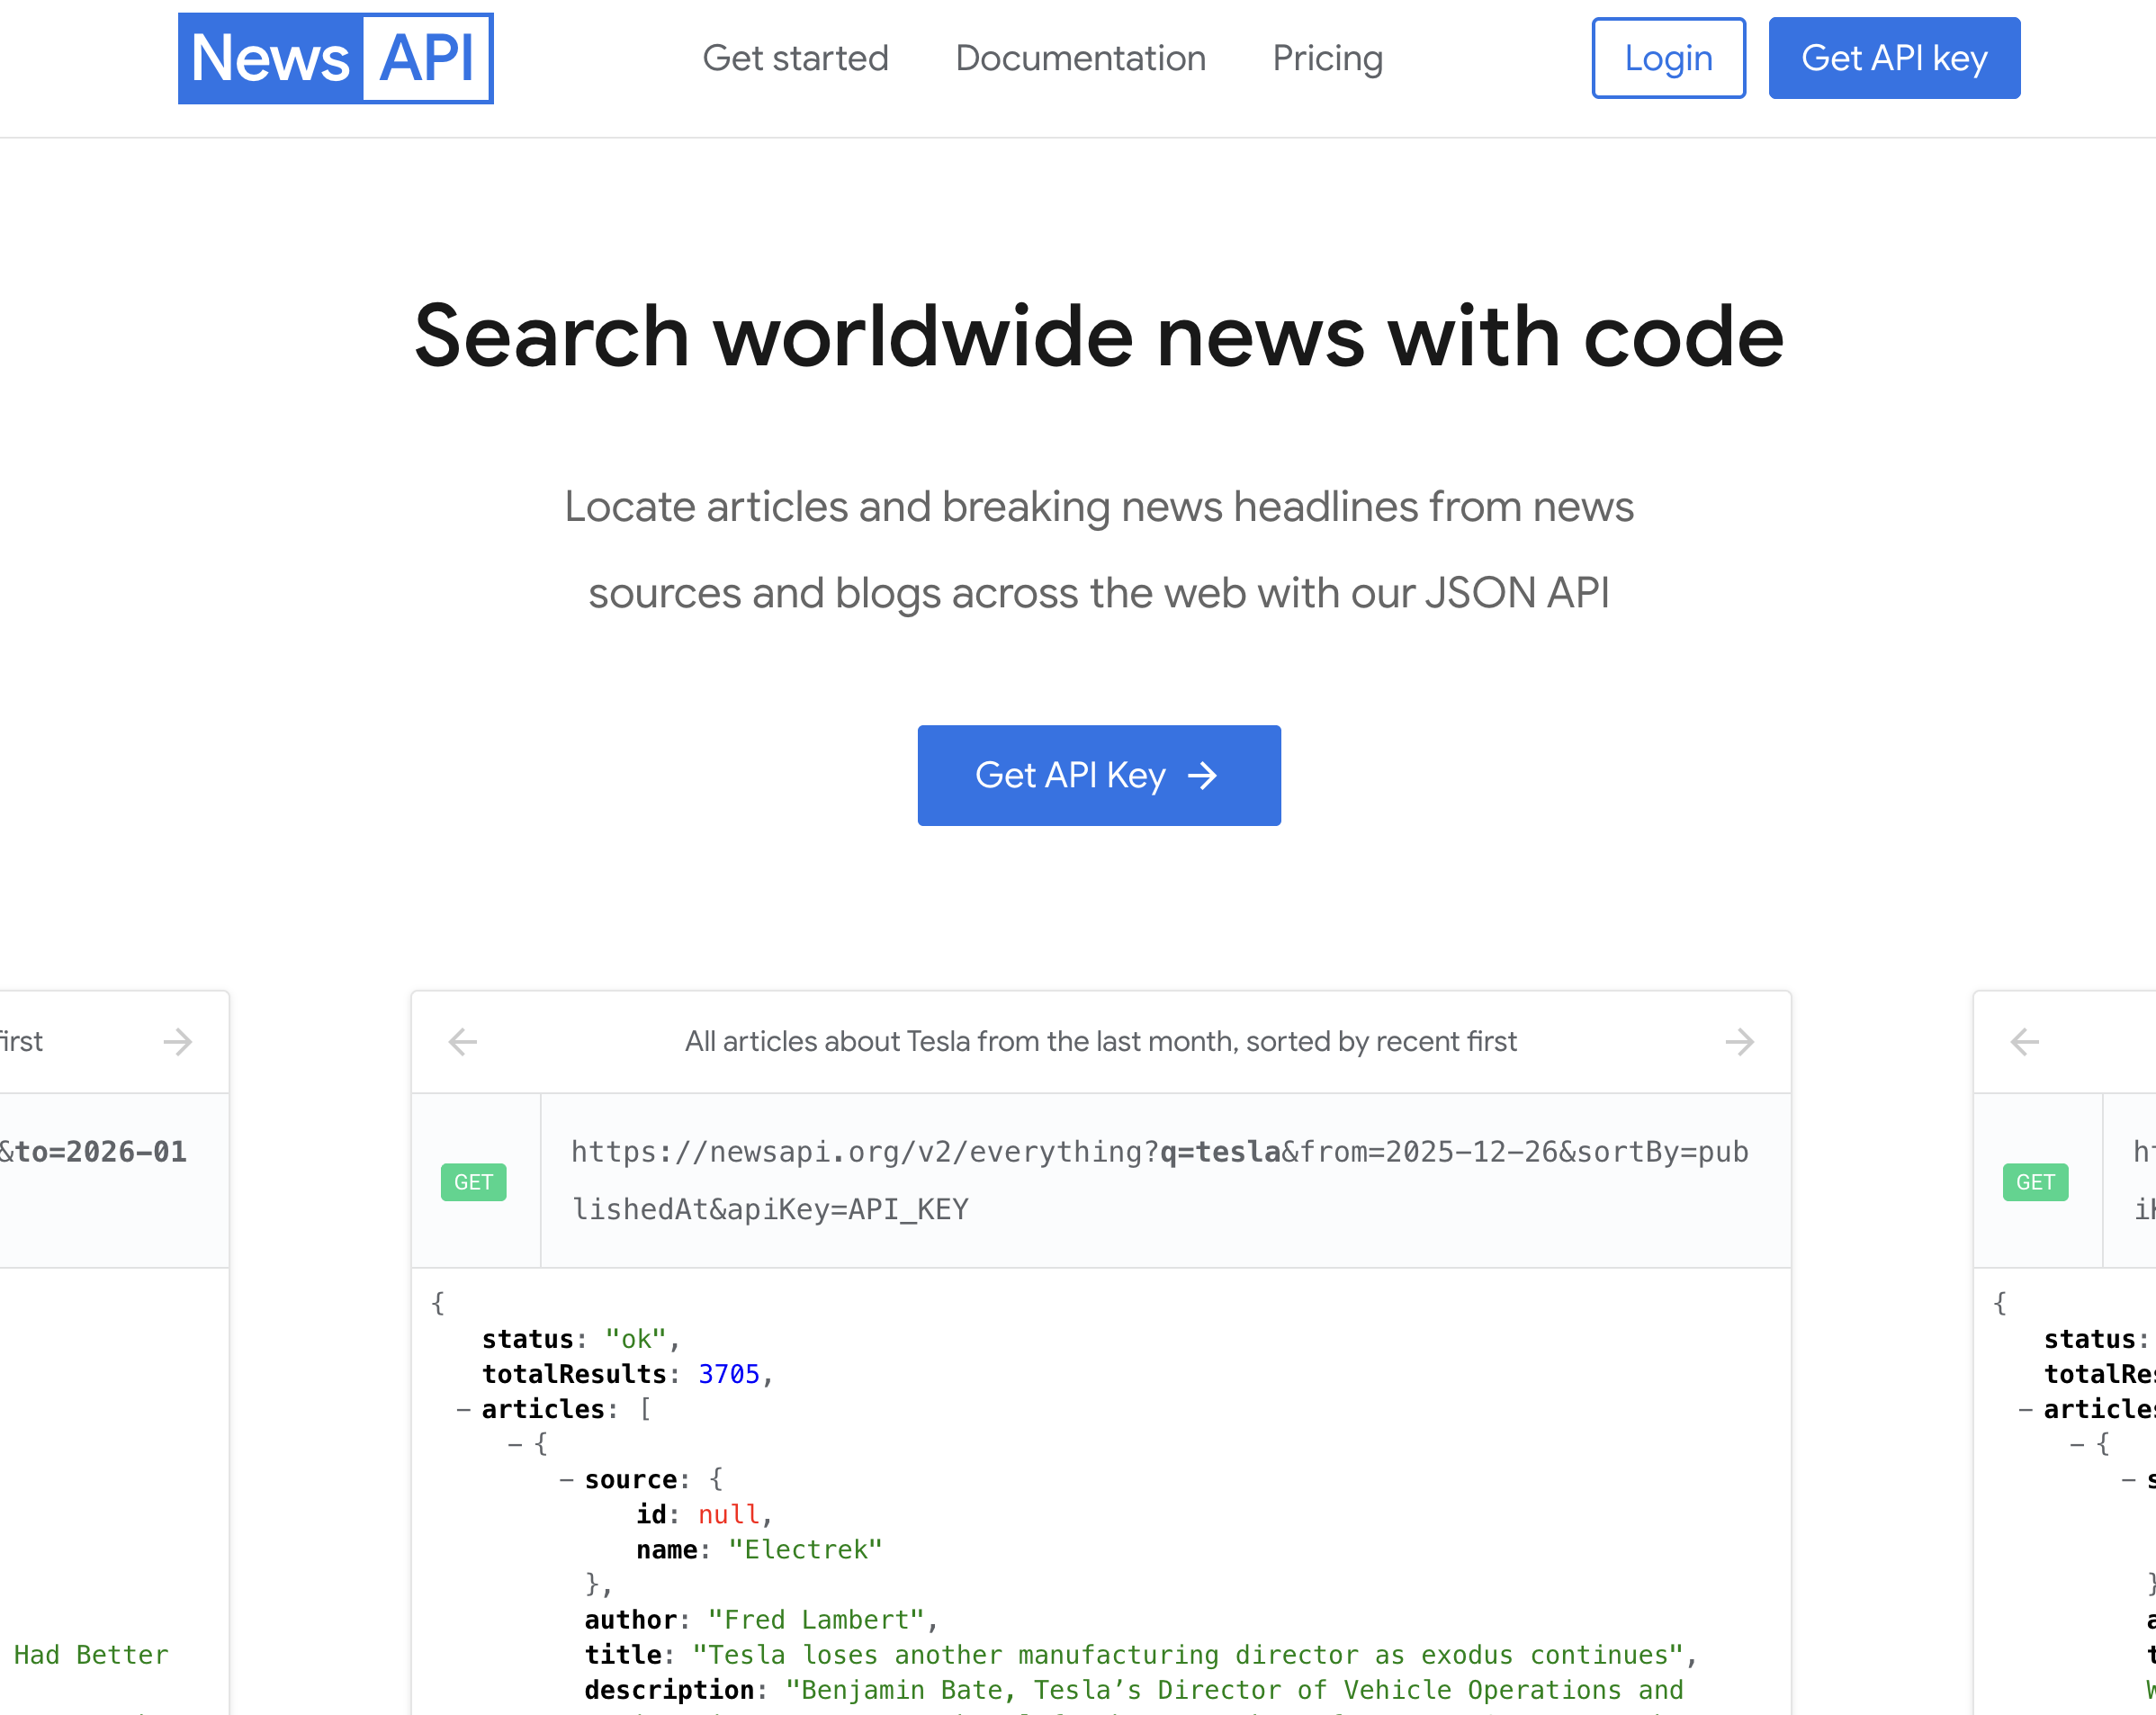
Go to newsapi.org and click Get API Key.
-
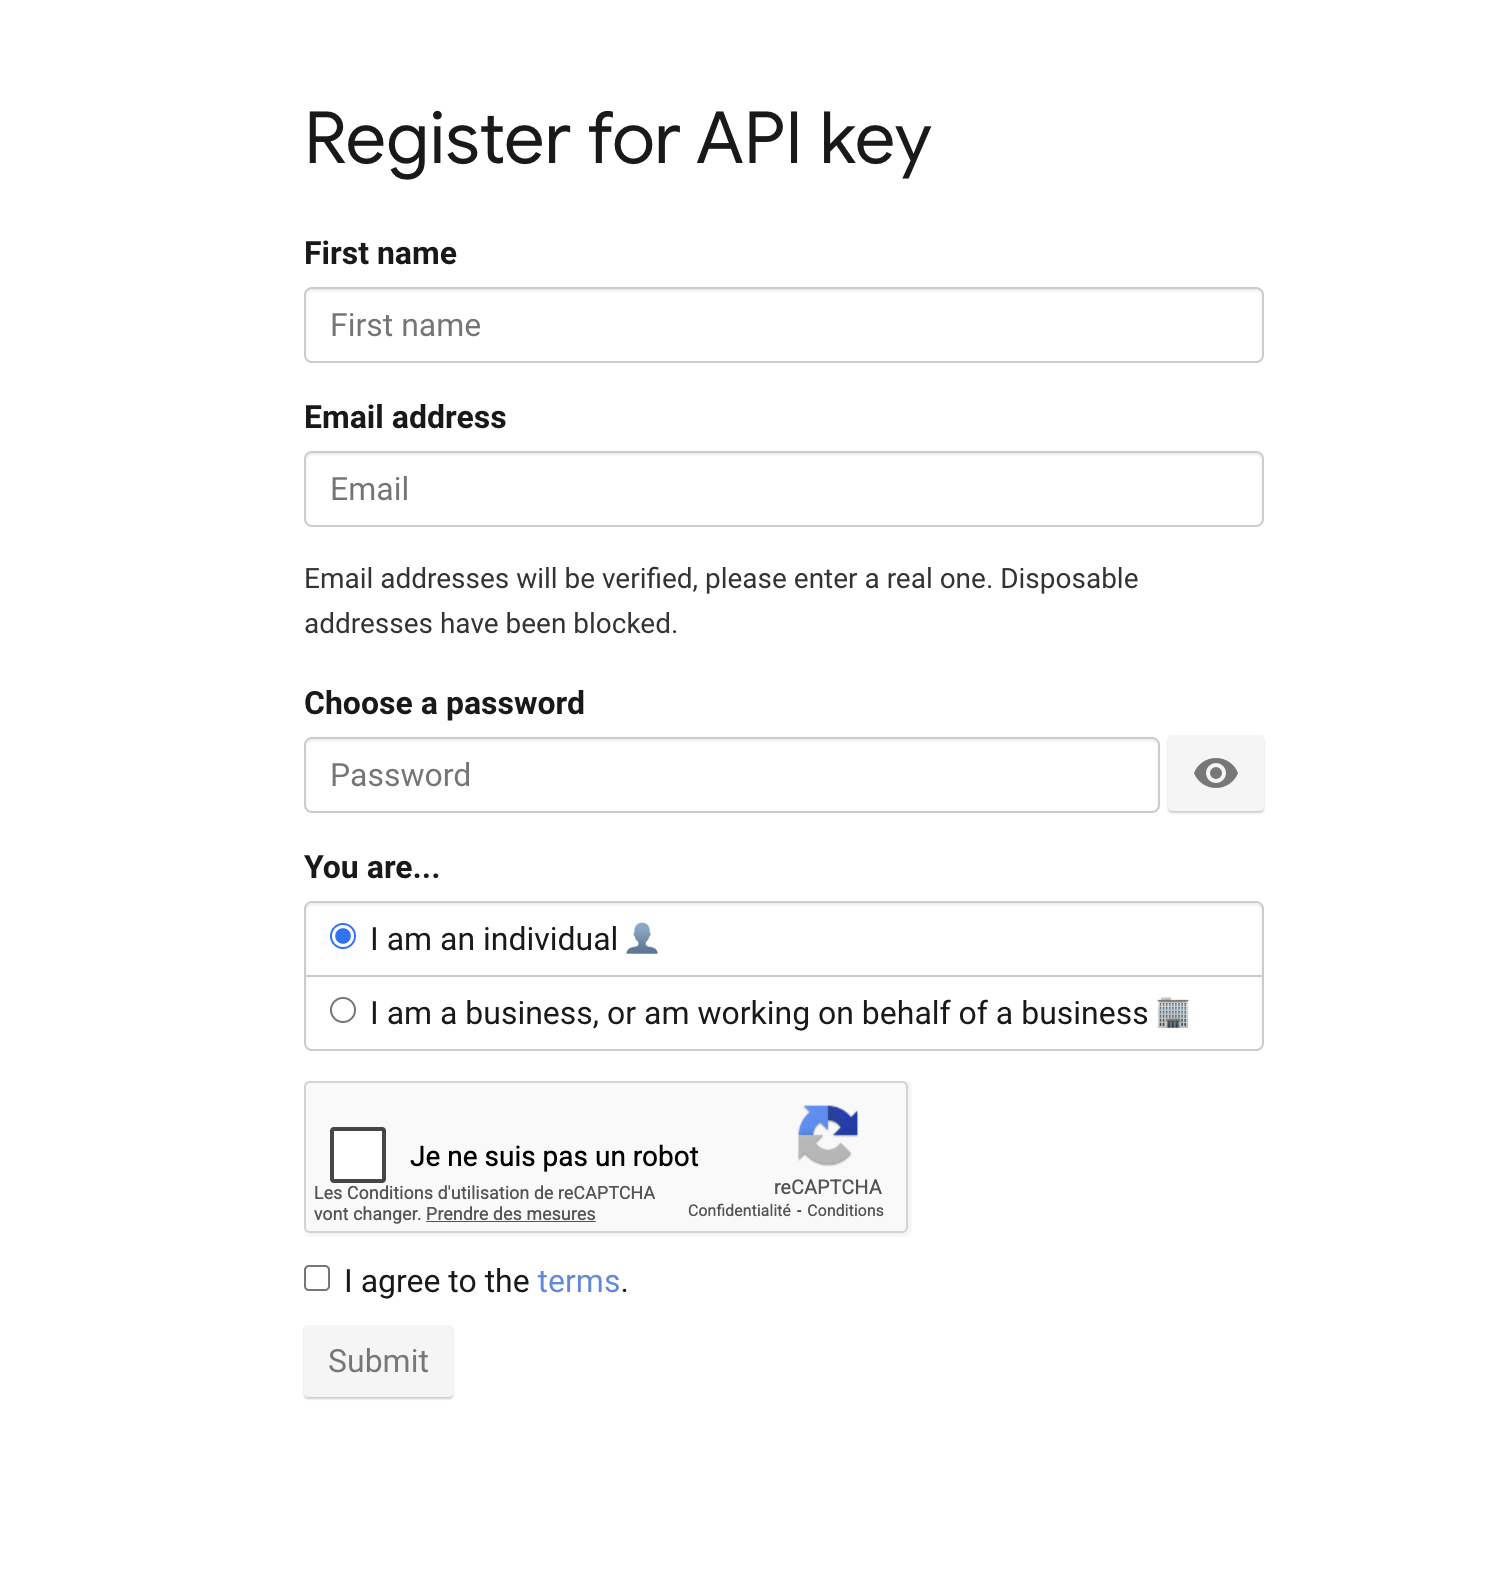
Create an account and complete the process. Your API key will be displayed at the end. Keep it safe — treat it like a password.
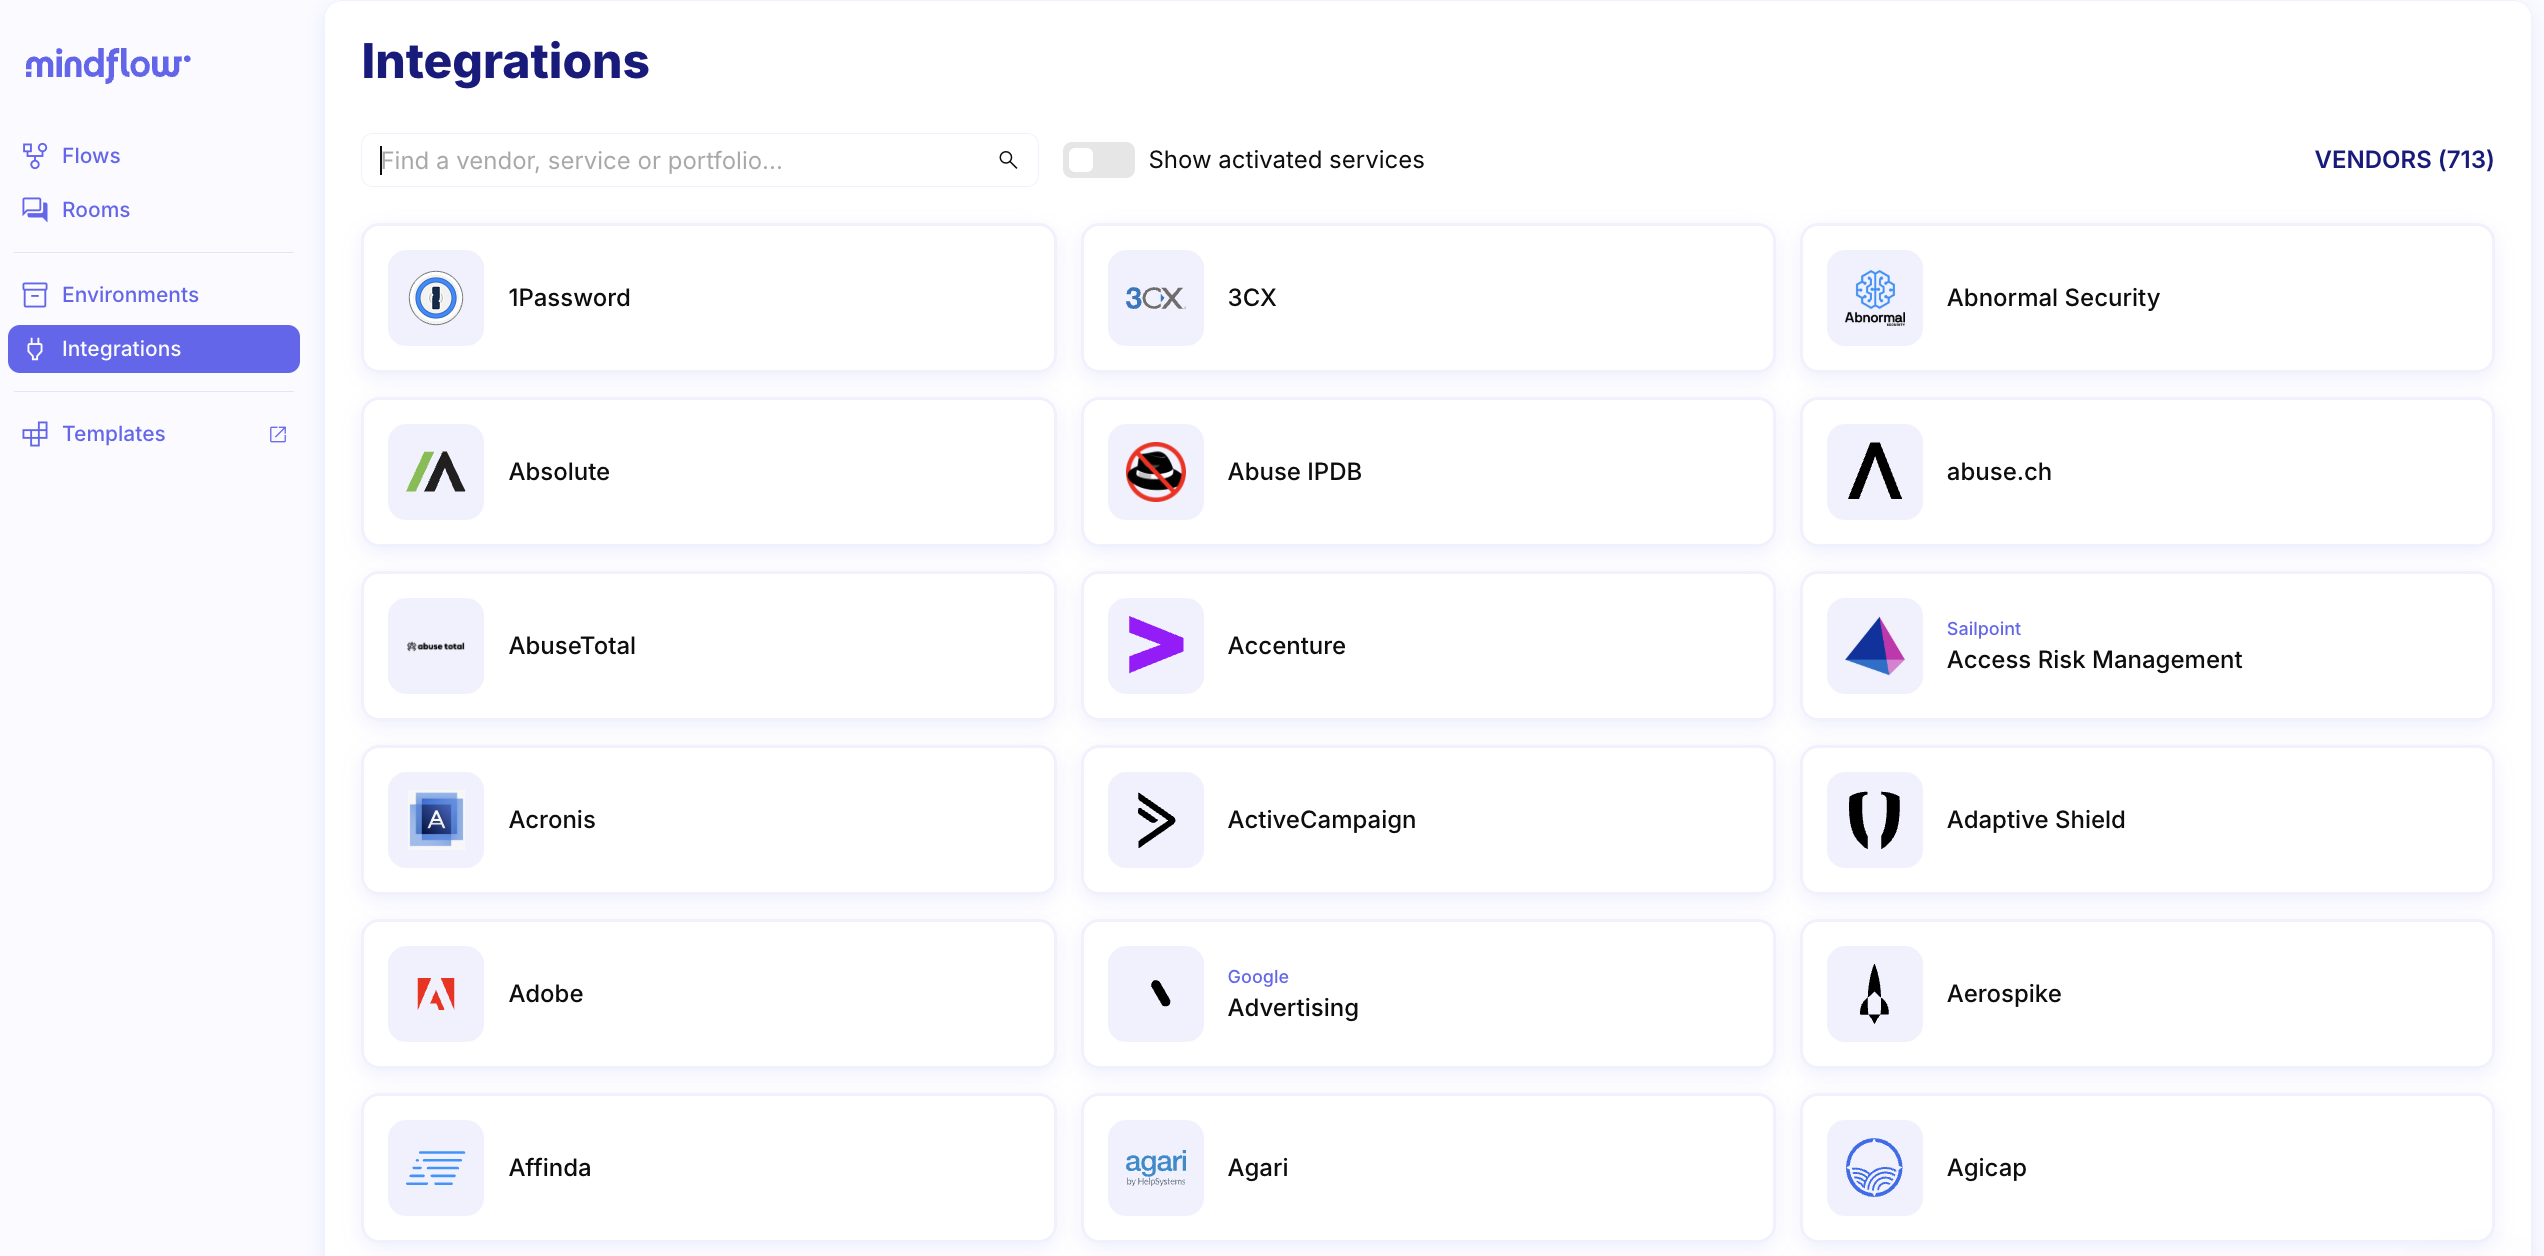
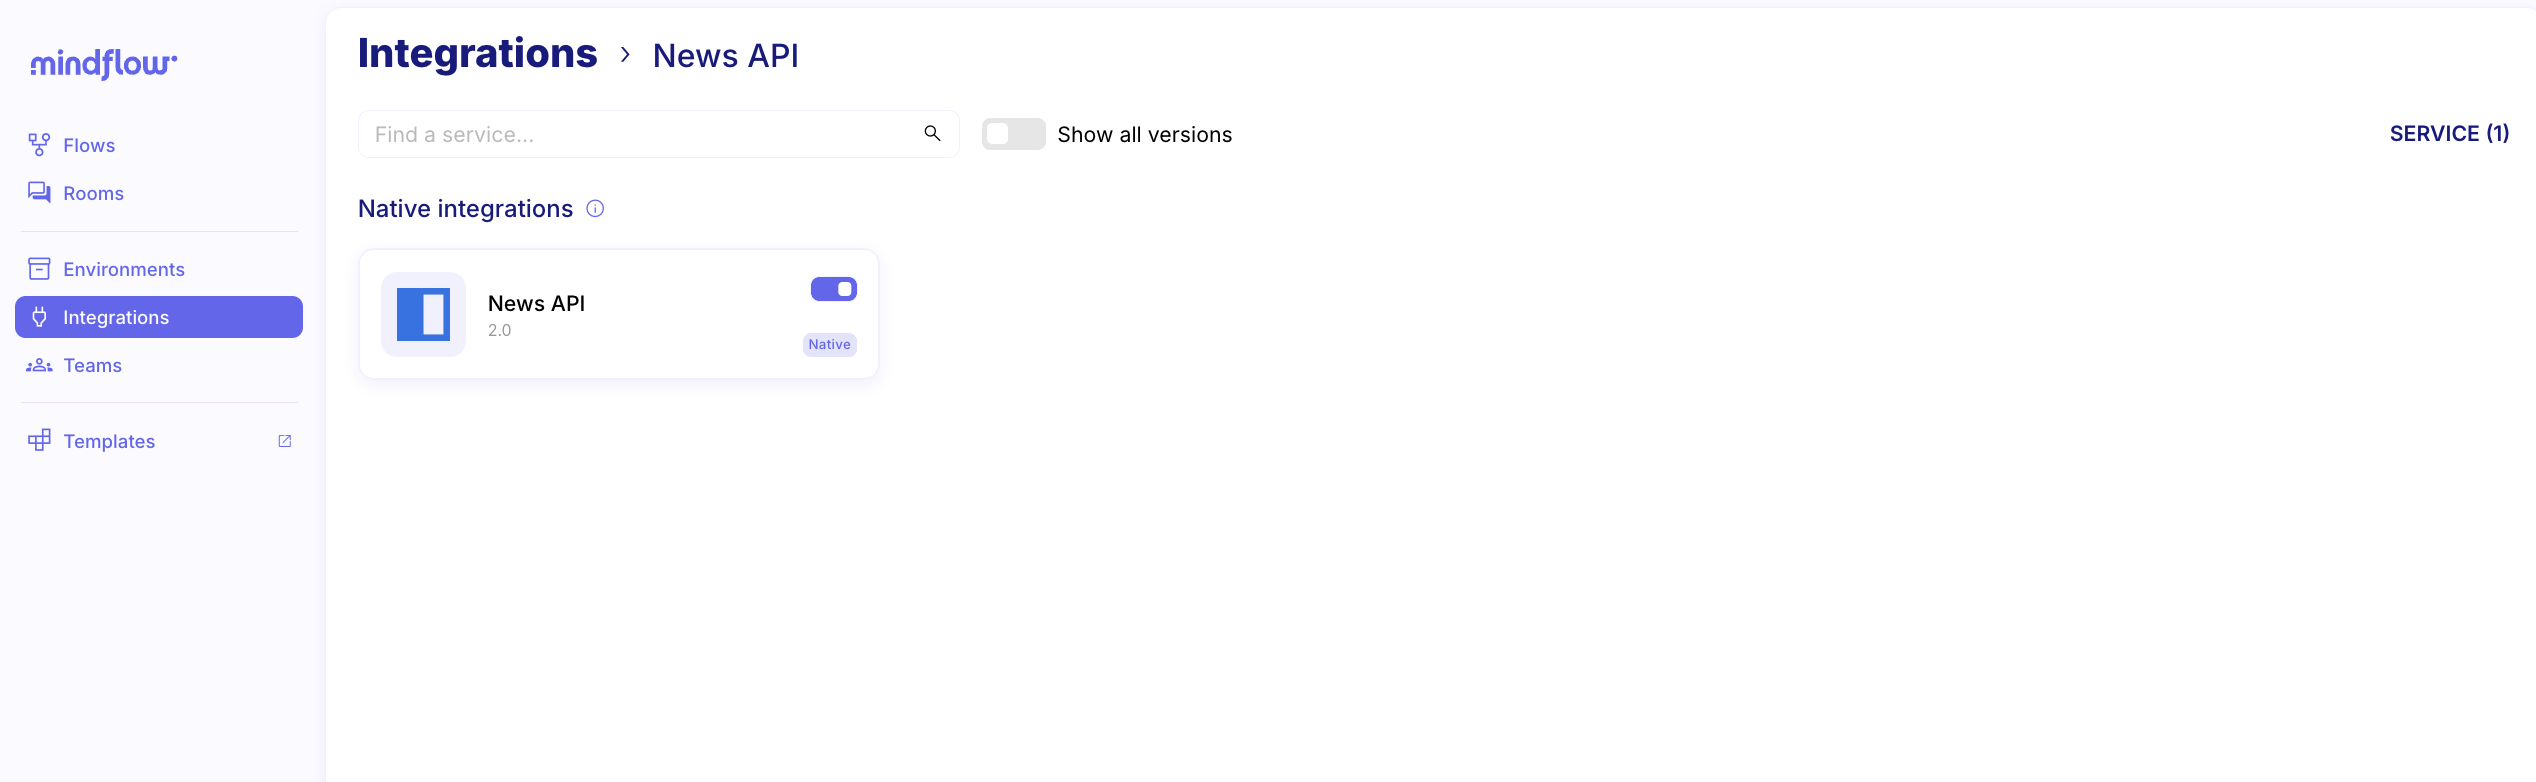
Now, create the credential in Mindflow, to do first you need to activate the integration News API:
- Open the Integration tab in the platform.
-
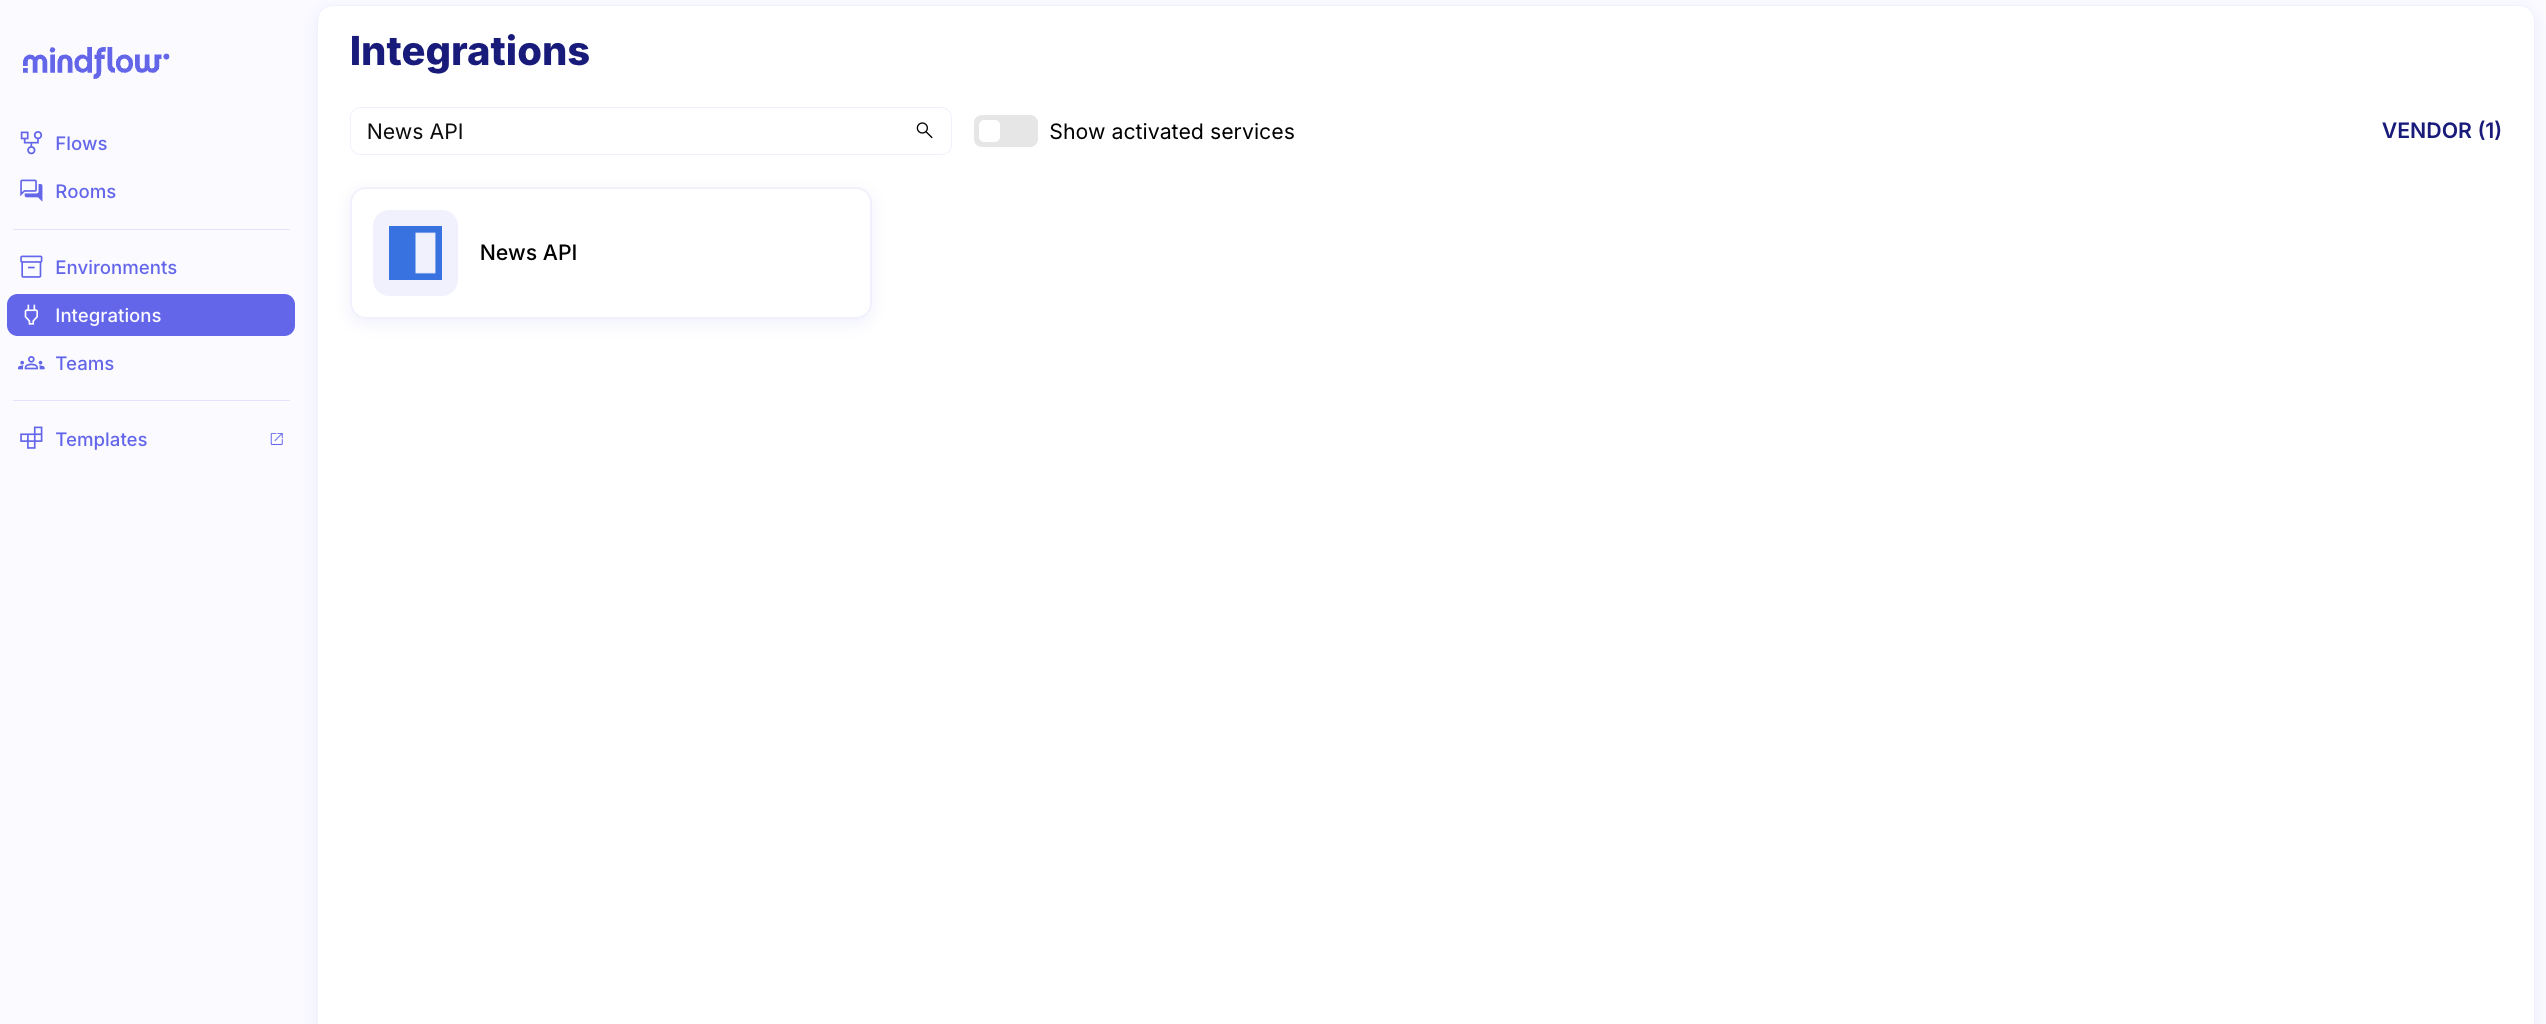
Use the search bar to find the vendor.
-
Select the service you want and turn on the integration using the switch in the top‑right corner.
Then you will be able to create the credential:
-
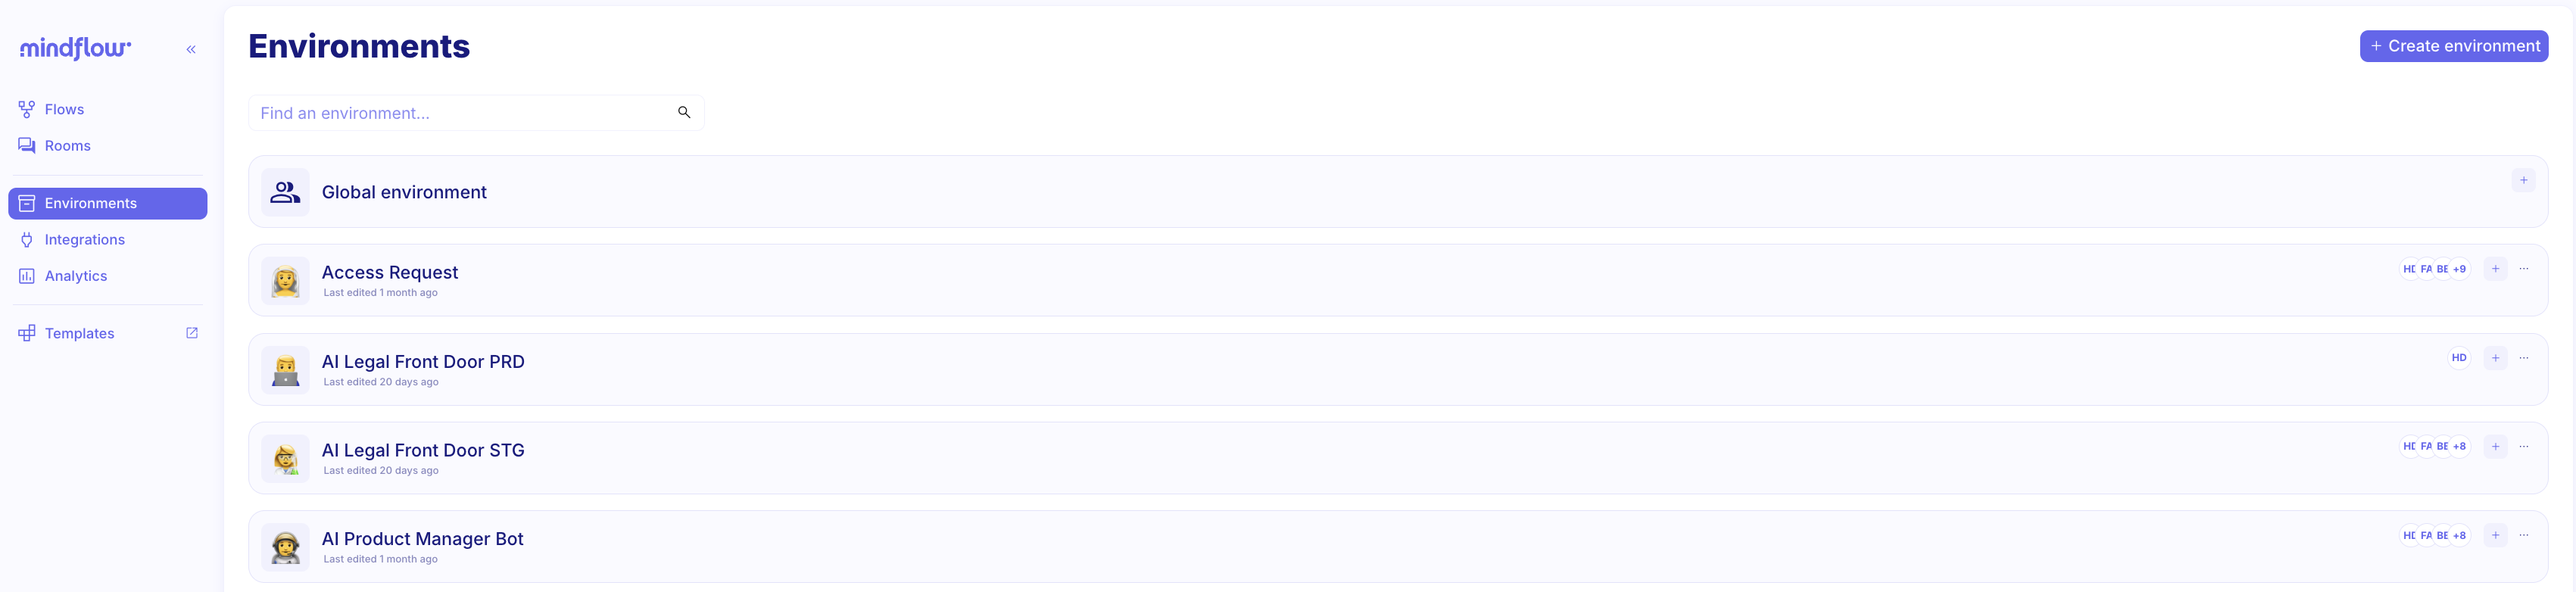
Navigate to Environments in the left-hand sidebar.
-
Open the Environment where you want to store the credential (your personal Environment or the Global one).
-
Click Create a credential (or the + icon if credentials already exist).

-
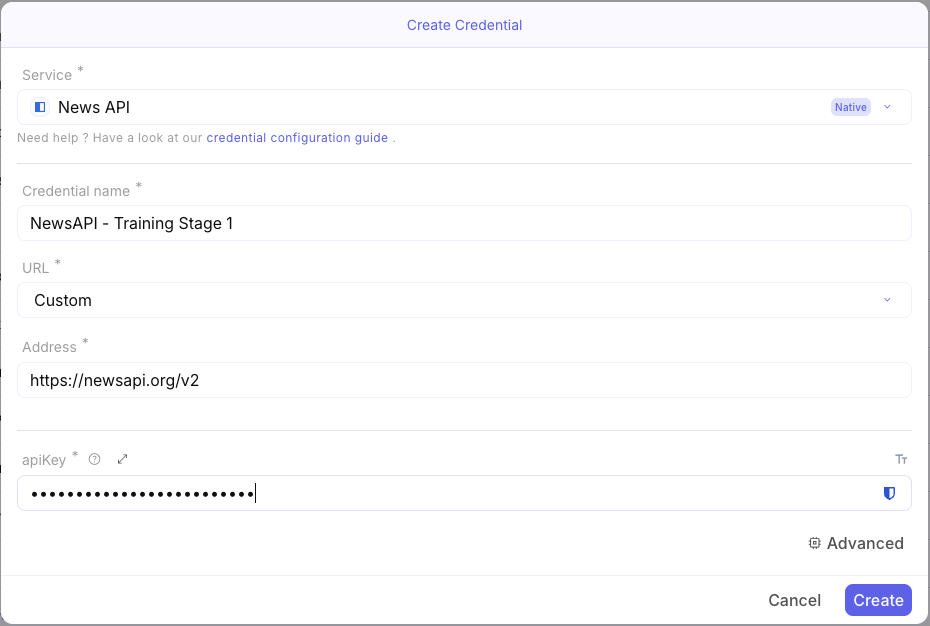
Configure the credential as follows:
- Service: Select NewsAPI from the list of native integrations.
- Credential name: Give it a recognisable name (e.g.,
NewsAPI - [Your Name]). - Address: Paste the NewsAPI URL (e.g.,
https://newsapi.org/v2). - API Key: Paste the API key you retrieved from NewsAPI.
-
Click Create.
Your NewsAPI credential is ready!
Step 2: Create your Flow
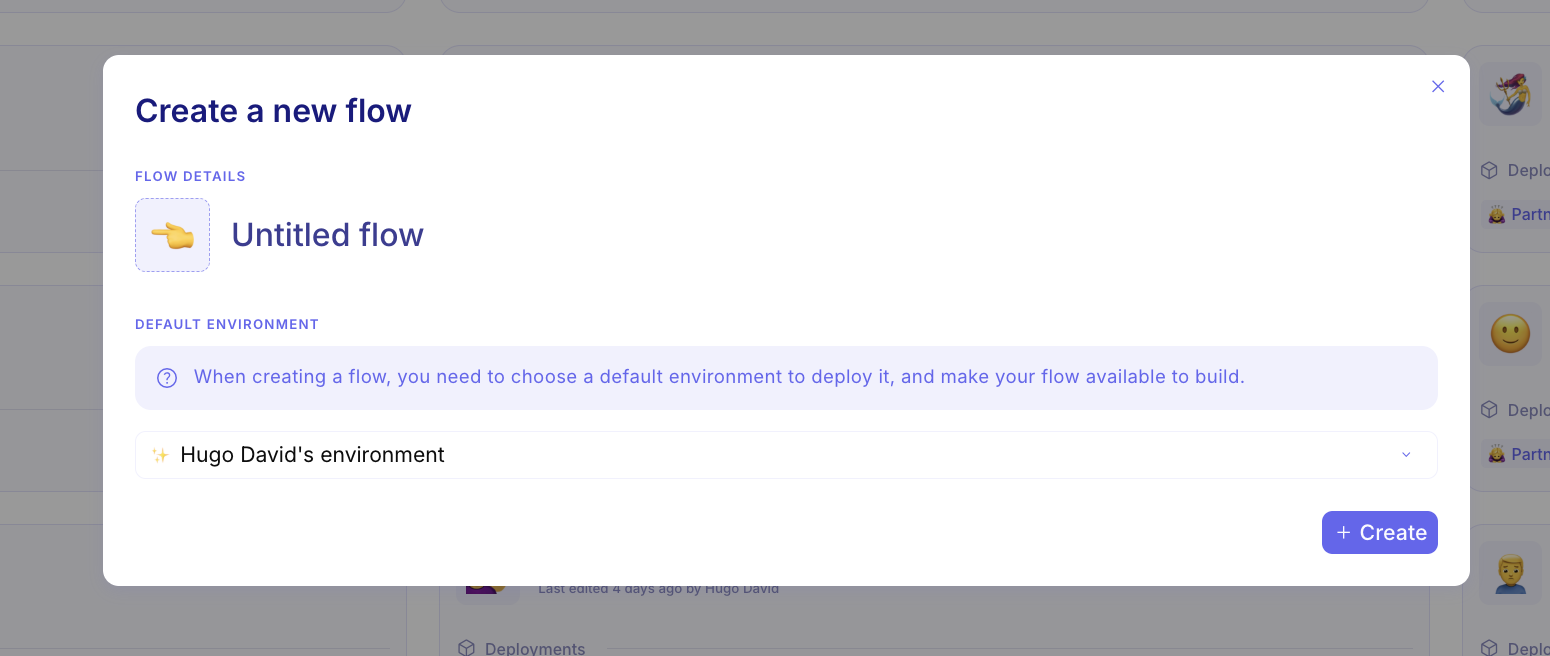
Section titled “Step 2: Create your Flow”On the far right of the Mindflow interface, click the Create button and select Flow.

Name your flow (e.g., Airport Lounges Newsletter) and select the Environment where you stored your credential. Click Create — you will be redirected to a blank canvas.
Step 3: Add a Scheduler Trigger
Section titled “Step 3: Add a Scheduler Trigger”On Mindflow, every Flow can be triggered in multiple ways:
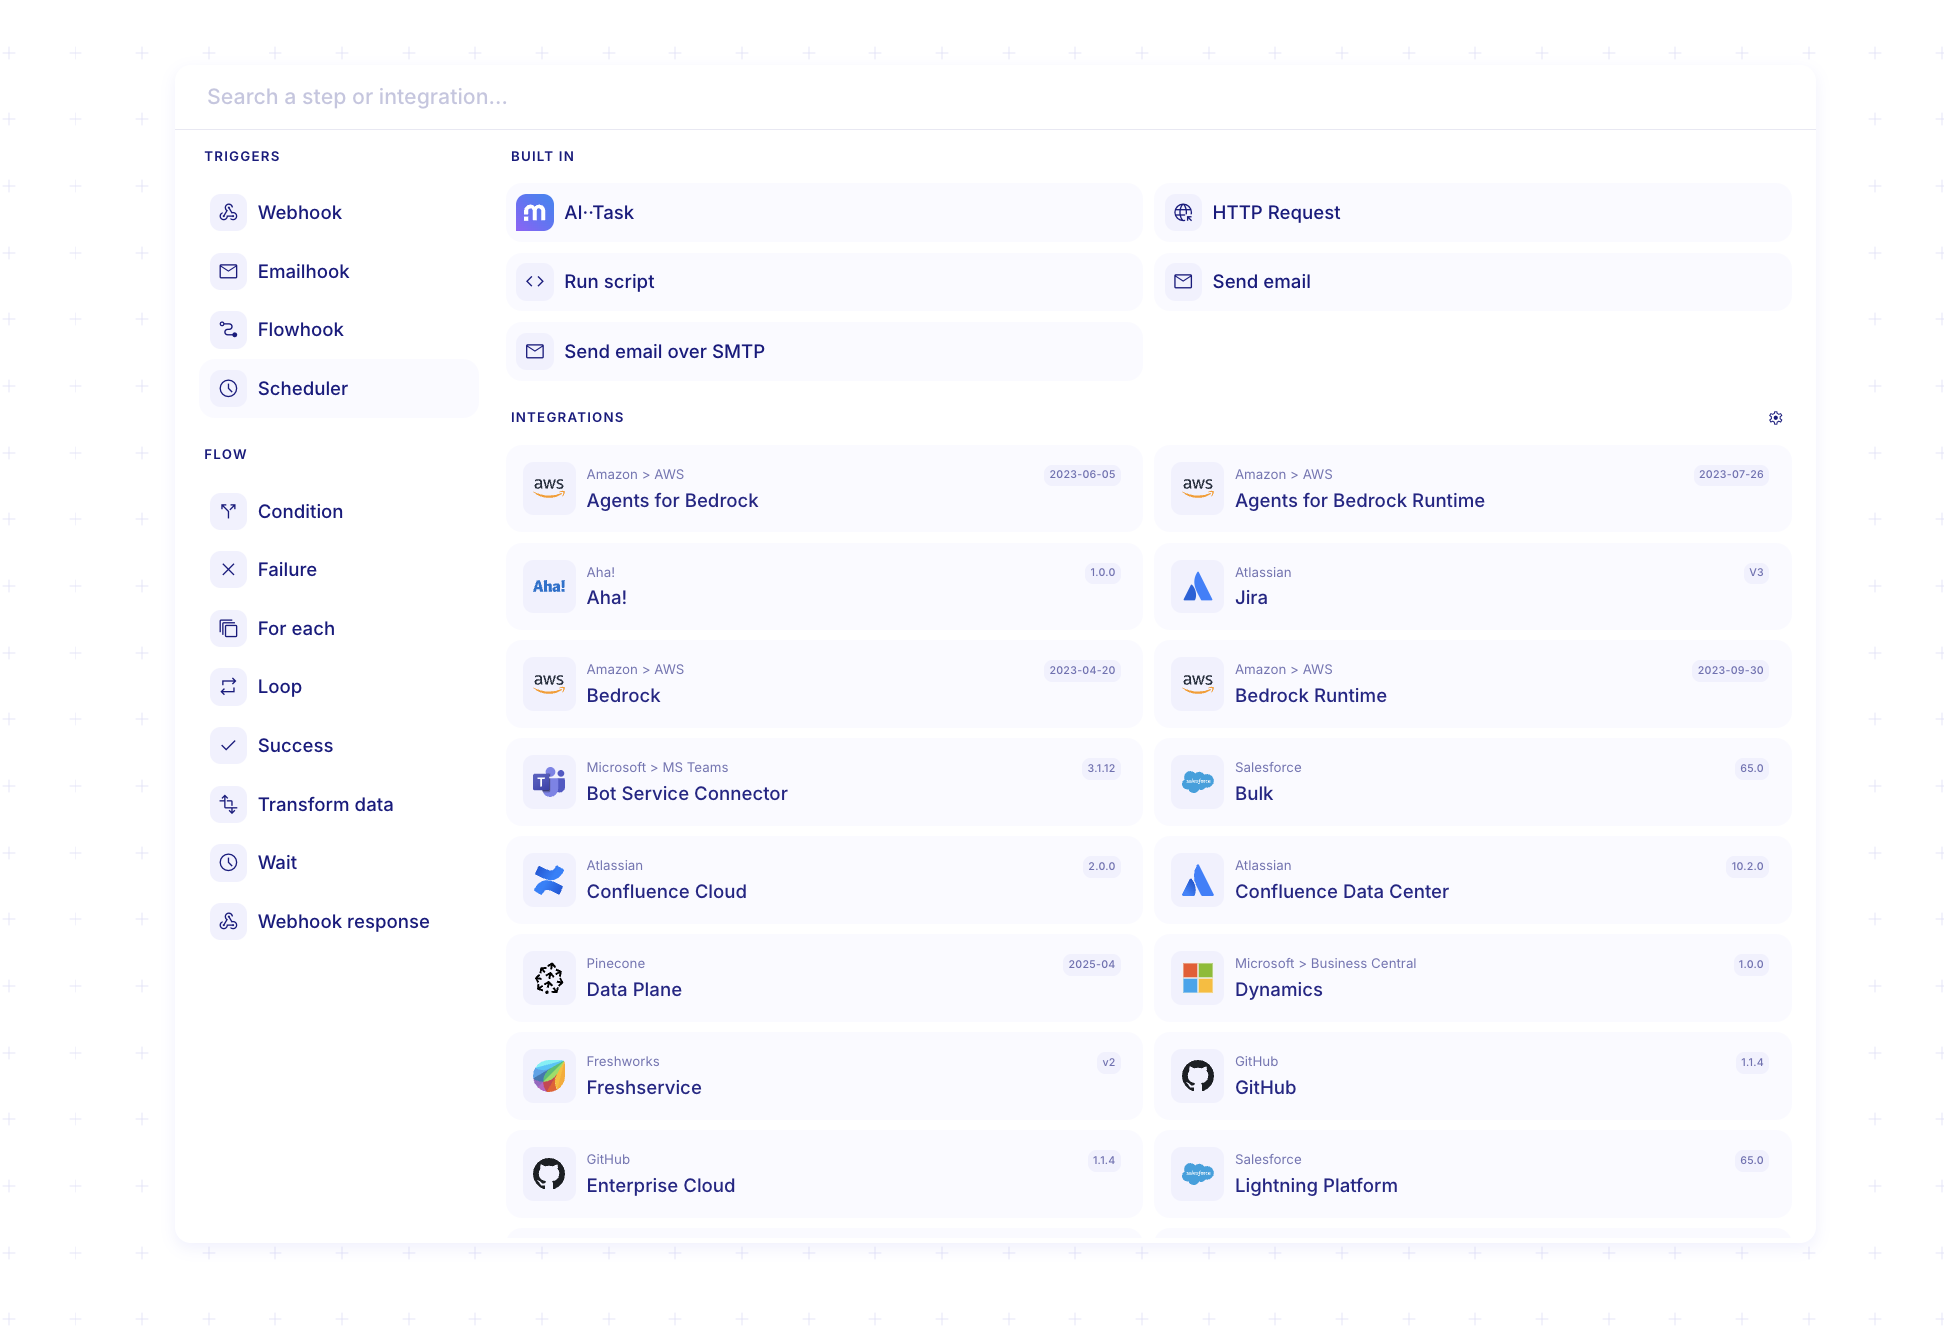
- Webhook: This is the most common use case. You will configure a third-party to react on specific events and send the data to another service, Mindflow in this instance. This goes through what is called a “Webhook URL”. Whenever you create a Webhook Trigger step, if you open its settings tab, you will see two URLs. These are two types of Webhook URLs. We will come back on the difference in another Training.
- Emailhook: In some cases, you will want to trigger a flow with something else than a Webhook (third-party tool limitation, direct mail ingestion, or else). Whenever you create a Emailhook Trigger, you generate a unique email address to which you can send email to (Beware, you may need to ask for sender domain whitelisting to MIndflow!).
- Flowhook: This will be needed to create Swarms in Mindflow. It incredibly powerful and we will get back to this in another Training.
- Scheduler: This is the one we will use today. You can direct a Flow to automatically start itself through this Scheduler Trigger.
For this use case, we want the flow to run automatically once a week.
-
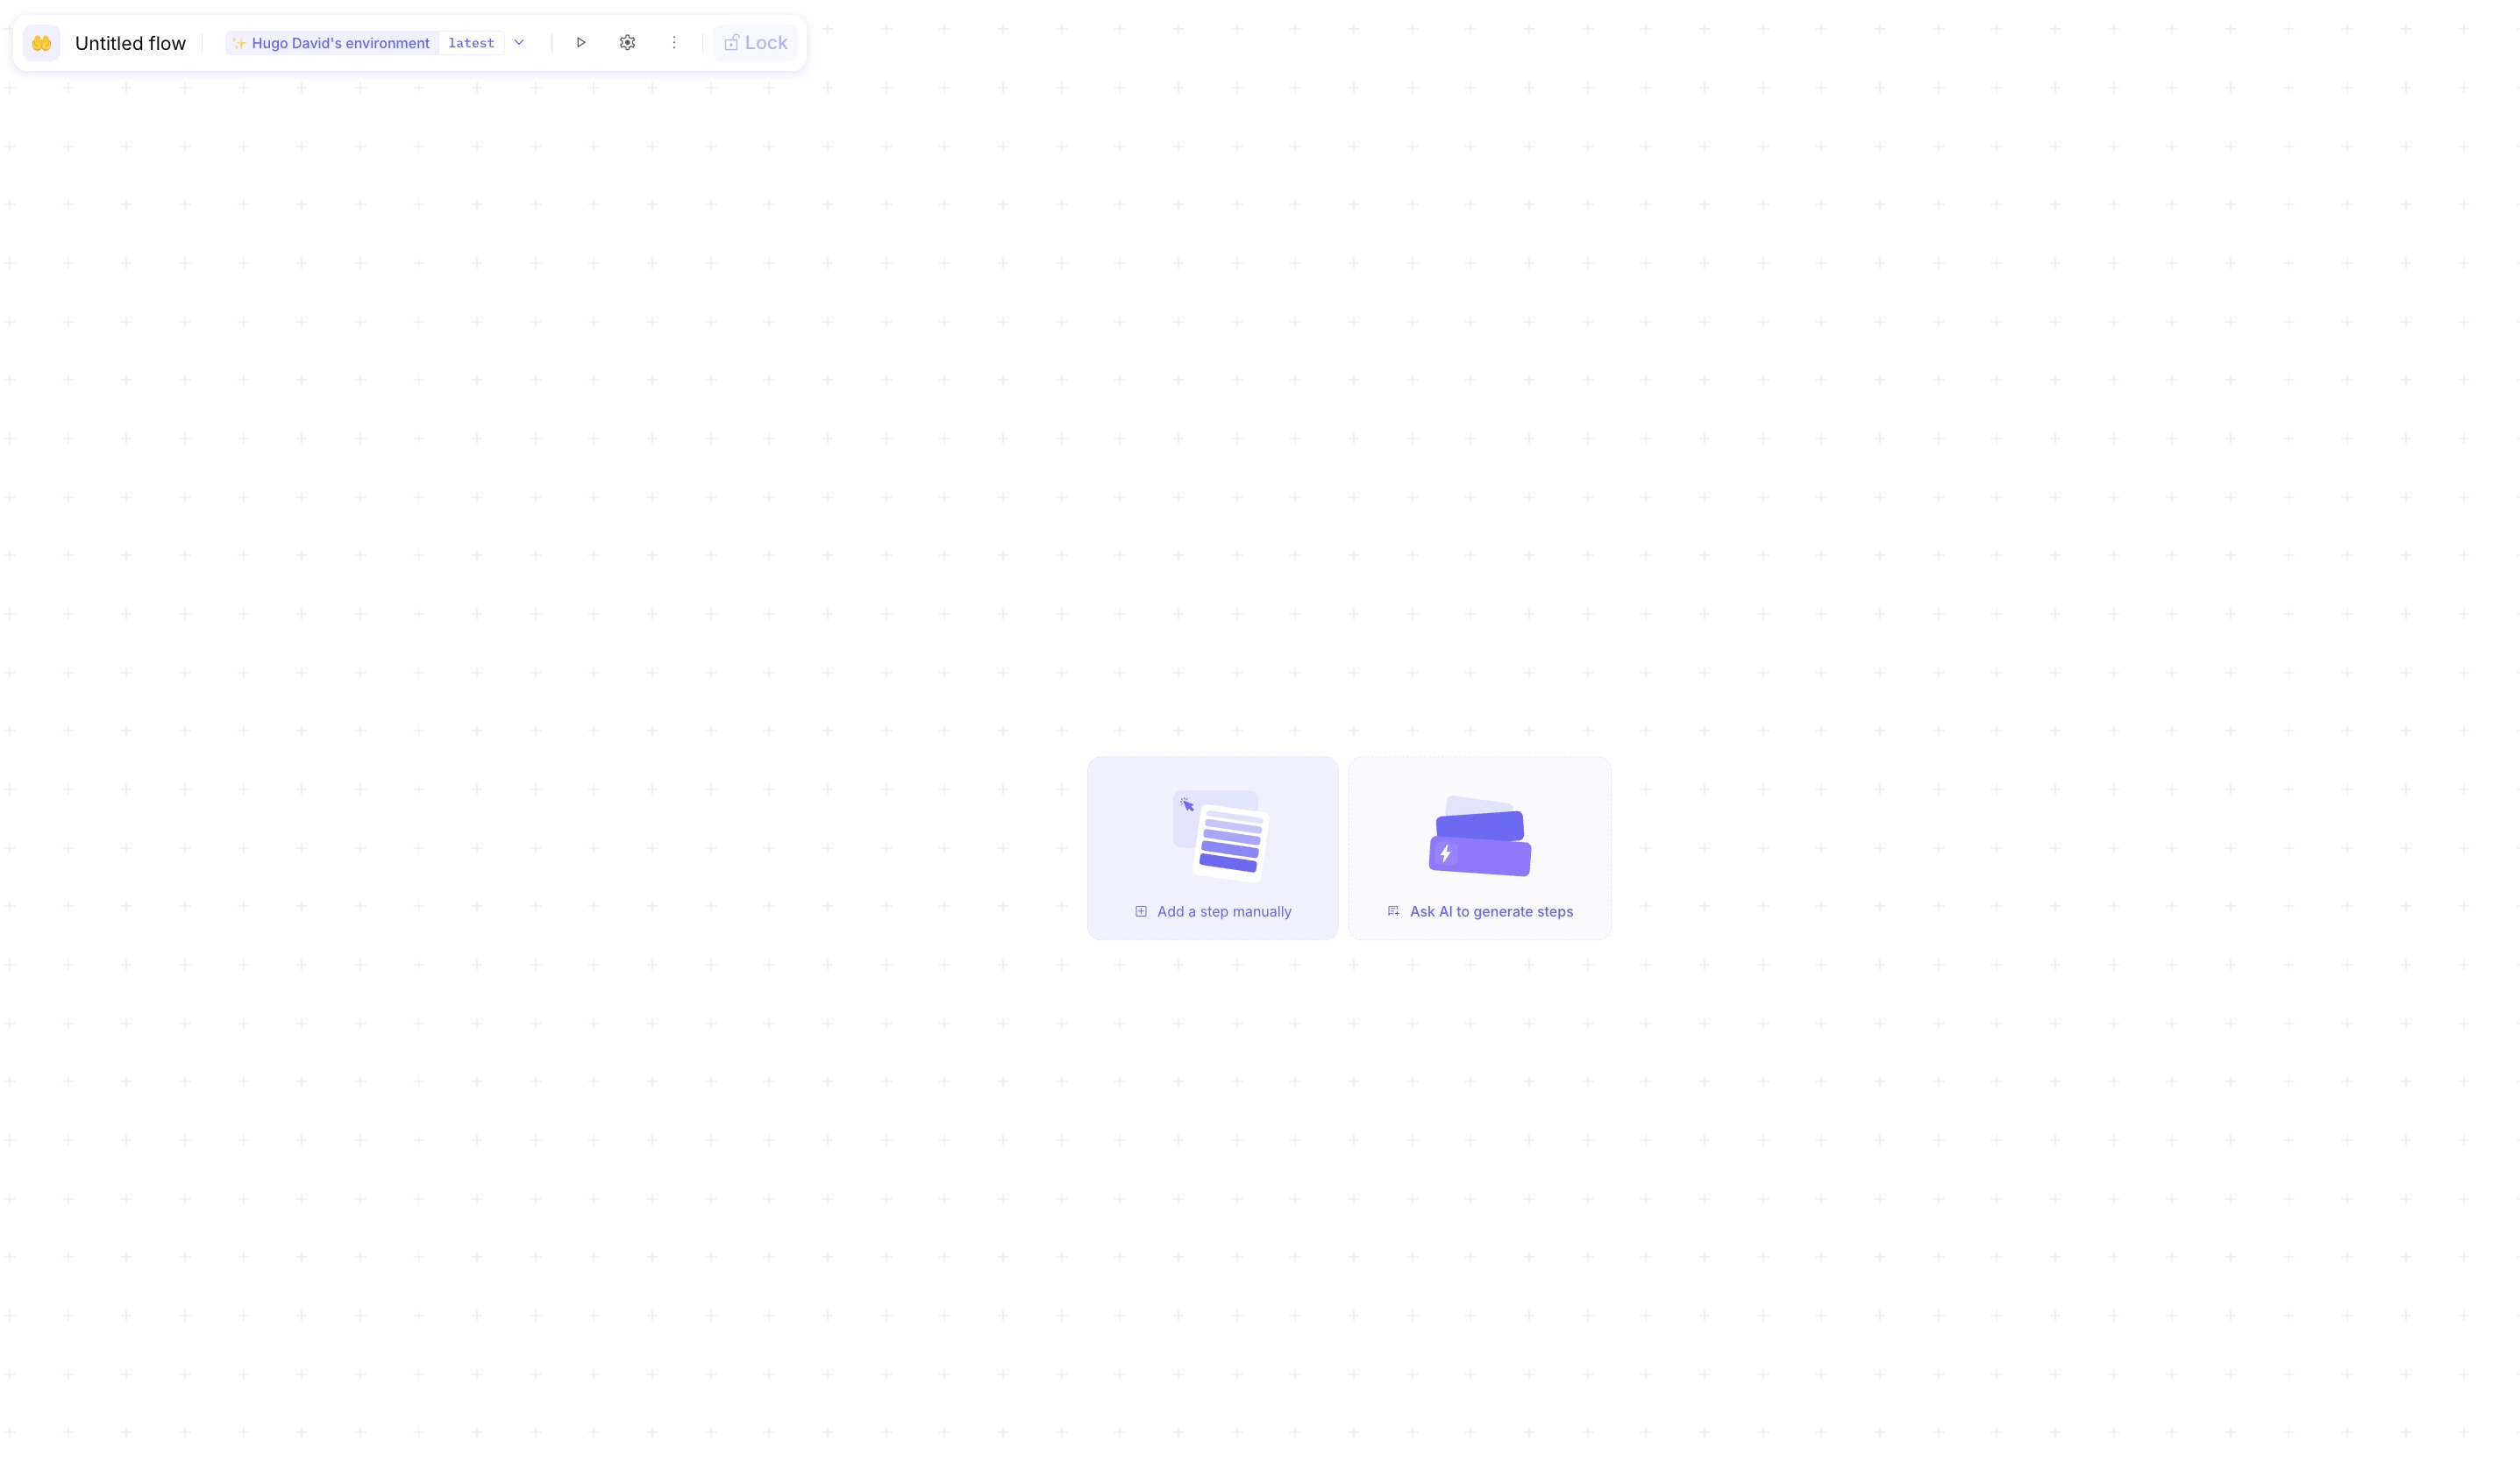
Click Add a step manually on the canvas.
-
Select Scheduler.
-
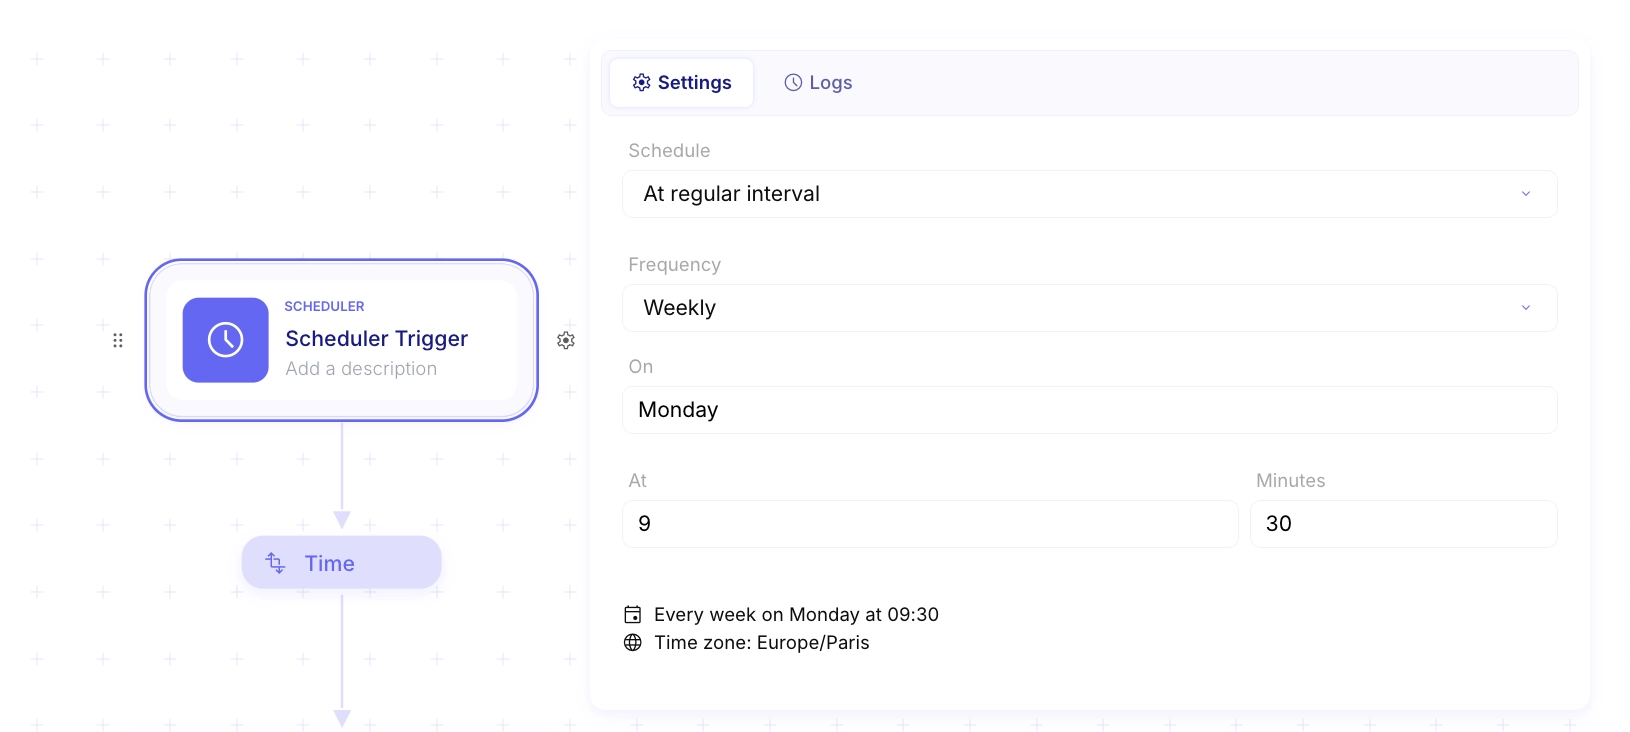
Open the step’s settings tab (⚙️) and configure it:
- Scheduler: At regular interval
- Frequency: Weekly
- On: Select the day(s) of your choice
- At / Minutes: Set the time you want the flow to run
Step 4: Compute Last Week’s Date with Transform Data
Section titled “Step 4: Compute Last Week’s Date with Transform Data”Before fetching articles, we need to calculate the date from 7 days ago to limit our query to recent news. The Transform Data step is your go-to for generating or modifying data within a flow.
-
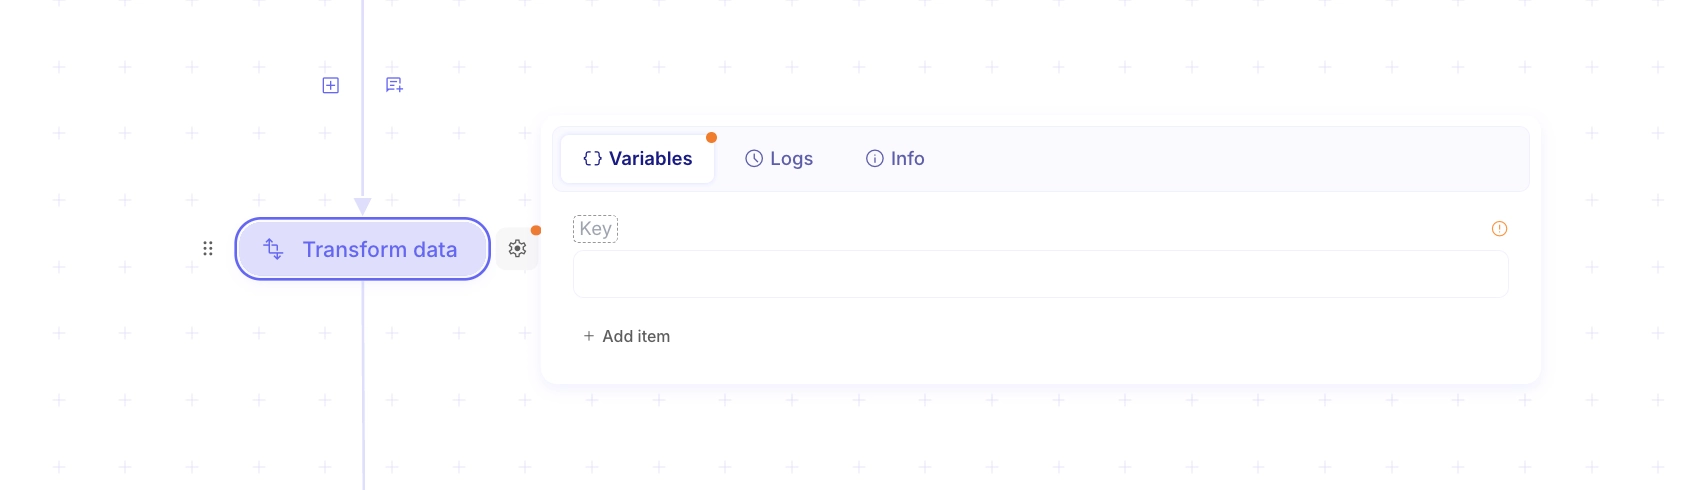
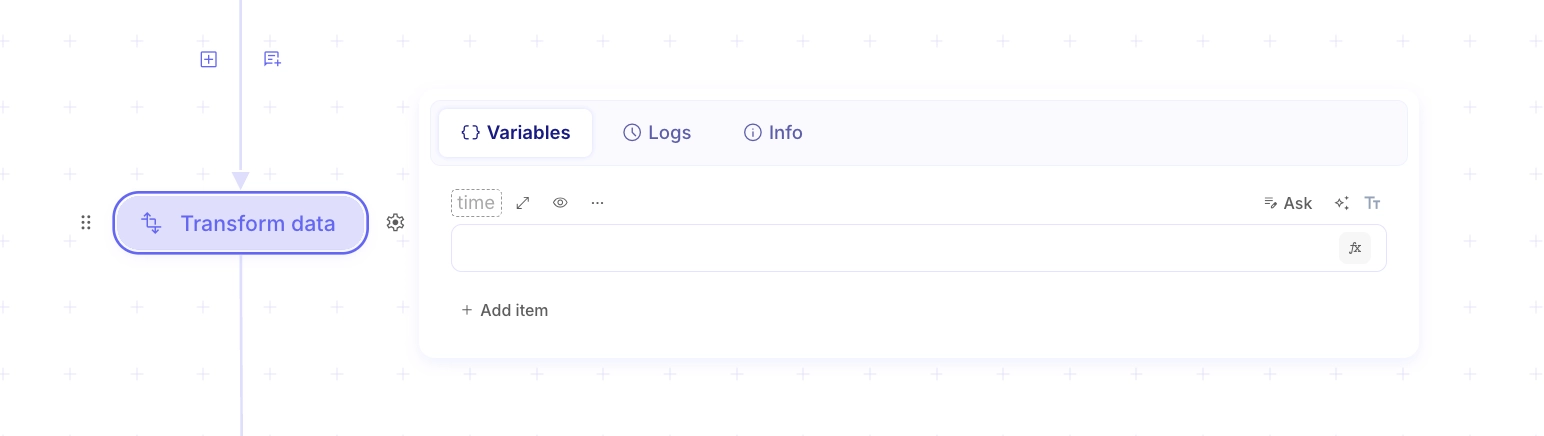
Add a Transform Data step below the Scheduler.
-
Rename the default variable (click the dotted rectangle) to
from_date. -
Click the fx button on the value field to open the Data Transformation module.
-
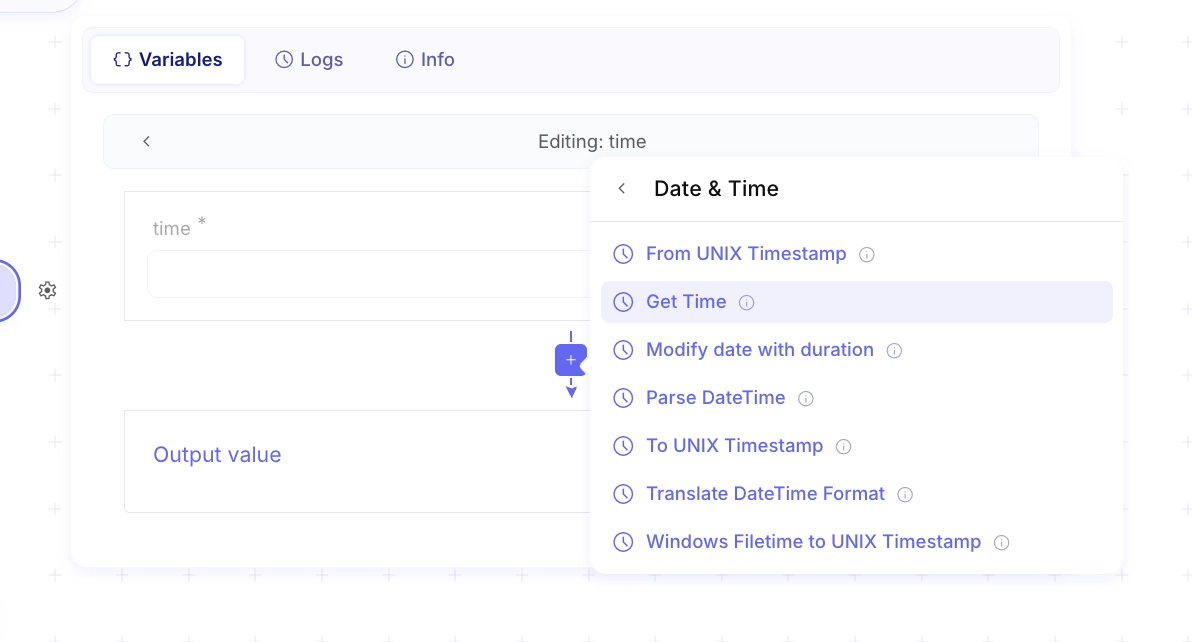
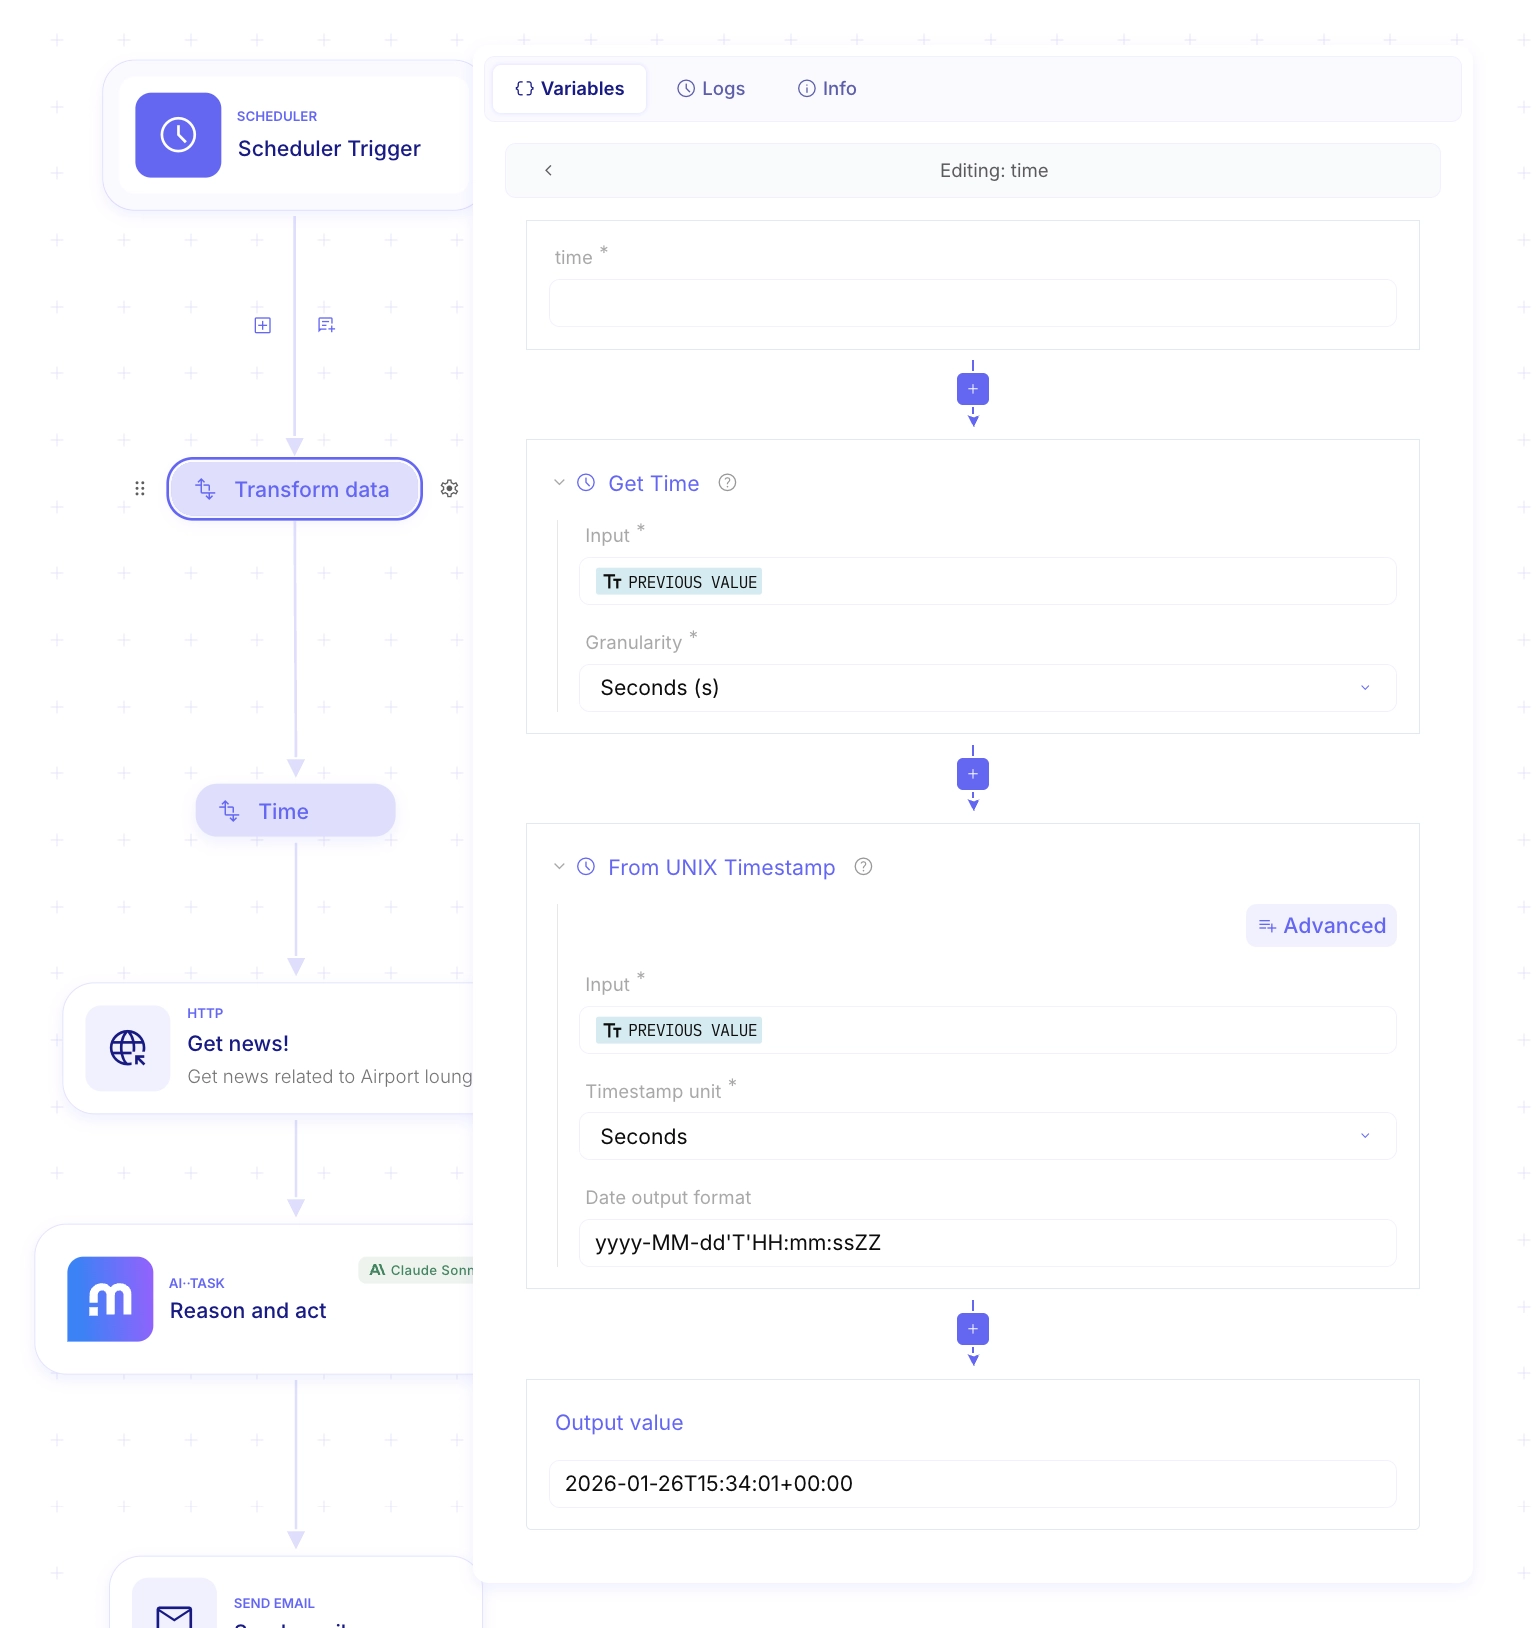
Chain the following three functions:
- Get Time (Date & Time): Returns the current time as a UNIX timestamp.
- From UNIX Timestamp (Date & Time): Converts the timestamp into a human-readable date.
- Modify date with duration (Date & Time): Subtracts 7 days.
- Click Advanced and enable Days to adjust.
- Set Operator to Subtract.
- Set Days to adjust to
7.
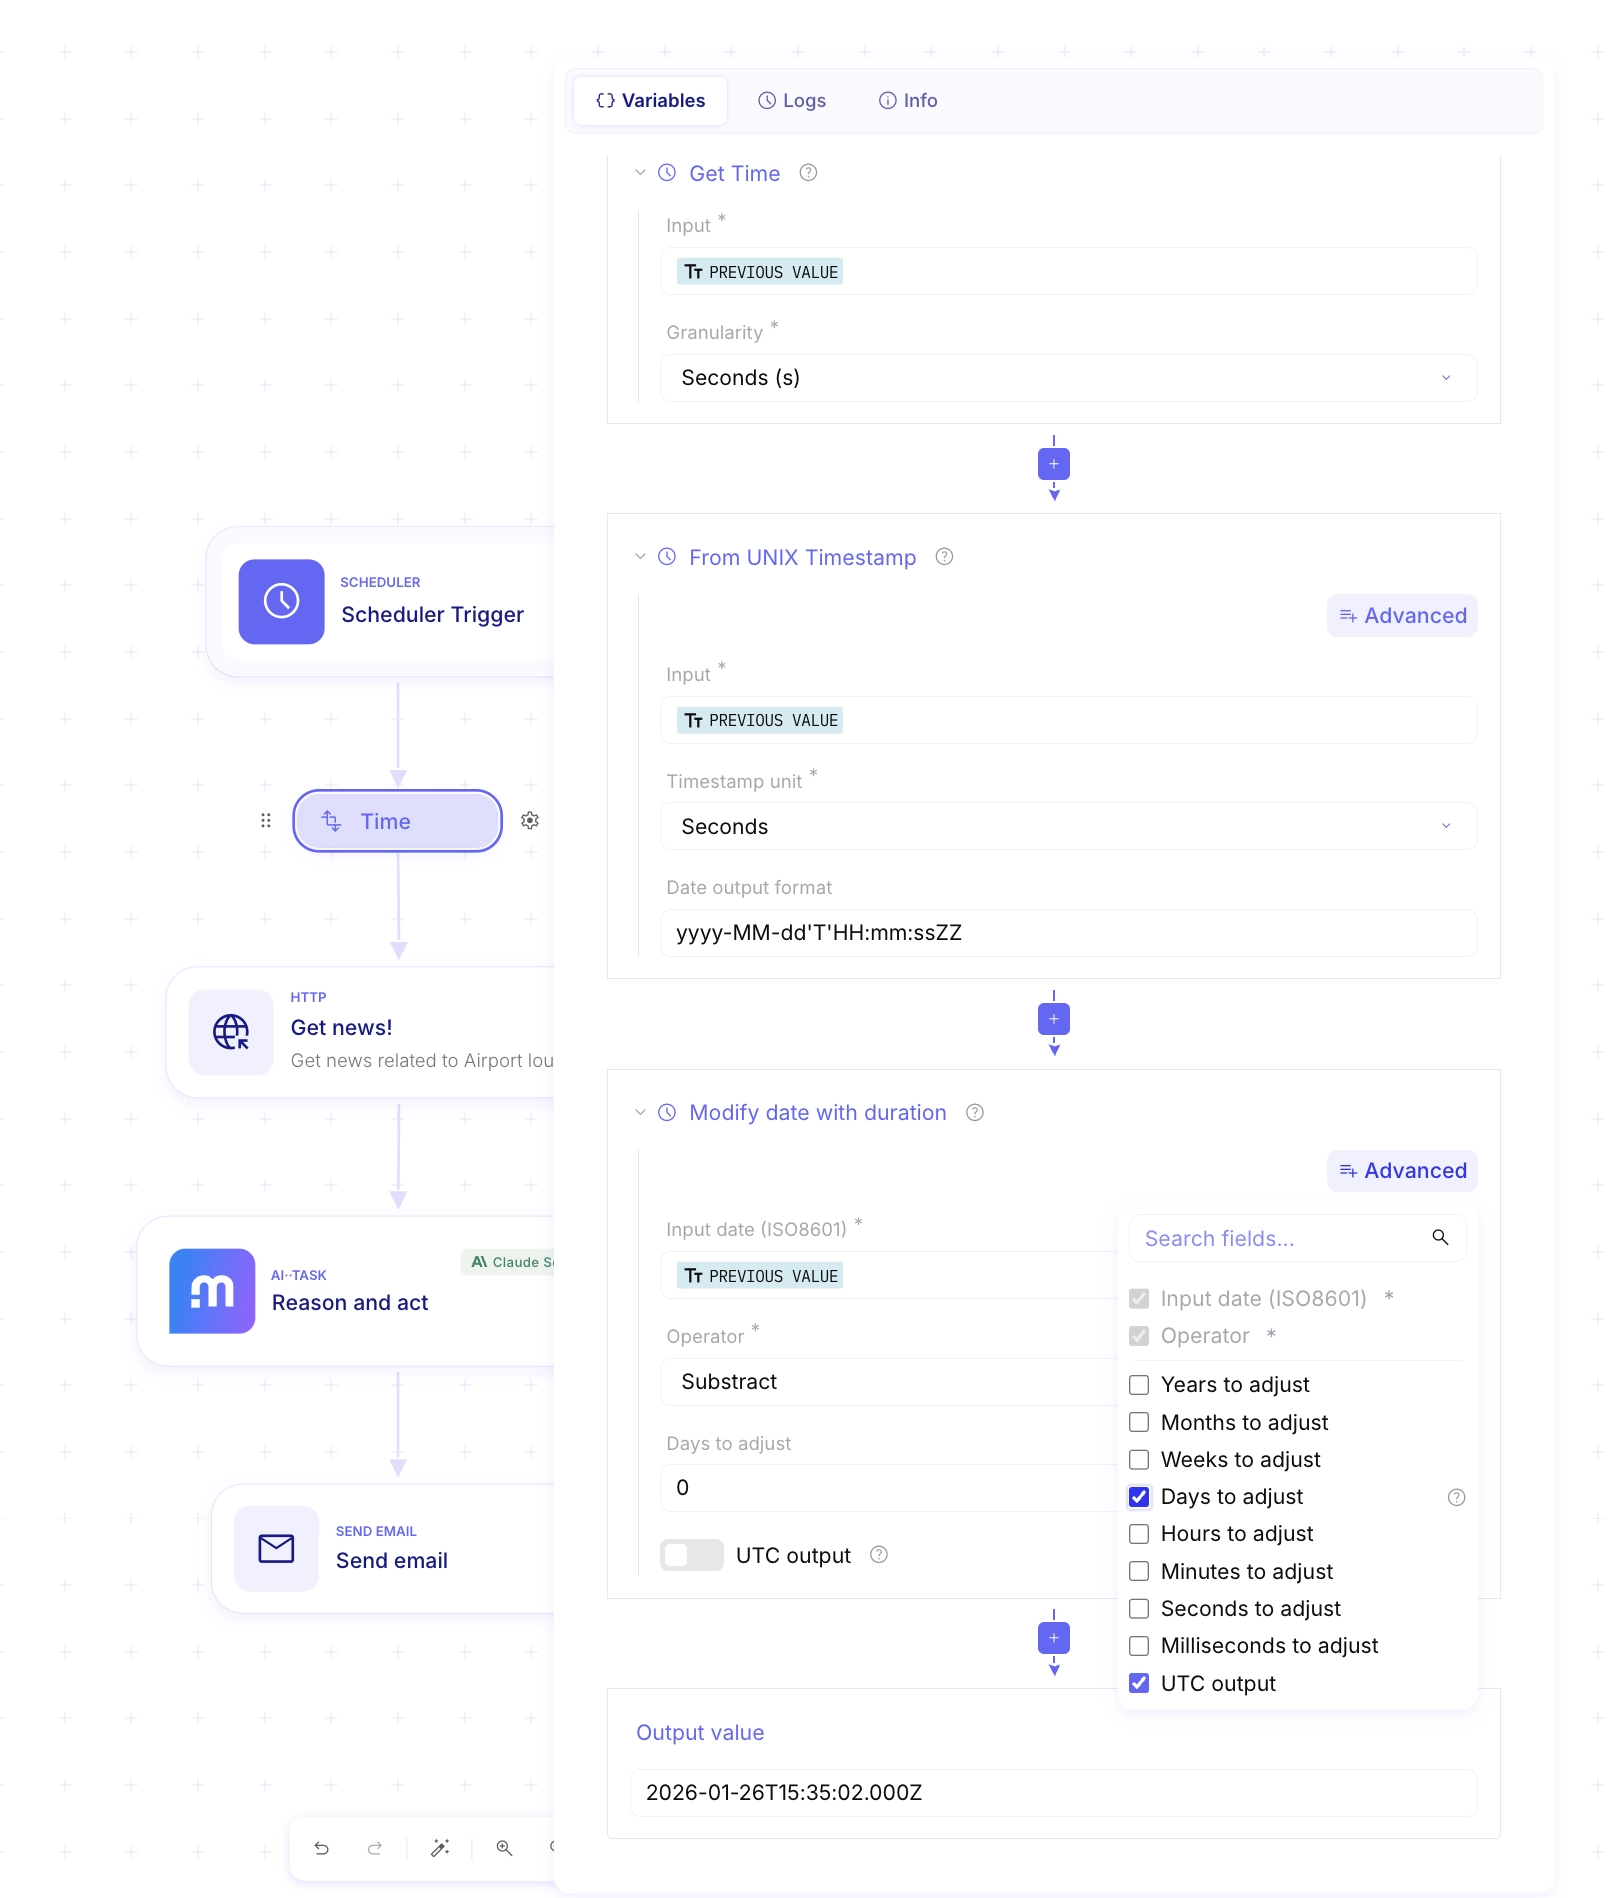
The module will auto-evaluate at each step so you can verify the result in real time. Your from_date variable is set!
Step 5: Fetch News with the NewsAPI Step
Section titled “Step 5: Fetch News with the NewsAPI Step”Now that we have our date, let’s pull the latest articles.
-
Add a NewsAPI step below the Transform Data step. You will select the
Search all articlesendpoint.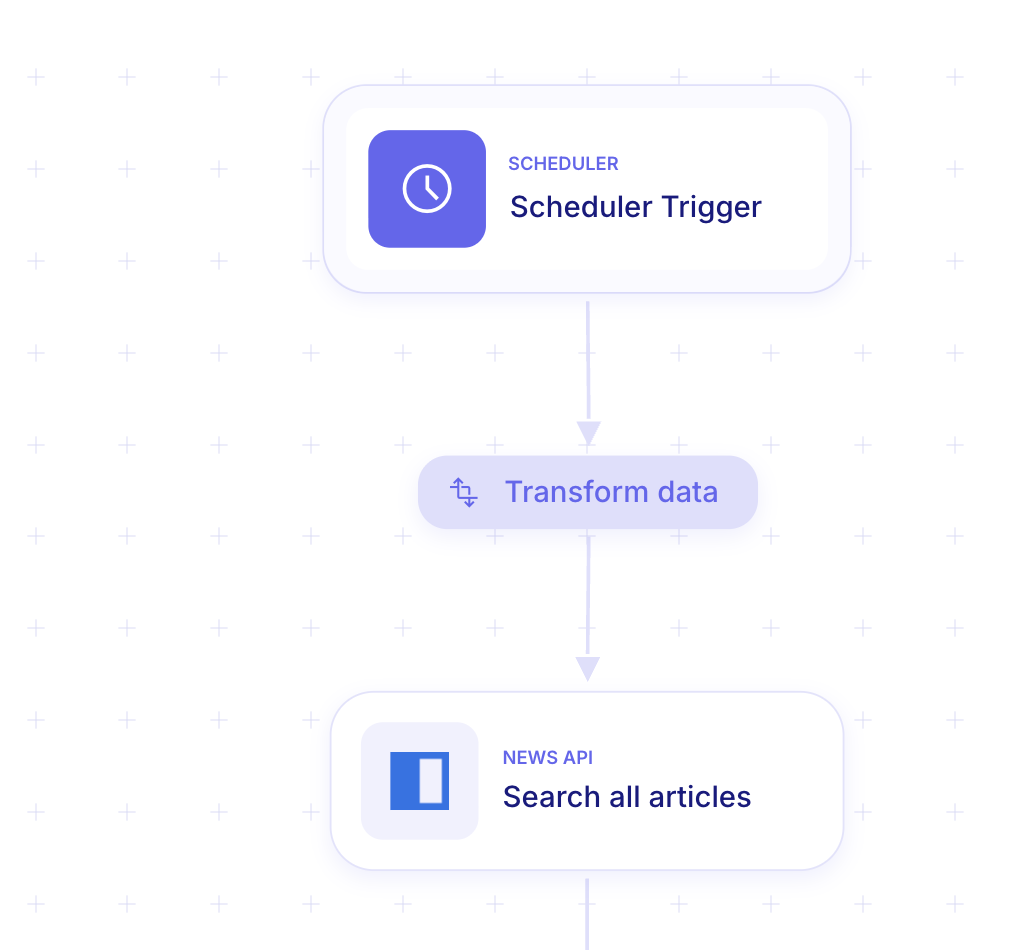
-
Open the step’s Settings tab (⚙️) and assign the NewsAPI credential you created in Step 1.
-
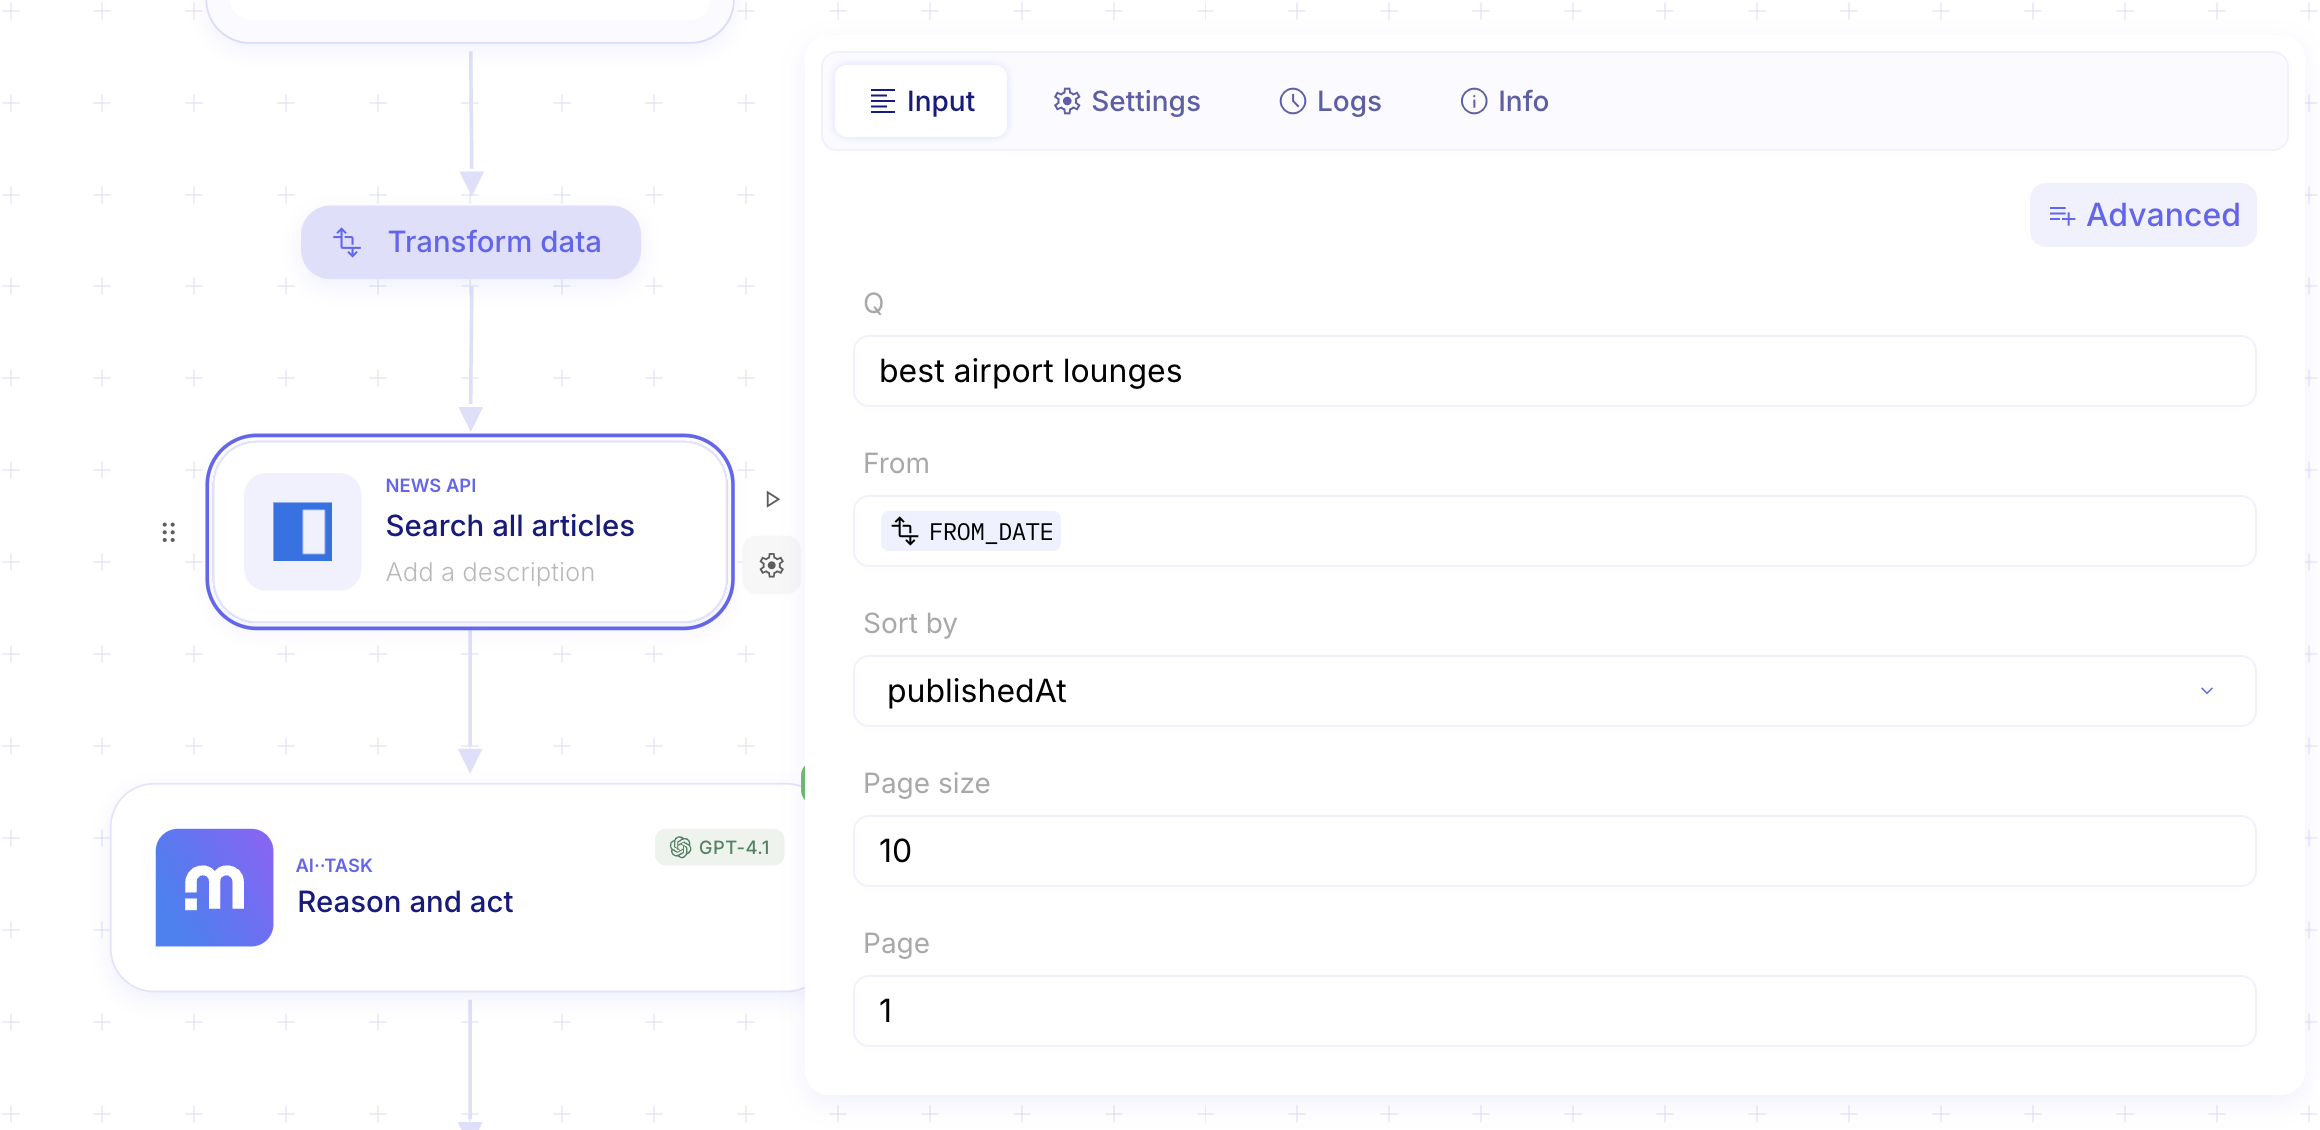
Switch to the Configuration tab and set the following parameters:
- Activate both
QandFromparameters throughAdvandedbutton - Q (query):
best airport lounges - From: Type
/to open the Data Picker, then select thefrom_datevariable you created in Step 4. This creates a Data Pill — a dynamic reference that will evaluate and inject the correct date on every run.
- Activate both
-
Click the ▶️ (Play) button next to the step to Dry run it.
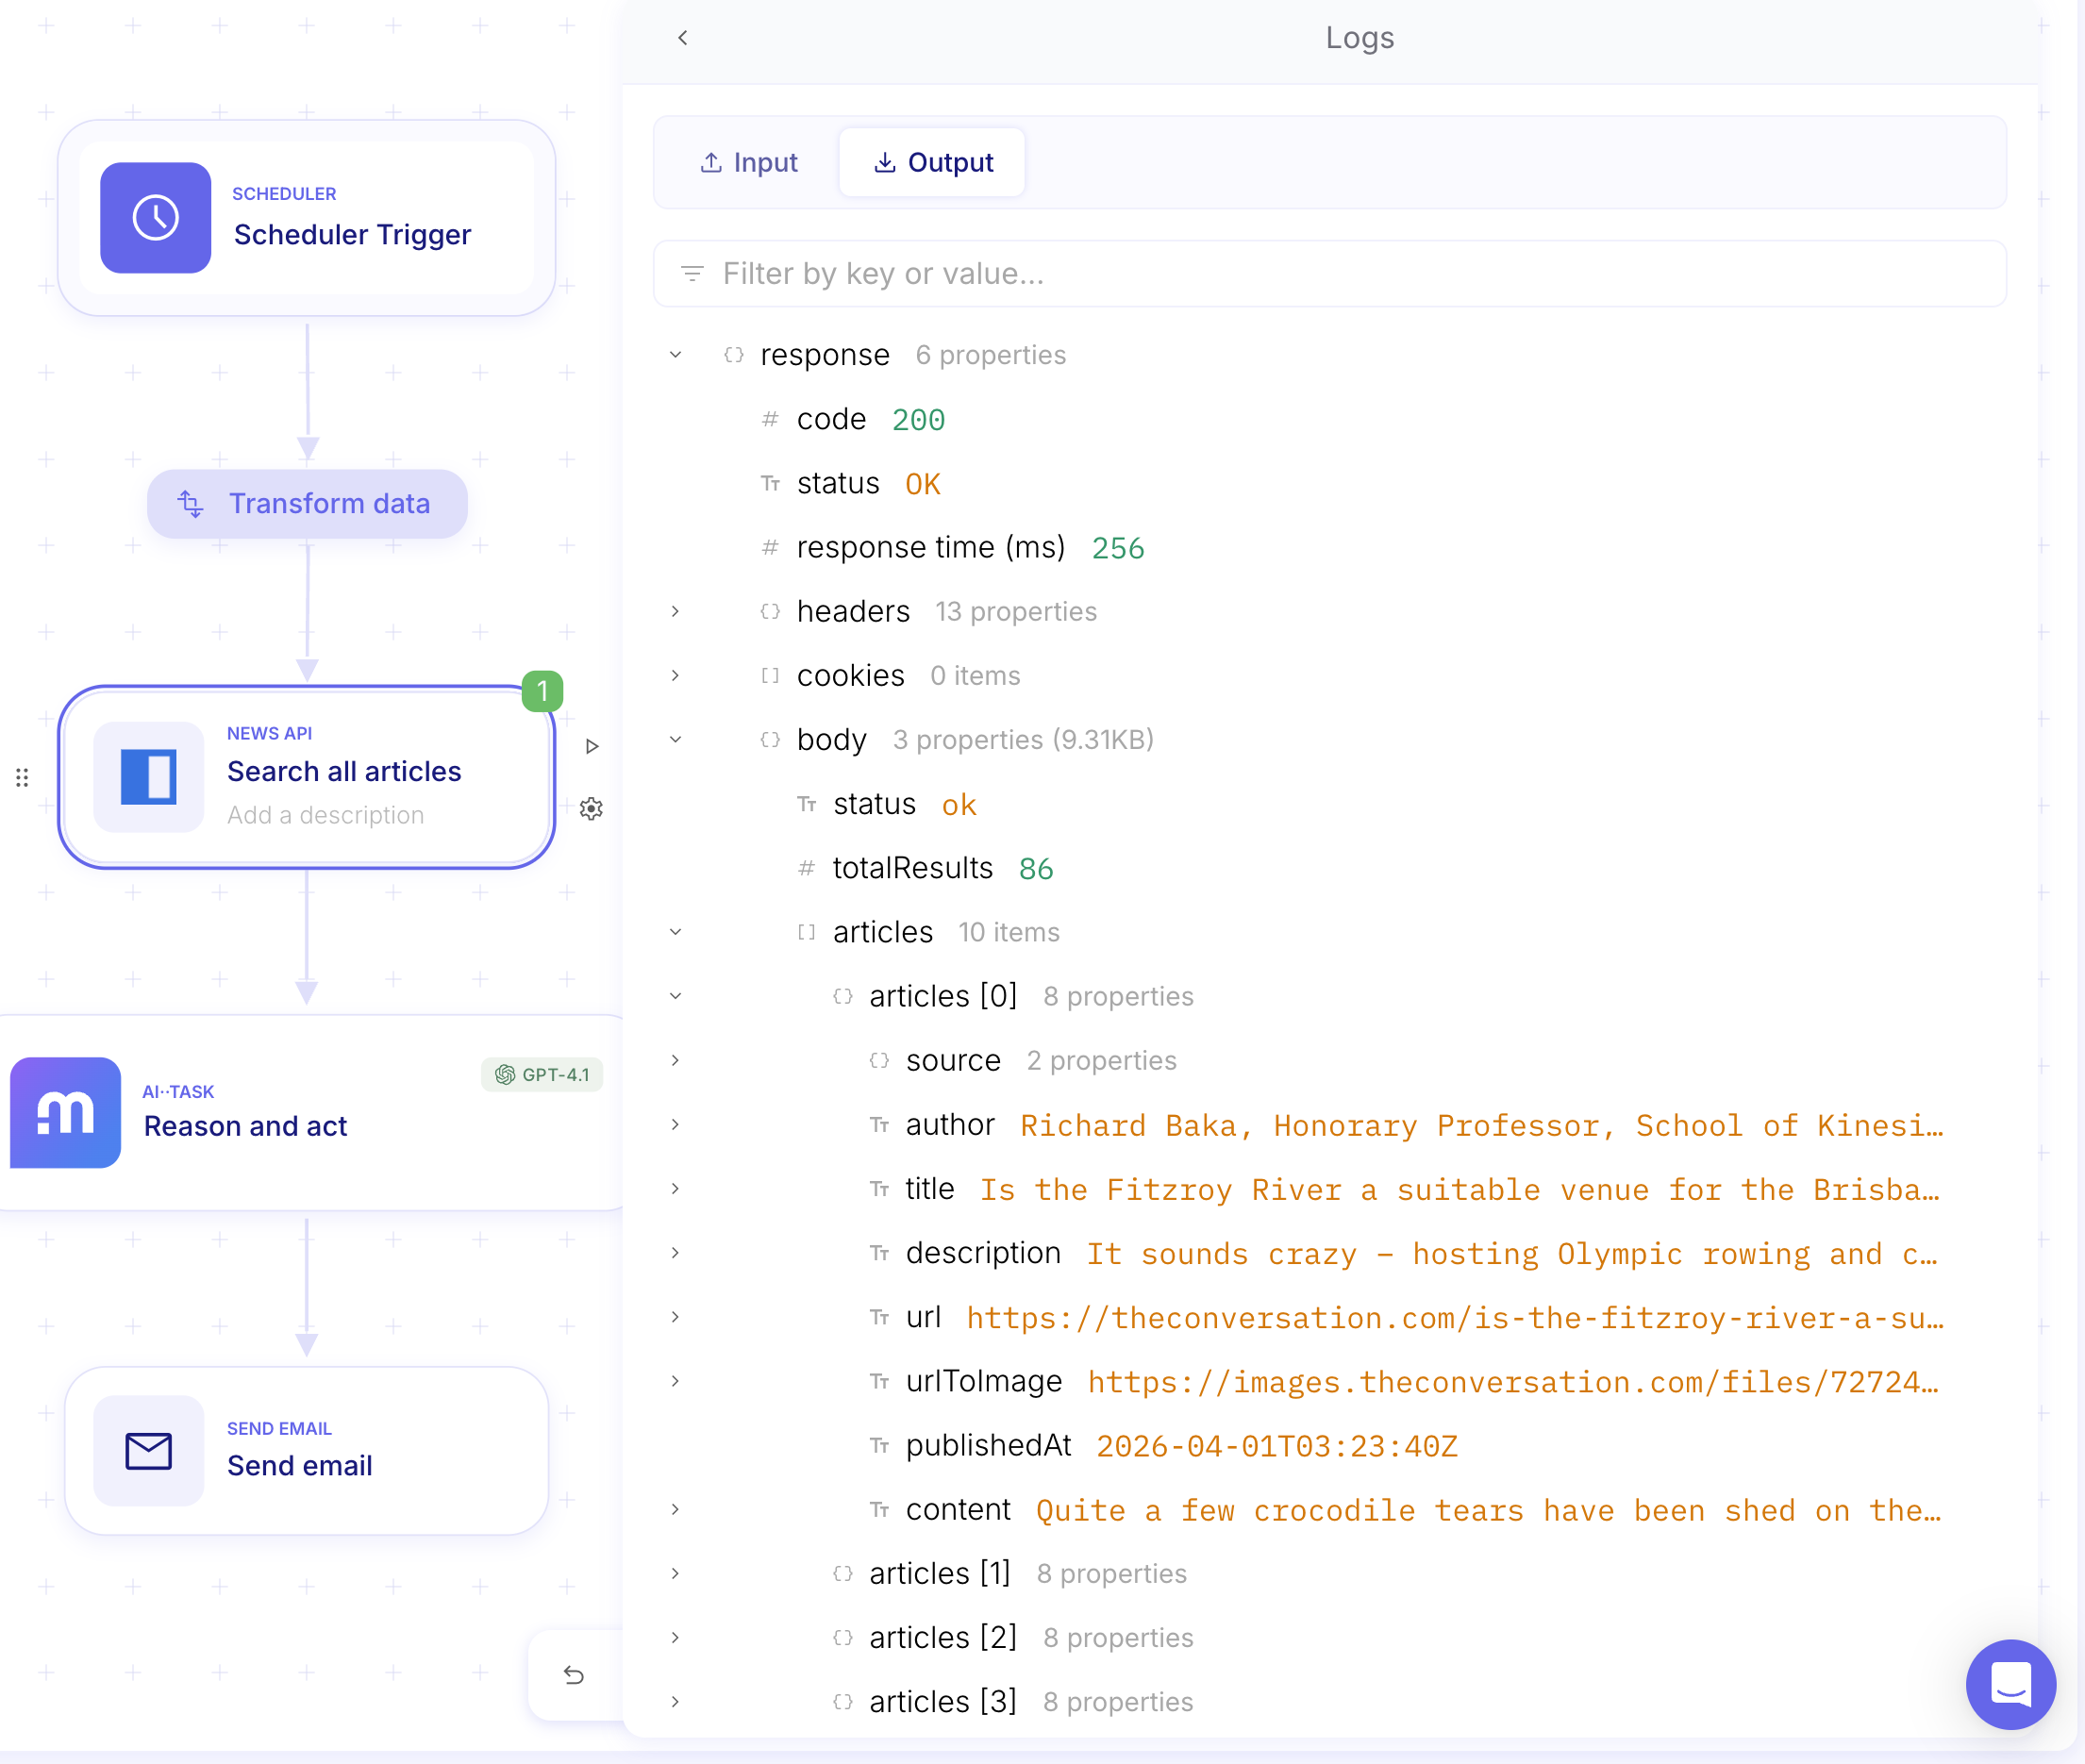
Once the pill turns green, the step ran successfully! Open the execution log (click the green pill or switch to the Logs tab) to inspect the response. You will find a body object containing totalResults and articles — an array of news article objects. Familiarise yourself with the JSON Viewer, then close the log.
Step 6: Summarise Articles with an AI··Task
Section titled “Step 6: Summarise Articles with an AI··Task”In Mindflow, AI··Tasks are agentic steps that can generate outputs, call APIs, and orchestrate sub-agents. Here, we will use one to turn raw article data into a polished HTML newsletter.
-
Add an AI··Task step below the NewsAPI step.
-
Open the configuration tab and set:
- Model: Choose your preferred LLM (e.g., Claude or GPT).
- Prompt: Type the following instruction, then type
/to open the Data Picker. Select the articles array from the NewsAPI step’s last execution — this creates a Data Pill that will inject the articles at runtime.
Provide a detailed summary of the following news articles. Not all of them may be relevant to my subject, which is: airport lounges.Answer, as a newsletter, with a nicely crafted HTML content.Include embedded URLs of selected articles.Only reply with the HTML, no backticks encapsulation.News: [articles Data Pill]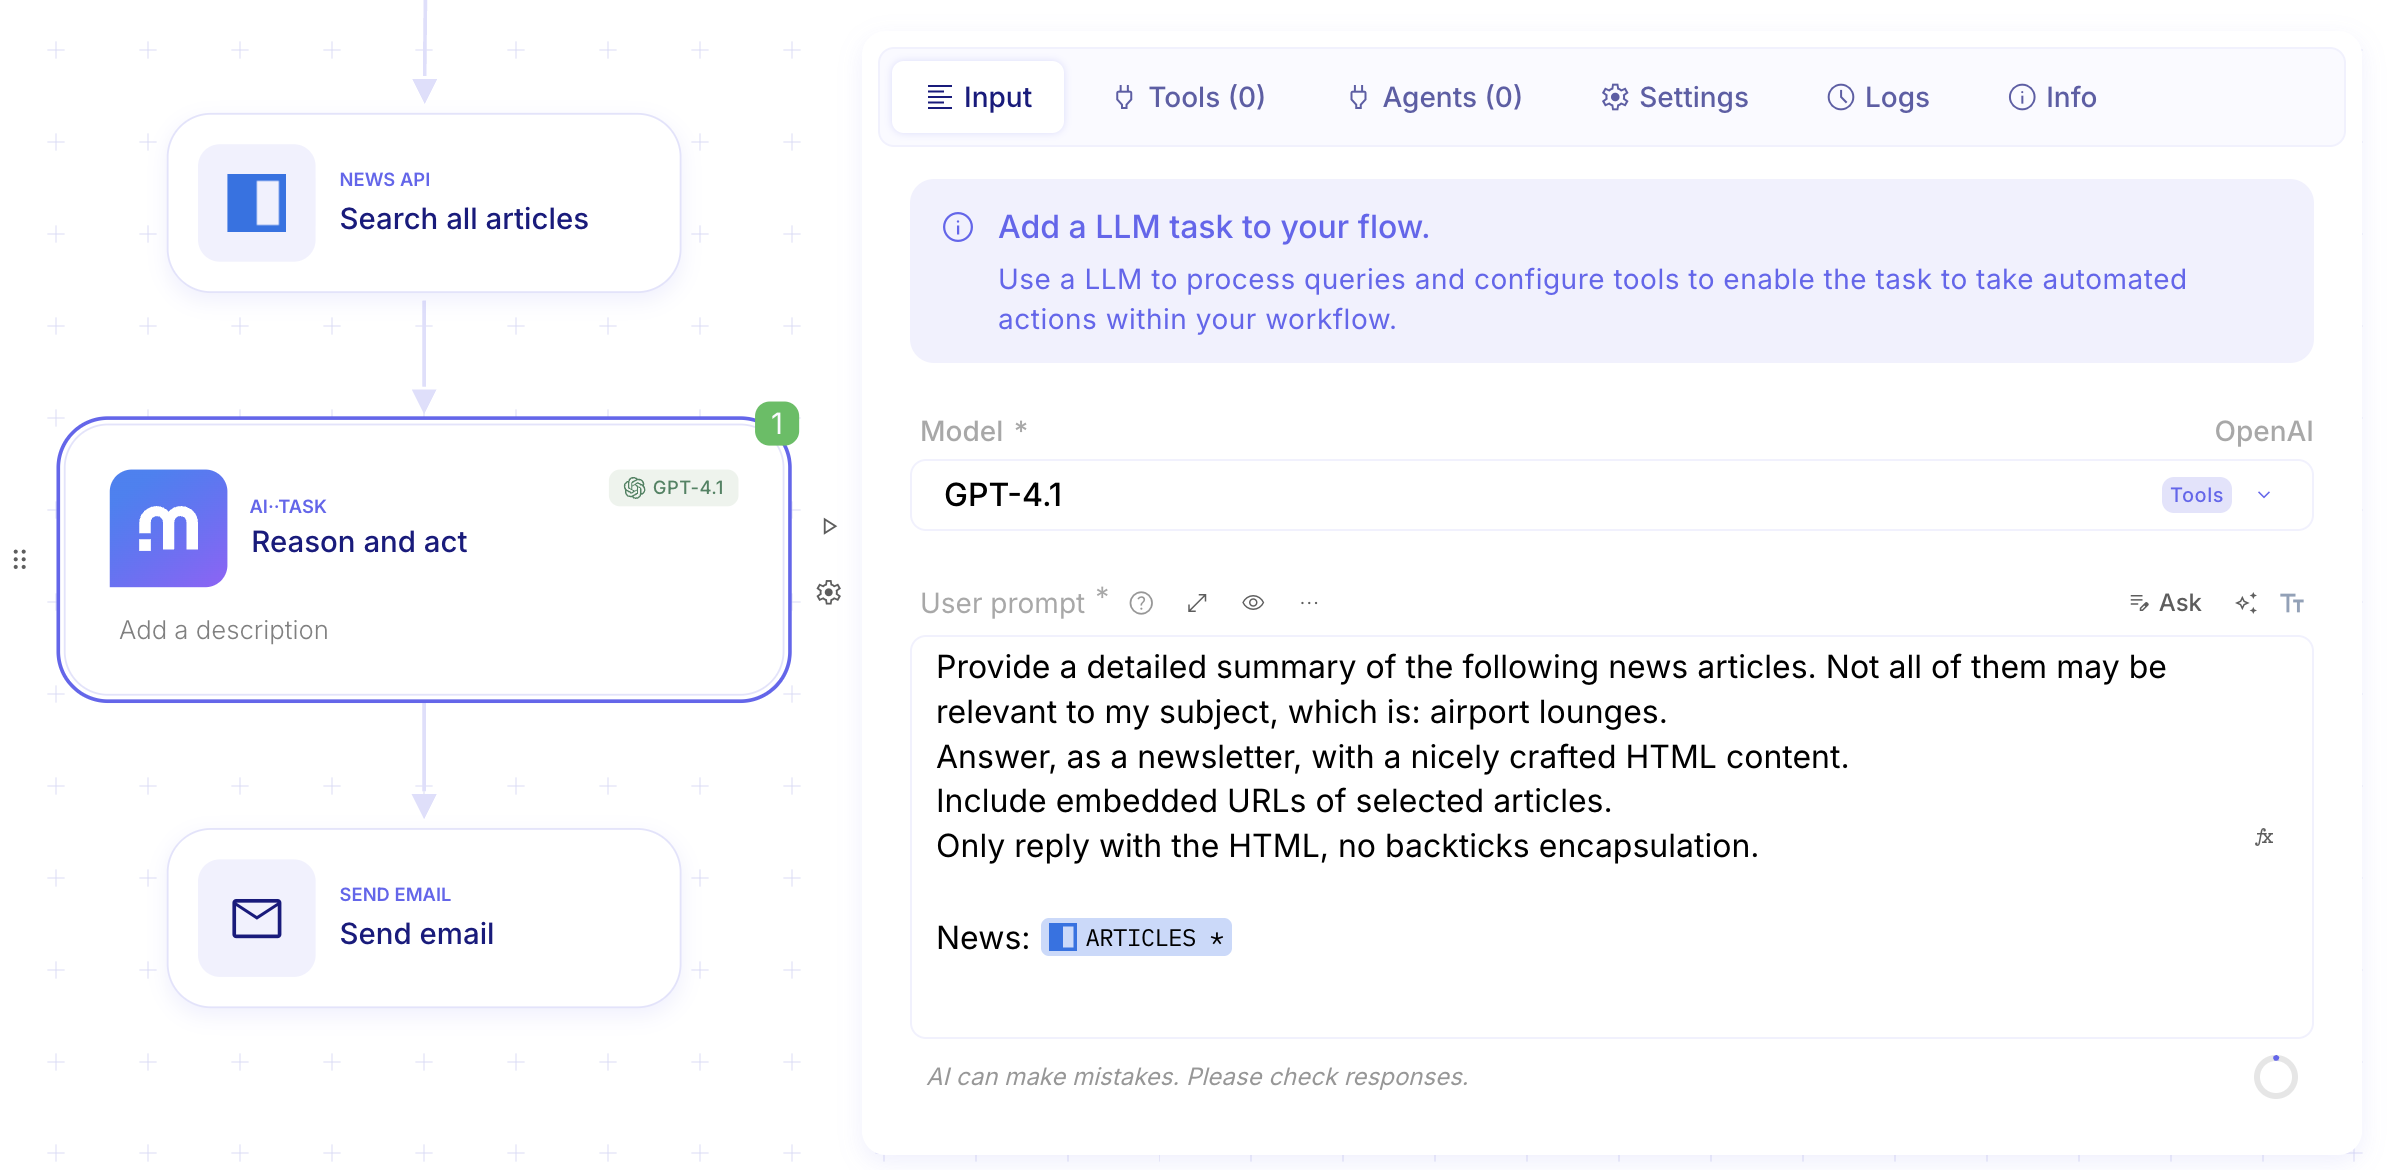
-
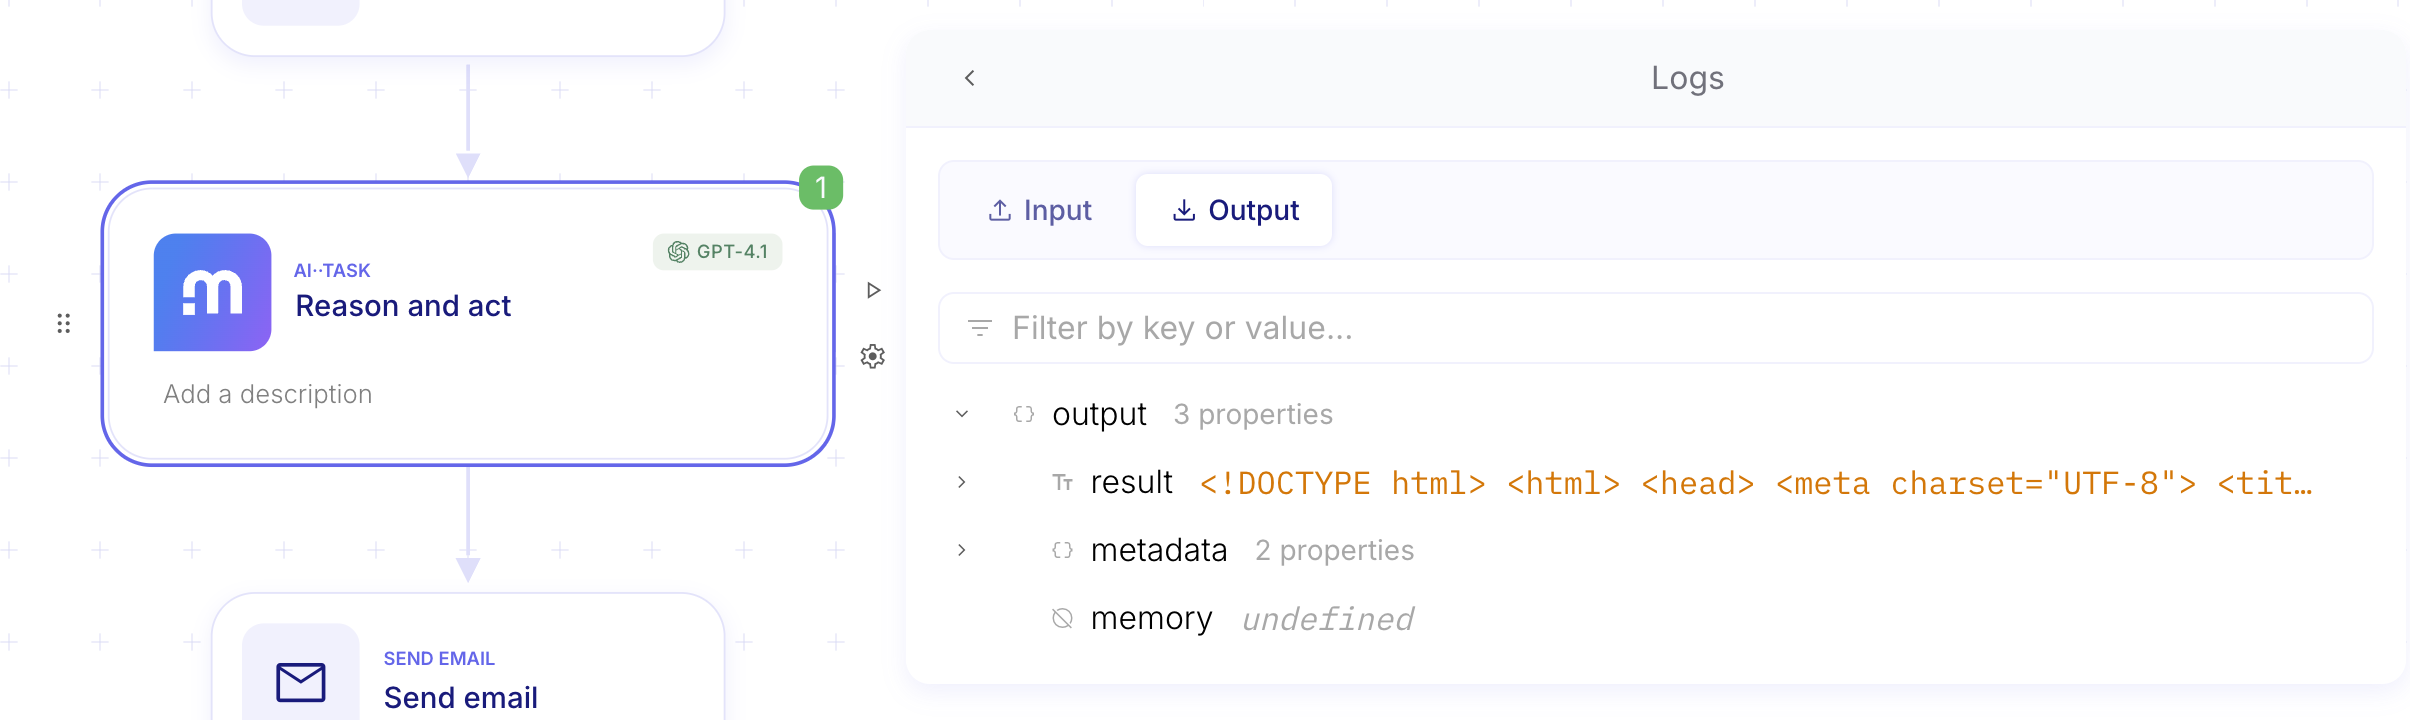
Click ▶️ to Dry run the step. Once complete, open the log — the result will be a ready-to-send HTML newsletter!
Step 7: Send the Newsletter by Email
Section titled “Step 7: Send the Newsletter by Email”The final step delivers the AI-generated newsletter straight to your inbox.
-
Add a Send Email step.
-
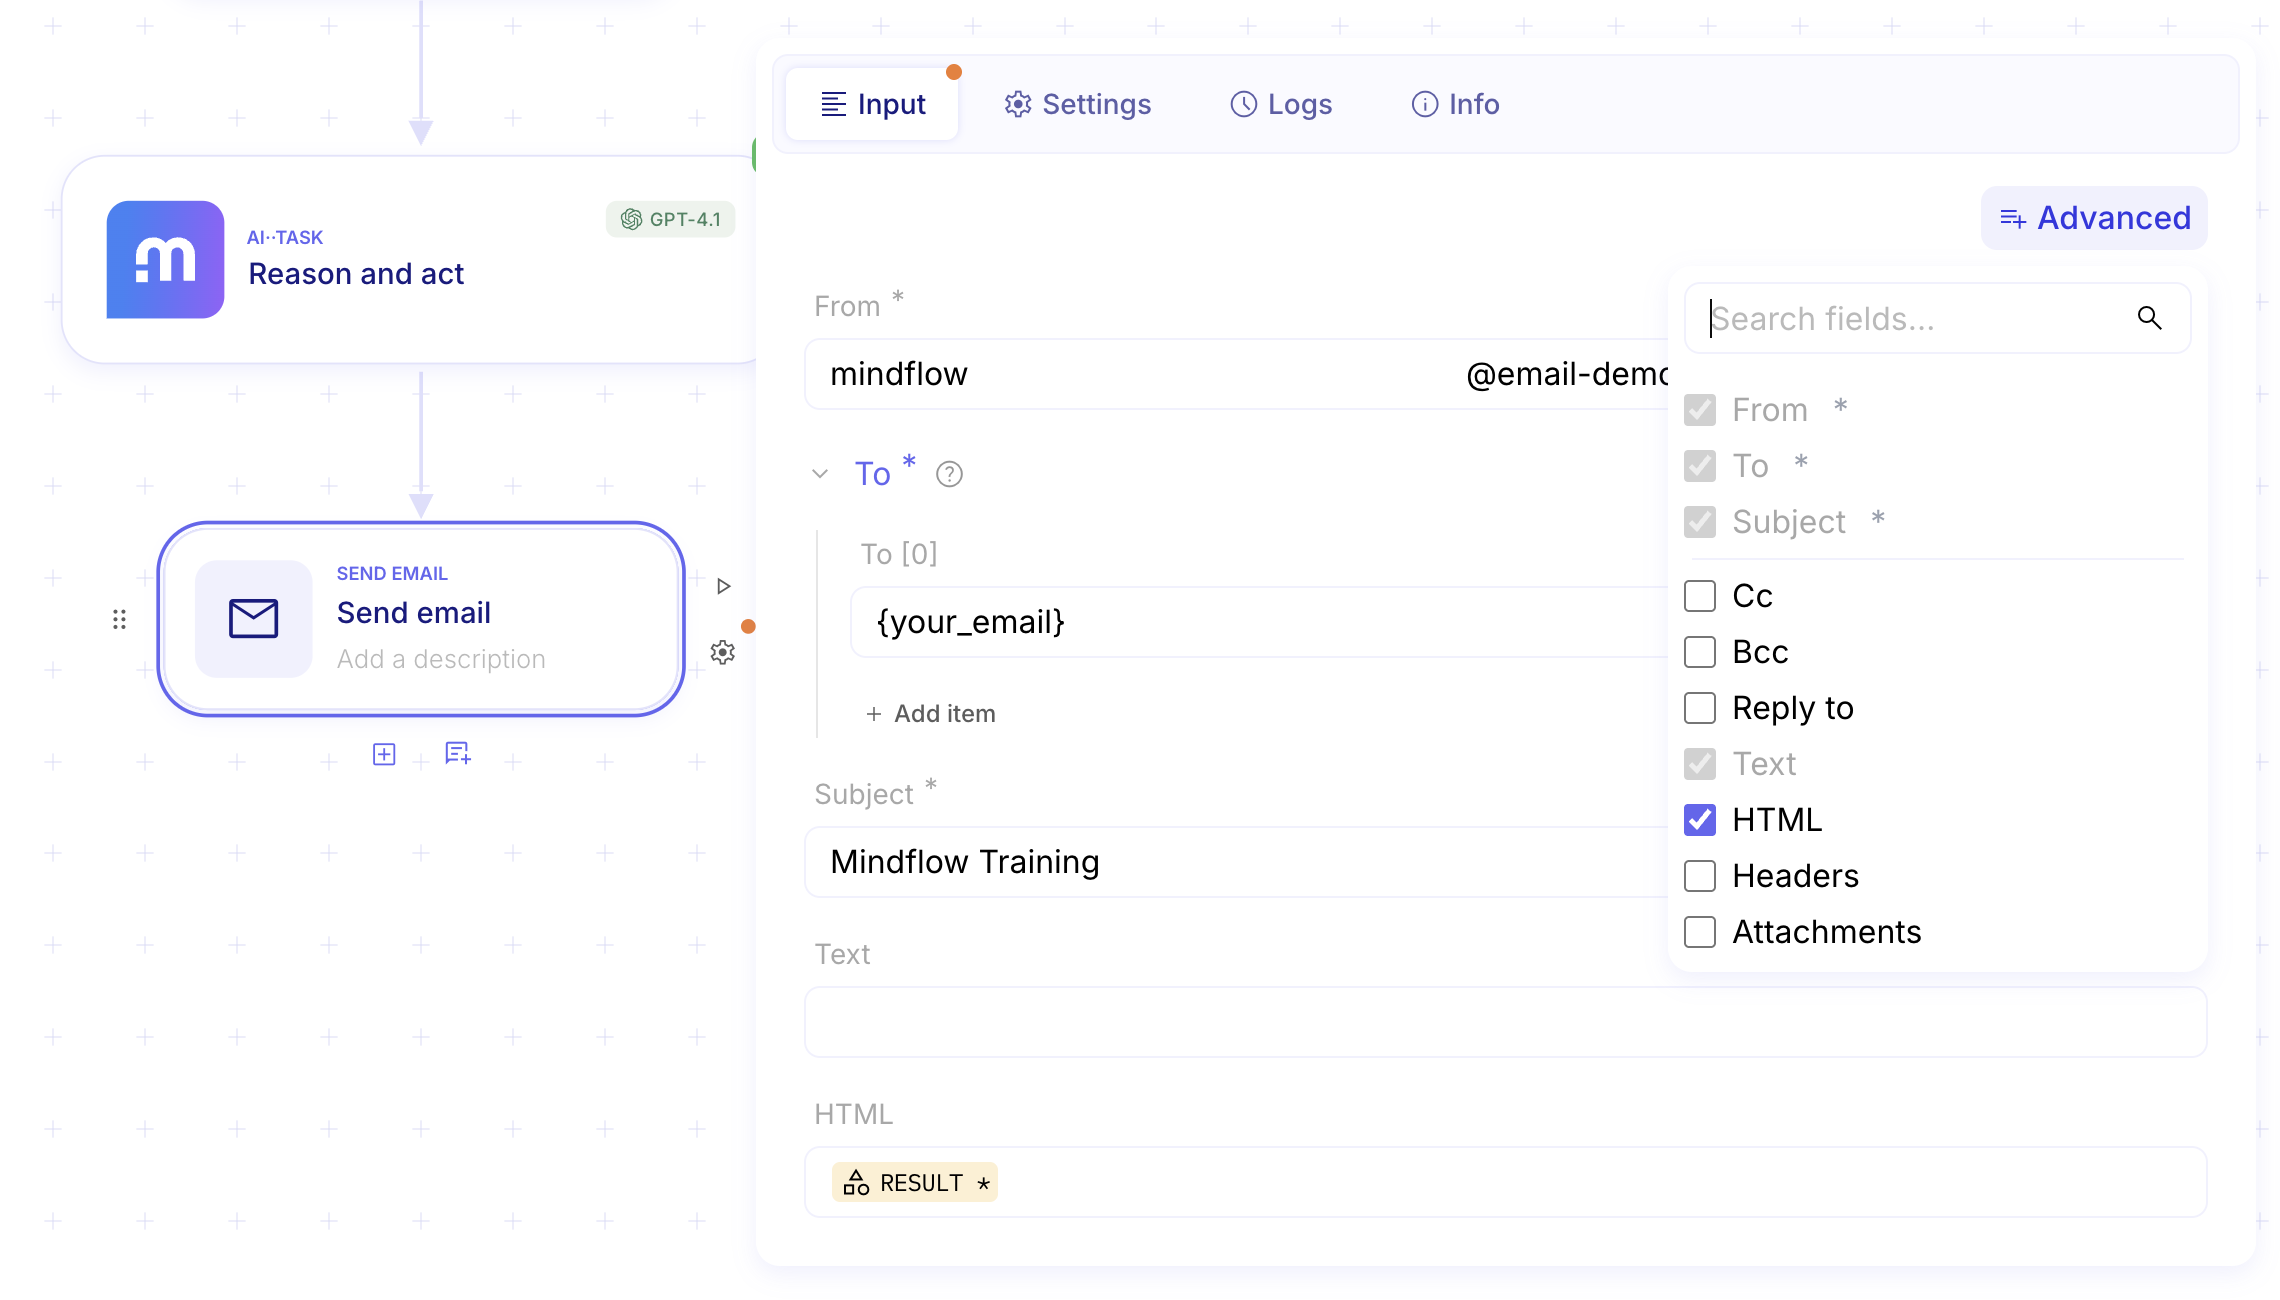
Configure it as follows:
- From: Leave as default, or customise the prefix.
- To: Enter your email address (add more recipients with Add item).
- Subject: e.g.,
✈️ Airport Lounges Weekly
-
Click Advanced in the top right of the panel and enable HTML.
-
In the HTML field, type
/to open the Data Picker. Navigate to the AI··Task step, select the last execution, and pick Results from the JSON Viewer.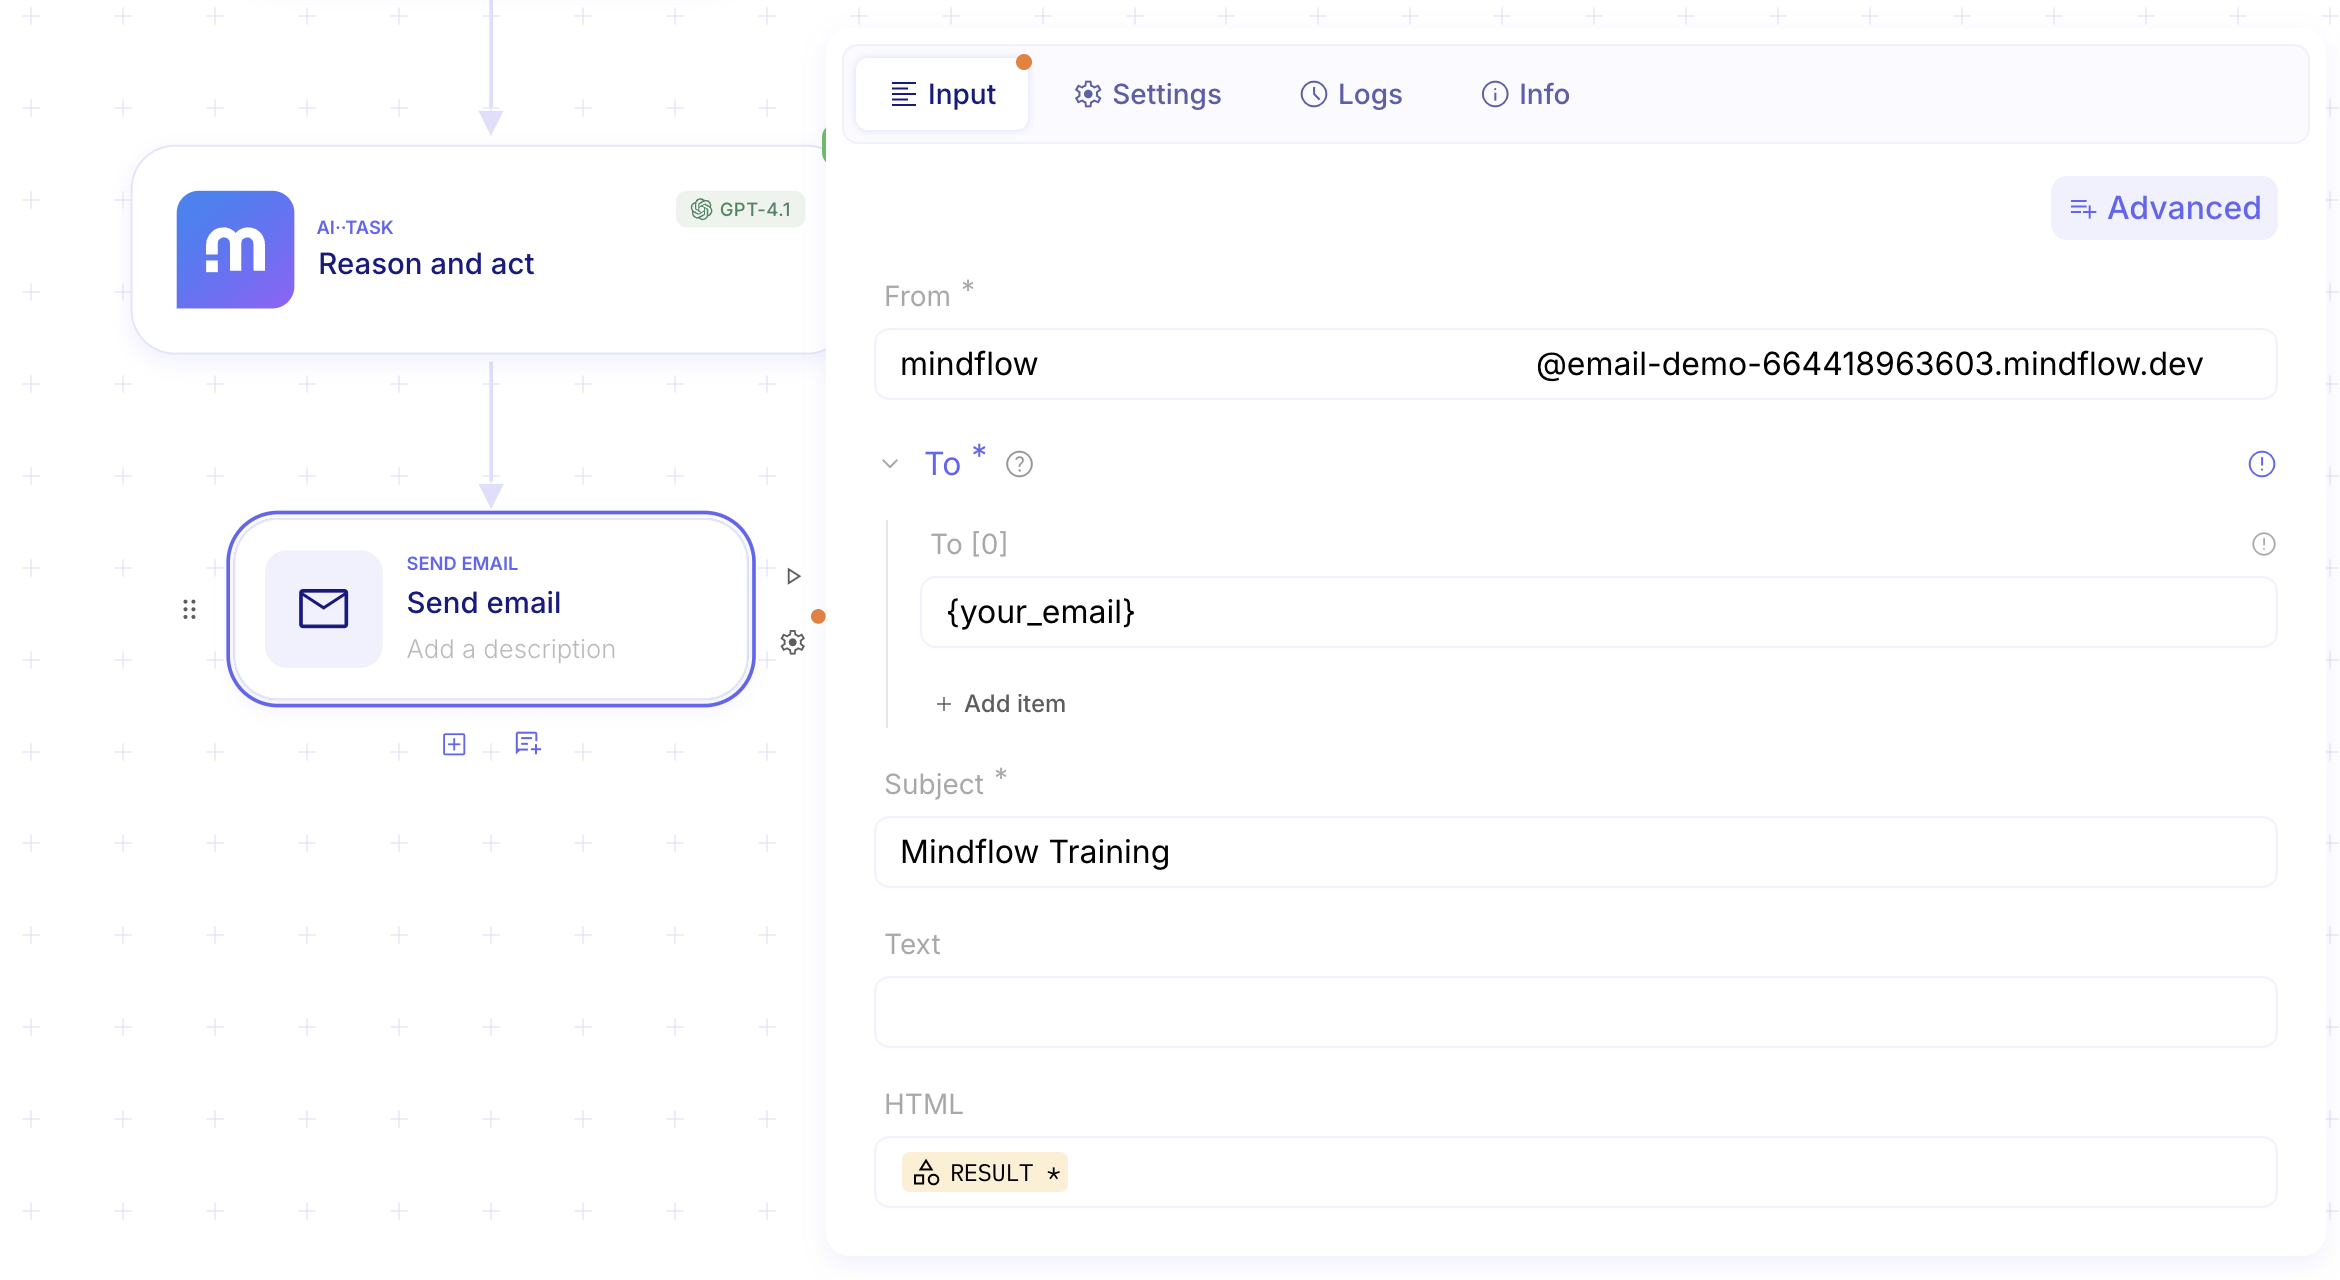
-
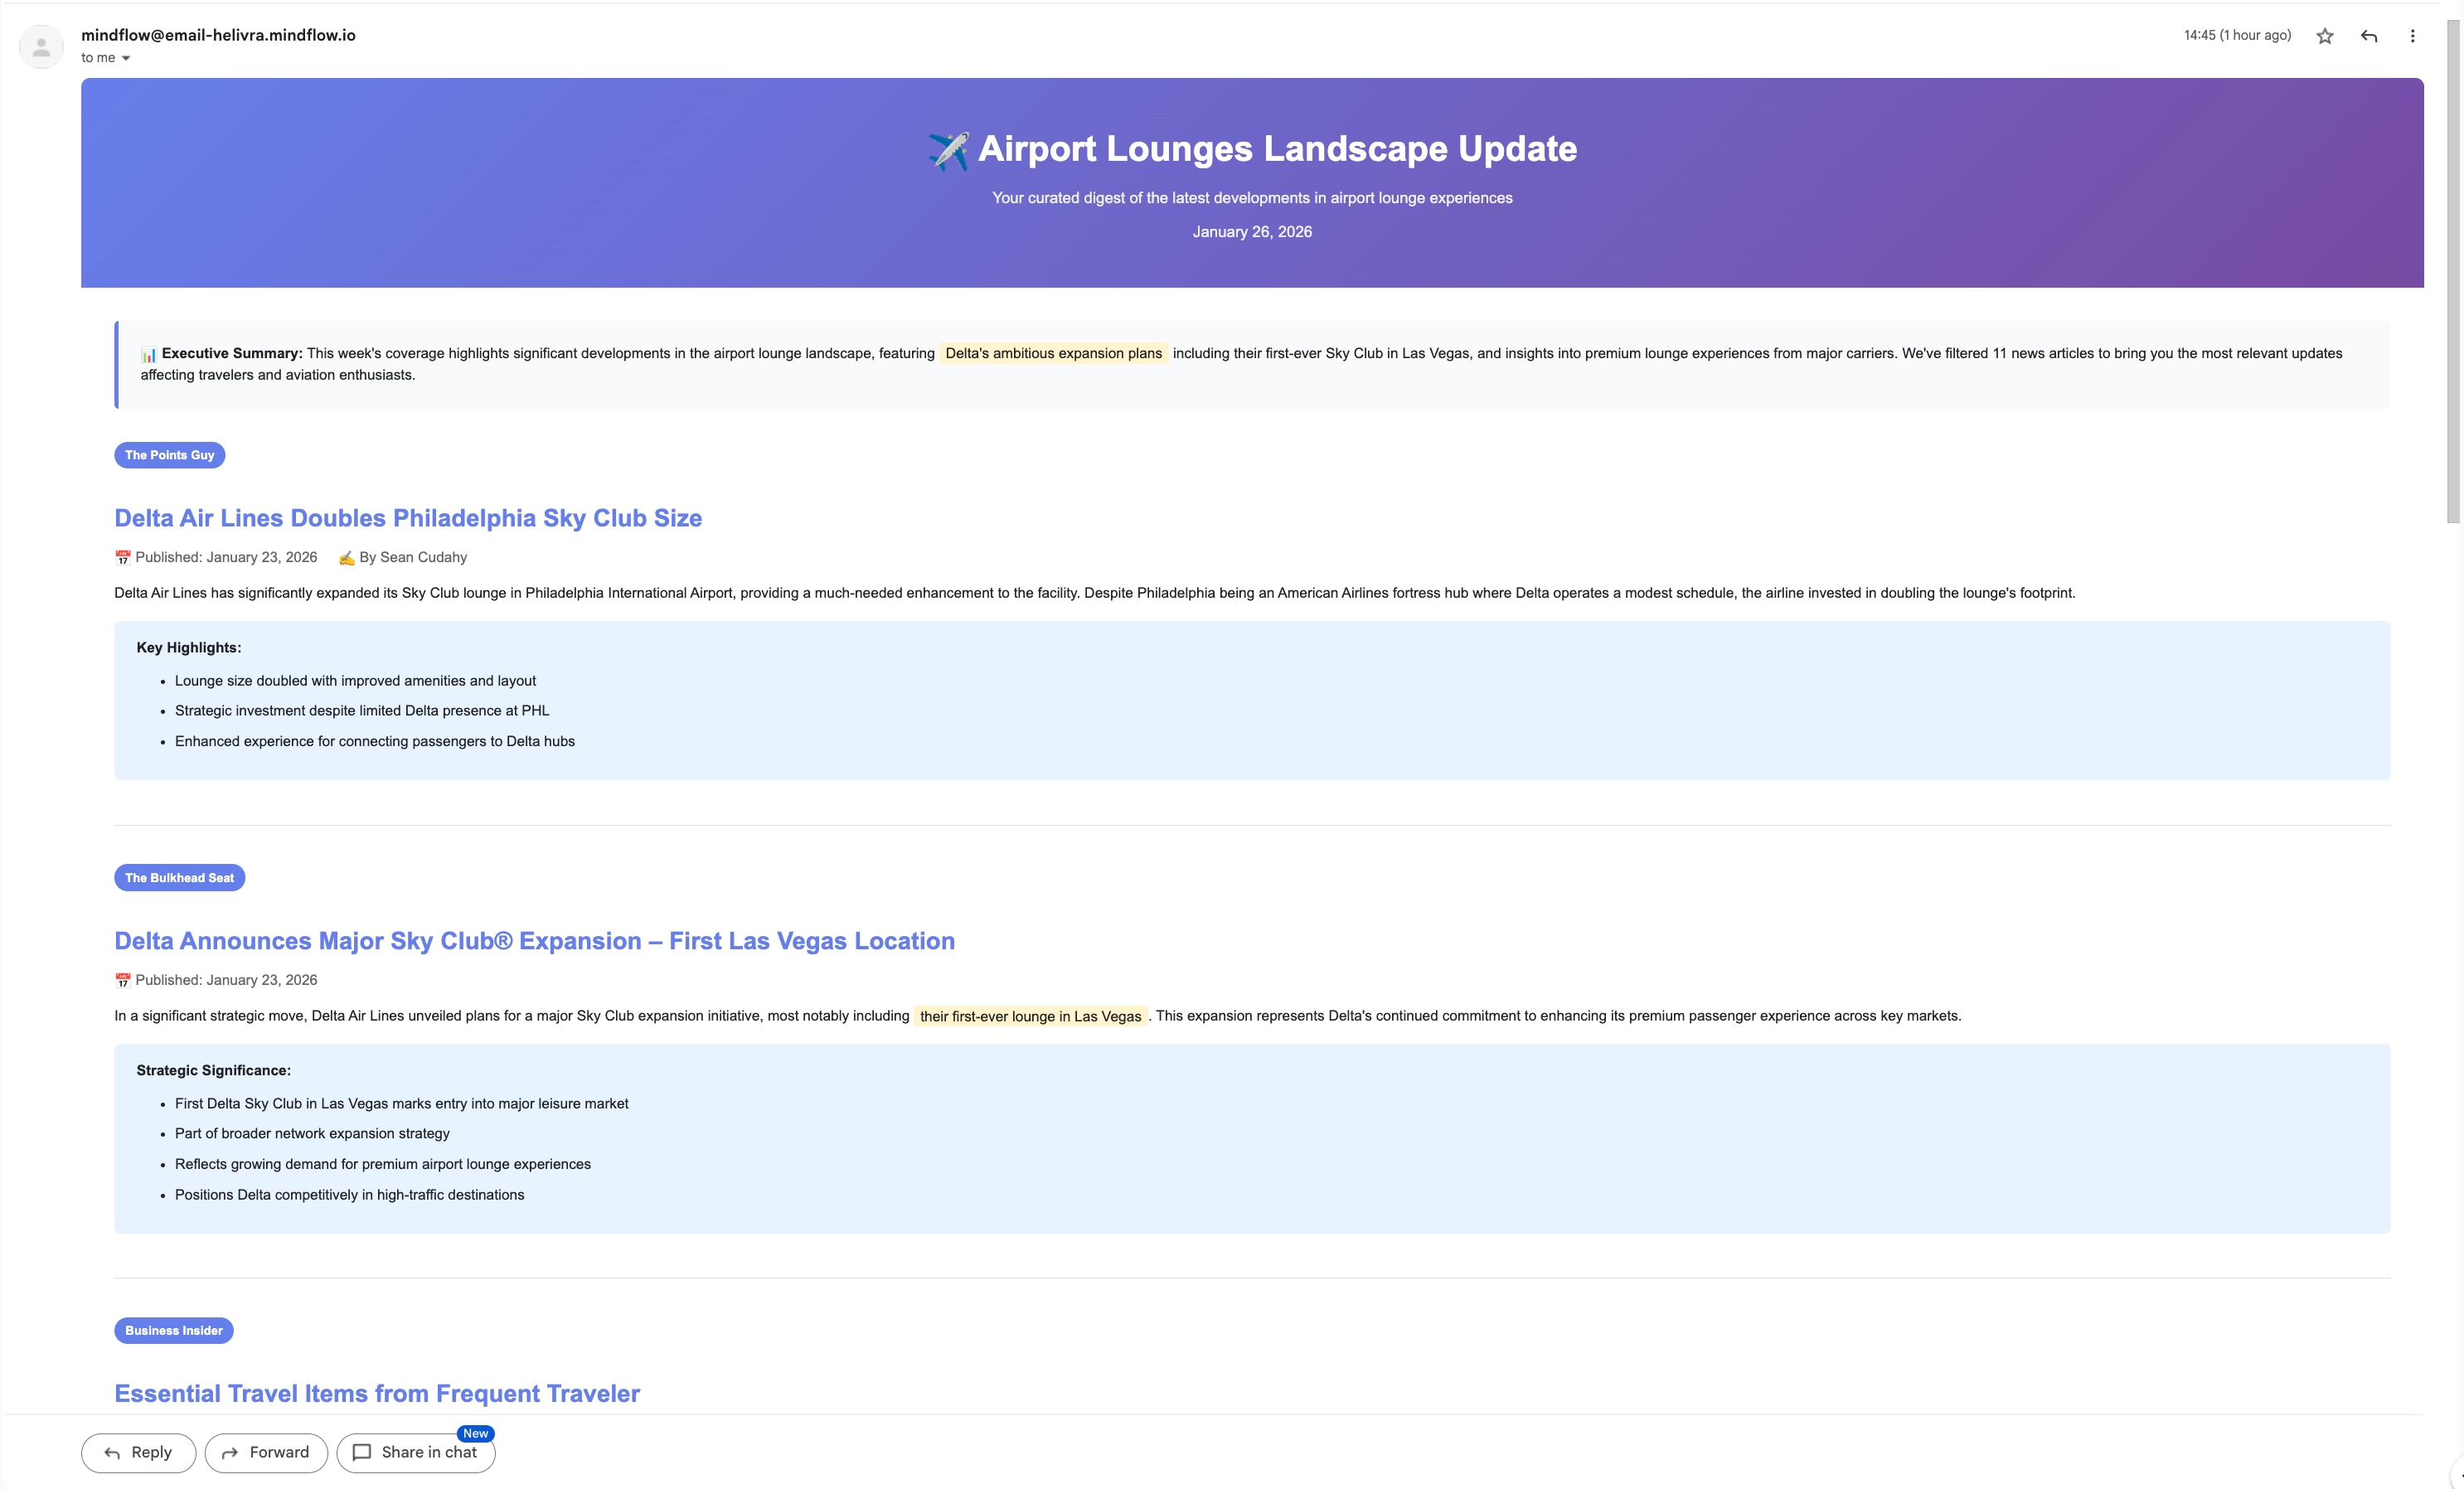
Dry run the step and check your inbox — your HTML newsletter should arrive within seconds!
First Flow — Complete
Section titled “First Flow — Complete”Congratulations! You have built your first end-to-end automated flow on Mindflow.
Every week, this flow will automatically fetch the latest airport lounge news, use AI to curate and format the content, and deliver a beautiful HTML newsletter to your inbox — without any manual intervention.
Ready to see it run in full? Click the ▶️ Play icon in the top left of the canvas, or press ⌘+P (or Ctrl+P on Windows).
In Lesson #2: Process lists with AI, you will go further: handling lists of data with For Each loops, empowering AI··Tasks with external tool calls, and parsing complex API responses.