

Lesson #3: Route work with subflows
After Lesson #1 and Lesson #2, build modular, intelligent workflows.
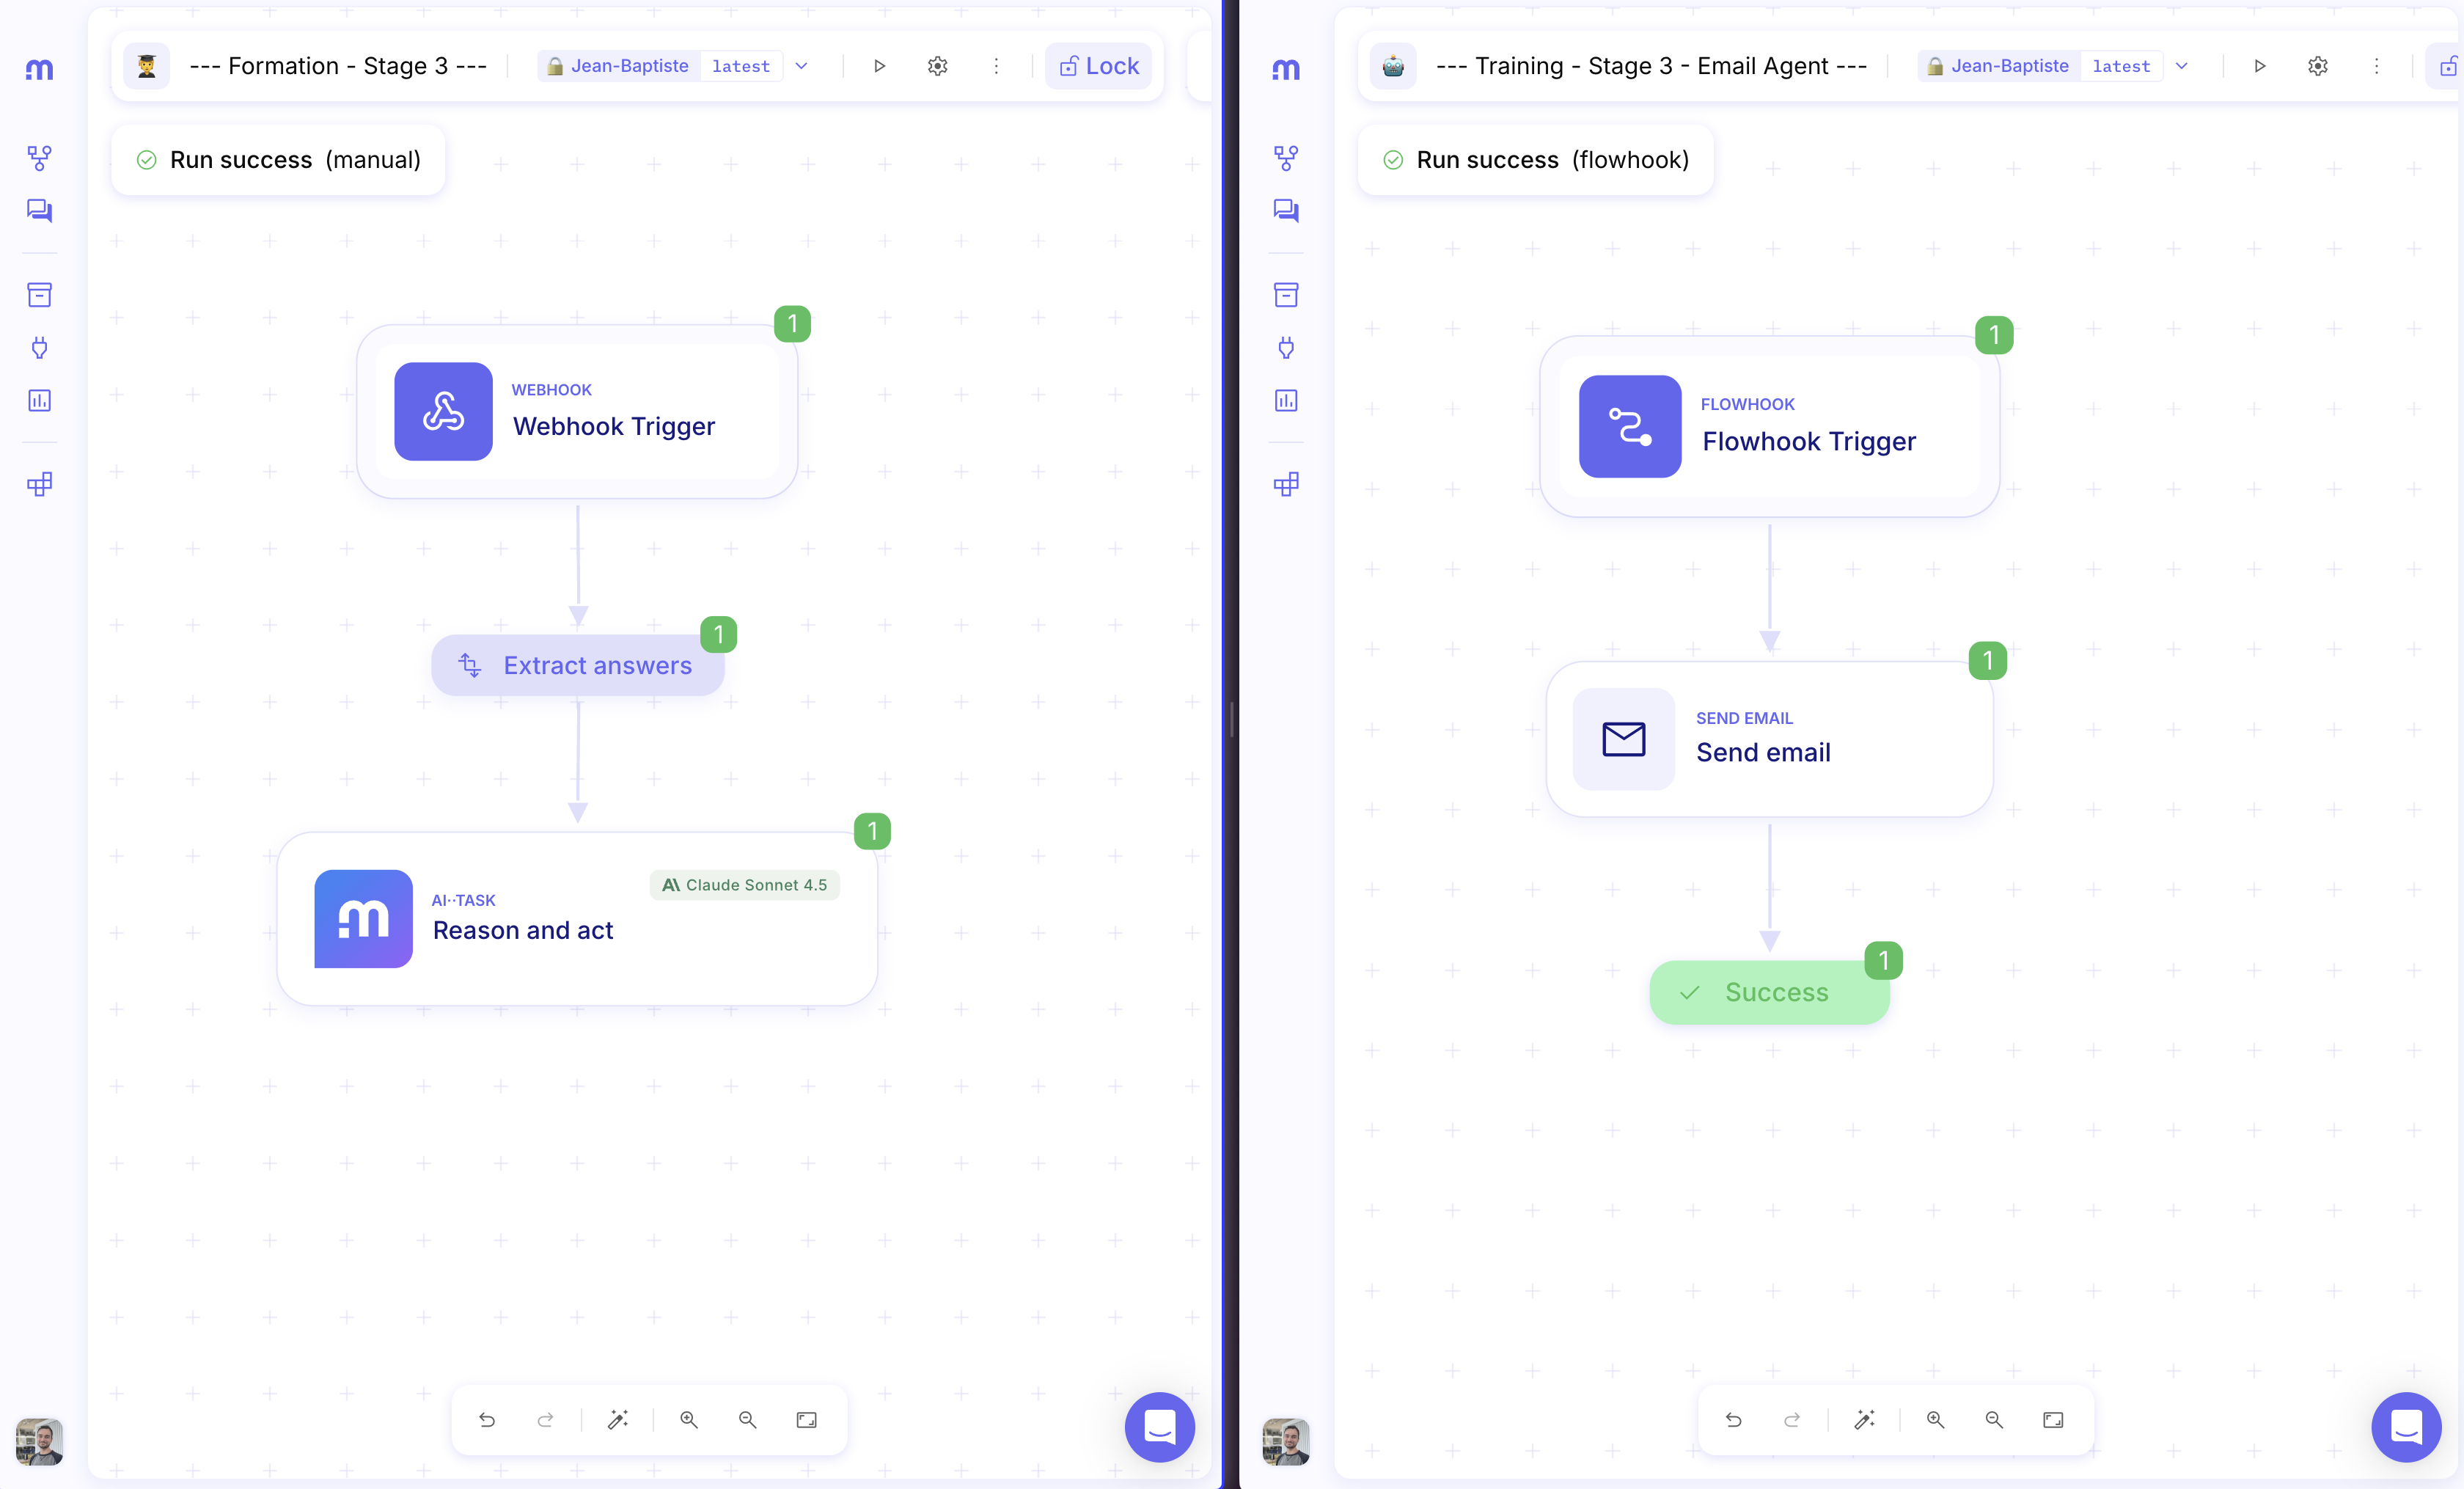
In this lesson, you will break down playbooks with Subflows, use AI··Tasks, and manipulate payloads with Internal Dictionaries and JSONPath.
The Use Case: Automated Customer Support Triage
Section titled “The Use Case: Automated Customer Support Triage”To illustrate these concepts, we will build a customer service workflow using Typeform and Email.
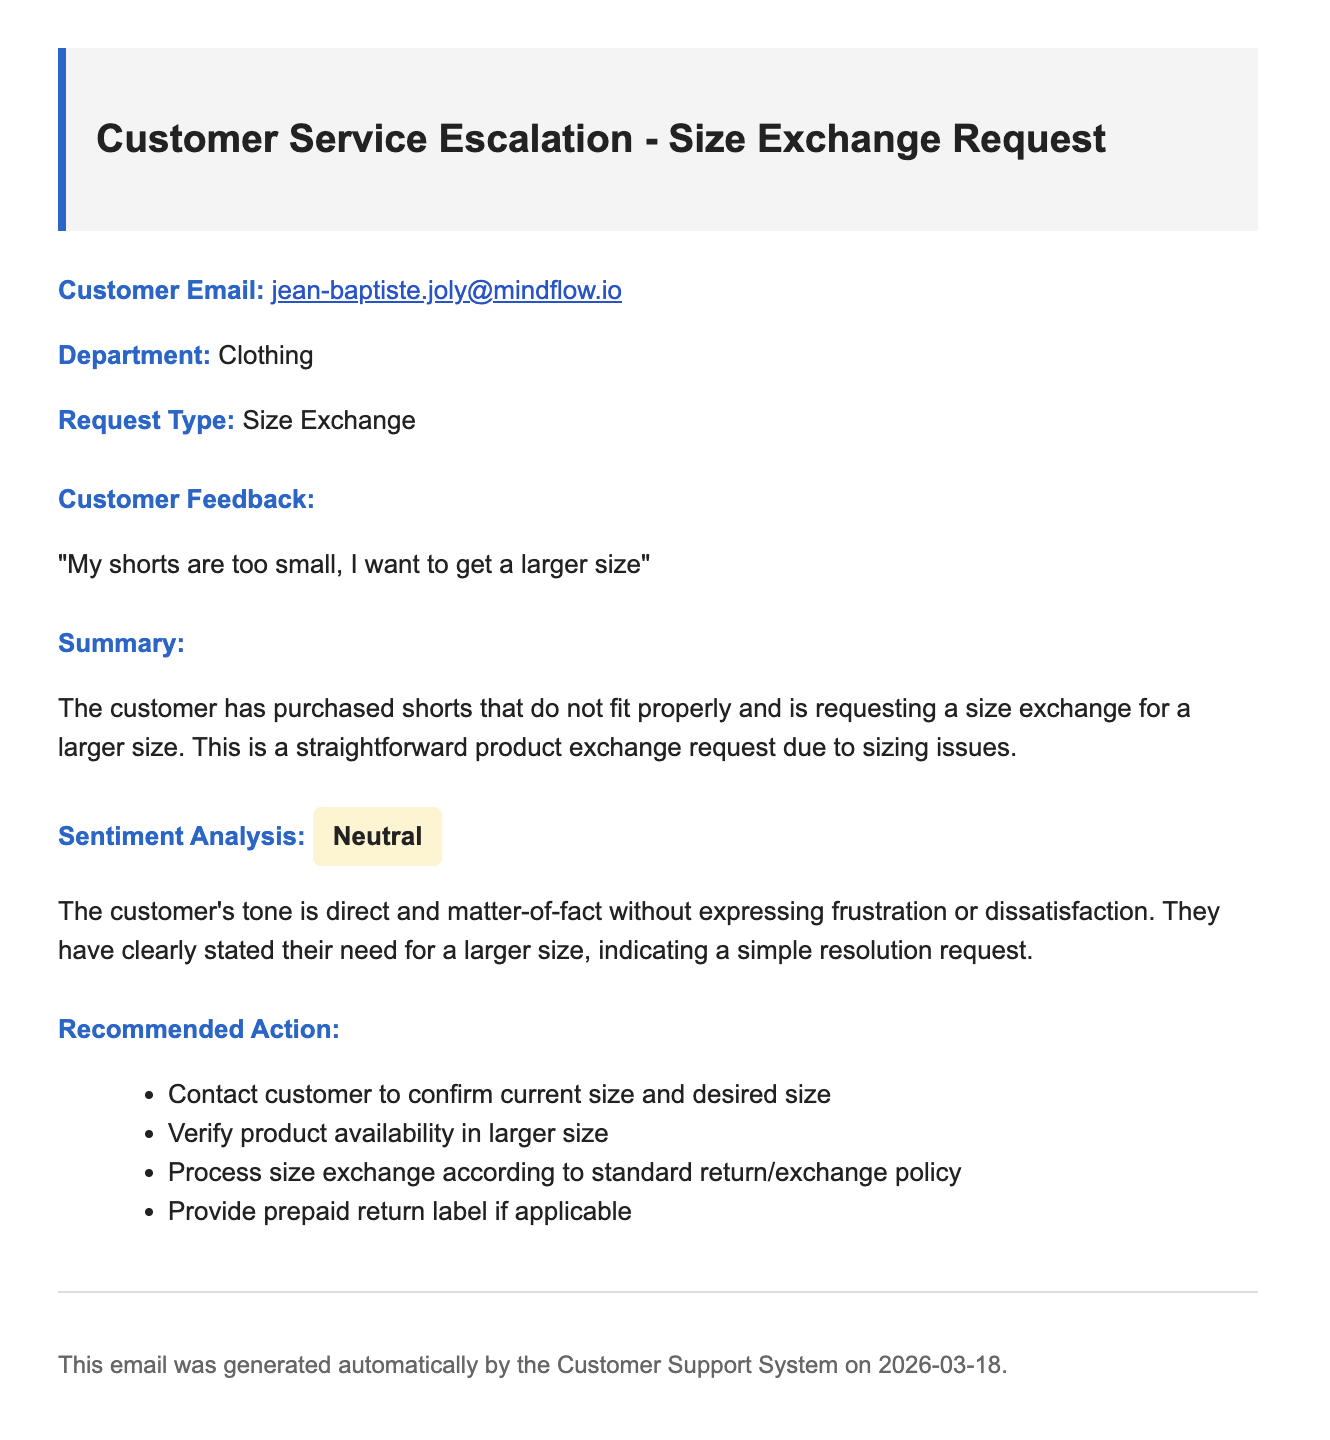
The Scenario: When a customer submits a feedback form via Typeform, our main playbook will catch the data. It will use an AI··Task to analyze the sentiment of the message and draft a clear internal escalation email. Then, an internal dictionary will determine which department should handle the ticket based on the product category. Finally, the main playbook will trigger a Subflow to send this AI-generated summary to the correct team via Email.
Prerequisites: Creating the Typeform
Section titled “Prerequisites: Creating the Typeform”To ensure our Mindflow playbook works perfectly, we first need to set up the form that will act as our Trigger. Typeform’s free version is more than enough for this exercise.
Step A: Create the form structure
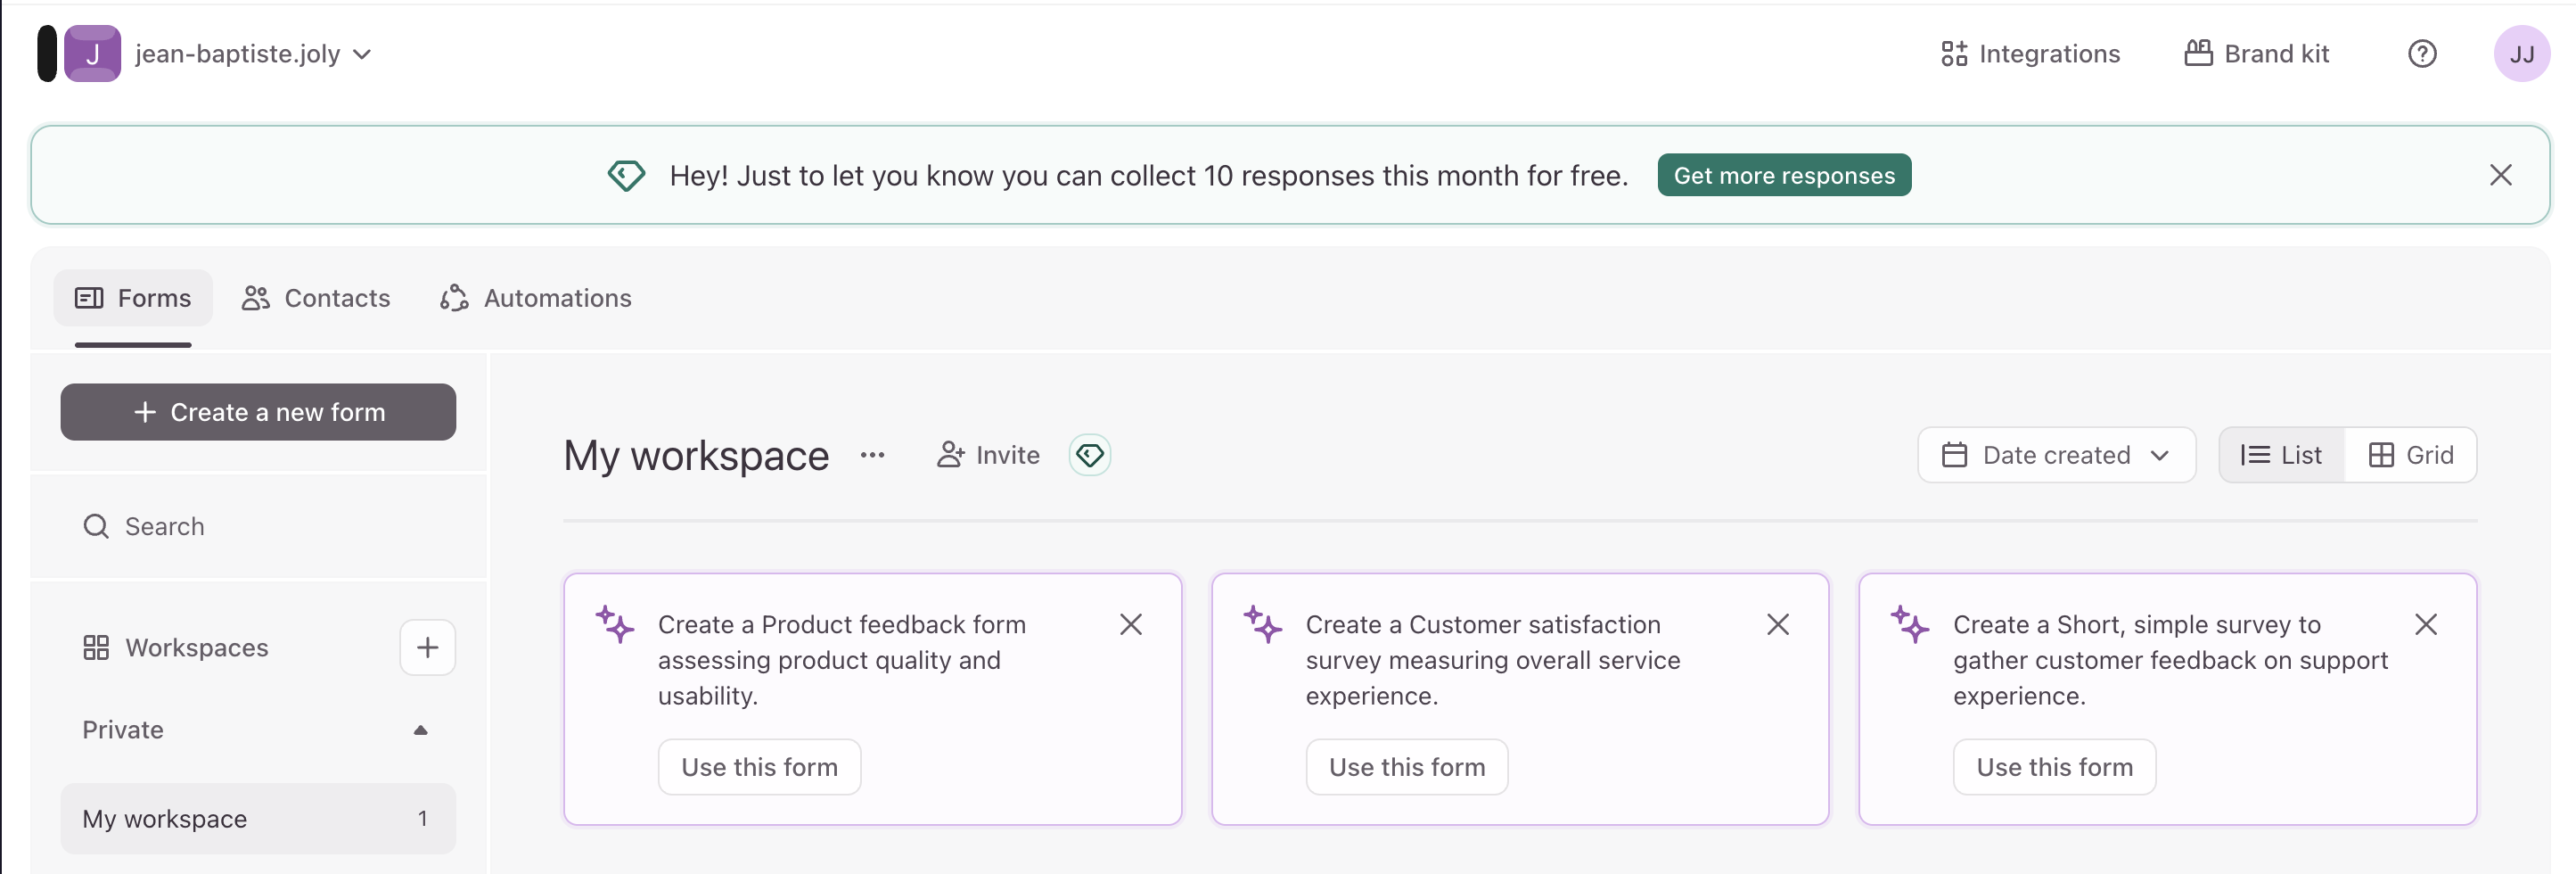
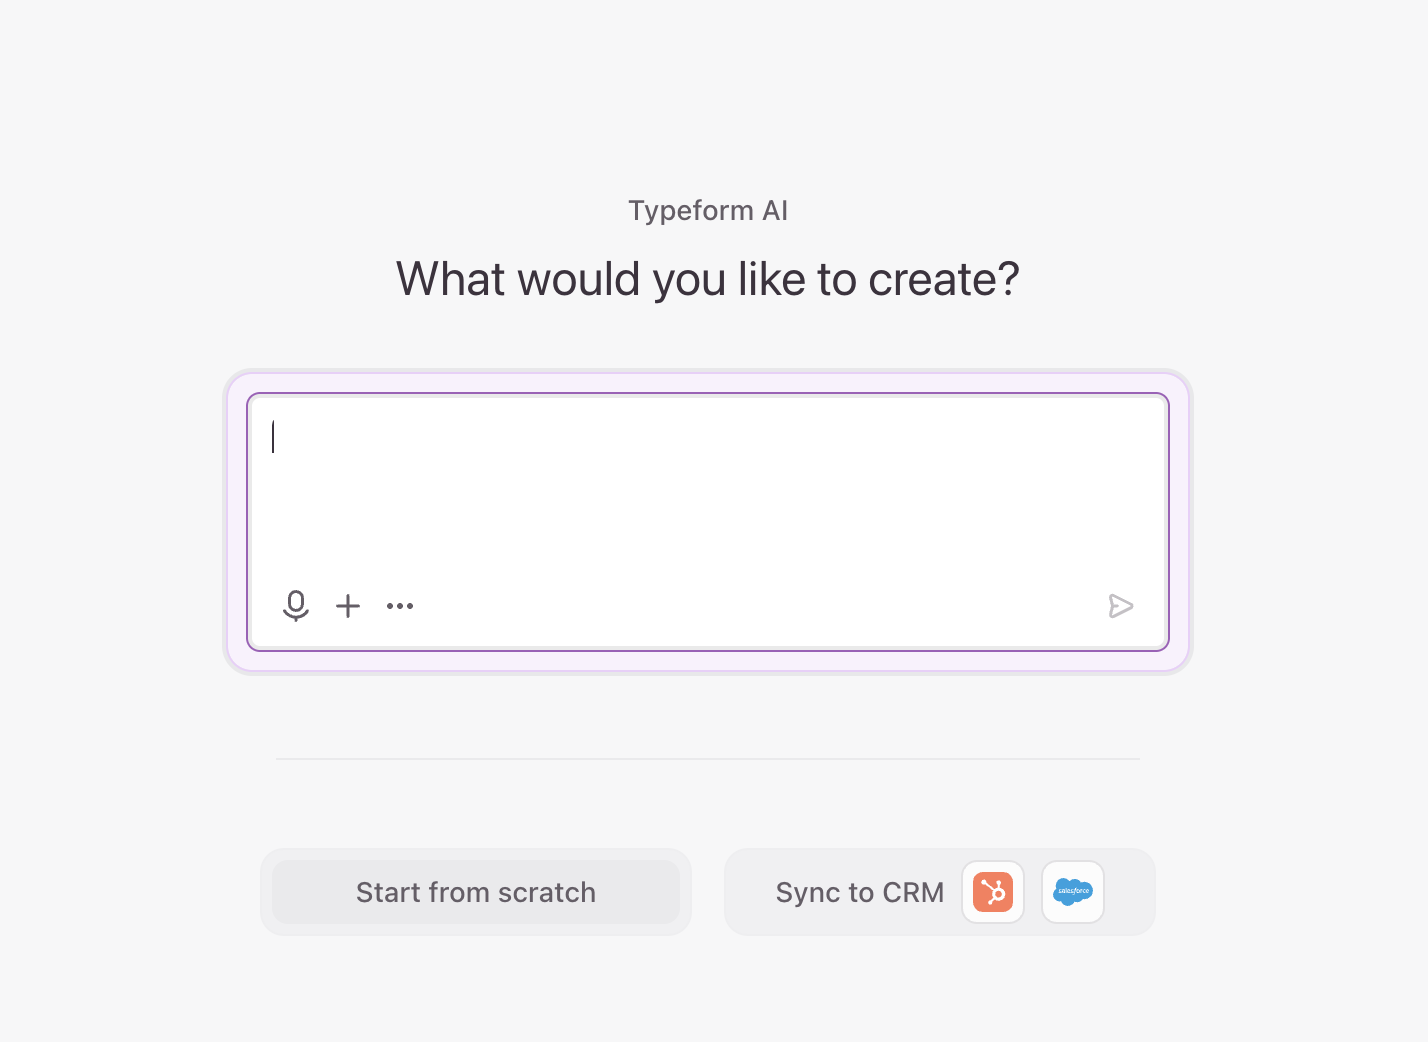
Section titled “Step A: Create the form structure”Log into your Typeform account, click on Create a new form, and select Start from scratch.
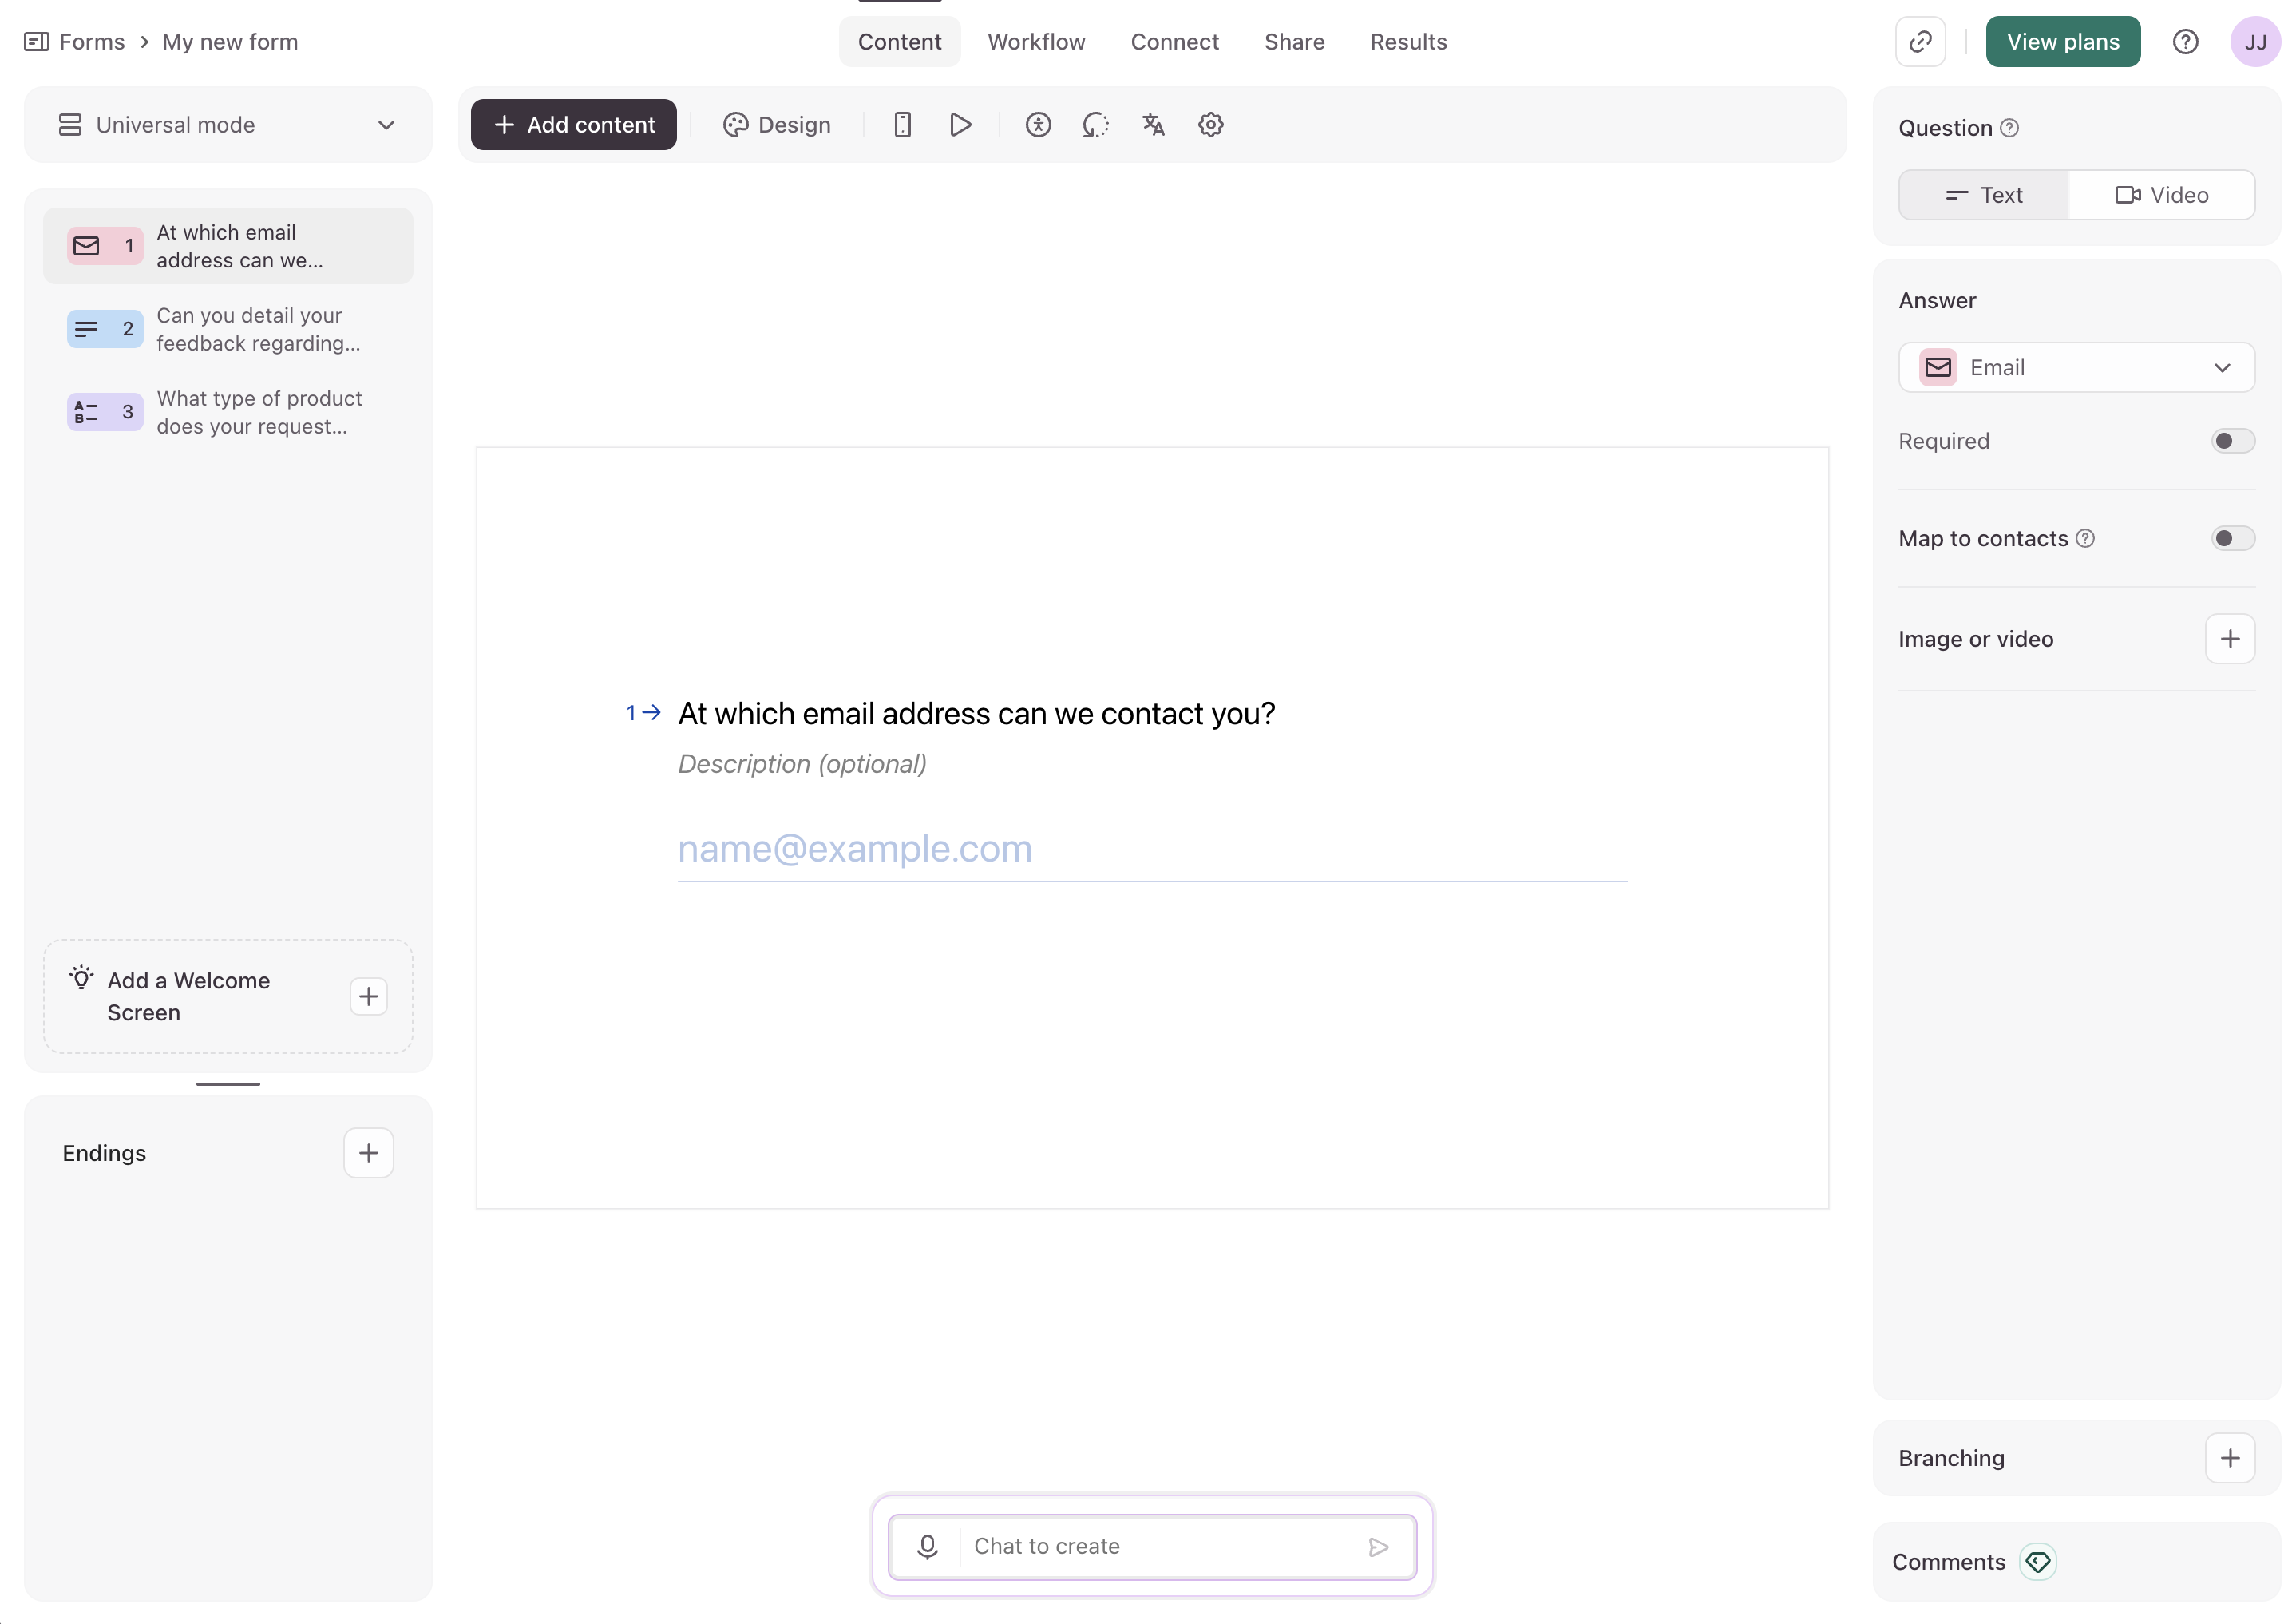
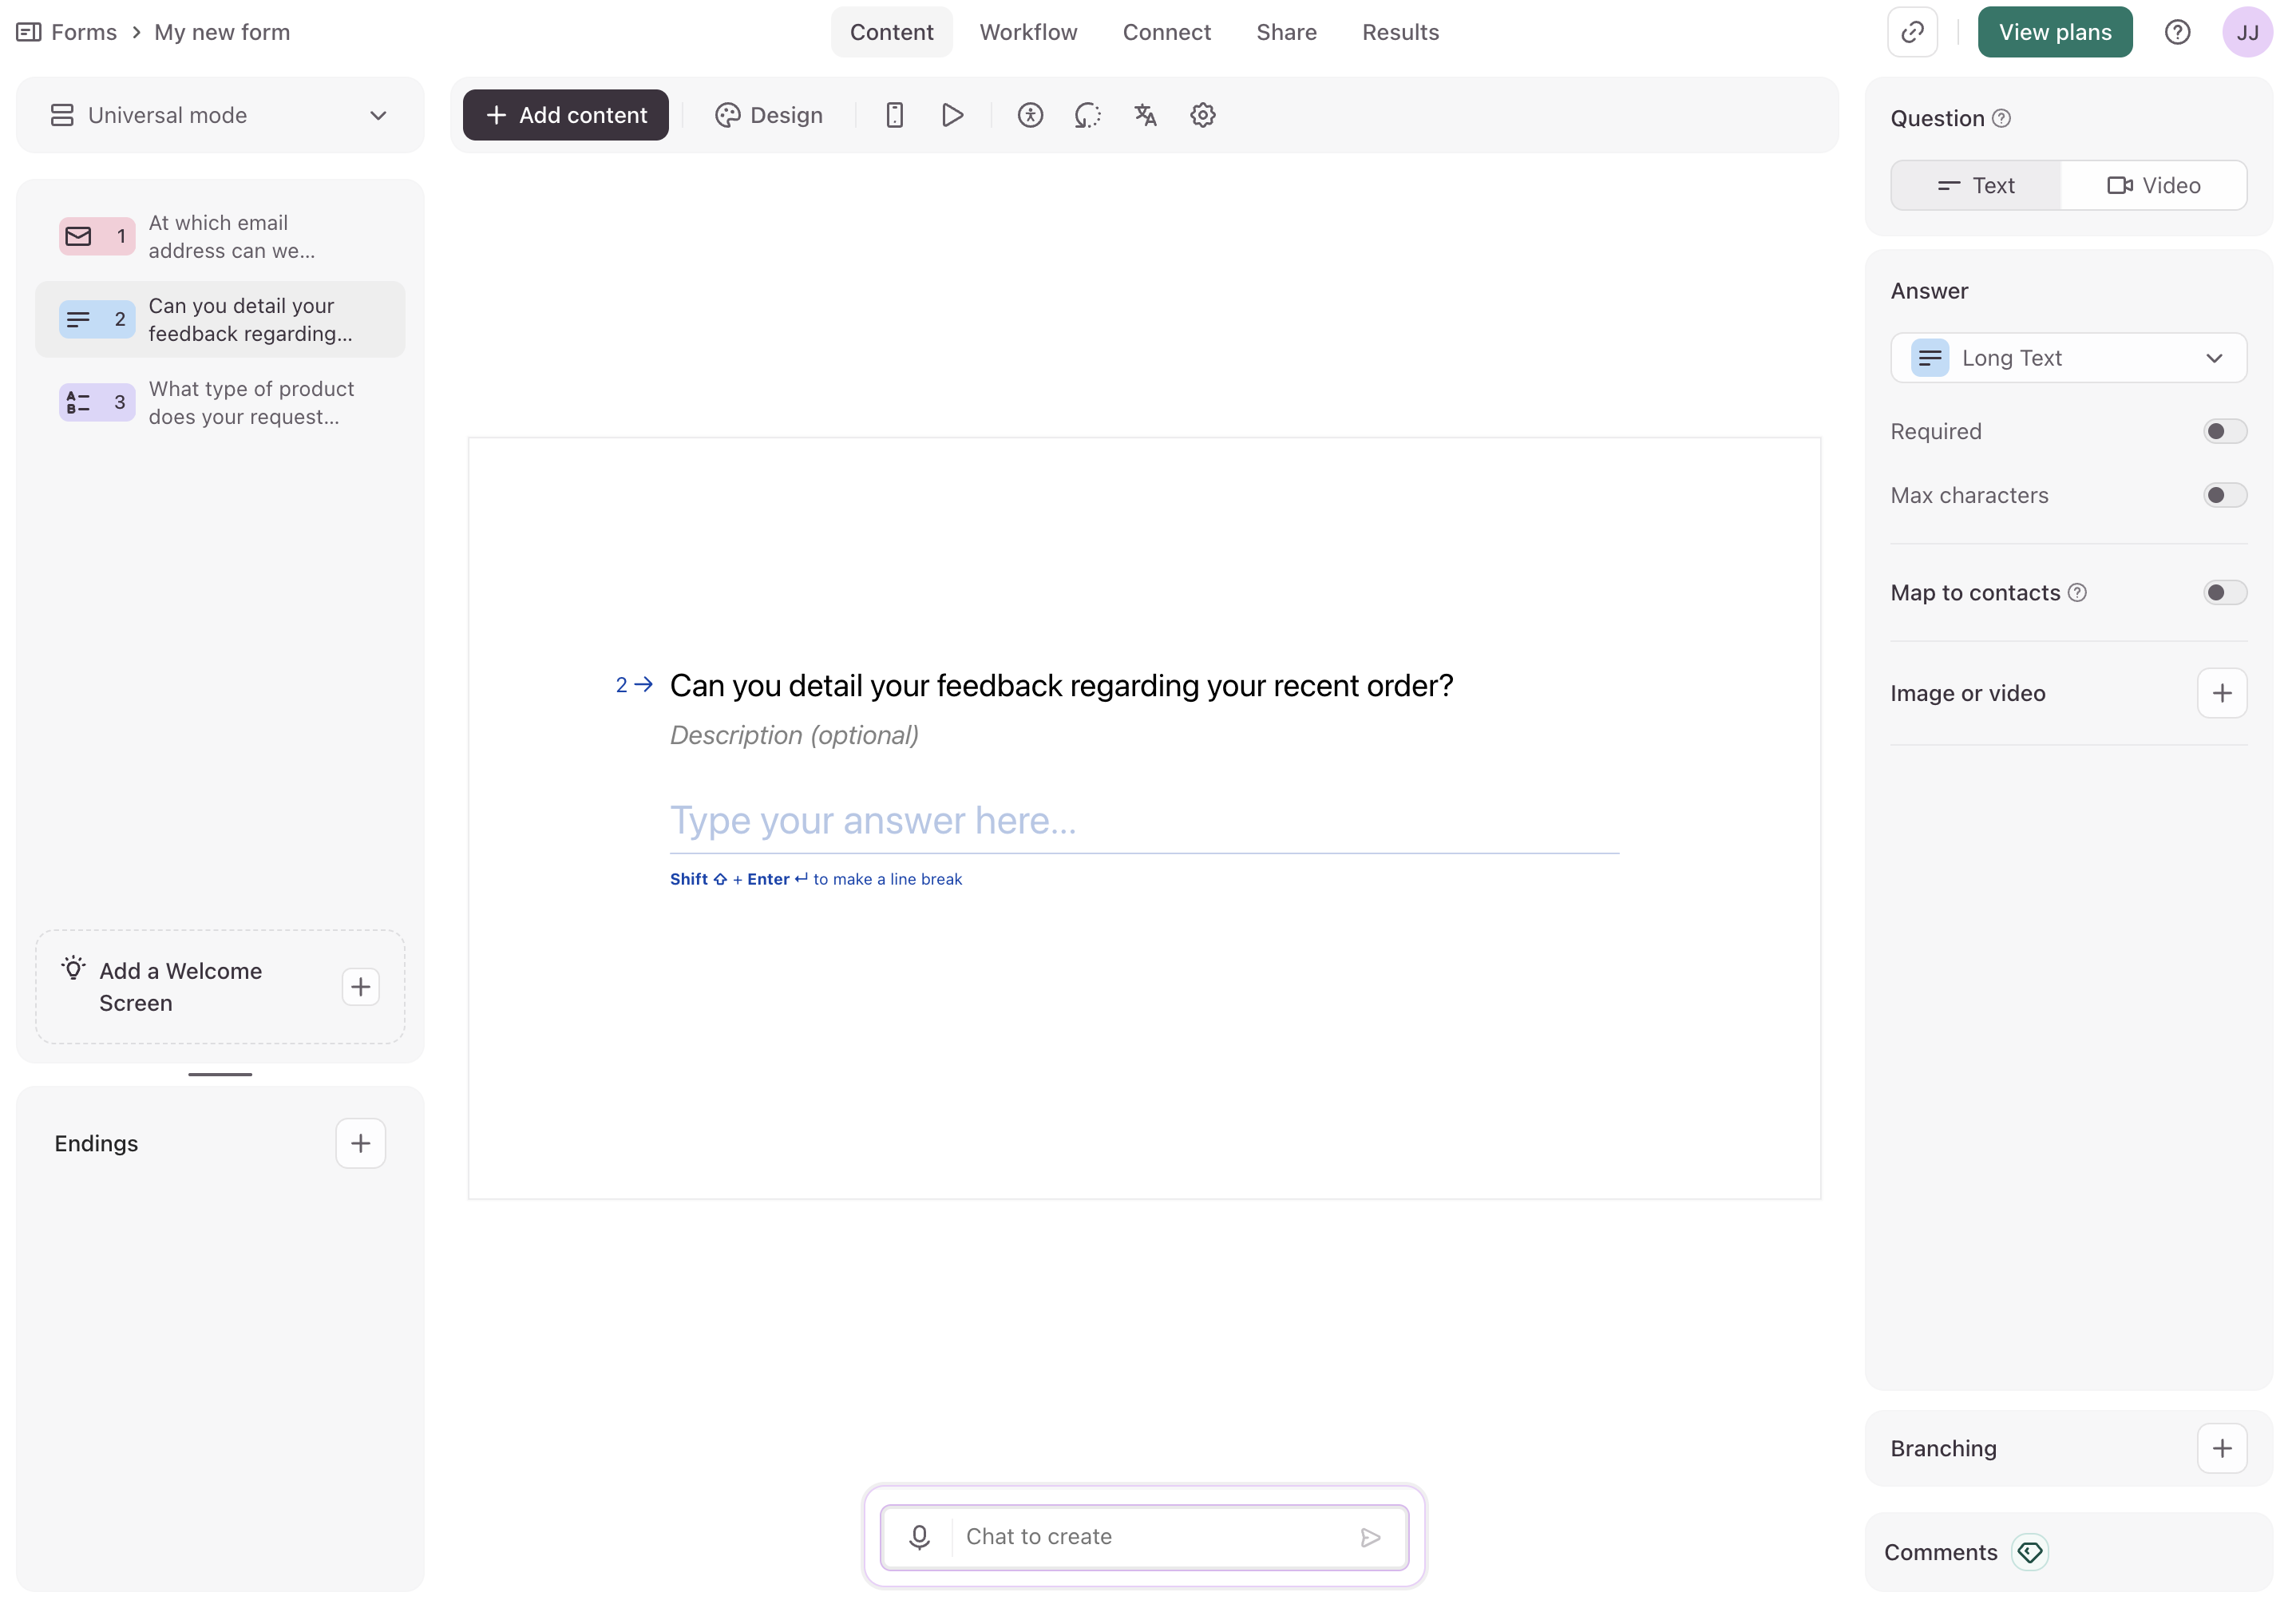
Add the following three questions, strictly respecting the order and field types, as this will impact your JSONPath queries in Mindflow:
-
Client Contact
- Field Type:
Email - Question: “At which email address can we contact you?”
- Field Type:
-
Collecting the feedback
- Field Type:
Long Text - Question: “Can you detail your feedback regarding your recent order?”
- Field Type:
-
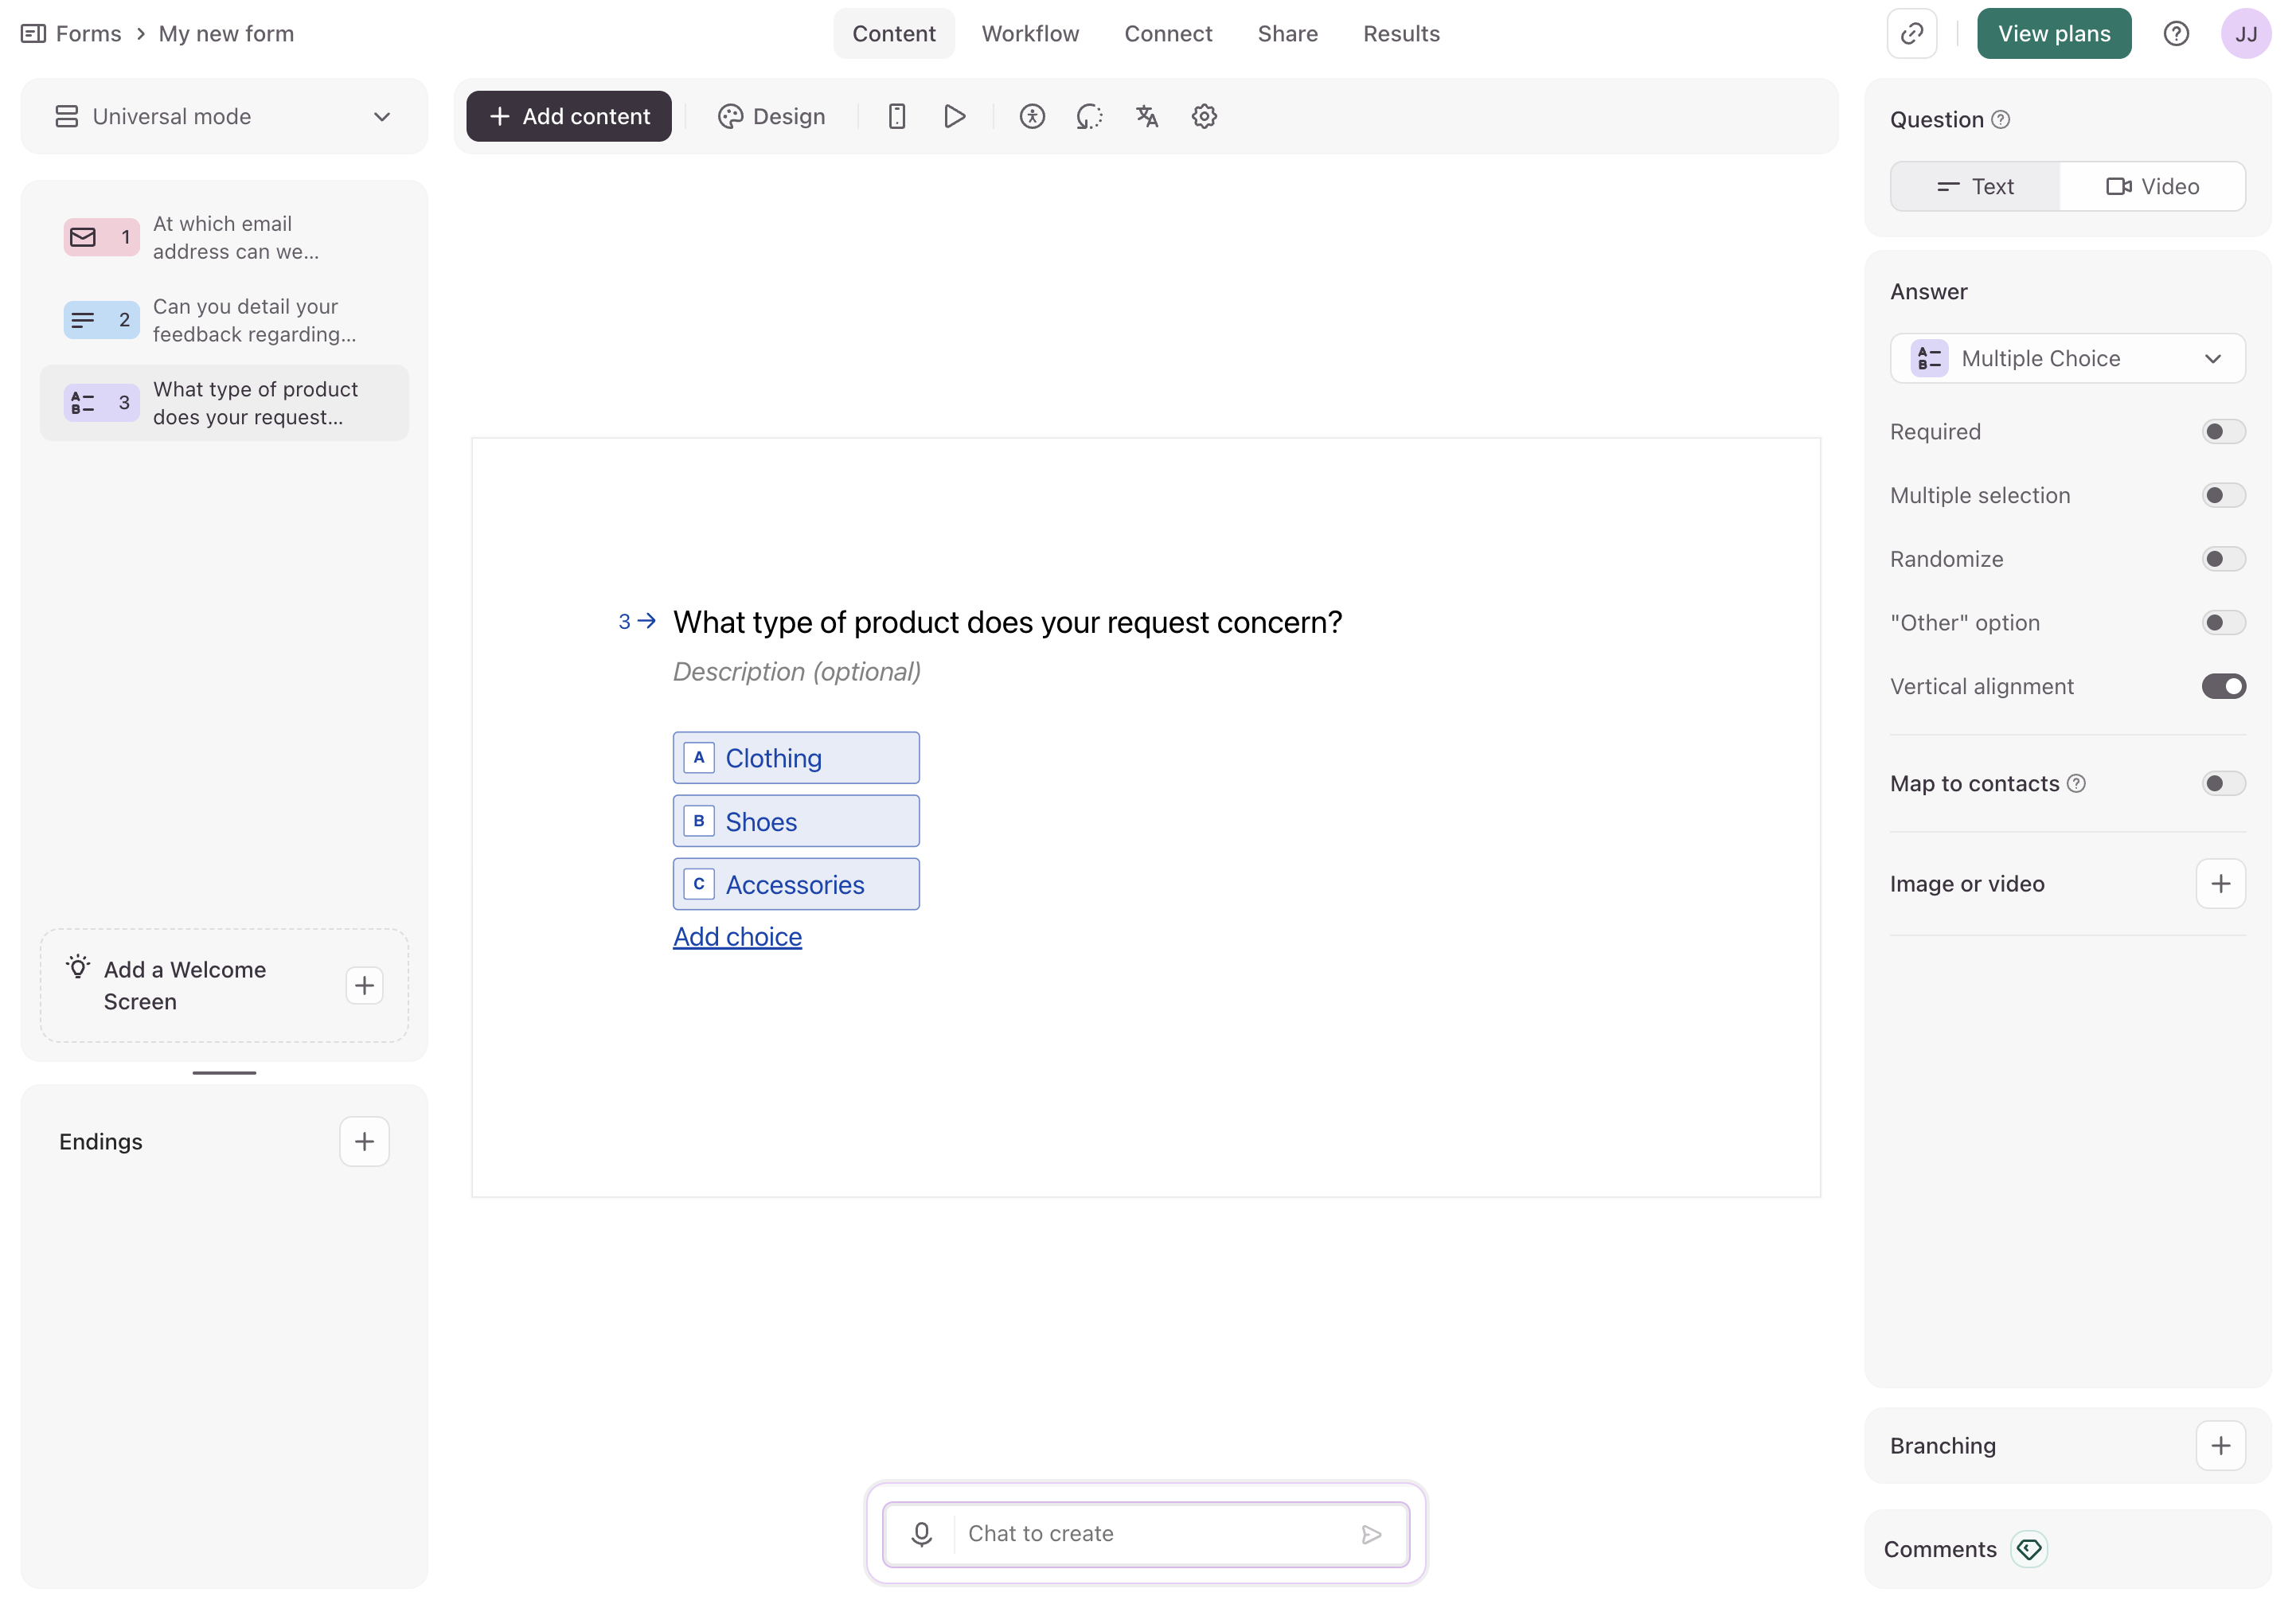
Product Category (for routing)
- Field Type:
Multiple Choice - Question: “What type of product does your request concern?”
- Mandatory choices (must be written exactly like this for our Dictionary to work):
clothingshoesaccessories
- Field Type:
Step B: Connect the Webhook to Mindflow
Section titled “Step B: Connect the Webhook to Mindflow”Once the form is ready and published (click the Publish button in the top right corner):
-
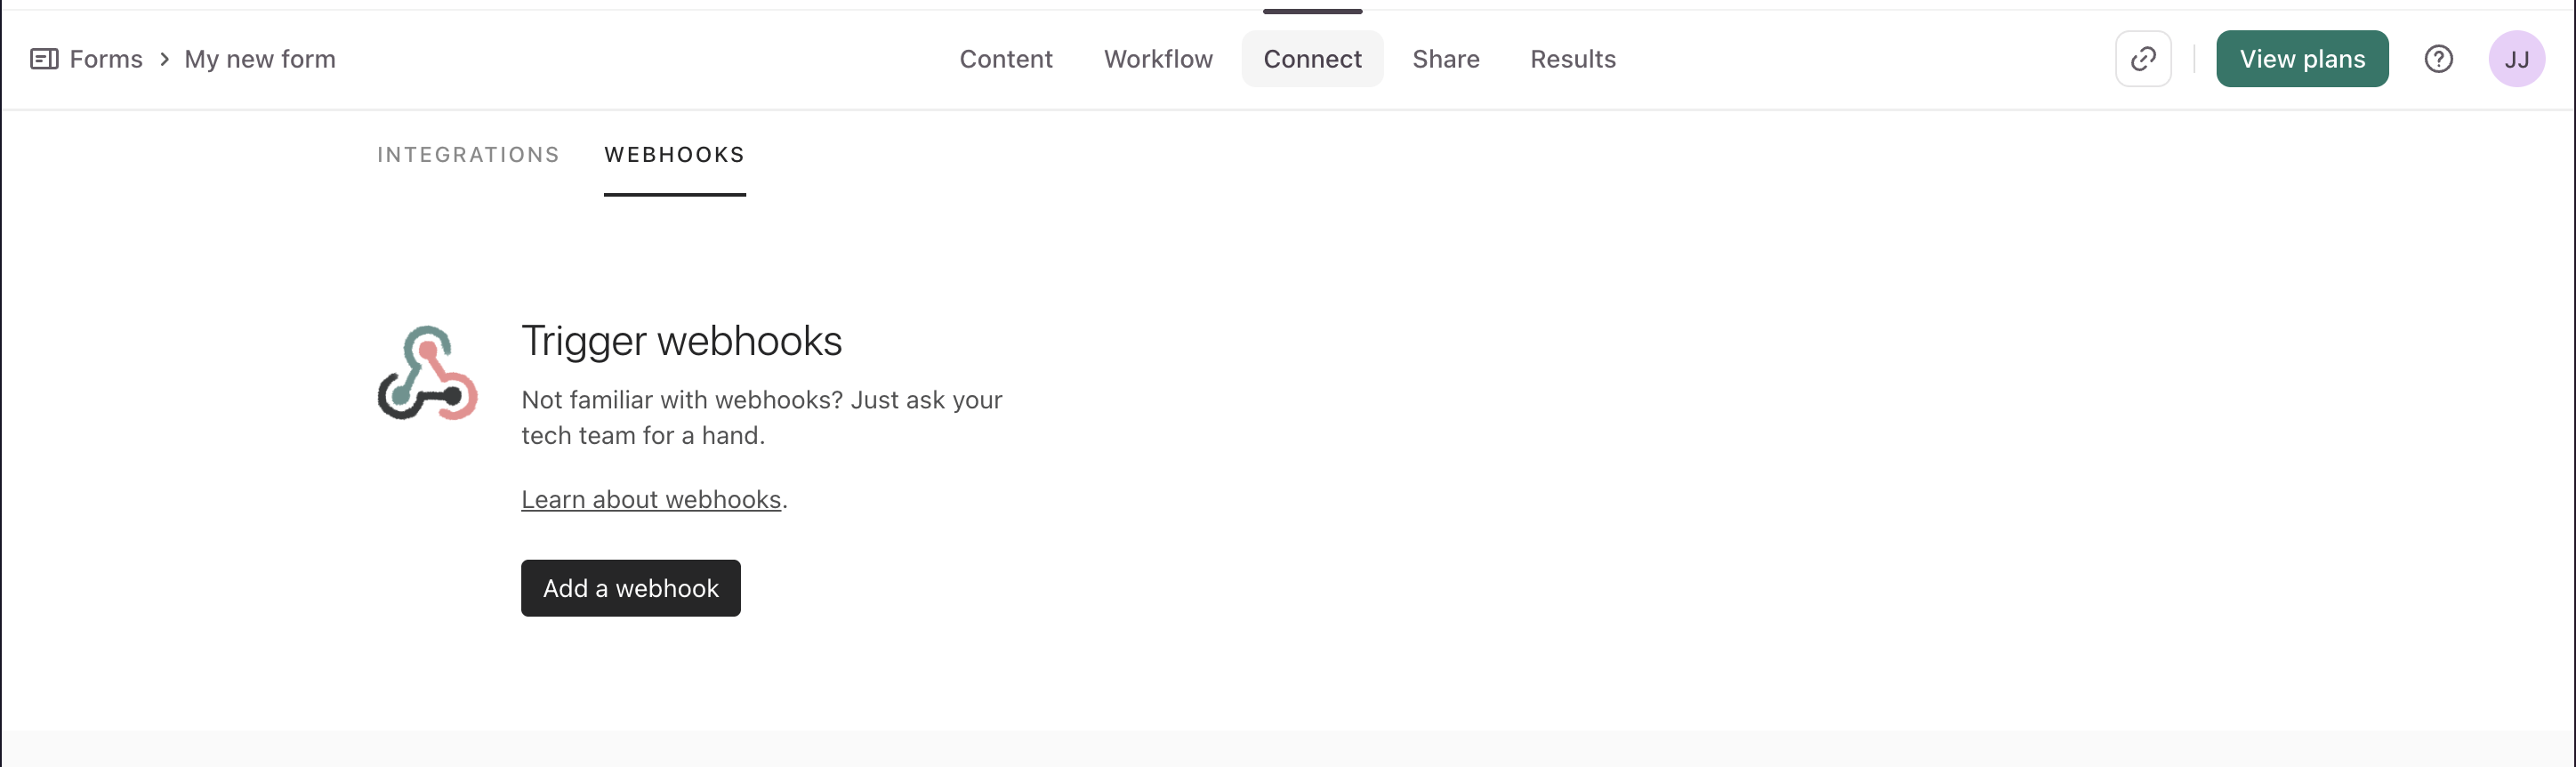
Go to the Connect tab at the top of the Typeform interface.
-
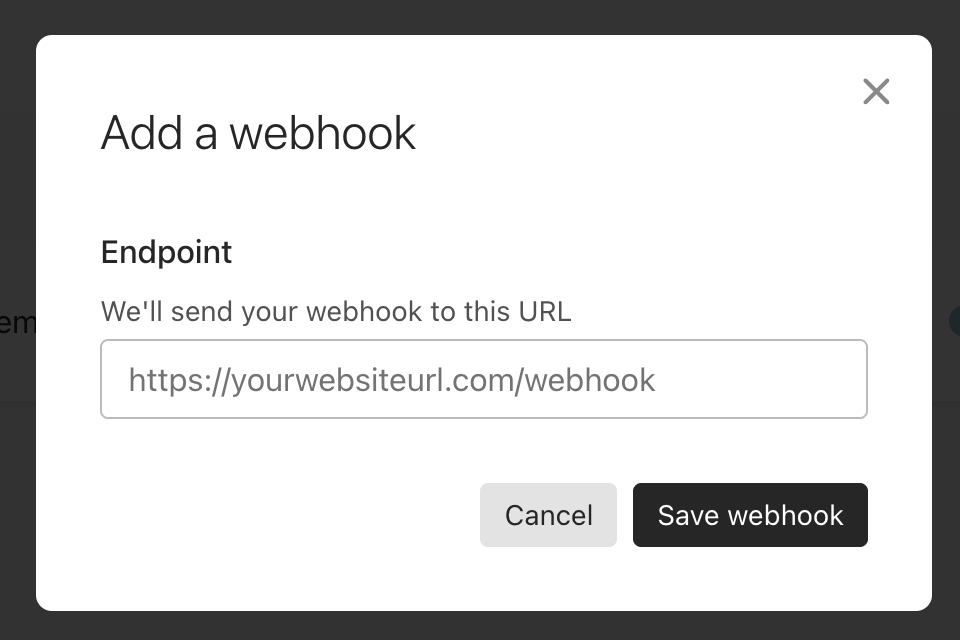
In the left-hand menu, click on Webhooks and click Add a webhook.
-
Endpoint URL: Create a new workflow in Mindflow, add a Webhook Trigger and paste the URL generated by the Webhook trigger of your main Mindflow playbook here.
-
Click on Save webhook, and make sure to toggle it On (the switch should turn green).
To generate test data, click on Share, open your Typeform link, and submit a fake ticket. Your Mindflow trigger will capture this event, and you can start configuring your flow
Step 1: Data Extraction with JSONPath
Section titled “Step 1: Data Extraction with JSONPath”When your Webhook trigger receives an event from Typeform, it captures a dense JSON “payload” containing dozens of technical data points.
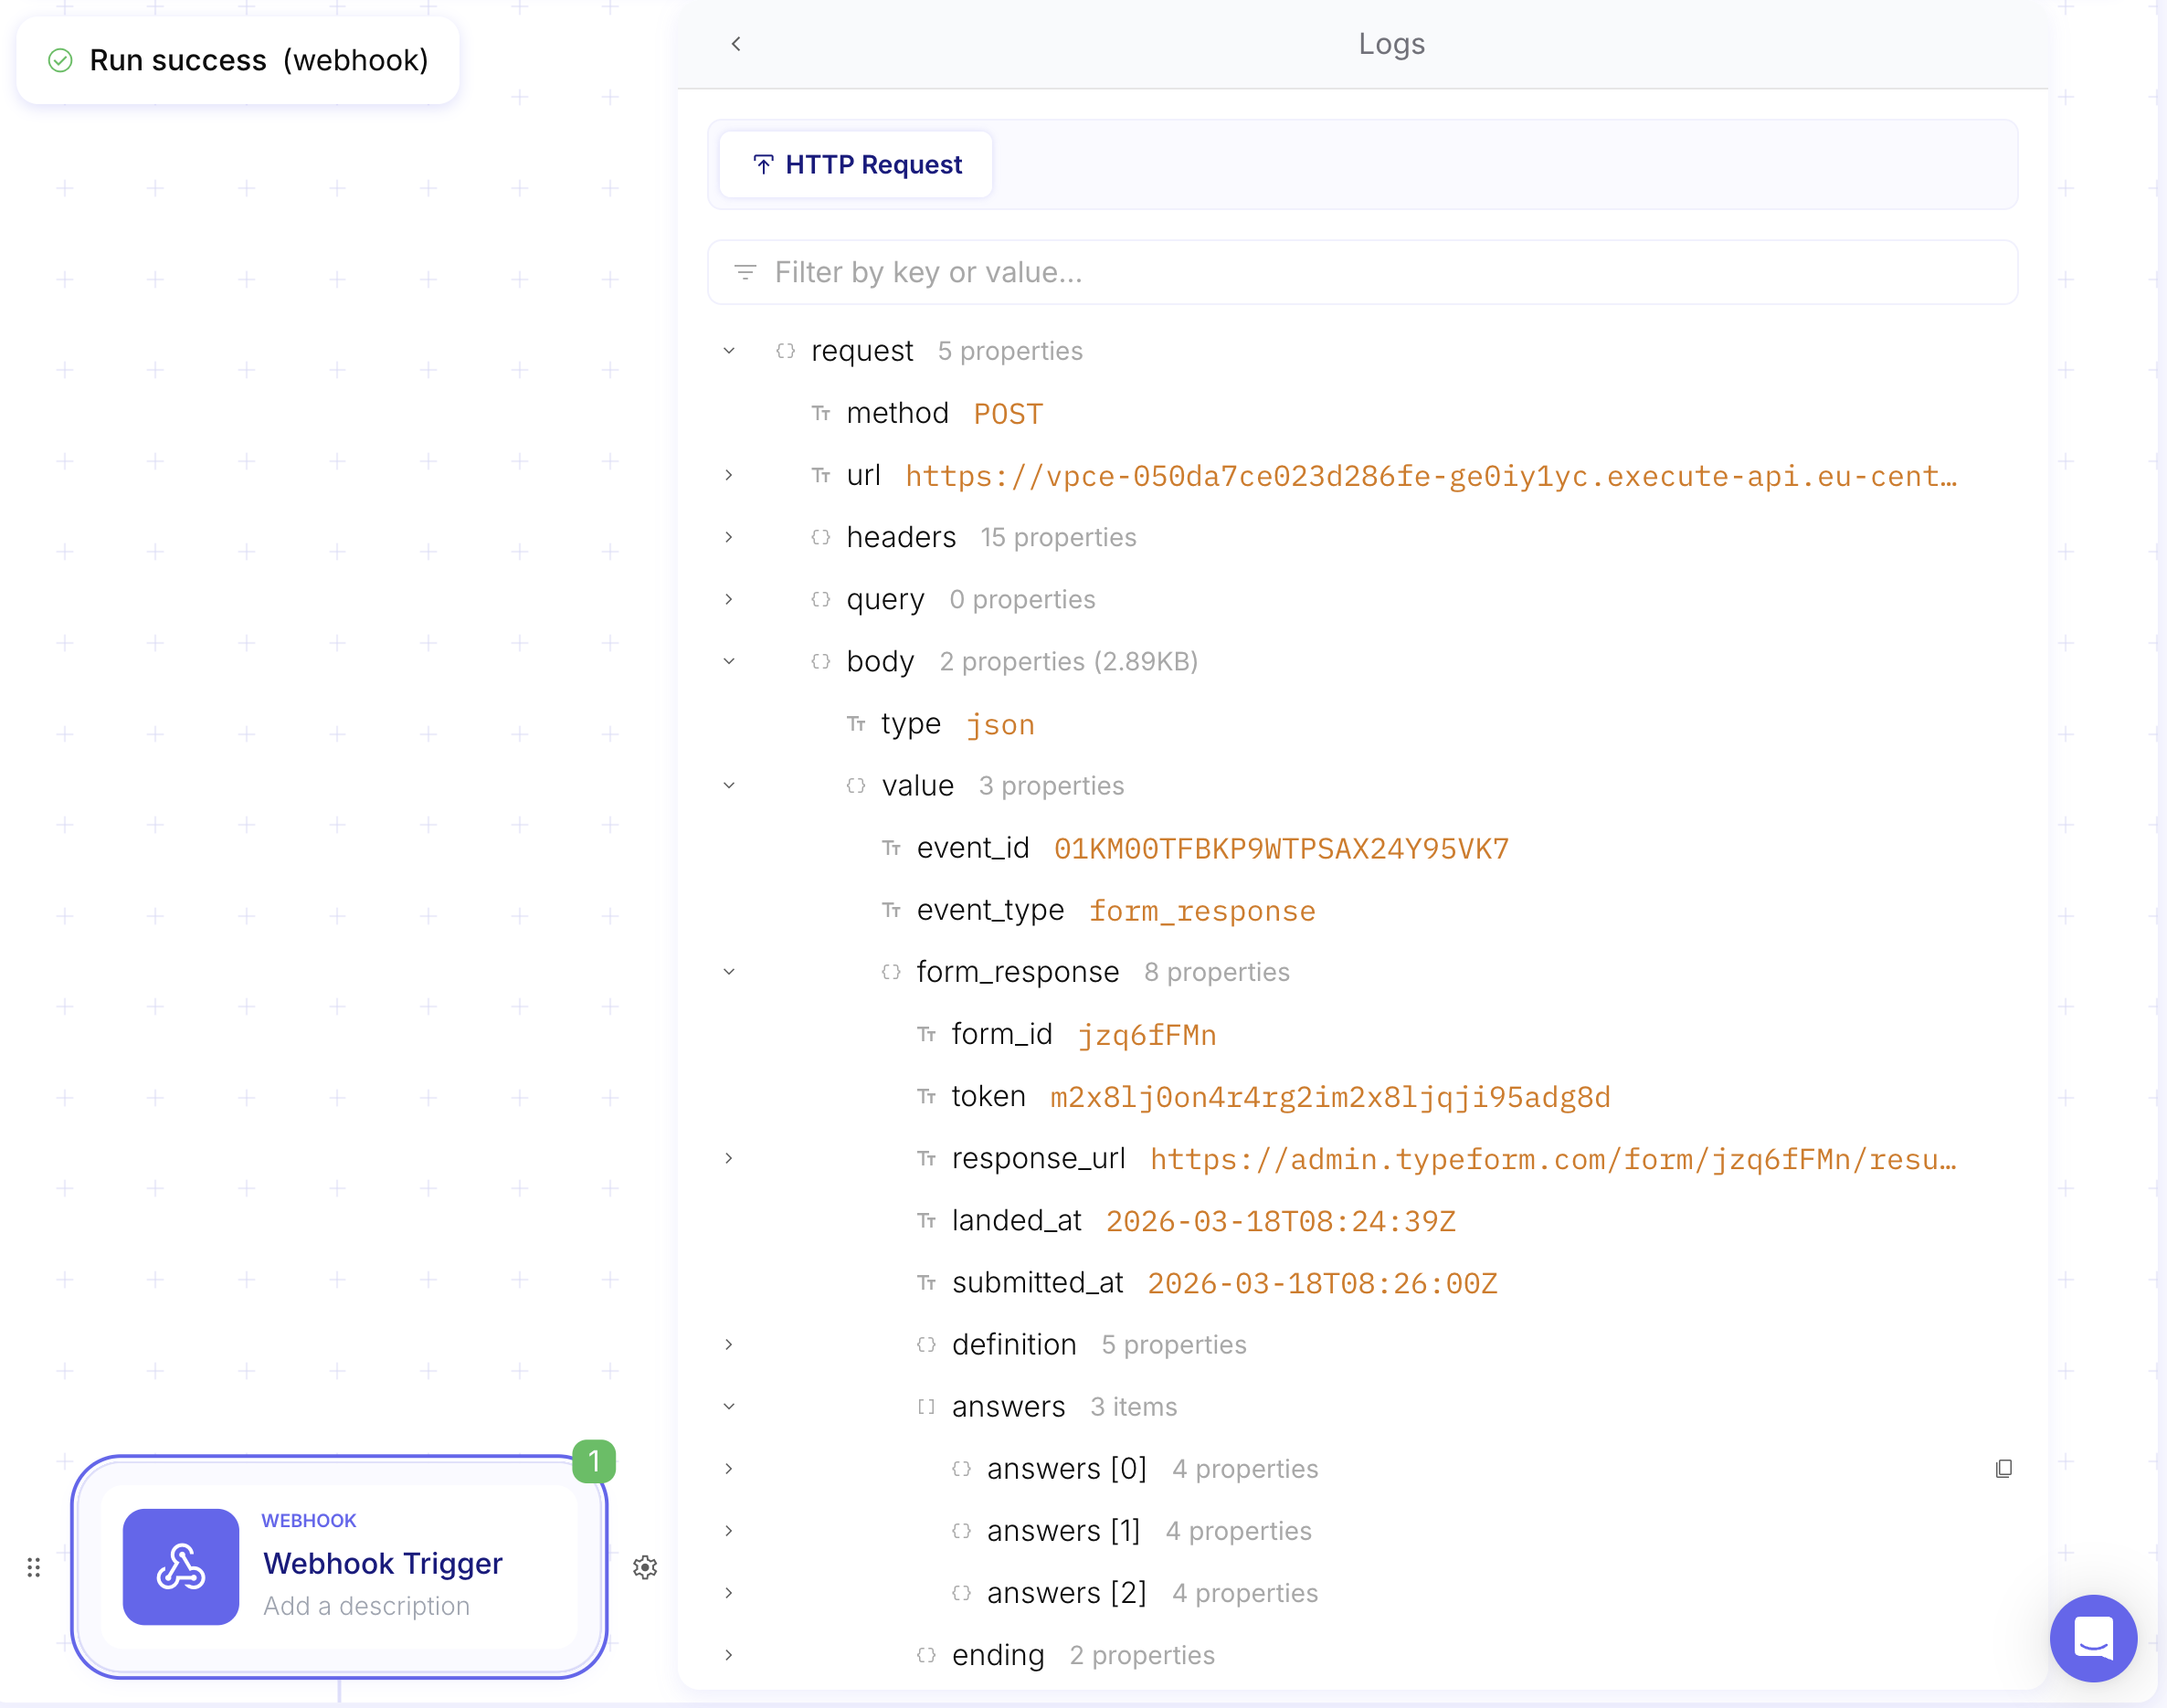
Instead of keeping all of it, we use JSONPath to isolate exactly what we need.
JSONPath is a standardized query language used to navigate through a JSON object. To apply it in Mindflow:
-
Add a Transform Data step immediately after your Typeform trigger.
-
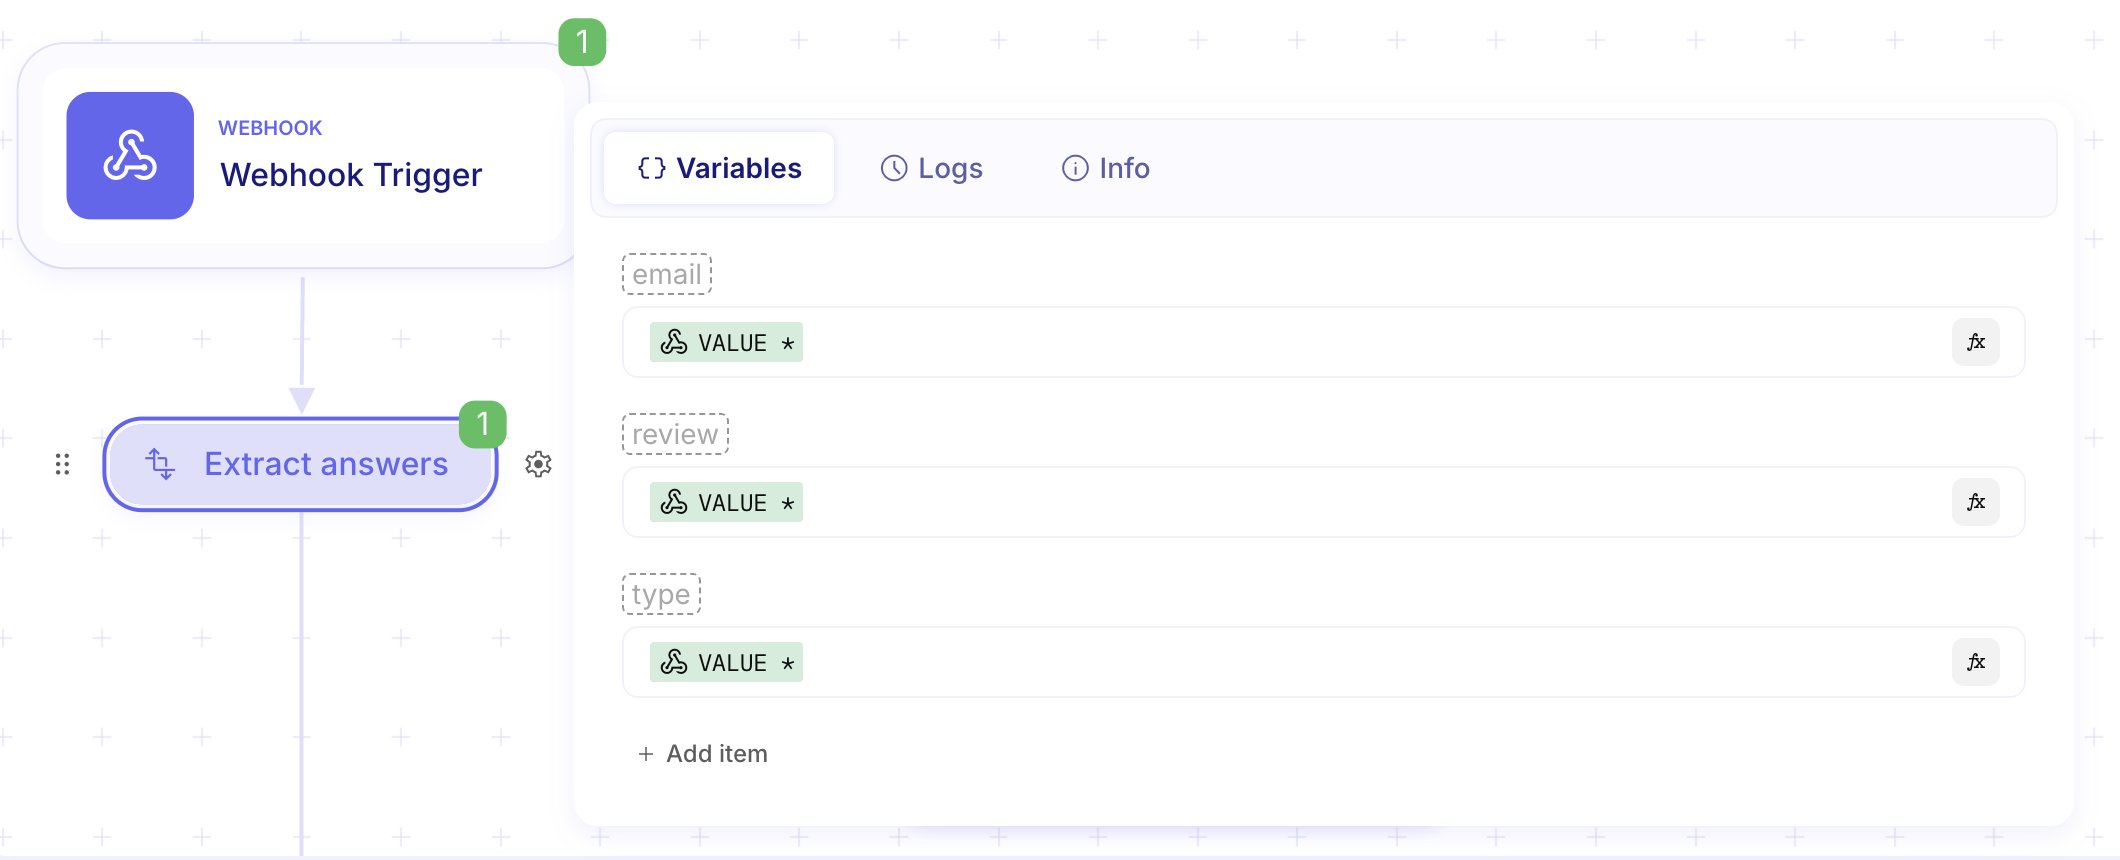
Create a new variable for each element you want to extract (e.g.,
email,review,type). -
For each variable, select the
valuevariable from the Webhook Trigger then click thefxbutton to apply a function.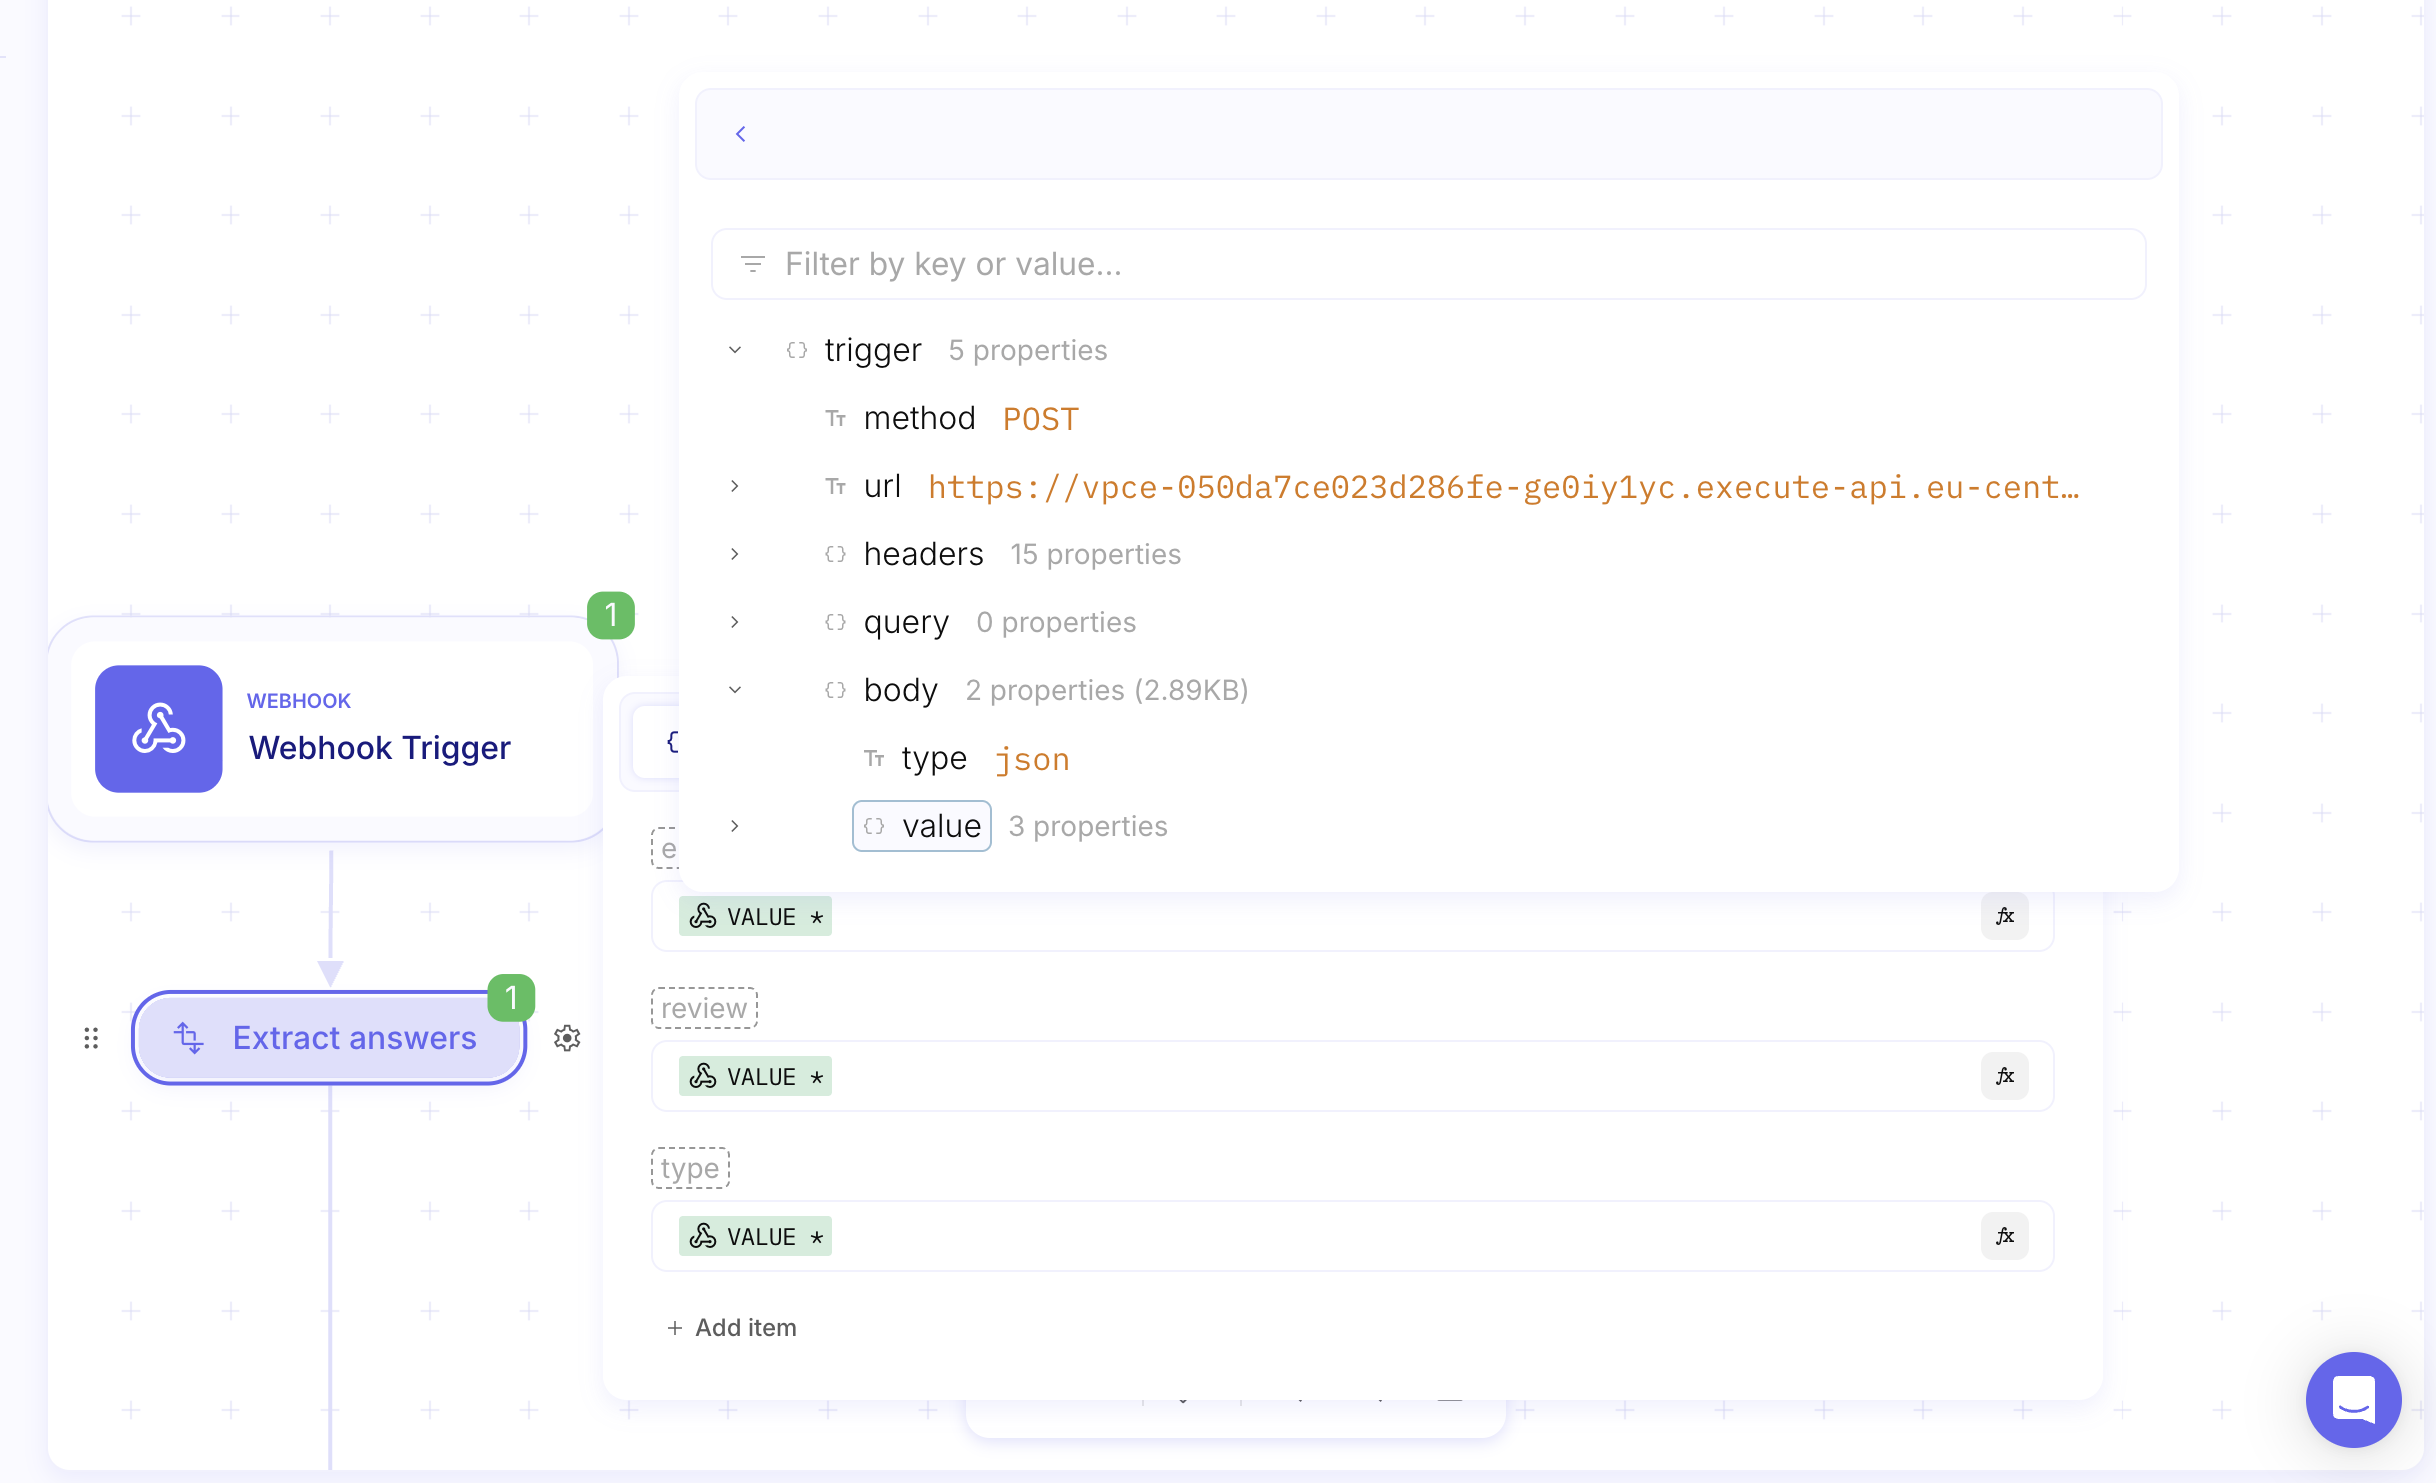
-
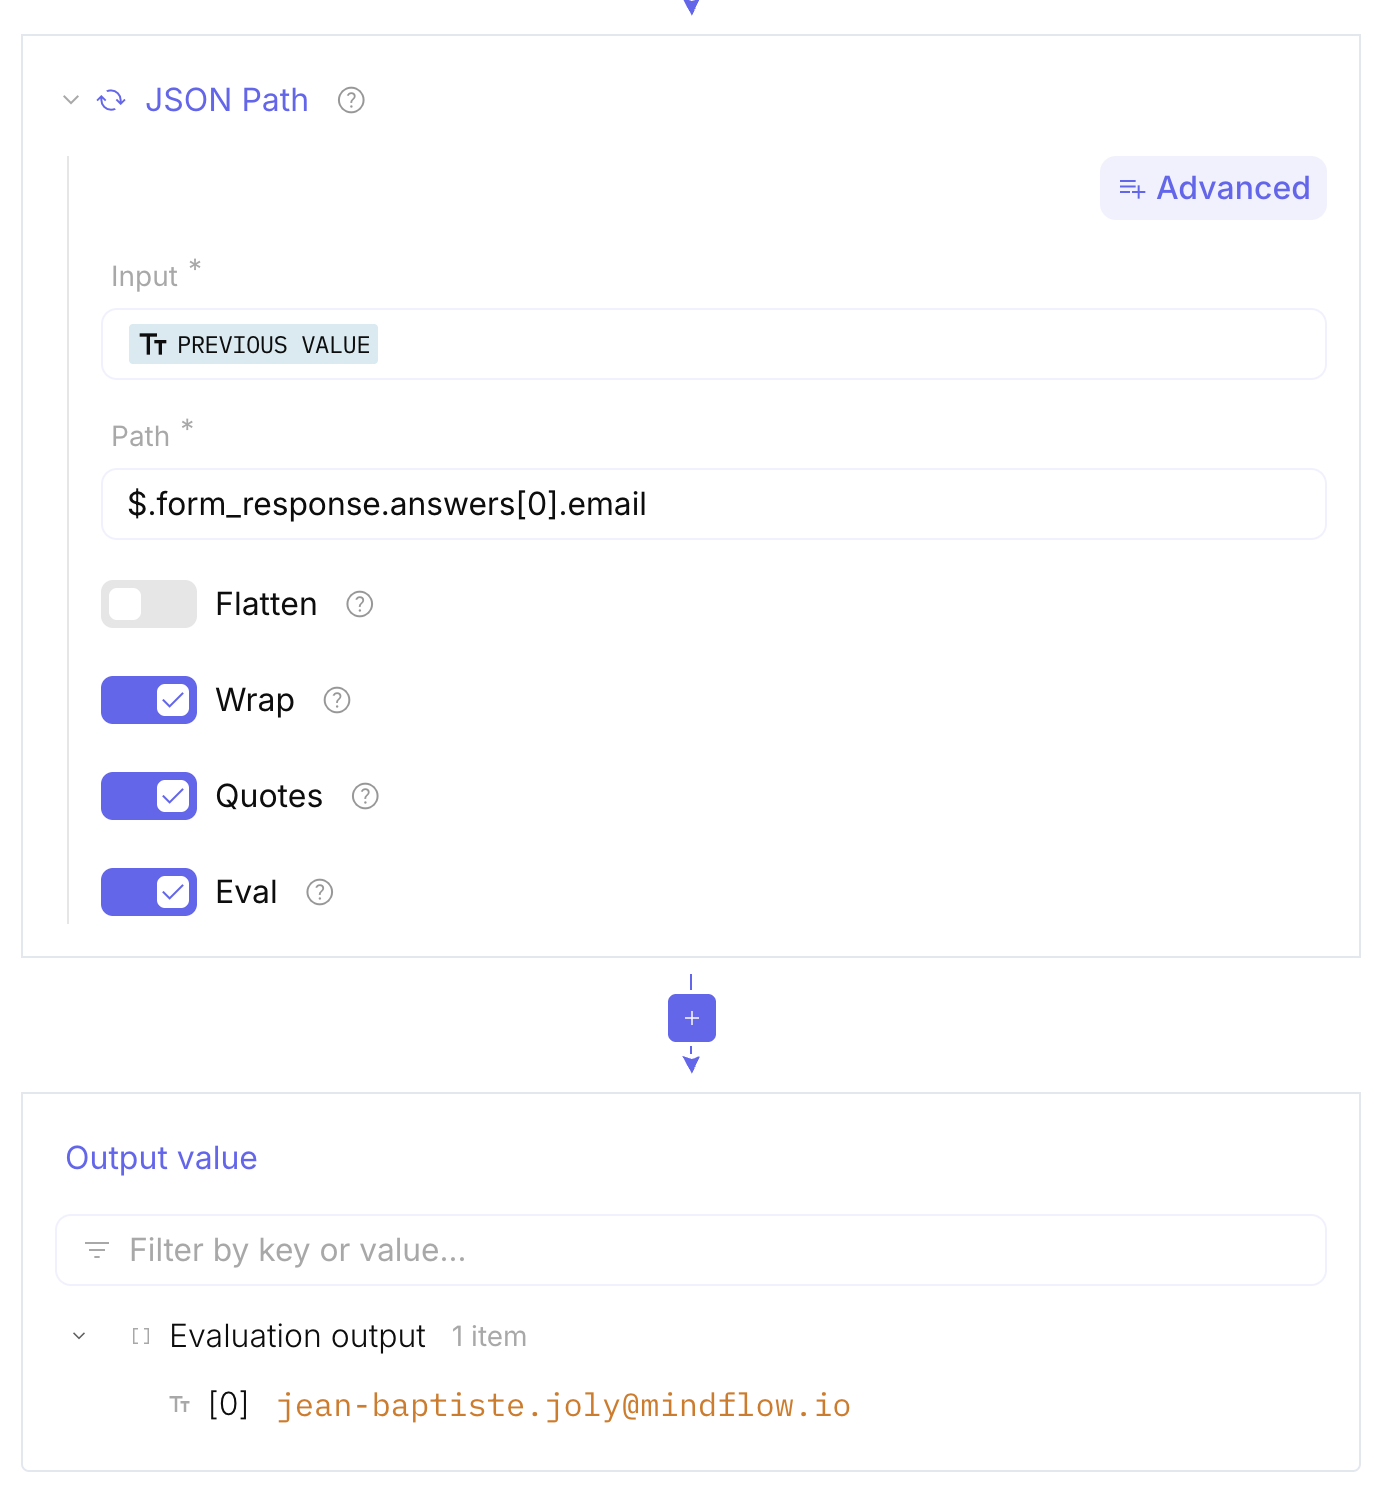
Enter your JSONPath queries to target the specific data in the trigger’s payload:
- To extract the customer’s email:
$.form_response.answers[0].email - To extract the customer’s feedback text:
$.form_response.answers[1].text - To extract the selected product category:
$.form_response.answers[2].choice.label
- To extract the customer’s email:
These extracted elements become clean variables, ready to be injected into the next steps of your flow.
Step 2: Intelligent Routing with an Internal Dictionary
Section titled “Step 2: Intelligent Routing with an Internal Dictionary”We need to route the ticket to the correct department based on the product category the customer selected. Instead of building a long, messy chain of “If/Else” conditions, we will use a Dictionary.
A dictionary works on a simple Key / Value system. You provide a “Key” (the product category), and it instantly returns the corresponding “Value” (the department’s email address). To create this dictionary in Mindflow, we will set it up as a global variable:
-
Open the flow settings by clicking the gear icon (⚙️) in your Mindflow interface.
-
Navigate to the Variables tab. Here, you can create “global” variables that are accessible and usable throughout your entire flow.
-
Create a new variable and name it
dictionary. -
Set its value using the following JSON format. Copy and paste:
{"clothing": "{your_email}+clothing@{your_domain}","shoes": "{your_email}+shoes@{your_domain}","accessories": "{your_email}+accessories@{your_domain}"}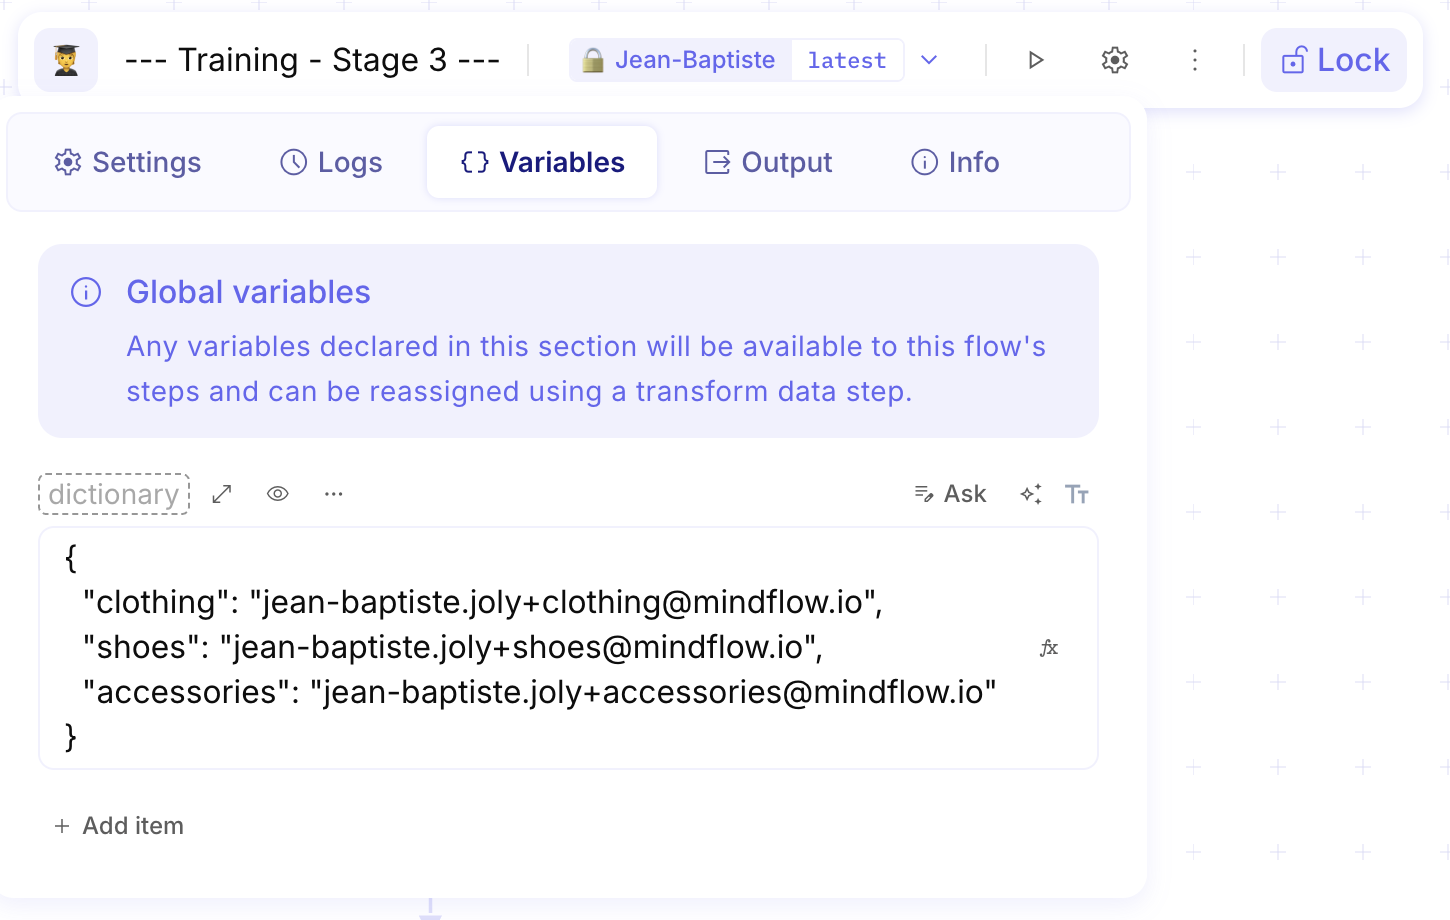
Pro Tip: Alternatively, this dictionary creation process can also be executed directly within a Transform Data step on your canvas if you prefer not to use global flow variables
Step 3: Adding an AI··Task (our first AI··Swarm)
Section titled “Step 3: Adding an AI··Task (our first AI··Swarm)”Mindflow allows you to seamlessly integrate LLMs to process unstructured data without writing complex API calls.
- Add an AI··Task step to your workflow.
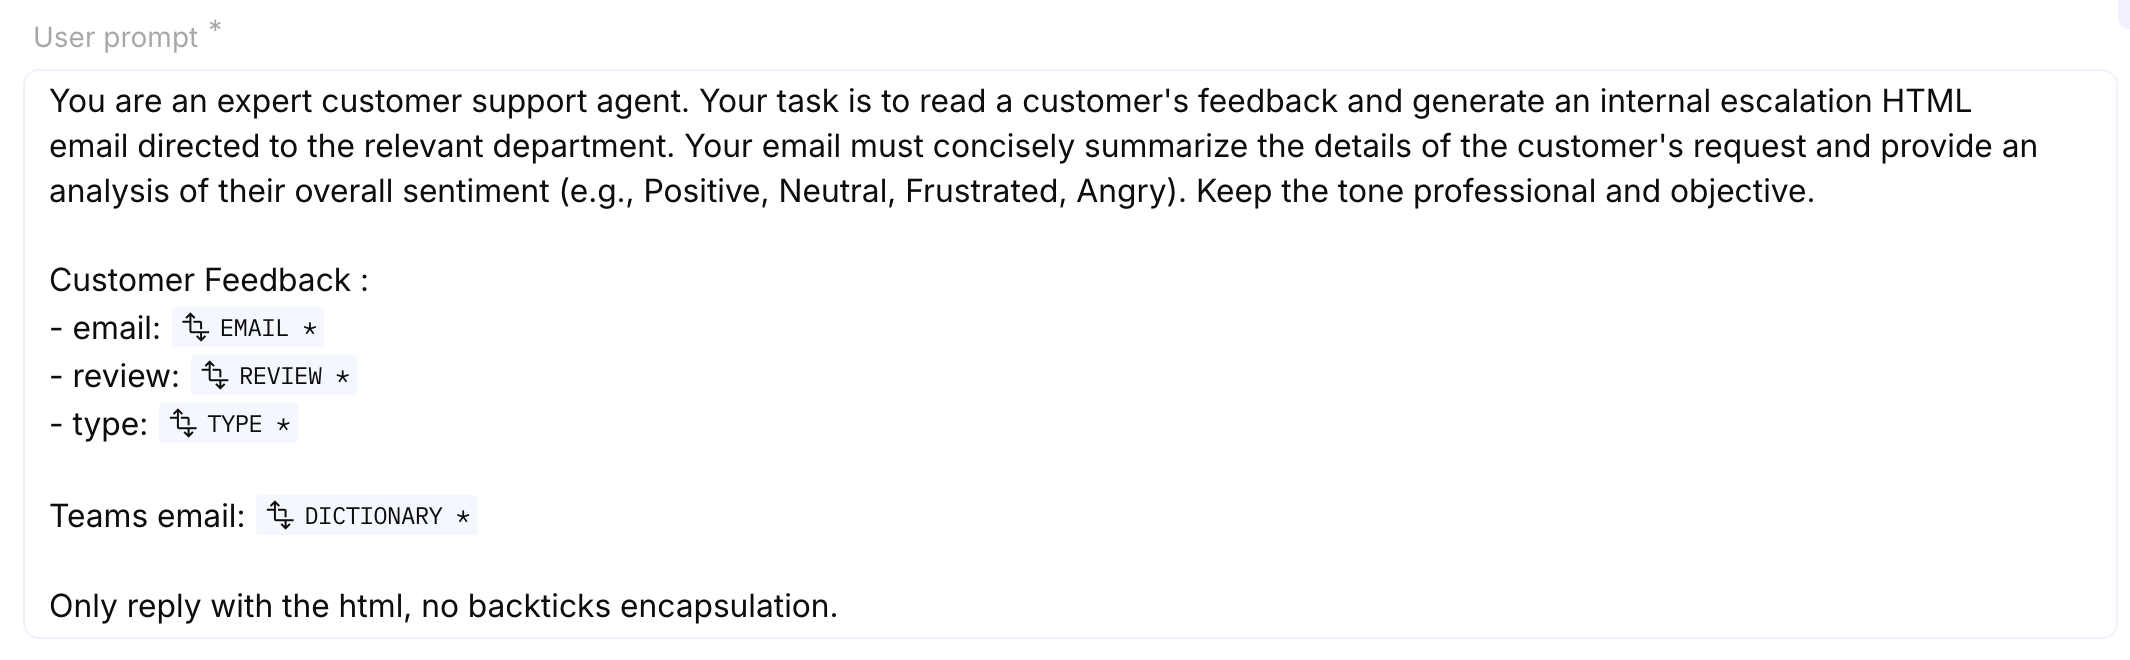
- Configure the Agent by giving it a specific behavior via a System Prompt. Copy and paste the following instructions:
-
In the Agent’s prompt, insert the variable containing the customer’s feedback text (extracted via JSONPath in Step 1) and the dictionary previously created.
-
The Agent will analyze the text and generate a structured internal email that you will pass to the final Subflow step.
We will return to this AI··Task later to give it the ability to call a sub-agent tasked with sending an email. Let’s now move on to creating this sub-agent.
Step 4: Modularizing with Agents (via the AI··Task)
Section titled “Step 4: Modularizing with Agents (via the AI··Task)”To keep your workflows maintainable and reusable, you should use Subflows. A Subflow is simply another Mindflow playbook called by your main playbook. In this lesson, we will configure our AI··Task to call the Subflow directly.
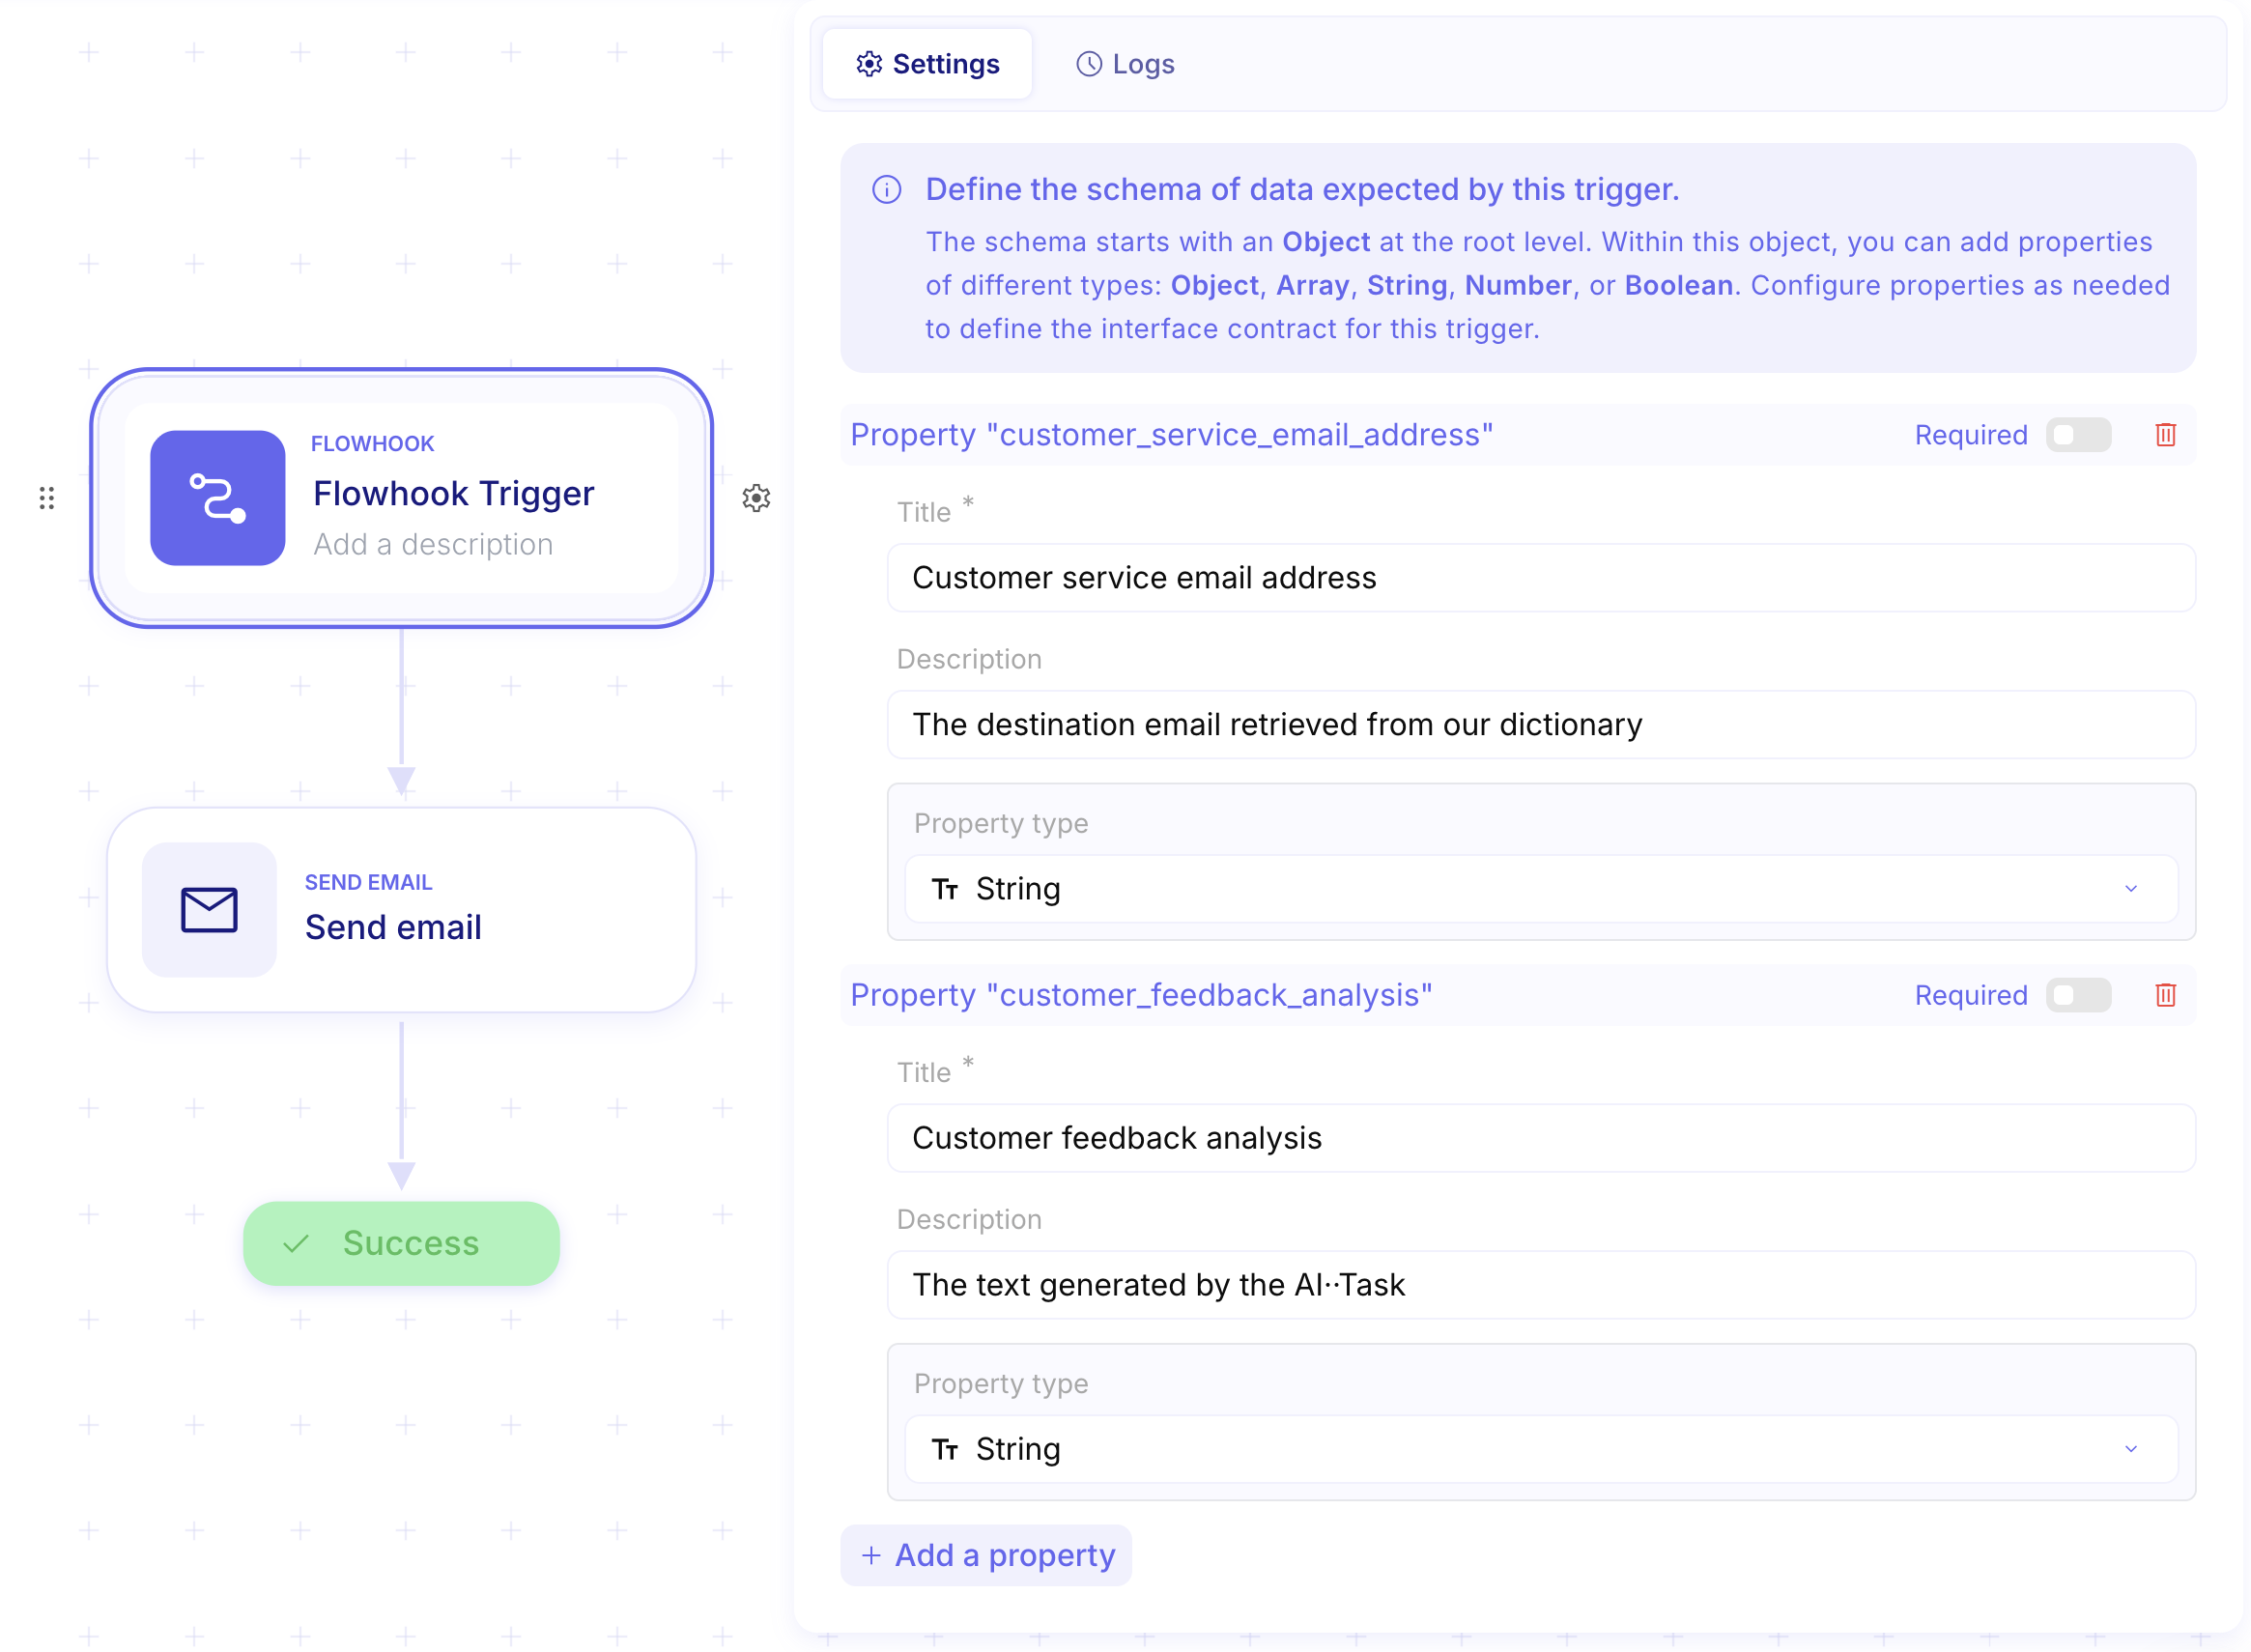
To create a subflow, you must create a completely new playbook. This new playbook will use a Flowhook Trigger, which allows our first flow to call it securely.
Part A: Creating the Email Subflow
Section titled “Part A: Creating the Email Subflow”-
Create a new flow named “Email Agent”.
-
Add a Flowhook Trigger to the canvas. In the configuration of this trigger, you must define the expected input information required for the flow to execute properly. We need two inputs:
Customer service email address(the destination email retrieved from our dictionary).Customer feedback analysis(the text generated by the AI··Task).
Part B: Connecting the Agent and Executing a Dry-Run
Section titled “Part B: Connecting the Agent and Executing a Dry-Run”Before we can configure the email step in our subflow, we need to generate some test data!
-
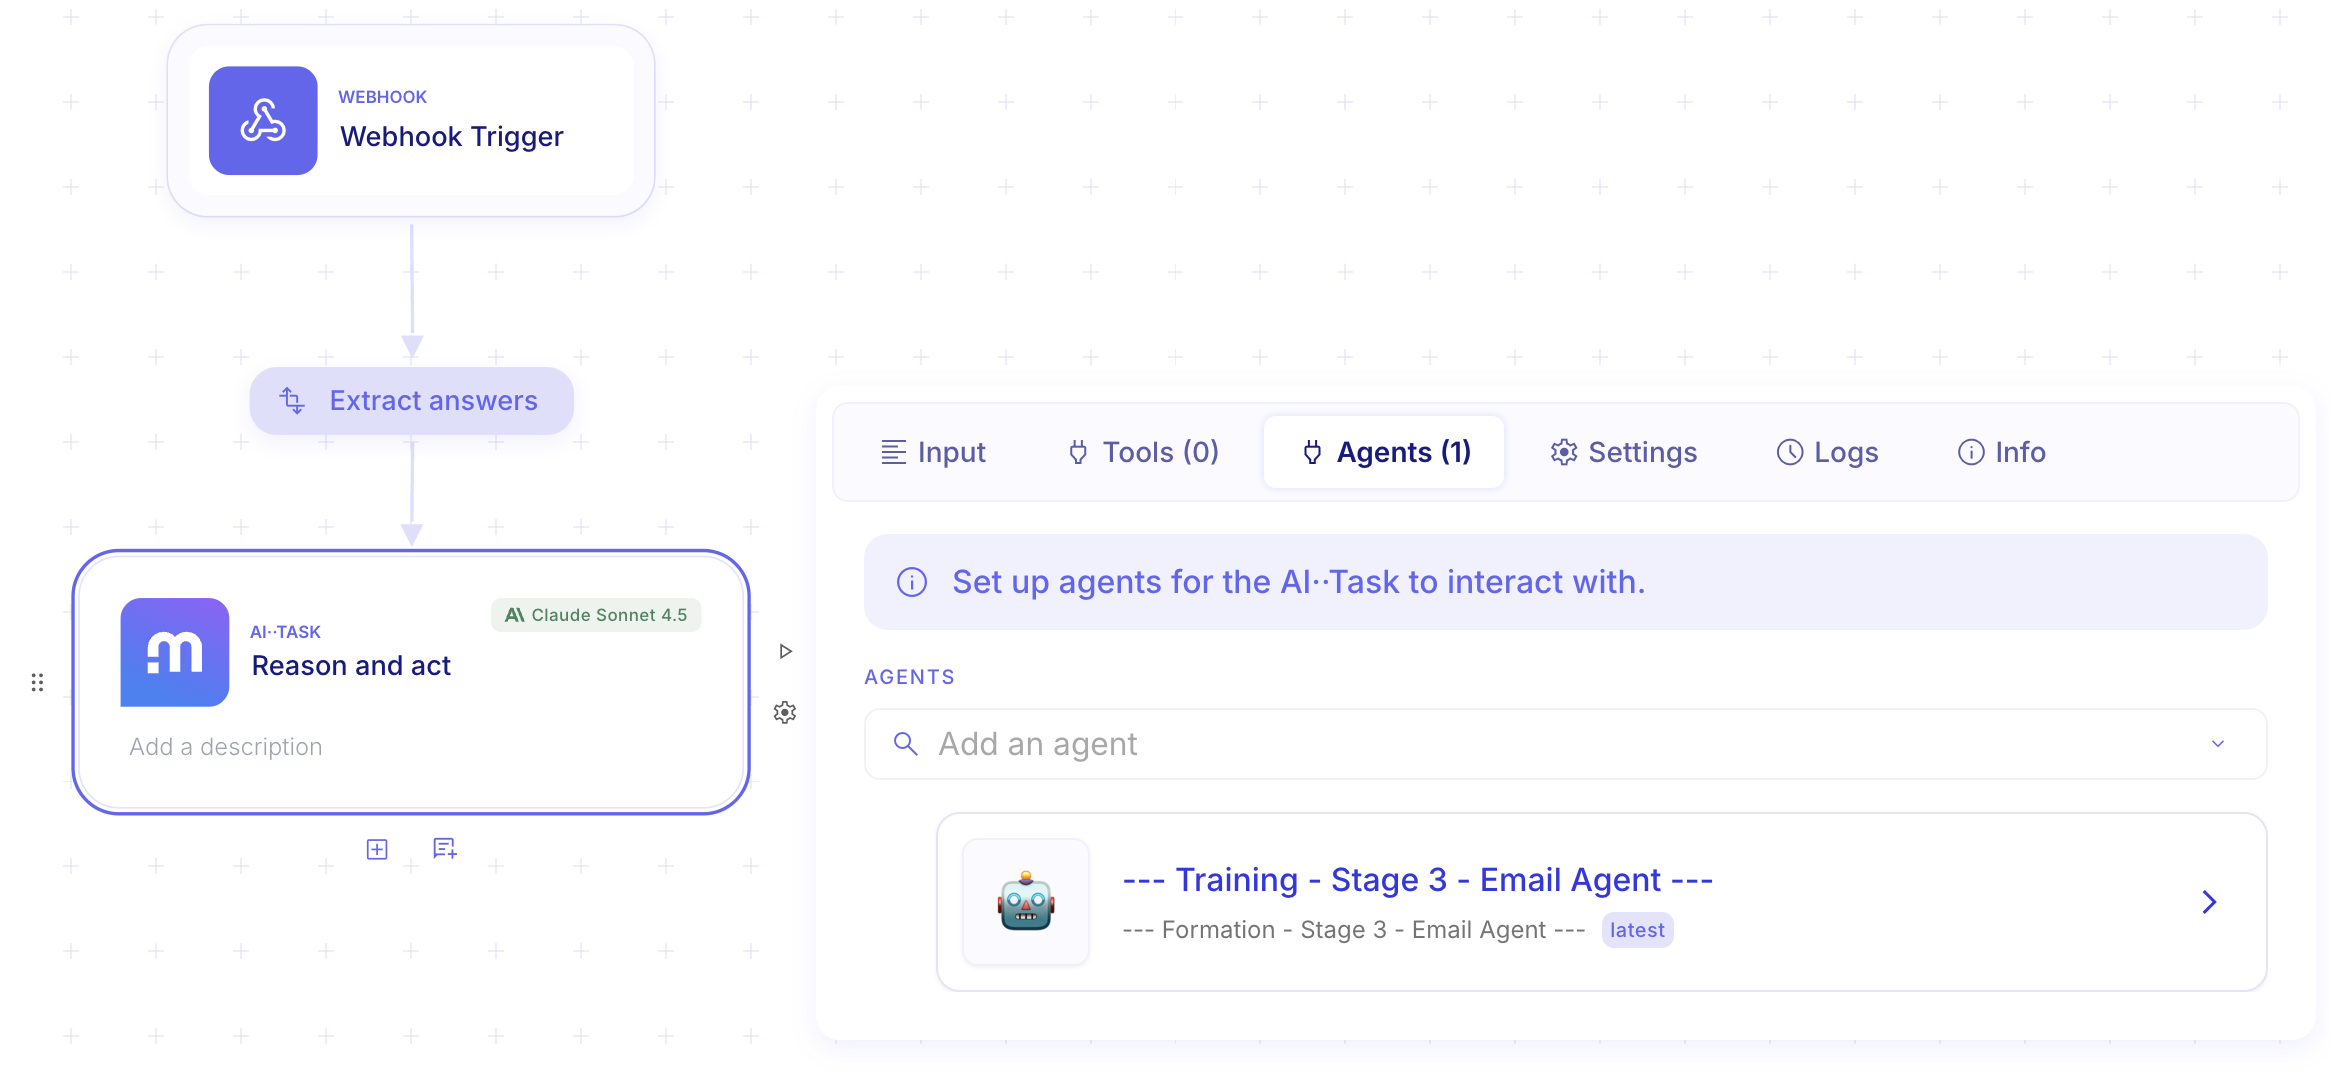
Go back to your first flow and open your AI··Task (from Step 3).
-
Navigate to the Agents tab and add your newly created “Email Agent” flow as a capability.
-
Execute a Dry-Run of this AI··Task. This crucial step will trigger the AI, analyze your test data, and send a real payload to the Flowhook trigger of your subflow. This data will be extremely useful for the next mapping step!
Part C: Completing the Email Subflow
Section titled “Part C: Completing the Email Subflow”Now, switch back to your “Email Sub-Agent” flow to finish the setup:
-
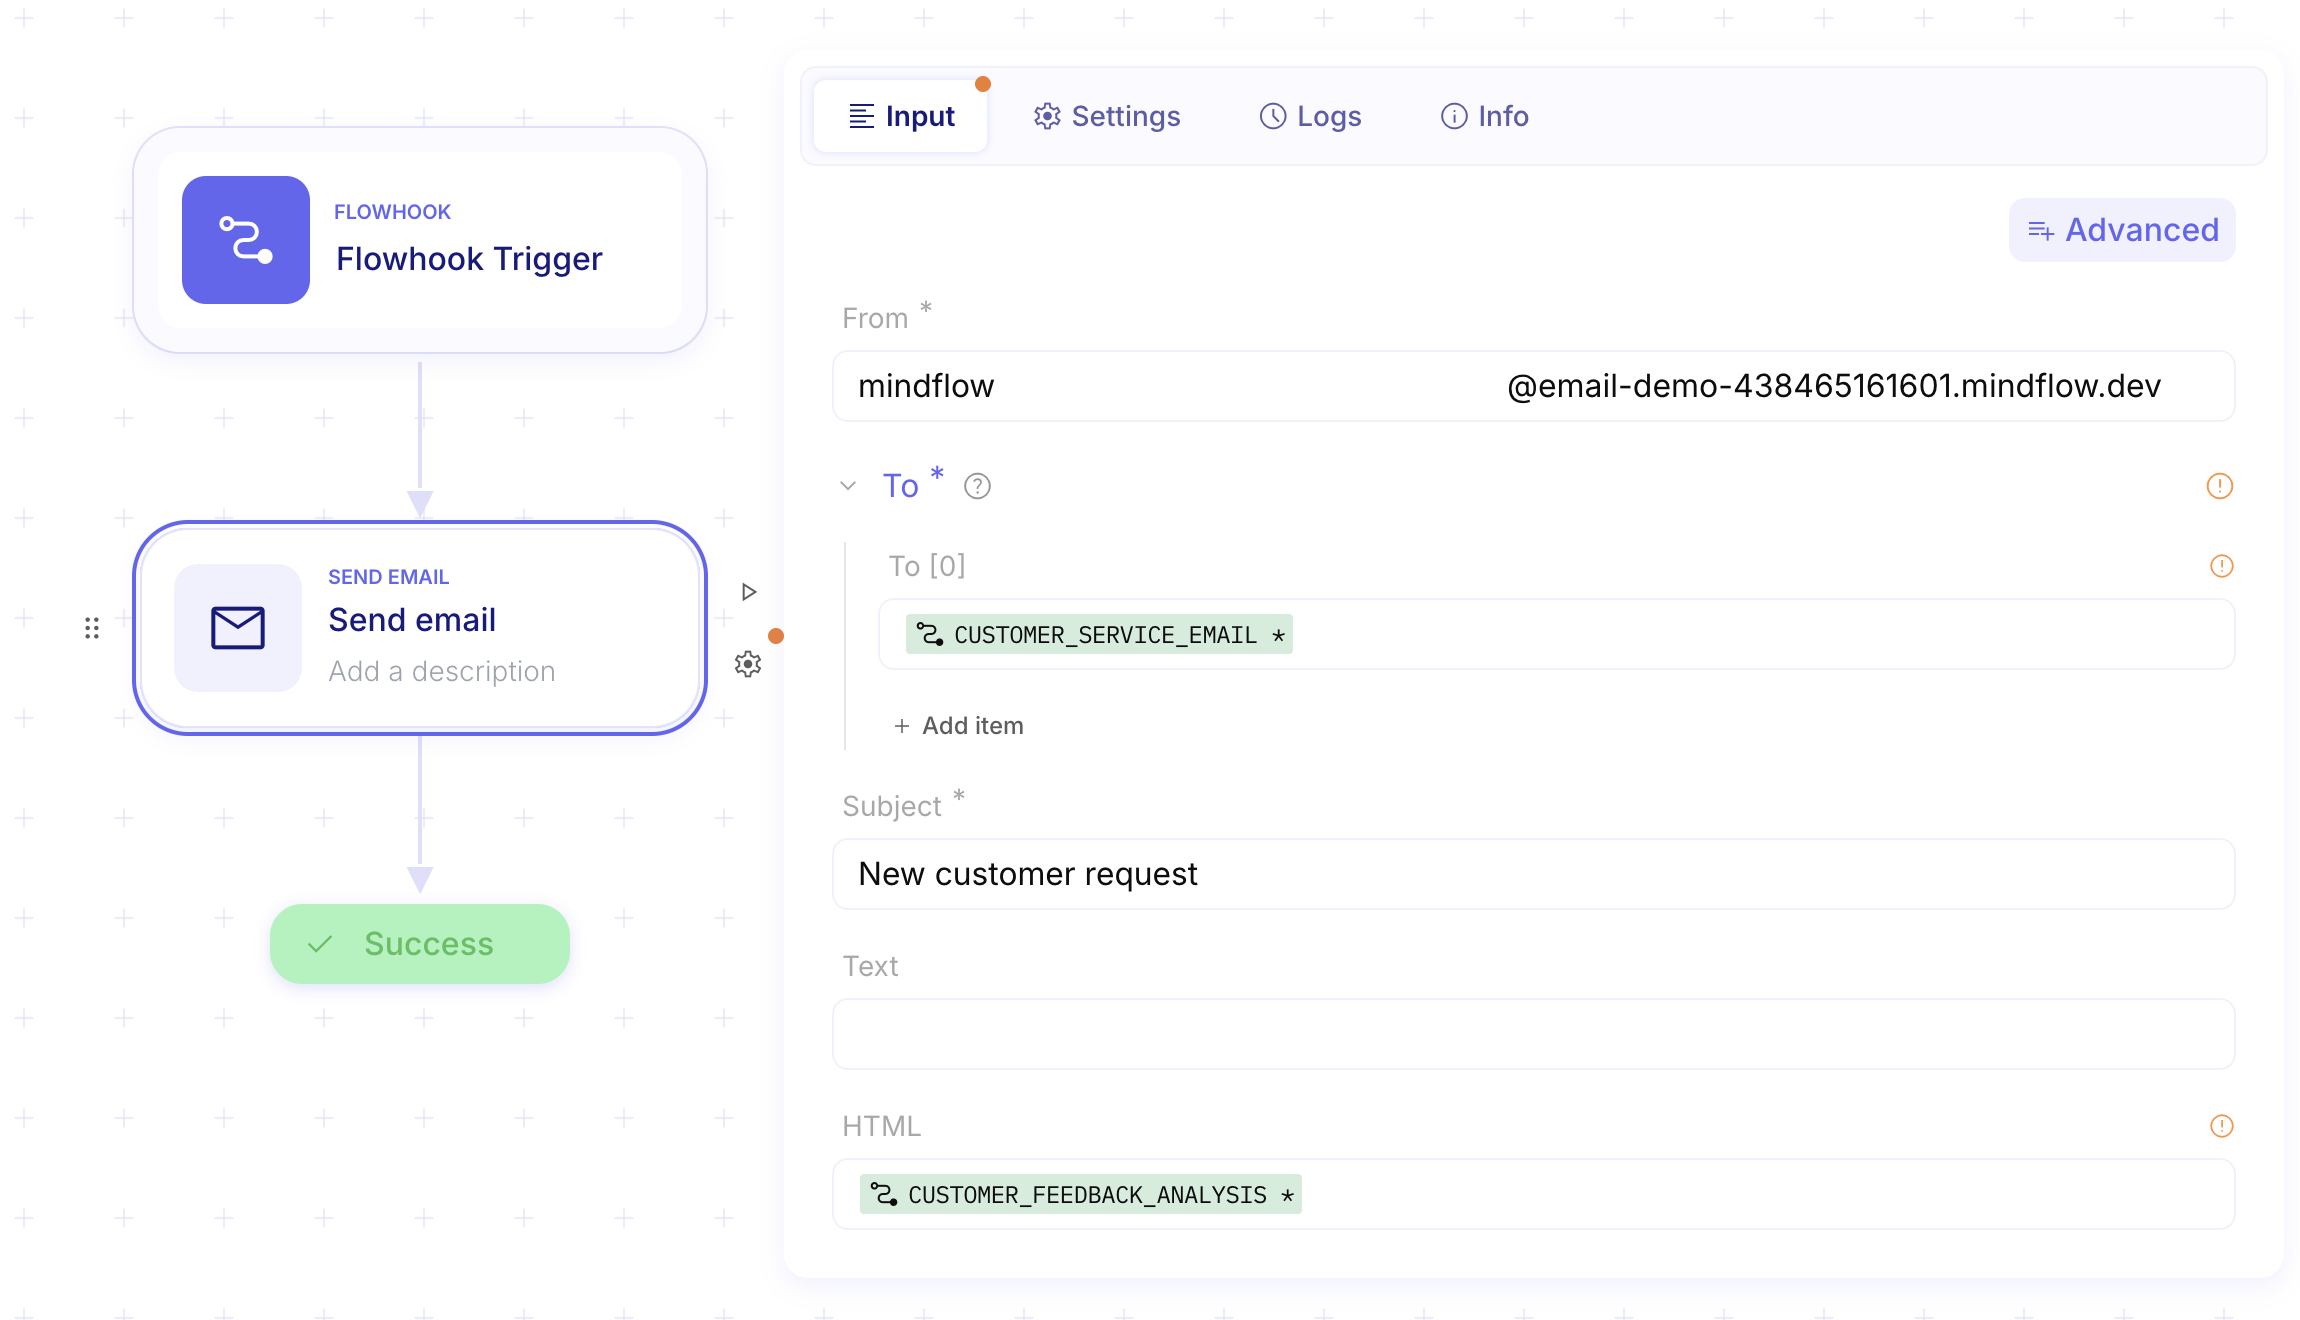
Add a Send Email step and configure it using the elements received by the Flowhook trigger:
- To: Map this to
Customer service email address - Subject: Type
"New customer request" - HTML: Map this to
Customer feedback analysis
- To: Map this to
-
At the end of the workflow, add a Success step to properly terminate the execution.
Step 5: Test Your Workflow
Section titled “Step 5: Test Your Workflow”Everything is wired up. Submit a test response through your Typeform and watch Mindflow extract the data, generate an AI summary, route it through the dictionary, and trigger the subflow to send the final email!
Congratulations! You have completed Lesson #3. You now know how to extract data with JSONPath, create scalable routing logic with internal Dictionaries, inject AI··Agents to automate text analysis, and structure your processes using Subflows. You are ready to automate complex business operations!